Last updated on March 27th, 2026 at 09:14 pm
Learn how to make Pom-Poms easily. Having a big fluffy and poofy ball of yarn on top of a handmade hat is just the right amount of fluff to make the hat complete.
Pom-poms are one of the most popular crafts around. They’re easy to make, and can be used for a variety of purposes, from decorating hats and scarves to creating toys and accessories. In this tutorial, we’ll show you how to make pom-poms easily, with a few simple steps.
There are affiliate & ad links throughout this website. I will receive a commission. More information in the about us section.
Make a Pompom With Your Fingers
Yes, you do not need any special tools. You can make a pompom with your fingers. Here is an easy way to make them that doesn’t require any special tools. All you need are some scissors and a yarn needle. First, cut a length of yarn twice the desired length of your pom-pom. Tie the middle of the yarn together with a knot and then use a second piece of yarn to wrap around the tied yarn until it is tightly wrapped. Cut the loops on either end and slide off the excess wrapping yarn. Use your fingers to fluff up the pom-pom and trim any stray ends. There you have it – an easy pom-pom made in just a few minutes!
Making a Pompom with a Pompom Maker
While a pompom can be made using just your fingers. I find that I can tie the yarn or string tighter using this gadget.
Using a pom-pom maker is the best tool to use in creating the perfect fluffy round ball of yarn.
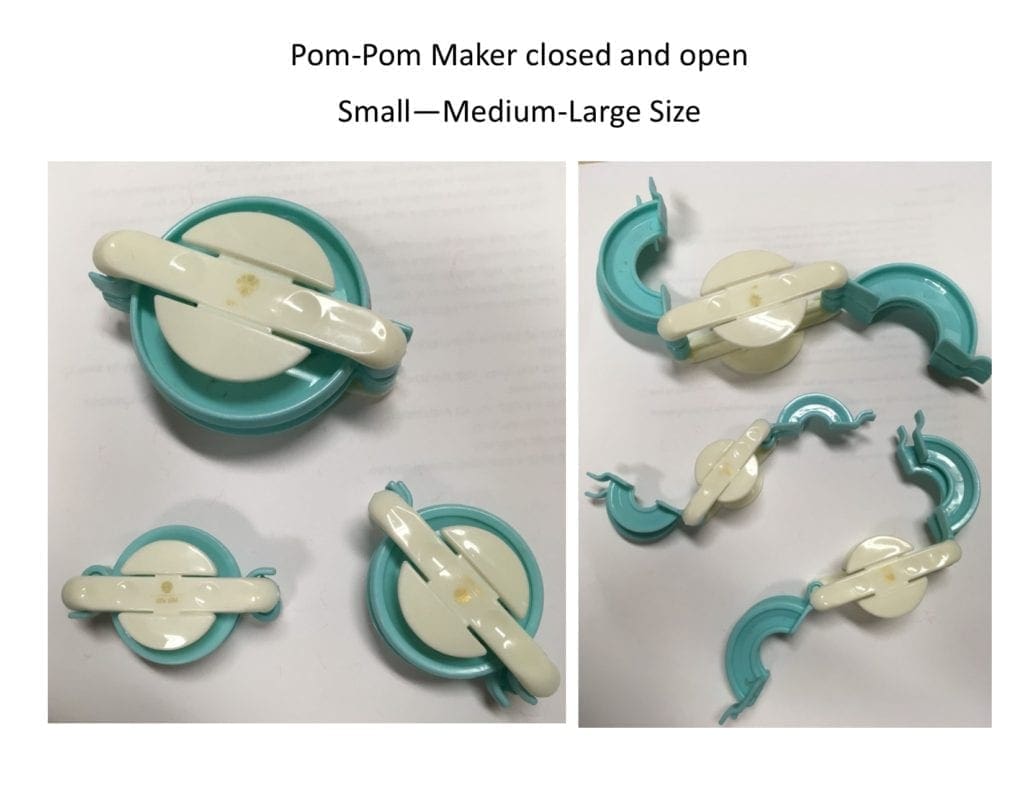
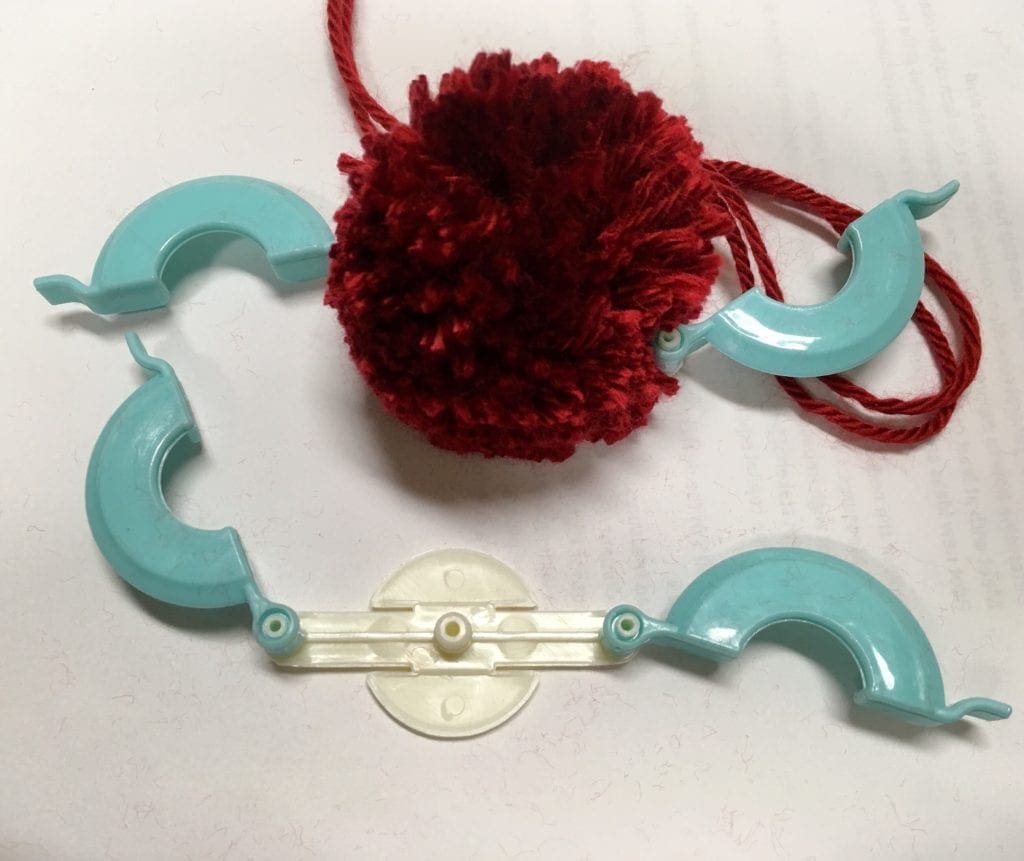
This is what the gadget looks like. In the photo below, you will notice that there are three different sizes. Get your own set here.
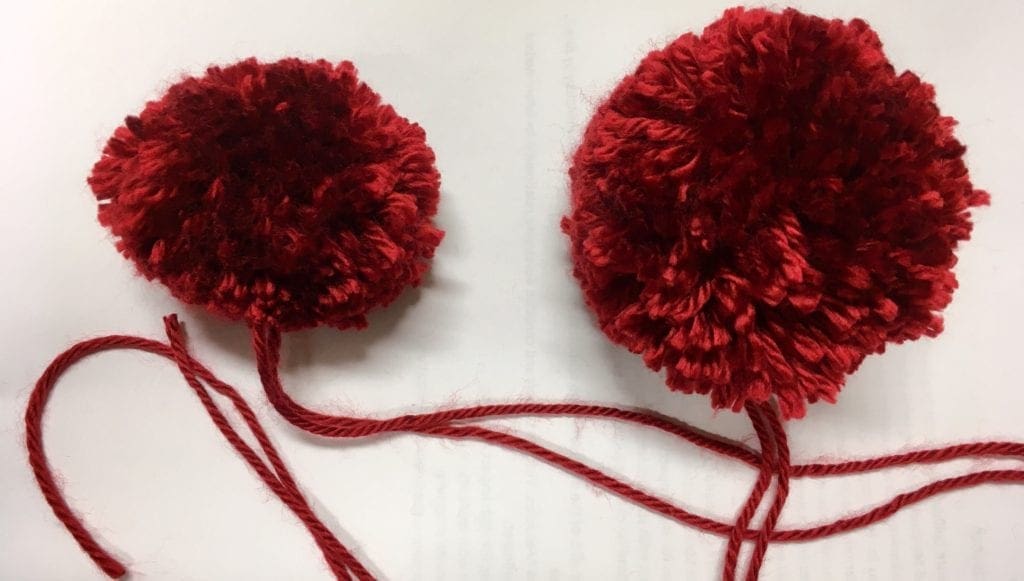
I have made a large one and small one for you.
Learn How to Make Pom-Poms Easily
This easy crochet tutorial will show you how to make pom-poms in a variety of sizes, and with minimal effort. Pom-poms are a great way to add visual interest and texture to any project, and they’re especially nice for winter items like hats and scarves.
Use the Right Tools for the Job
While you can achieve beautiful looking pom-poms using cut out cardboard, it is by far, much easier to use a this tool. You don’t have to cut the cardboard, do any measuring, and it does not slip all over when you are trying to wind the yarn and hold it together.
Directions: How to Make a Pom-Pom
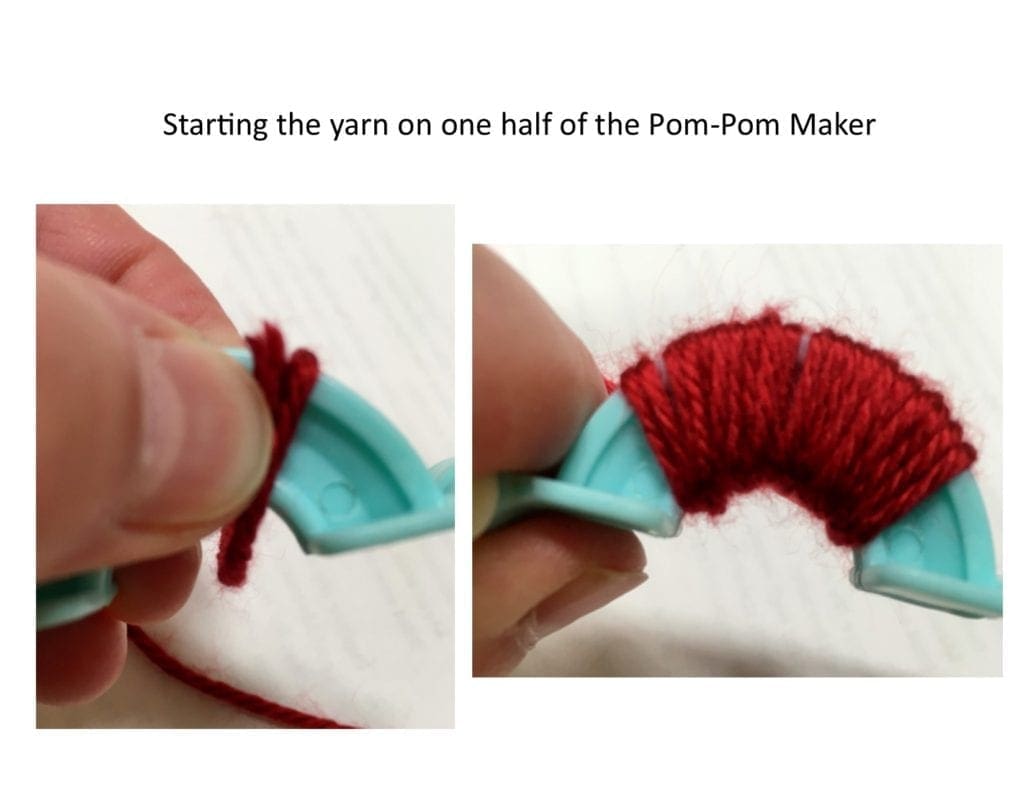
Begin by opening both halves of the pom-pom maker. Make sure to keep both arms together on each side. Holding the end of the yarn in place, start wrapping the yarn around both arms on one half.
Picture Tutorial follows
Continue wrapping yarn
Wrap the yarn around the one side until there are quite a few layers of the yarn. Hint: the more layers you wrap around the thicker, fuller, and fluffier the pom-pom will be. I wrap each side until I can just get the side closed. When you think there is enough yarn on the side, close that side of the pom-pom maker and cut the piece of yarn off from the skein of yarn.
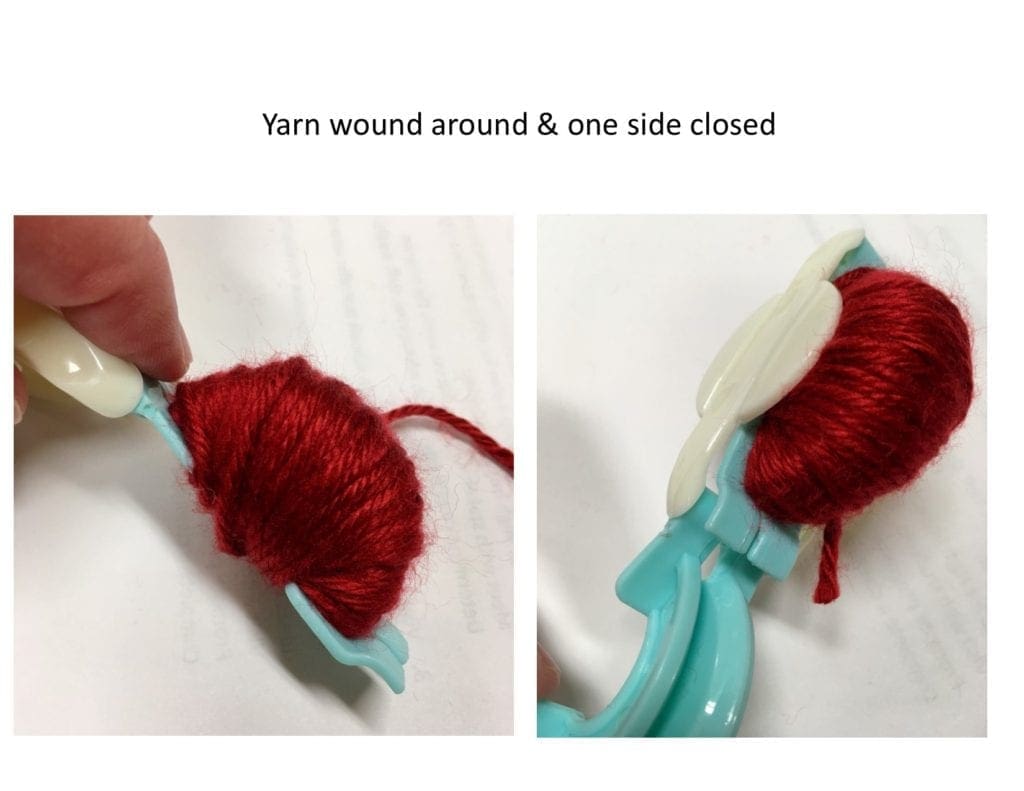
Complete Other Side
Now wind the yarn on the other half just like the first side. Then close that side too.
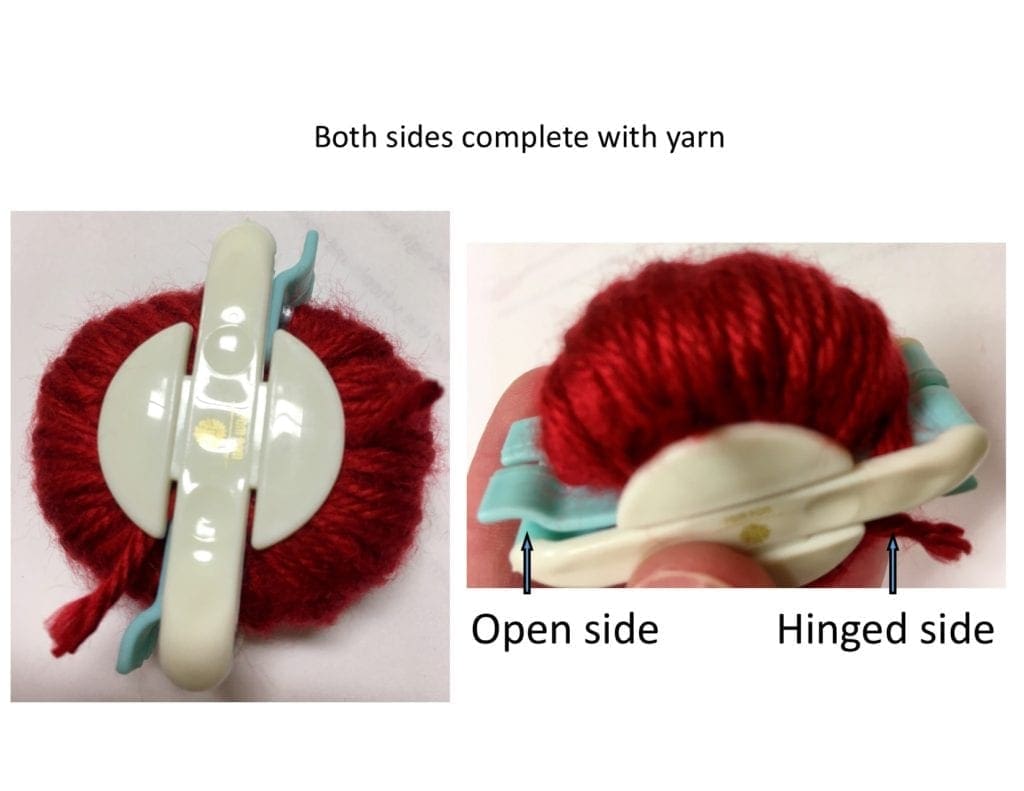
Hinged Versus Open Side Hint
If you look at the photo above, you will see that there is a hinged and open side. When I start cutting, I found that it is easier to start the cutting on the hinged side.
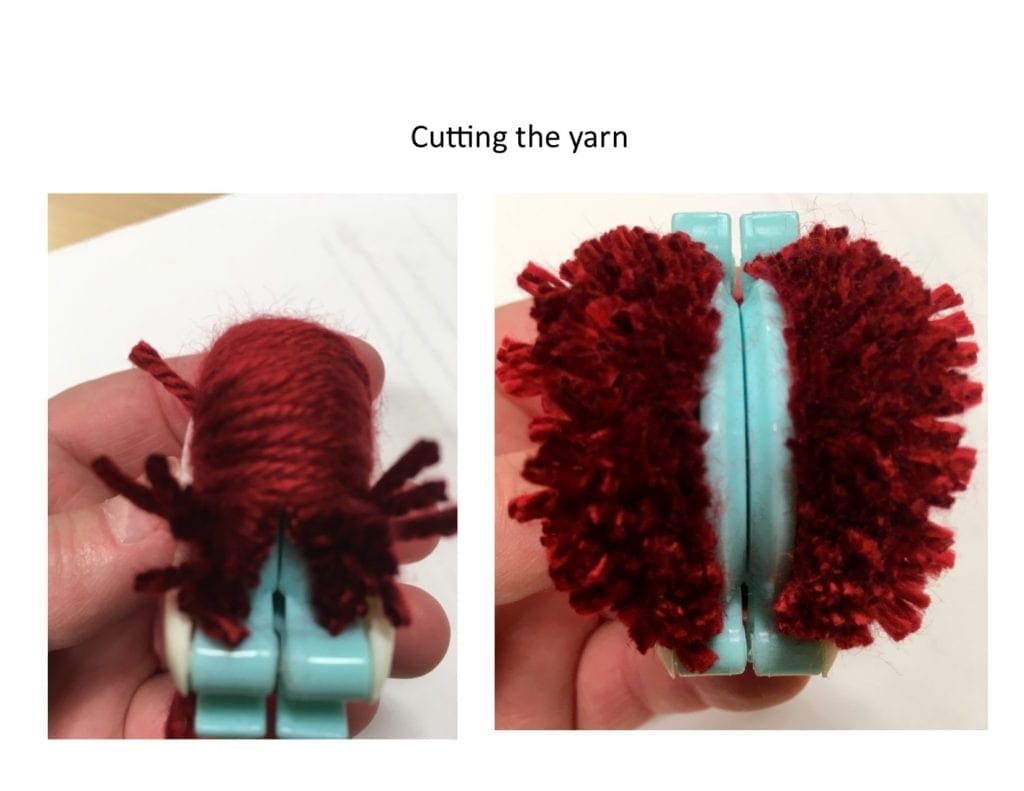
Cutting the Yarn
Make sure that you are using a very sharp scissors. This will provide for the cleanest lines and even yarn lengths during the cutting process. Cut the yarn between the arms of the Pom-Pom Maker and continue cutting both sides until all the yarn is cut and the center is visible.
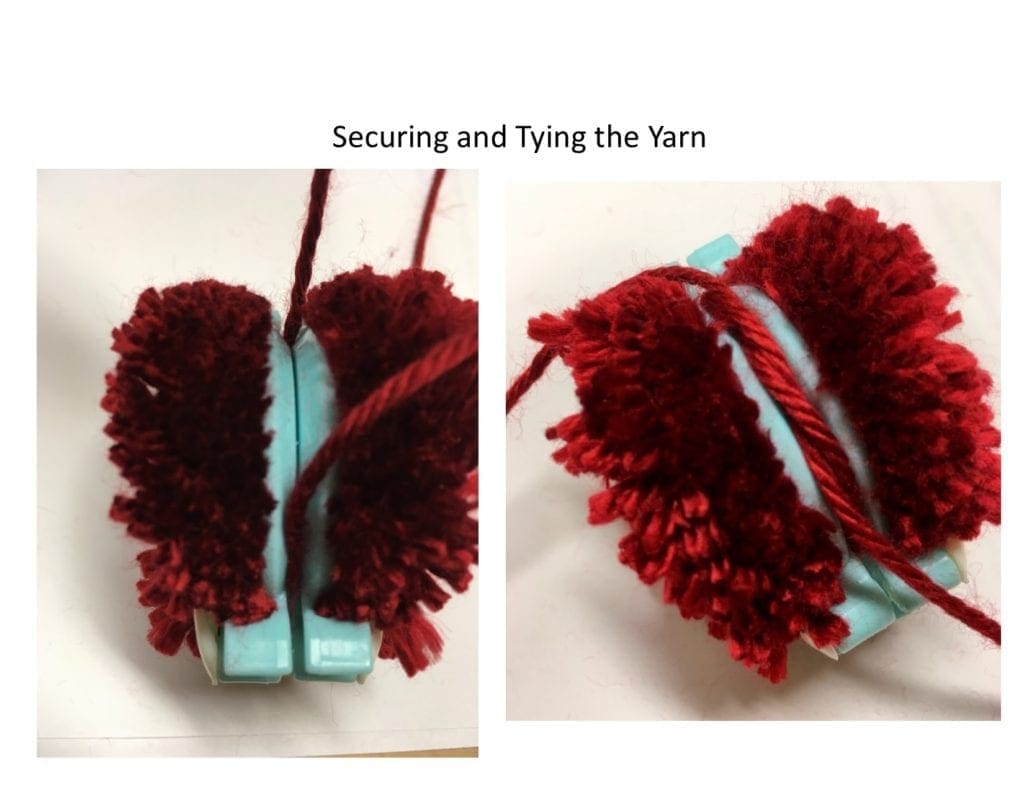
Securing the Yarn
Thread a piece of yarn through the arms. On the right, you can see the small opening between where the yarn has been cut. That is where you insert the yarn around the whole unit and tie the yarn.
When you make the first part of the knot, pull the yarn until it is through the center. Then complete the knot. I like to make a square knot (left side over right, pull. right side over left, pull) that ensures a snug tie. I like to bring the yarn to the other side and make another snug-fitting knot.
Opening to Reveal the Cute Ball of Yarn
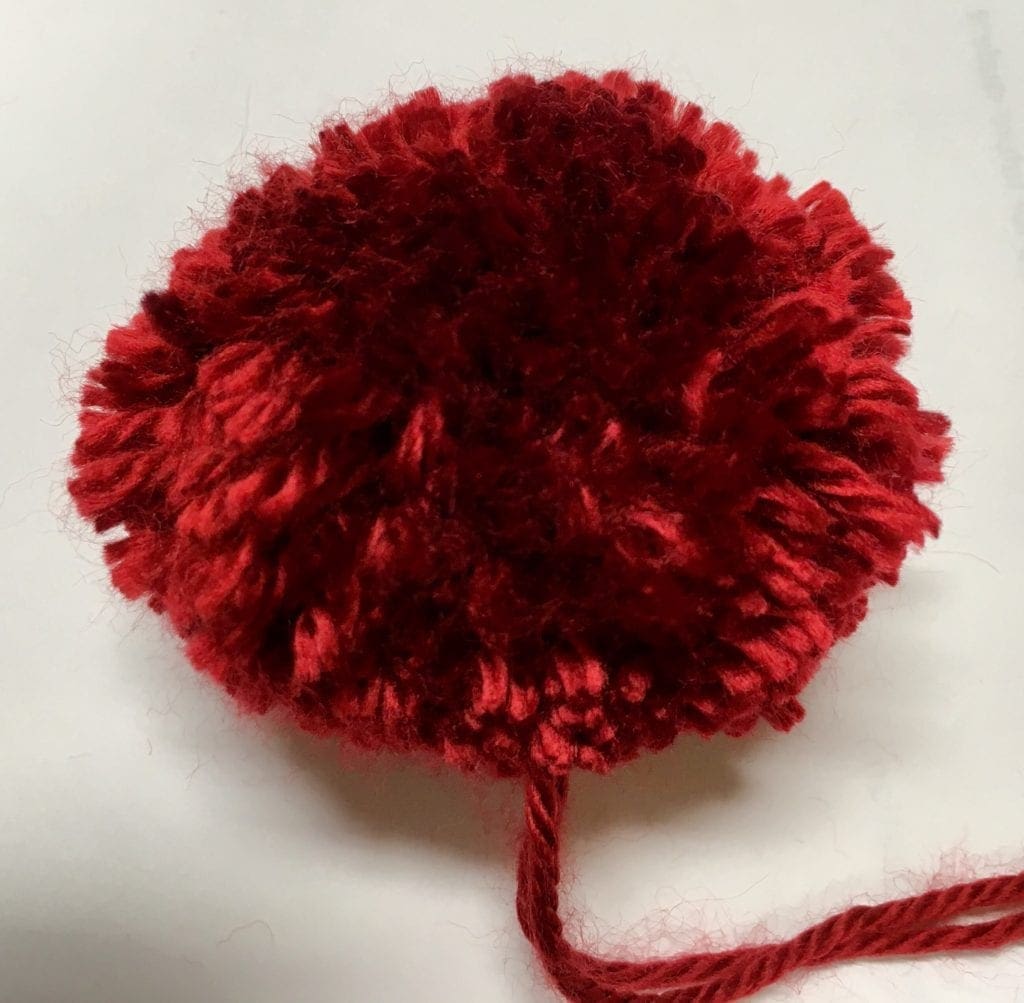
You have just completed making your first pom-pom. It is now time to open the arms and pull the two halves off of the pom-pom. There may be a piece of yarn or two that need a bit of trimming.
Use various yarns for different looks. Here is the large size pom-pom that I made.
Adding the pom-pom to a Crochet Hat
My daughter wants one on the hat I recently crocheted for her.

Pull the long yarn pieces through the top of the hat.
Tie the yarn pieces together. (or your could thread the yarn through a button for a bit more security).
Weave in Ends.

Pom-Pom on Crochet Hat
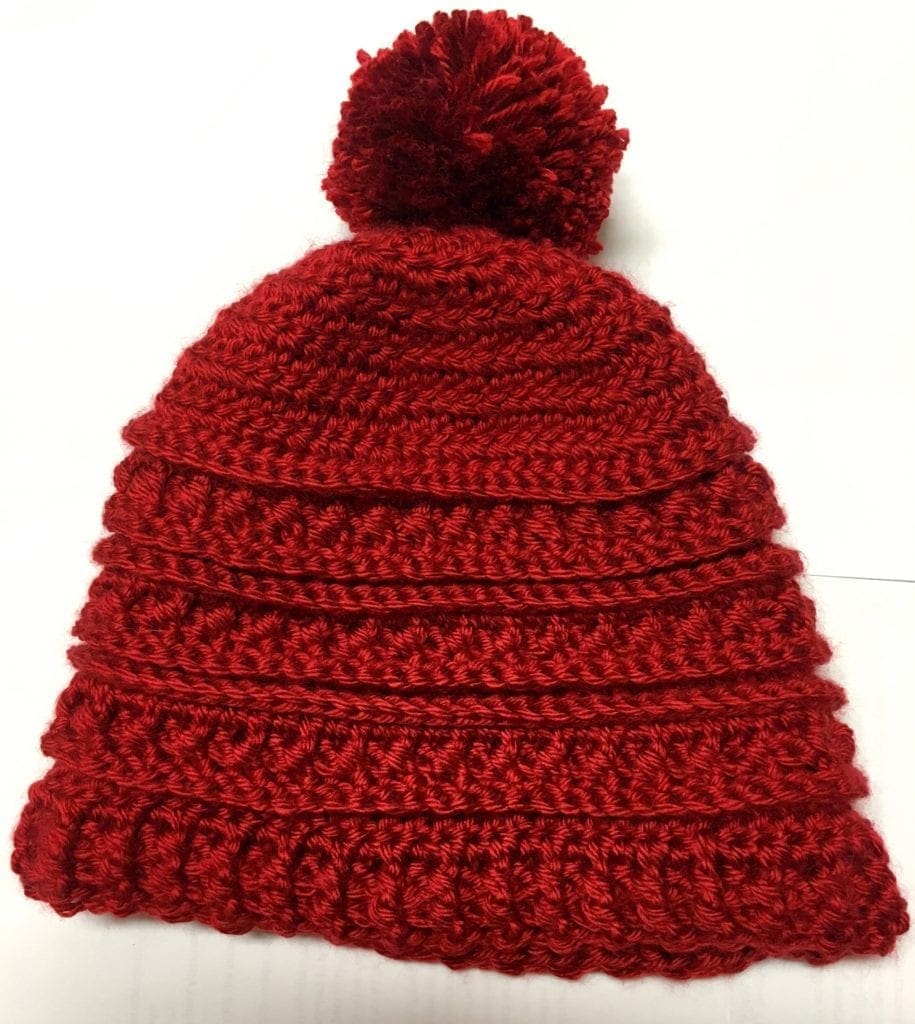
Autumn Crochet Hat
If you would like to crochet the hat, here is that free crochet pattern.
Get your own Pom-Pom Maker too here.
If you loved this post, please share on your fave social media links. It helps to show me that these types of posts are helpful – thank you!

You can find Victoria crocheting, quilting, and creating recipes. She has cooked in restaurants for over 20 years, including many larger parties. She learned to crochet when she was just 11 years old and has been crocheting ever since; over 50 years now. Over 40 years ago, she loved her first class in sewing and continues to hone her skills in quilting. Many have enjoyed the handmade gifts over the years. In her professional career, she has worked in management in a wide variety of businesses including higher education as a dean of a division. All the while attending college part-time to achieve her doctorate in higher education with an emphasis in e-learning.