Last updated on March 27th, 2026 at 10:02 am
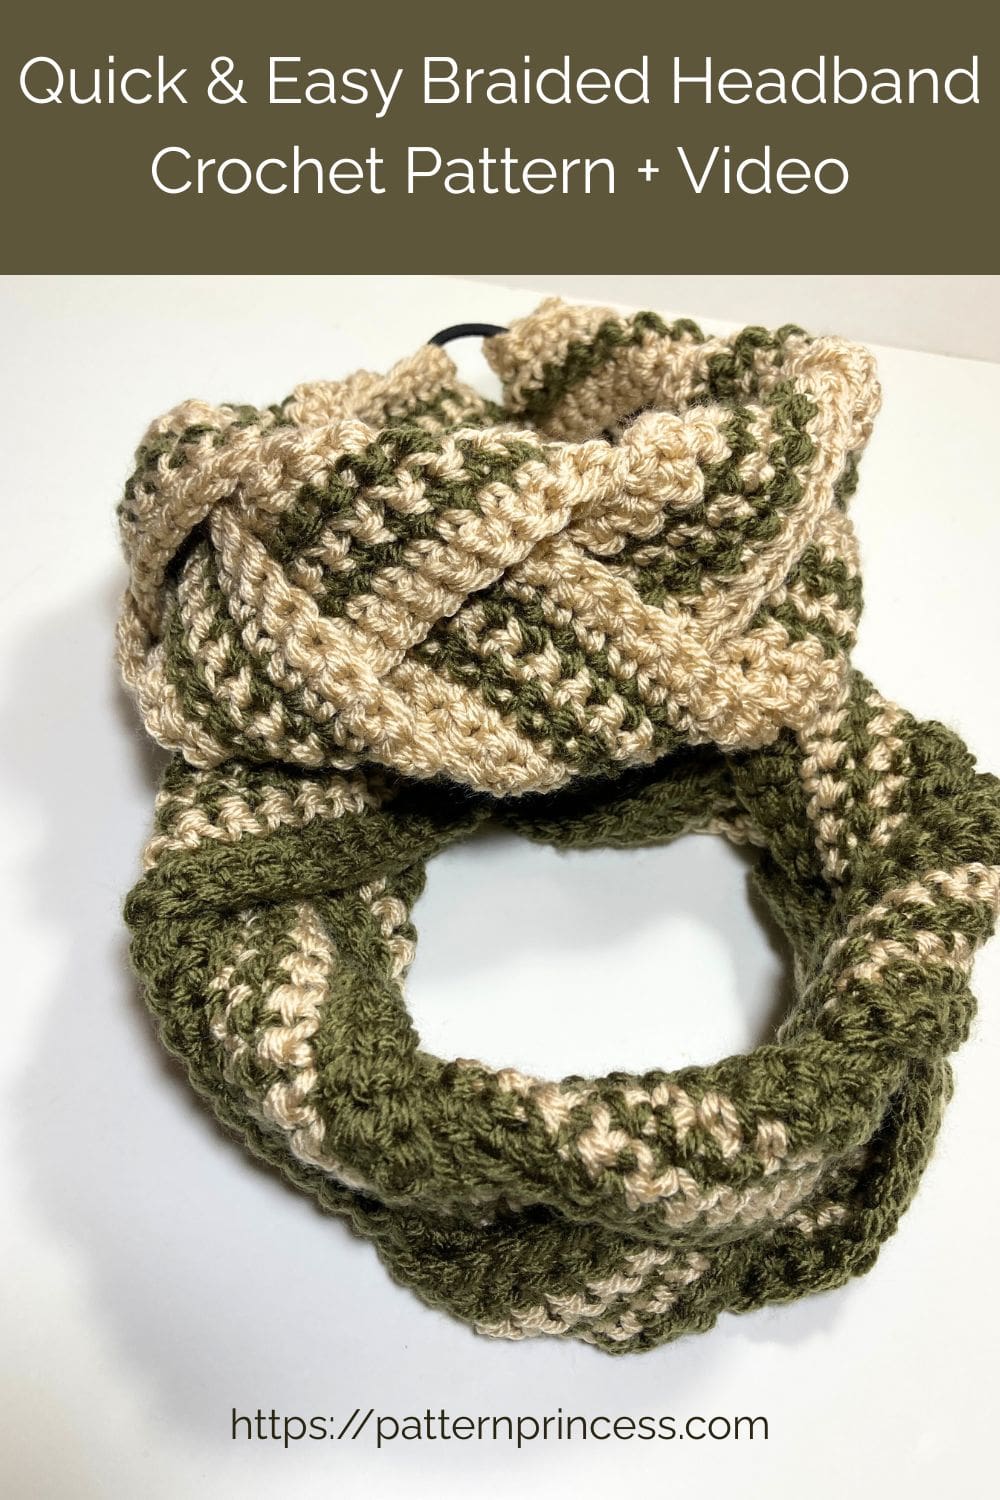
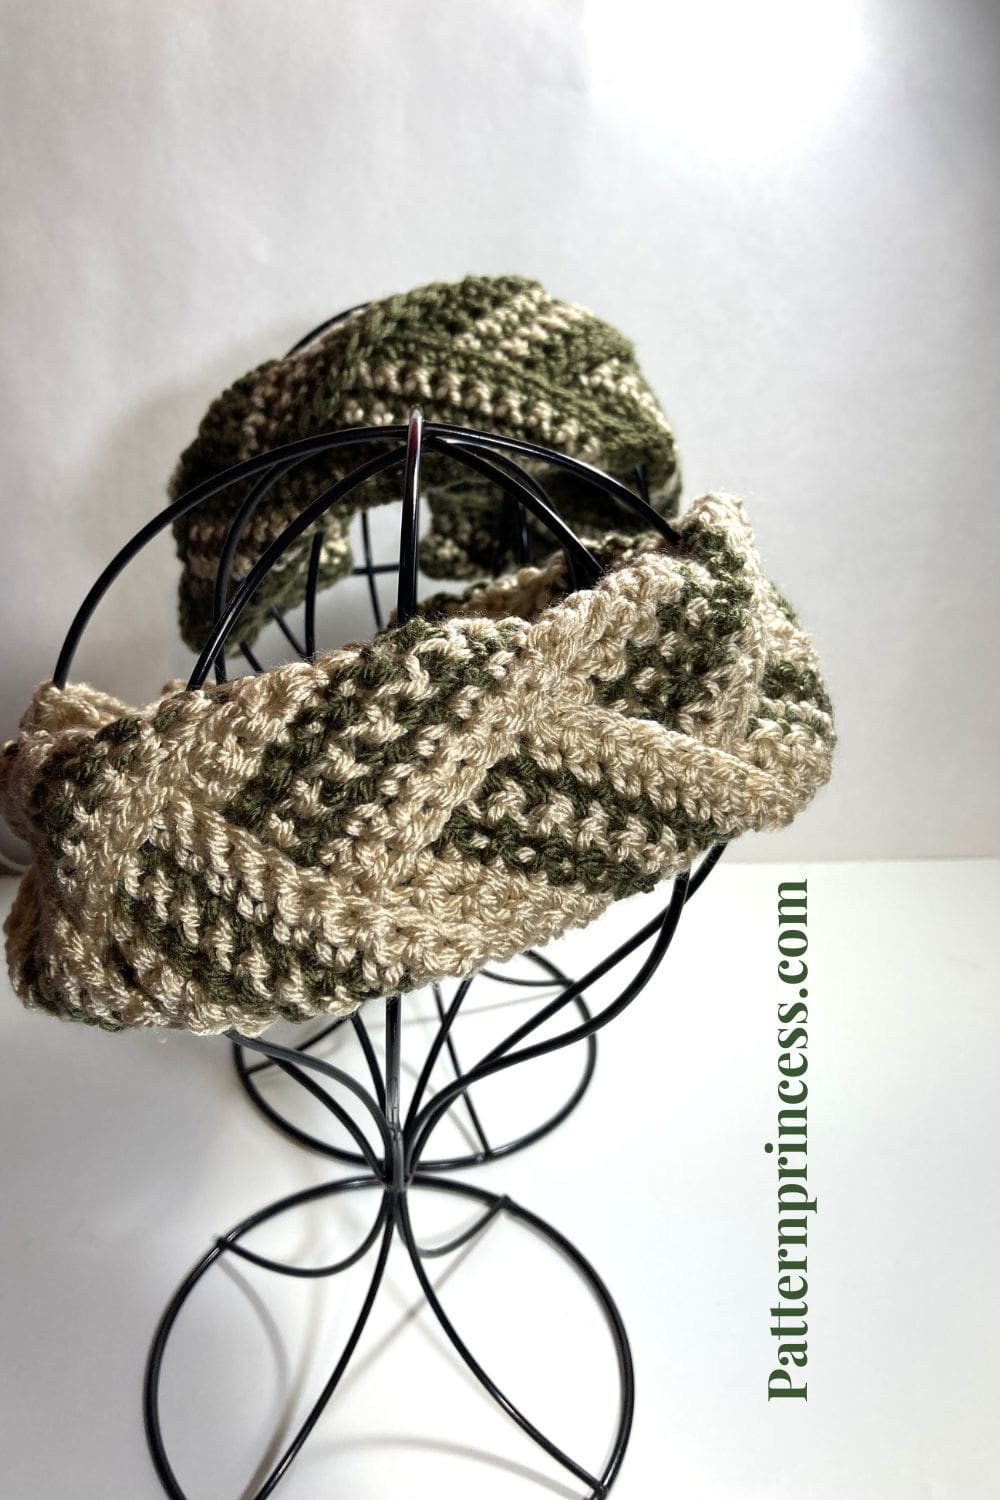
There’s no better way to welcome the season than by crocheting this super easy braided headband. This free pattern comes with video tutorials to help make sure you’re successful at completing your own accessory.
I am completely obsessed with this pattern! Designing it was such a joy, and I hope you love making it just as much as I did.
This versatile headband can be made in any colors you like, and to make it even better, I’ve included three sizes, small, medium, and large, so it’s perfect for anyone.
Hello, Autumn! Stylish and on-trend, this braided headband also makes a thoughtful Birthday or Christmas gift.
Crochet Pattern Inspiration
The idea for this braided headband came while I was crocheting strips in two-colors for a Vintage Ribbon Candy Christmas Ornament pattern. I kept thinking I could use the wide strips to braid. Once I tried it, I instantly fell in love with how this turned into such a beautiful wearable accessory.
Beginner-Friendly Crochet Headband
If you can work single crochet stitches, you can make this attractive pattern. This easy headband is made from three crochet strips. Each strip measures approximately 2 inches wide and 17, 18, or 19 inches long. I used two skeins of Lion Brand Basic Stitch Anti-Pilling #4 medium weight yarn in the colors Almond and Olive. With those two skeins, I was able to make two headbands by swapping which color was the main color, and which served as the contrasting color.
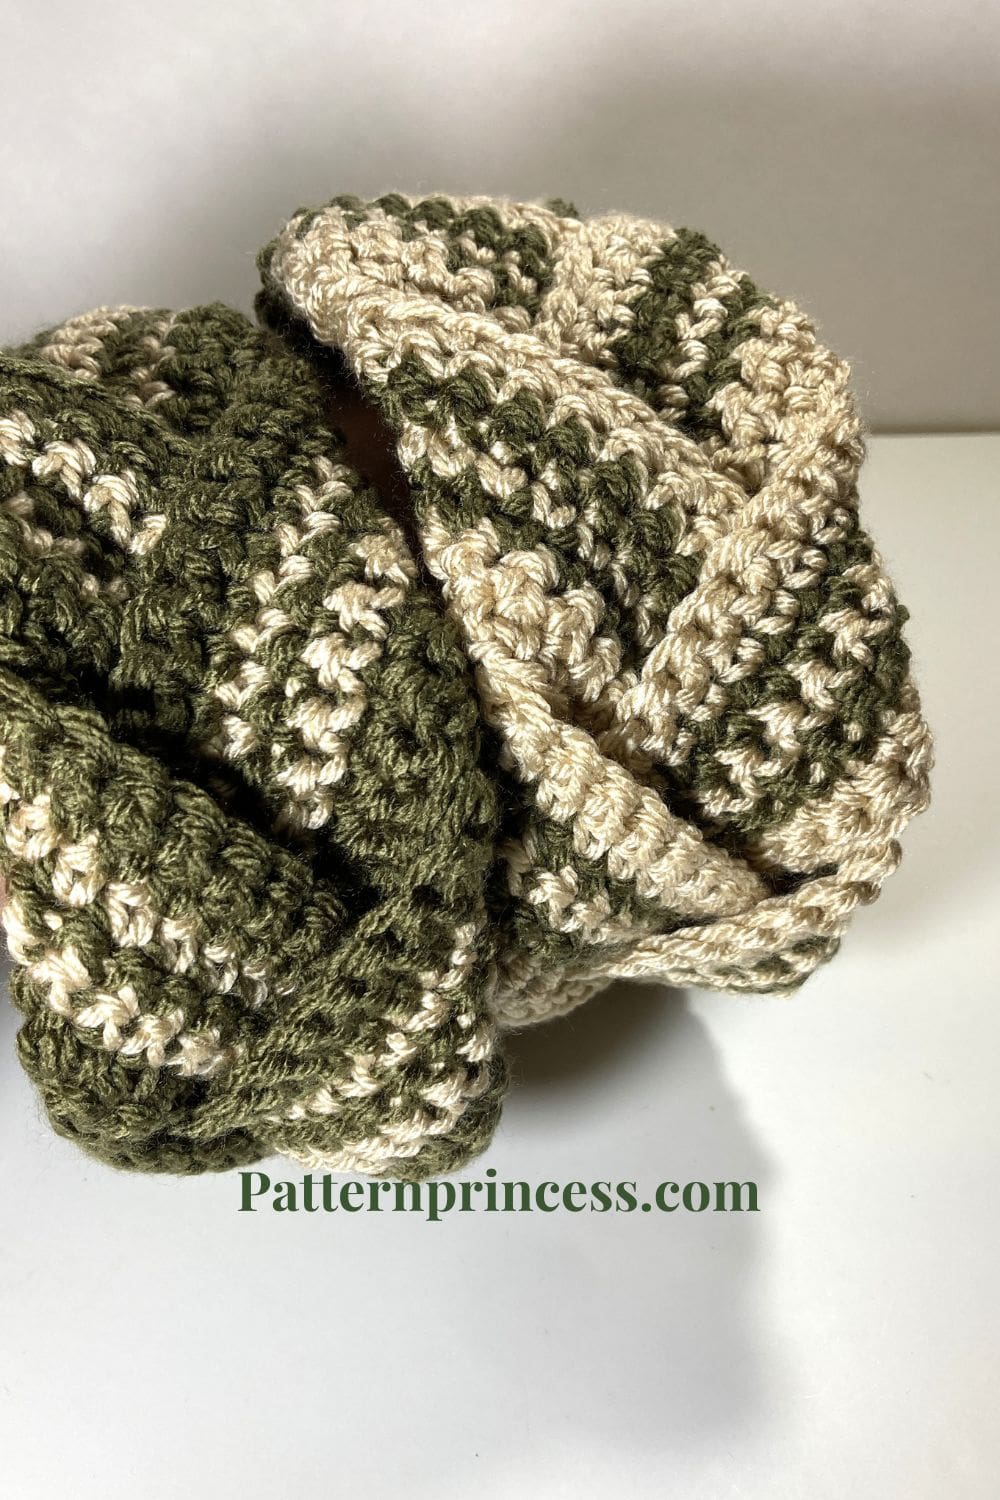
You can change the color of this headband in different ways by using different colors for each strip, crocheting solid color strips, or changing the location of the stripes. It’s so easy to make this your own unique style.
Here is the free pattern for the ribbon candy crochet ornament.
Simple Assembly
To assemble the headband, the three strips are stacked and sewn together at one end. I then inserted a hairband, braided the strips, and tucked the hairband between the layers at the other end, sewing it all together to secure the braid.
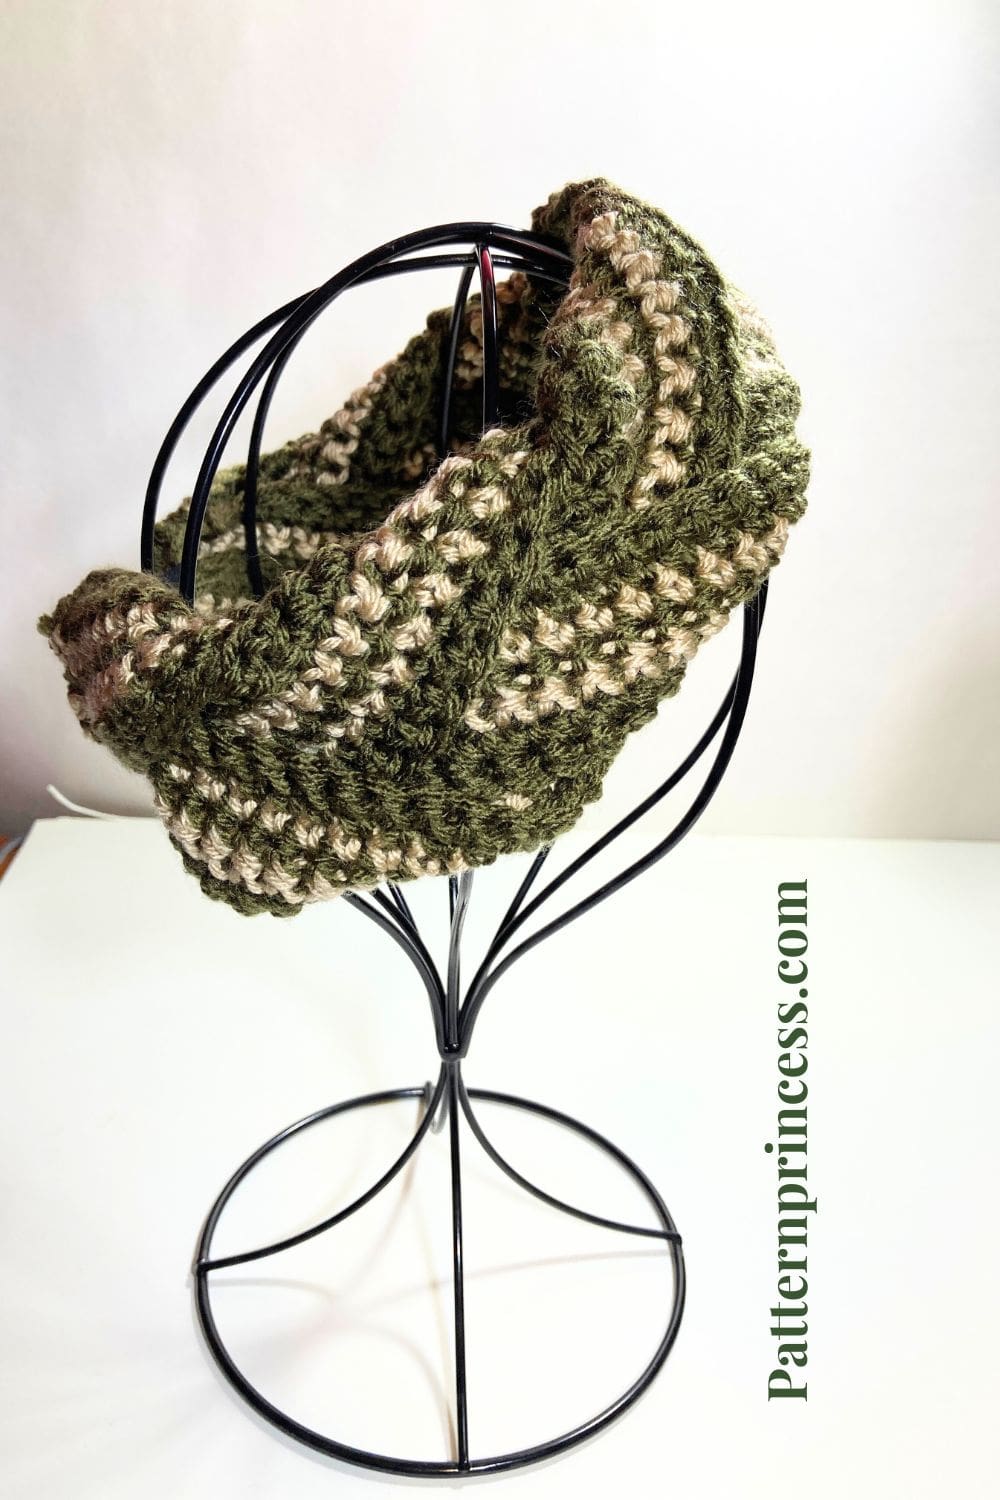
The result is a stylish, cozy headband that holds its shape beautifully.

Get Your Ad Free Printable PDF in our Etsy Shop
Directions: Quick & Easy Braided Headband Crochet Pattern
Skill Level
Beginner Friendly – Easy
Gauge
Approximately 12 stitches and 14 rows every 4 inches.
For accurate size, check your gauge as your crochet stitches may be looser or tighter than mine.
Sizes
- Small: 3 inches X 17 inches
- Medium: 3 inches X 18 inches
- Large: 3 inches X 19 inches
Because this headband uses a hairband to join, it will stretch up to 2 inches.
Each Strip is 2 inches wide x 17, 18, or 19 inches long.
Can I adjust the size of the Braided Headband crochet pattern?
Yes, it’s easy to change the size. Use any number of chain stitches to adjust the length. The width can be adjusted by adding or reducing the number of crochet rows. Keep in mind that the headband will stretch up to 2 inches when worn.
Abbreviations
- CH = Chain Stitch
- SC = Single Crochet Stitch
- SK = Skip
- ST = Stitch
- STs = Stitches
- [ ] = Repeat Between
Materials
Lion Brand Basic Stitch Anti-Pilling. #4 medium weight yarn. Partial skein about 50 yards total.
Colors Shown:
- Almond
- Olive
If you are not able to find the yarn locally, you can purchase it online.
Savings Center – Pattern Princess
Size I Crochet Hook 5.5 mm
Tapestry Needle
Scissors
Tape Measure
Crochet Stitches
Chain Stitch (CH ST)
Begin the chain stitch by making a slip knot on the crochet hook. Leave about a 5-inch tail on the yarn. This will be weaved in later.
Next snug up the yarn loop that is on the crochet hook; while it should be firm, it should also be loose enough to slide on the hook with ease.
Keeping the loop on the hook, wrap the yarn over the crochet hook from back to front. Draw the yarn through the loop. You’ve just made a chain stitch. Continue yarning over and drawing the yarn through the loop on the hook to make more chain stitches.
HOW TO CROCHET THE CHAIN STITCH video tutorial
Single Crochet (SC)
Insert the hook, pull up a loop. Yarn over and pull through the two loops on the hook.
HOW TO CROCHET THE SINGLE CROCHET STITCH video tutorial
Pattern Notes
Pattern is written in US crochet terminology.
Turn after each row.
Since this pattern is reversible, there isn’t a right side and wrong side.
I carried the yarn up the side. There are links to video crochet tutorials for both right hand and left hand crocheters after the written pattern for crocheting the strips and assembly.
Crochet Pattern
Begin with the primary yarn color.
Start by making a slip knot and adding the loop on the hook.
Work foundational chain stitches.
- Small: 60 chain stitches
- Medium: 63 chain stitches
- Large: 66 chain stitches
Row 1
SC in the back bump of the second ST from the Hook and in each back bump of the STs across. Turn (59)
Row 2
CH 1 (Does not count as a ST). SC in the first ST and in each ST across. Turn (59)
Row 3
Change yarn color.
Repeat row 2.
Row 4
Change back to the first yarn color.
Repeat row 2.
Row 5
Change yarn color
Repeat row 2.
Row 6
Change back to the first yarn color.
Repeat row 2.
Row 7
Continue using yarn color.
Repeat row 2.
Finishing
To make things easy when assembling:
- When cutting off your yarn, leave a long tail on one side of two of the strips.
- On one strip weave in the yarn ends and cut off the excess yarn.
- On the two other strips weave in the yarn ends on one end and leave two yarn ends on the other side.
Assembling
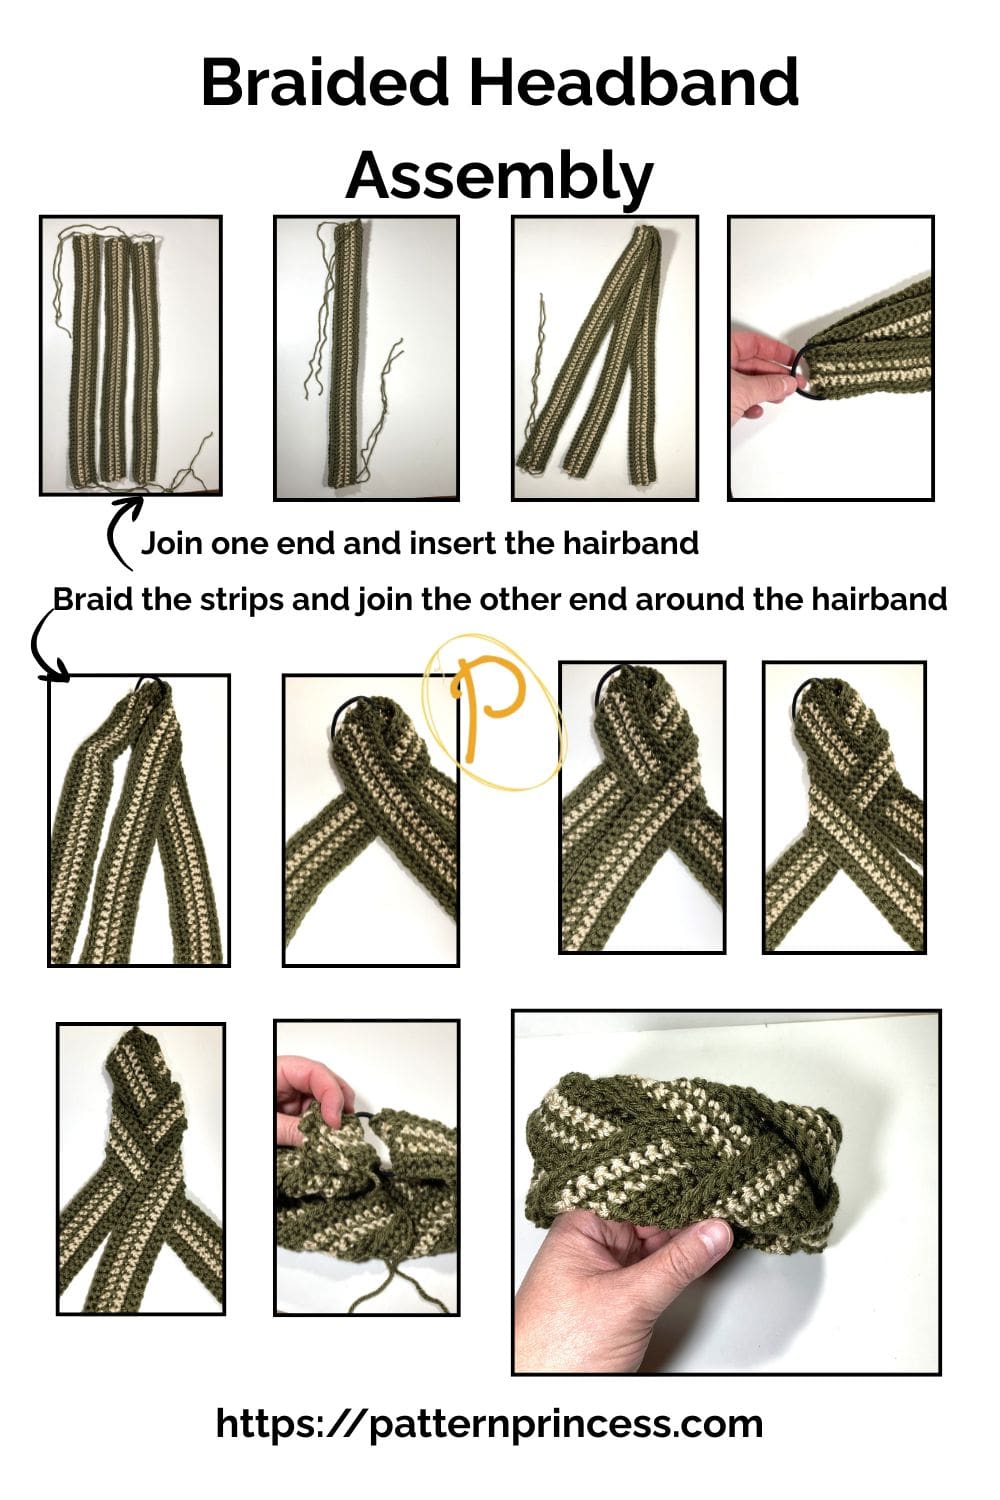
How to Assemble the Braided Headband
- Prepare the Strips:
You should have three crochet strips, each about 2 inches wide and 17–19 inches long. Decide which colors you want as the main and contrasting colors. - Stack and Secure One End:
Stack the three strips together and sew one end securely. This is where you’ll start your braid. - Insert the Hairband:
Slide a hairband into the sewn end, positioning it so that it will be hidden inside the braid. - Start Braiding:
- Since the strips are wide, the traditional braid technique (sliding the side strips over the middle strip) can be tricky.
- Instead, flip each side strip over the middle strip as you braid. Alternate sides with each pass, flipping one side over the center, then the other, rather than trying to slide them smoothly.
- This method keeps the braid even and prevents the strips from bunching.
- Insert Hairband on the Other End:
Once you reach the end, insert the other end of the hairband between the layers. - Secure the Final End:
Sew the three strips together at the end, making sure the braid is snug and the hairband is fully enclosed. - Adjust and Finish:
Gently adjust the braid to make it sits neatly, then your braided headband is ready to wear!
Finishing
Weave in the yarn ends and cut off the excess yarn.
YouTube Video Tutorials
How to Crochet in the Back Bump, the Striped Strip, and Carry the Yarn up the Side.
Assembling the braided headband video
We hope you’ve enjoyed this stylish crochet headband pattern. Here are a few more easy crochet patterns to inspire your next project.

You can find Victoria crocheting, quilting, and creating recipes. She has cooked in restaurants for over 20 years, including many larger parties. She learned to crochet when she was just 11 years old and has been crocheting ever since; over 50 years now. Over 40 years ago, she loved her first class in sewing and continues to hone her skills in quilting. Many have enjoyed the handmade gifts over the years. In her professional career, she has worked in management in a wide variety of businesses including higher education as a dean of a division. All the while attending college part-time to achieve her doctorate in higher education with an emphasis in e-learning.