Last updated on July 3rd, 2025 at 07:32 pm
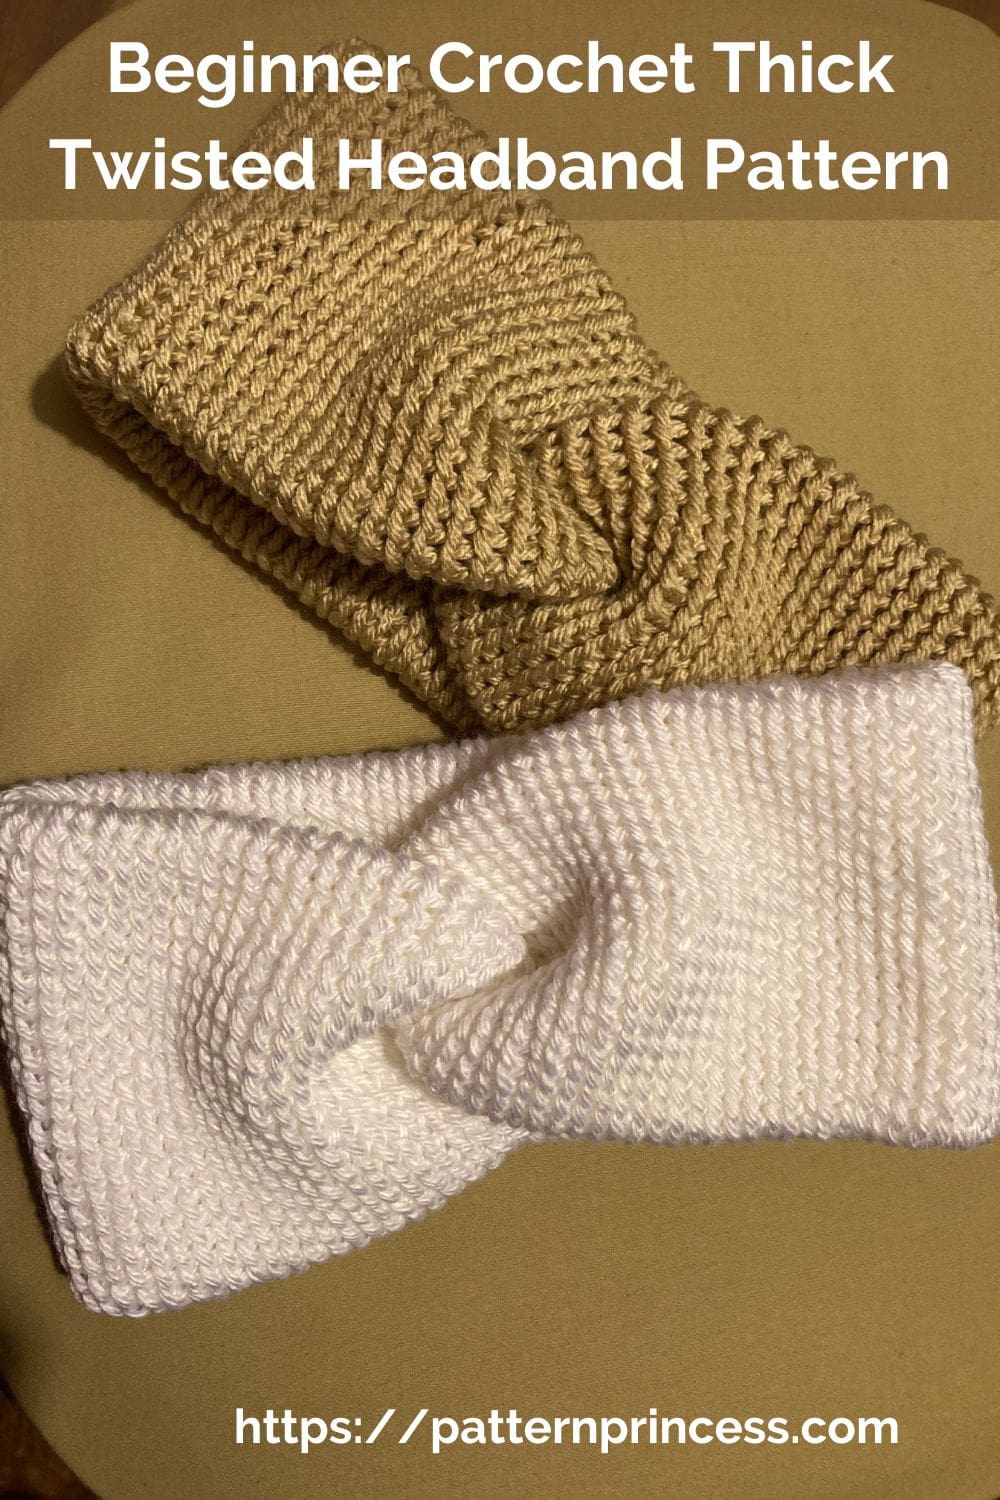
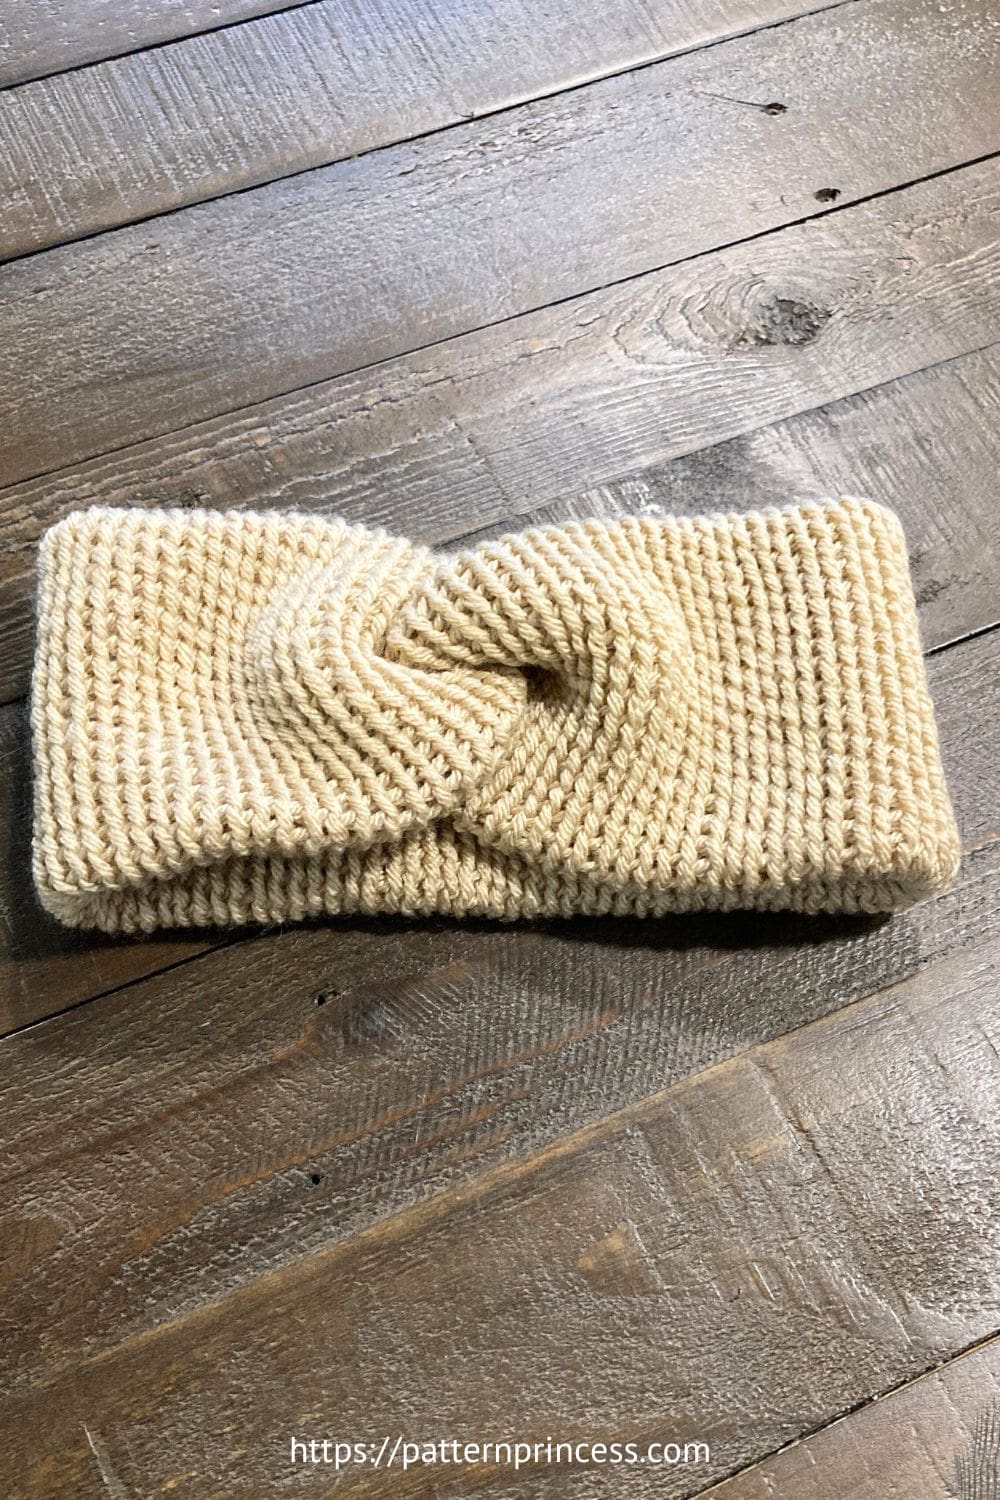
I just finished crocheting this thick twisted headband. Recently, we were on a family vacation, and I wanted to bring an easy crochet project to work on while we were relaxing.
We were packing light, so I had my little crochet pouch with one crochet hook, yarn needle, scissors, and one skein of yarn. So, that called for a simple pattern.
I have always loved the look of a twist headband. They are such a cute and chic way to stay warm in the cooler months. Even better, it works up quickly and they don’t use much yarn. They look great with your hair up or down.
Inspiration for this pattern
I have been wanting to make a twist headband for a while now. Recently, I had watched a YouTube video where another crocheter did slip stitches worked flat and joined at the end.
I liked the idea of the thicker headband, but I didn’t want to see the joining edge. It is nice when you can make something that looks like you’d purchase it in a store.
Therefore, I decided to use the same stitch, but work in the round rather than flat. It turned out beautifully. The nice part is how easy it is to make. No fancy stitch pattern to memorize.
All you need to be able to do is the chain stitch and slip stitch. If you are a beginner crocheter, this is a great project to build your skills.
2024 Holiday Stashdown Crochet Along
This pattern is one of the featured patterns for this event. You can find more information for the crochet along at the Underground Crafter.
Double Thickness Ear Warmer
The double thickness makes a warmer headband. It provides extra thickness for added comfort and warmth during cooler seasons.
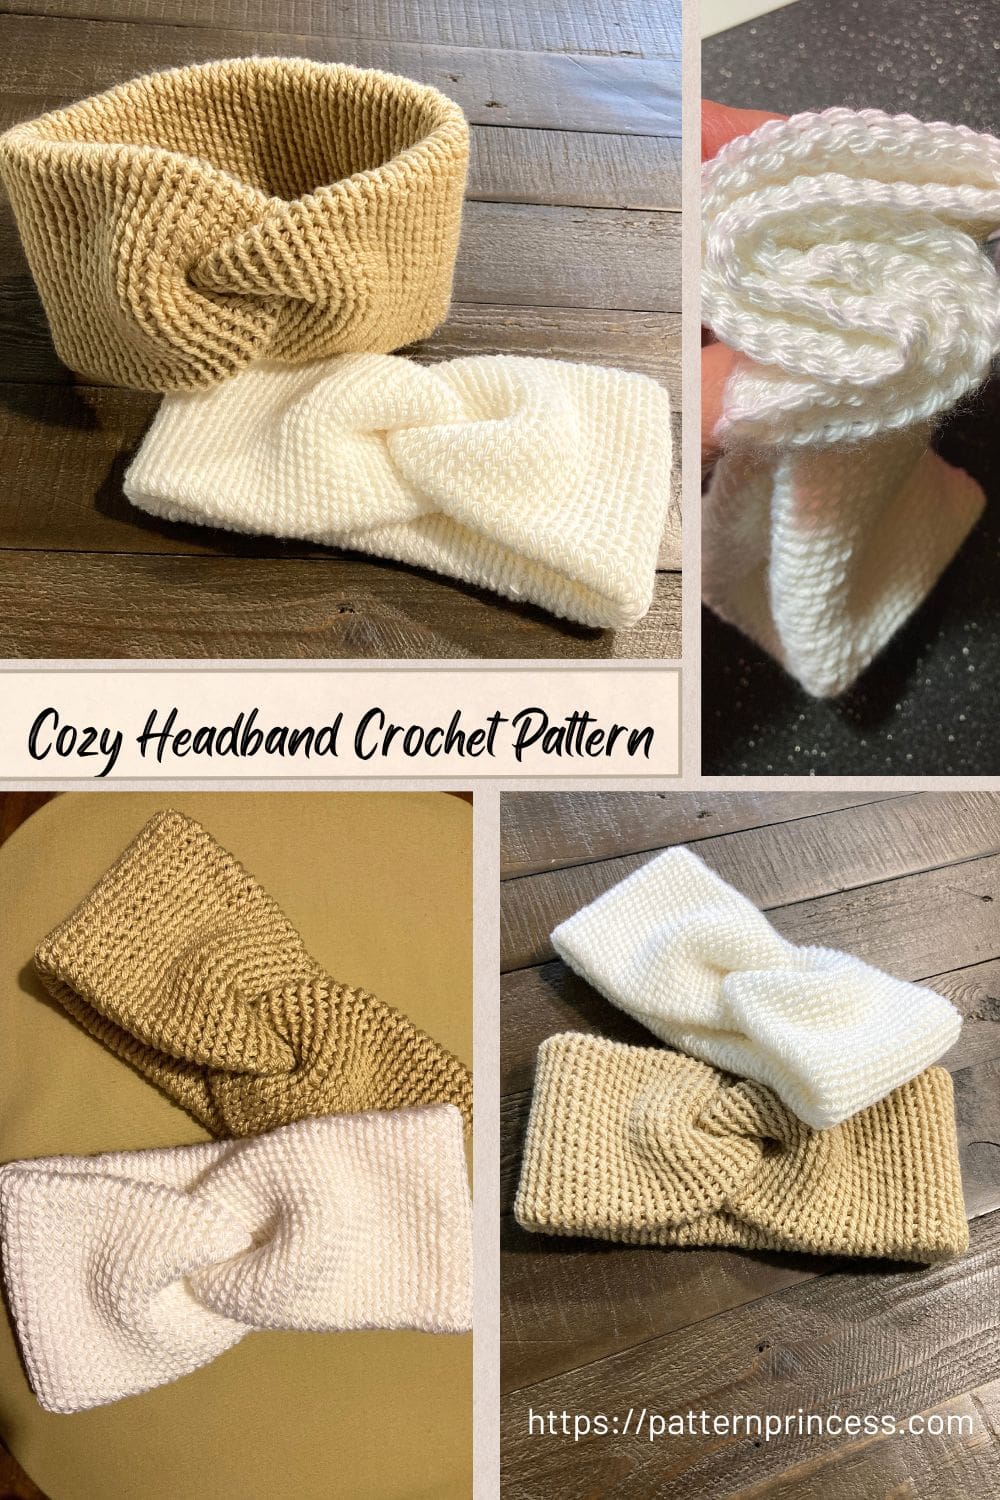
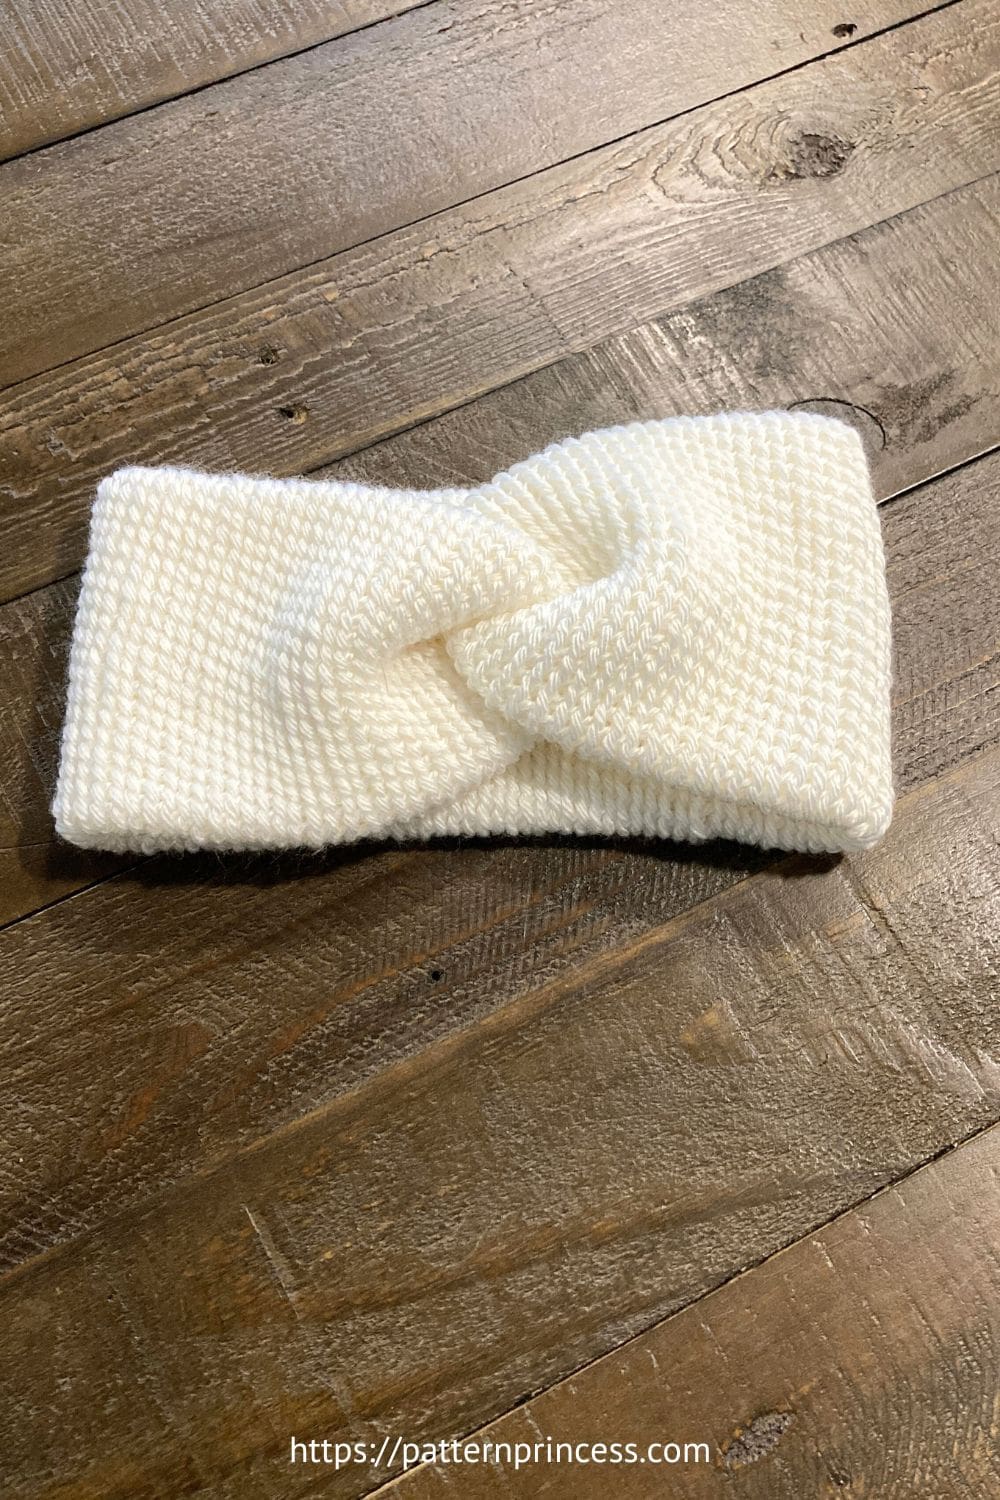
I personally love this pattern so much, I made a few of them. You can see two of the headbands I made so far. For one, I used Caron Simply Soft for and for the other Lion Brand Skein Tones yarns for the other. They are both so nice in a solid color.
However, this pattern would look great in any medium worsted weight yarn, even variegated in different colors. I have yet to try this pattern using a bulky yarn, so I can’t give any advice on that.
Whether you prefer subtle elegance or bold statements, this pattern adapts beautifully to your yarn choices and personal style.
Get the Printable PDF in our Etsy Shop
Cozy Accessory
Each one of these took me a weekend to make working on it on and off; about 8 hours total. They make perfect gifts or additions to your own wardrobe.
Directions: Beginner Crochet Thick Twisted Headband Pattern
Skill Level
Beginner Friendly
Gauge
12 Single Crochet and 14 rows every 4 inches.
Size
9” around X 18” long. Laying flat 4” X 18”. Will stretch to 22”. An average adult head size.
Changing the Size
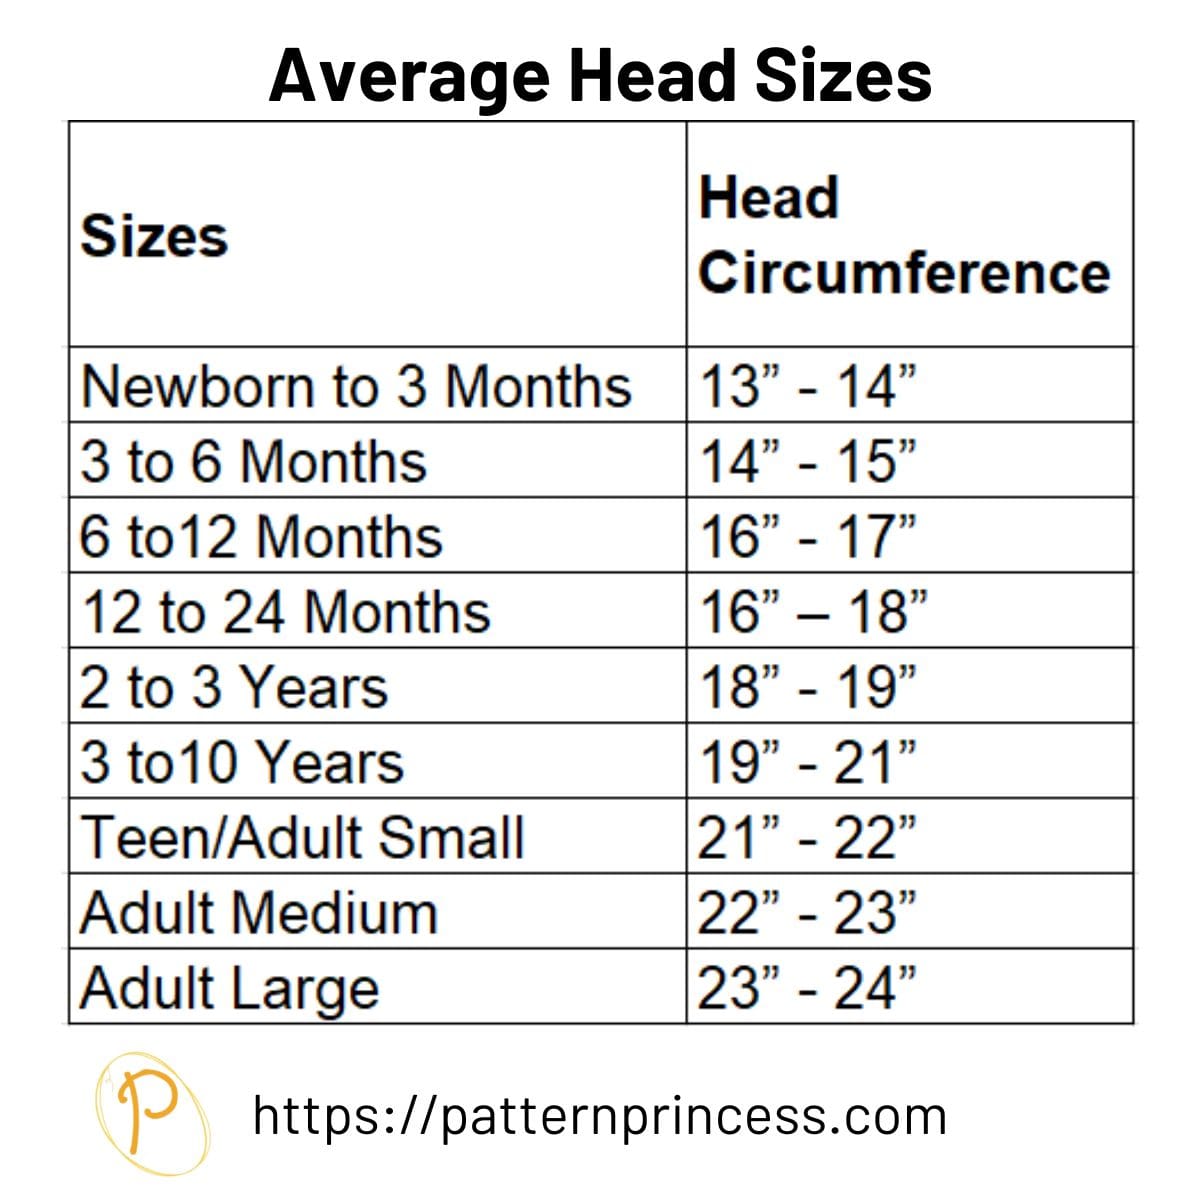
Measure as You Go. If you’re unsure about sizing, measure the headband around their head so you know how big around you need it. If you are not sure of what size to make it. I have a standard head size chart to help you.
This headband is quite stretchy. The length will stretch 2-4 inches. If the yarn you are using isn’t as stretchy, make the band a little bit longer.
Here are my suggested sizes for the average head circumference sizes above.
- Newborn to 3 months = 6” around X 11” long. Laying flat 3” X 11”
- 3 to 6 months = 6” around X 12” long. Laying flat 3” X 12”
- 6 to 12 months = 6” around X 13” long. Laying flat 3” X 13”
- 12 to 24 months = 6.5” around X 14” long. Laying flat 3” X 14”
- 2 to 3 years = 6.5” around X 15” long. Laying flat 3” X 15”
- 3 to 10 years = 8” around X 15.5” long. Laying flat 4” X 15.5”
- Teen/Adult Small = 9” around X 17” long. Laying flat 4” X 17”
- Medium Adult = 9” around X 18” long. Laying flat 4” X 18”
- Large Adult = 9” around X 19” long. Laying flat 4” X 19”
Abbreviations
- CH = Chain Stitch
- SL ST = Slip Stitch
- ST = Stitch
Materials
150 yards of any medium weight yarn. Lion Brand Basic Stitch Skein Tones in Almond and White.
Crochet Hook Size I 5.5 mm
Tapestry Needle
Scissors
Crochet Stitches
Mastering the Slip Stitch
To make the slip stitch, insert hook into the stitch, yarn over, pull the loop back through and through the loop on hook.
Joining the Long Chain
When joining a long chain, it can be difficult to avoid twisting the chain. However, I have an easy trick to make sure that you don’t have any unwanted twist no matter how long you make the foundational chain.
Here is the video showing How to Join a Long Chain with No Twists.
Essentially what you do is crochet about 5 chains, remove the hook from the loop on the hook. Put is back in the first chain, then put the end loop back on the hook. You now have two loops on your hook. Continue working your chain stitches.
When you have your chain to the length you desire, pull the last loop on the hook through the beginning chain that is on the hook.
You now have a circle without any twists ready to work your stitches in.
Pattern Notes
Pattern is written in US crochet terminology.
Keep a Loose Tension. Slip stitches can become tight quickly, which makes it harder to work into the next round. Maintain a looser tension while working the stitches. This helps your hook easily slide through each loop.
Practice Consistency. Slip stitches might not be as forgiving as other stitches when it comes to consistency. Take your time to make each stitch as even as possible for a neat finish.
Measure the headband rather than count the rows. This way, you can use any leftover yarn you happen to have.
You can find You Tube Video step-by-step tutorials for both left hand and right hand crocheters below the written pattern.
Pattern
Pattern is written for a medium adult head.
Medium Adult = 9” around X 18” long. Laying flat 4” X 18”
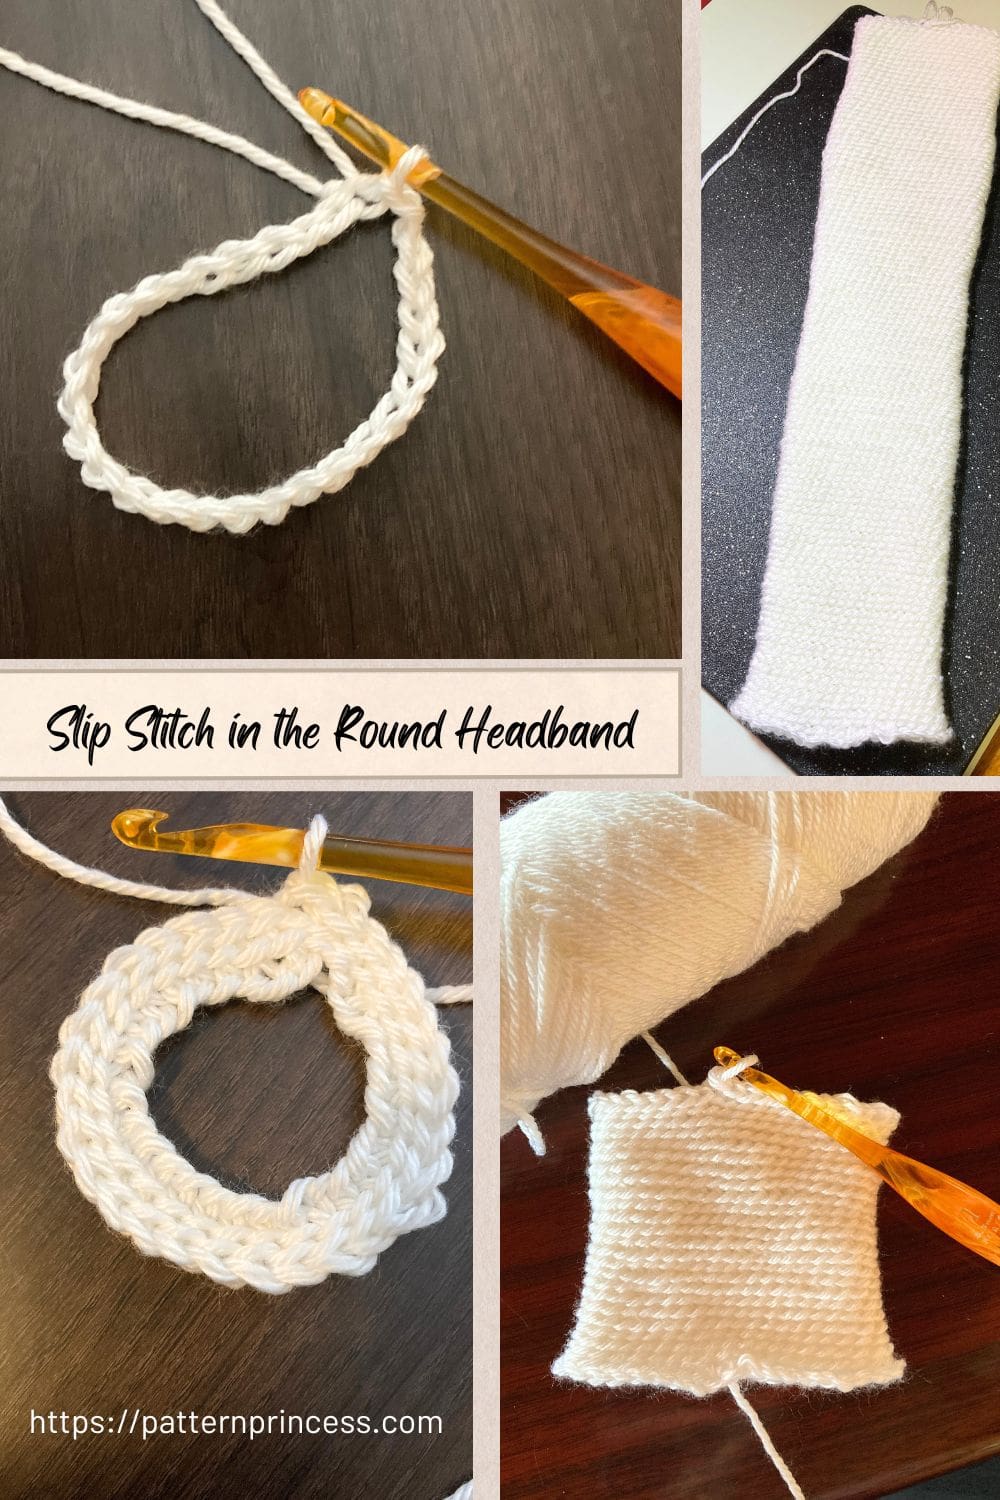
Start with by making a slip knot and adding the loop on the hook.
Work enough chains to make 9 inches in length. Join with a slip stitch to the first chain to form a circle. Making sure to not have any twists.
Note: For the Caron Simply Soft, it took 30 chains, for the Lion Brand Skein Tones, it took 34 chains. Use a tape measure to check.
Round 1
SL ST into each CH ST around. When you come to the end of the round, Do Not Join.
Round 2 and Beyond
Repeat round 1. Continue working a SL ST but this time place the stitch in the Back Loop of each ST.
Remember do not join when you get to the end each round.
Just continue working the slip stitch in the back loop of each stitch until the band measures about 18 inches in length for the adult medium size head.
When you’re done, leave a long tail. About 20 inches. You will be using this to sew the ends together.
Final Steps
Note: Before folding over, decide which side you want showing on the outside. I left mine with the outside showing, sometimes referred to as the right side, rather than turning it inside out, or the wrong side out.
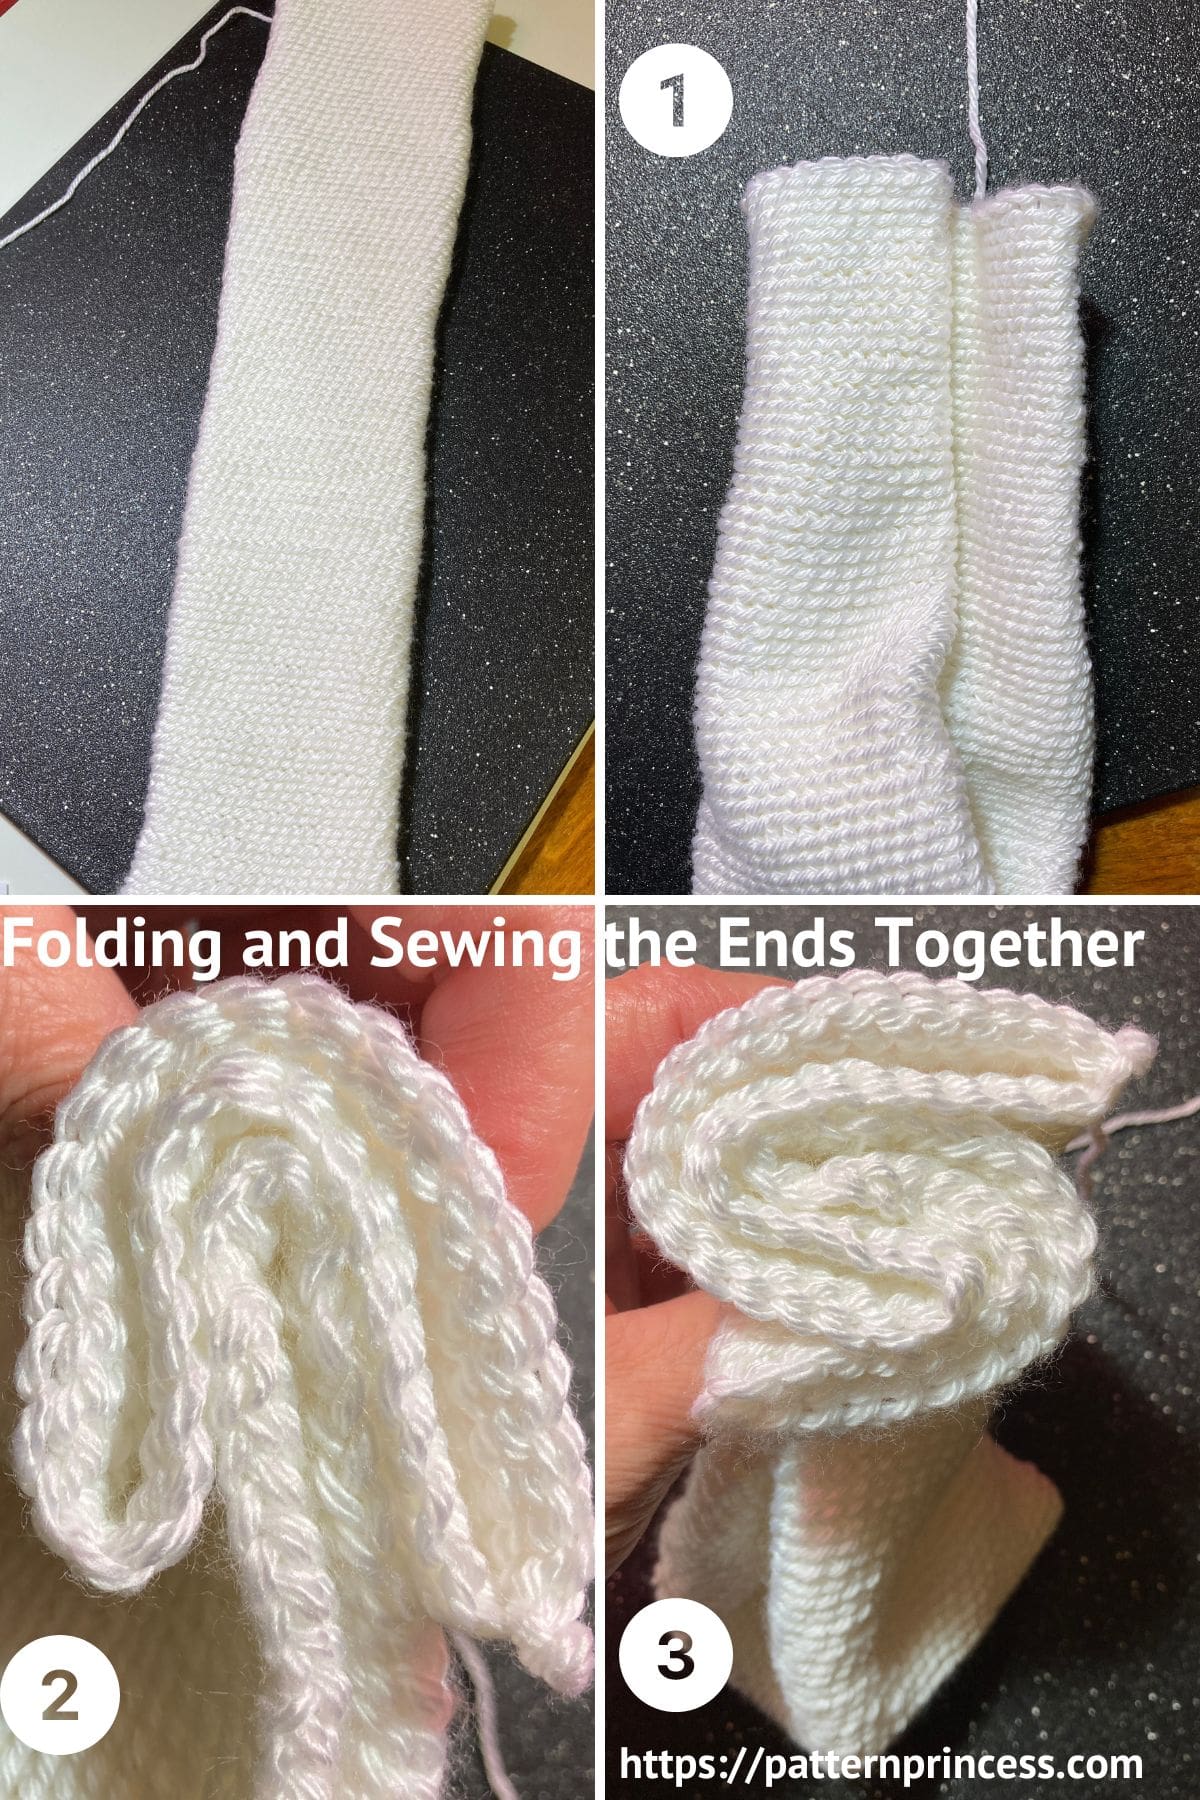
Folding and Sewing the Ends Together
- Fold the band in half matching the ends together.
- Fold the ends in half matching one end to the center of the other band.
- The other band fold over the other side to the front.
- Use the long yarn tail and yarn needle to sew the ends together. Starting on one end, insert the hook through all four layers and pull out the other side. Moving the needle over a little, insert it back through the layers and out the other side. Continue working back and forth like this until you get to the other end.
When done, weave in the yarn ends and cut off the excess yarn.
You Tube Step-by-Step Tutorial
We hope you loved this twisted ear warmer. There are lots of other free patterns to inspire your next crochet project.
You can find Victoria crocheting, quilting, and creating recipes. She has cooked in restaurants for over 20 years, including many larger parties. She learned to crochet when she was just 11 years old and has been crocheting ever since; over 50 years now. Over 40 years ago, she loved her first class in sewing and continues to hone her skills in quilting. Many have enjoyed the handmade gifts over the years. In her professional career, she has worked in management in a wide variety of businesses including higher education as a dean of a division. All the while attending college part-time to achieve her doctorate in higher education with an emphasis in e-learning.

