Last updated on July 5th, 2024 at 12:40 am
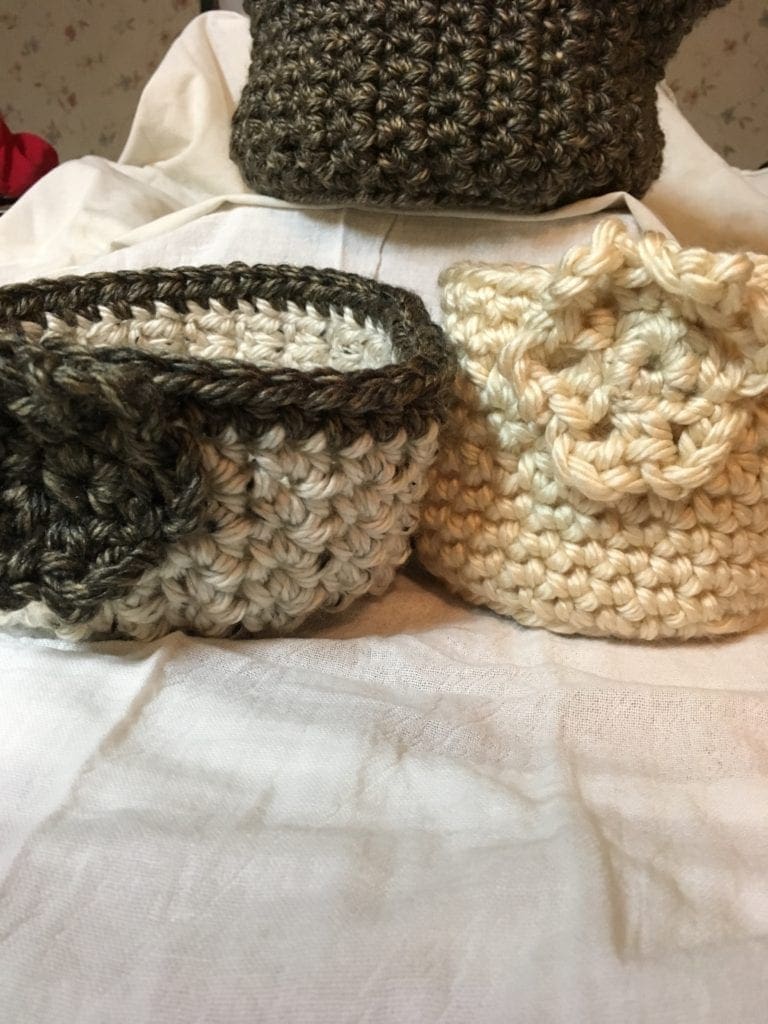
Great beginner pattern that works up in an afternoon. I named this pattern the rocky mountain DIY crochet basket because of the colors with the pop of color on top and the flower on the side. Once you get the hang of it, if you are like me, you will want to make more.
*Post contains affiliate links*at no additional cost to you for more information please read the disclaimer on the About Us page.
Free DIY Crochet Pattern
If you have any crafty DIY friends, they will probably ask you to make some for them too.This one was the first thing that I ever sold at a craft fair. I really like the color combinations on this basket. The flower on the side brings it all together.
The Yarn You Use Makes a Difference
This yarn really makes these soft crochet bowls pop too. I have tried making this same pattern with a single strand of other yarn and it is not sturdy enough. I have also tried to use two strands of yarn to create this same pattern and while it does hold up better, it does not have the smooth and luxurious look of this yarn.
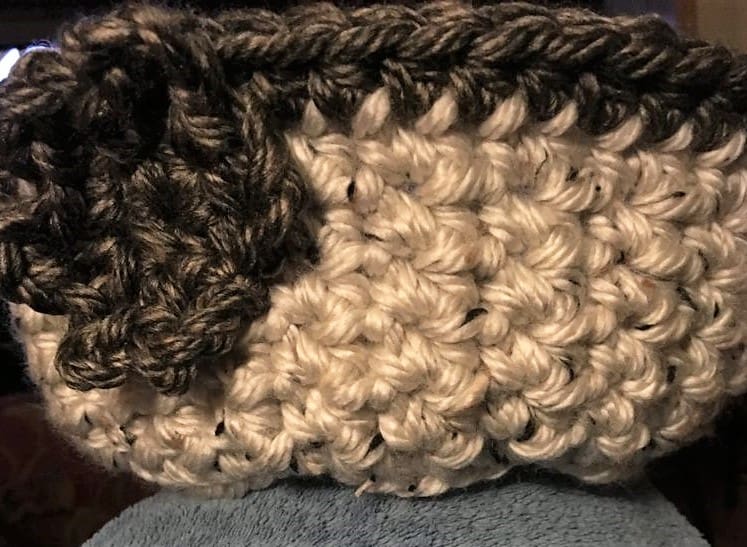
The photo above is of the completed basket sitting on top of my knee. I was happy wit the way it turned out. Looks so nice around the house.
Directions: Rocky Mountain DIY Crochet Basket
Materials:
Lion Brand Hometown USA Little Rock Granite Partial Skein
Darker color
Lion Brand Hometown USA Aspen Tweed One Skein
Lighter color
Boye Crochet Hook Size N
Yarn Needle
Stitch Marker
Scissors
Abbreviations
SC = single crochet
SL ST = slip stitch
ST = Stitch
CH = chain
HDC = half double crochet
Size
Approximately 5 ½ inches wide by 3 ½ inches high
Directions
Begin with a magic circle. Use the Lion Brand Hometown USA Aspen Tweed
Here is another post with complete directions on how to make a magic circle.
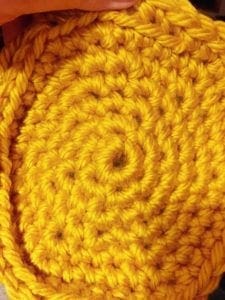
Picture
Here is a picture of the bottom and beginning row of the side of the basket from another soft crochet basket that I completed. If you would like this pattern, you can get that here.
Beginning Round 1:
8 SC in Magic circle and SL ST into first CH (insert a stitch marker in this stitch to help you find the beginning and end of each row).
Row 2:
2 SC in each ST and SL ST into first SC. Should be 18 SC in this row. (move the stitch marker to this stitch).
Row 3:
2 SC in first ST, 1 SC in next ST. Continue this pattern until the end of the row and join to the first SC with a SL ST.
Row 4:
[2SC in first ST, 1 SC in next two ST]. Continue to repeat between the [ ] until the end of the row and join to the first SC with a SL ST. (Continue to move the stitch marker).
Row 5:
[2 SC in first ST, 1 SC in next three ST]. Continue to repeat between the [ ] until the end of the row and join to the first SC with a SL ST. (Continue to move the stitch marker).
Row 6:
1 SC in back loop of each ST until the end of the row and join to the first SC with a SL St. This is the first row of the sides of the basket.
Rows 7-13:
[1 HDC and 1 SC in the first ST, Skip next ST, 1 HDC and 1 SC in the next ST, Skip the next St]. Continue to repeat between the [ ] until the end of the row and join to the first SC with a SL St.
Color Change
Row 14:
Change to the Lion Brand Hometown USA Little Rock Granite yarn. SC in each ST. SL ST into first ST.
Finishing off:
pull the yarn through the last loop. Using the yarn needle, weave in the ends of the yarn.
Directions to Making the Crochet Flower:
Using the Lion Brand Hometown USA Little Rock Granite yarn make a magic ring. Leave about a 6-inch tail on the yarn (you will use this to sew the flower onto the basket)
Row 1:
6 SC ending with a SL ST into first SC.
Row 2:
CH 4 SC into first ST. [CH 4, *SC into next ST]. Continue to repeat between the [ ] until the last ST. There should be 6 loops. Leave about a 6-inch tail on the end and cut off the excess yarn.
Finishing:
Determine the place you would like to add the flower. Using a yarn needle, sew from between the flower and the basket to hide the attaching yarn as much as possible. Weave the yarn between the flower and the basket following the inner circle using both of the extra yarn pieces that were left on the flower. Cut off the excess. Weave in all other yarn ends.
Enjoy your Soft Crochet Bowl and decorate it for a pretty Home Décor DIY.
If you loved this post, share on your fave social media links. It helps to show me that these types of posts are helpful – thank you!
Here are some other crochet patterns you might like.


You can find Victoria crocheting, quilting, and creating recipes. She has cooked in restaurants for over 20 years, including many larger parties. She learned to crochet when she was just 11 years old and has been crocheting ever since; over 50 years now. Over 40 years ago, she loved her first class in sewing and continues to hone her skills in quilting. Many have enjoyed the handmade gifts over the years. In her professional career, she has worked in management in a wide variety of businesses including higher education as a dean of a division. All the while attending college part-time to achieve her doctorate in higher education with an emphasis in e-learning.