Last updated on November 16th, 2025 at 03:05 pm
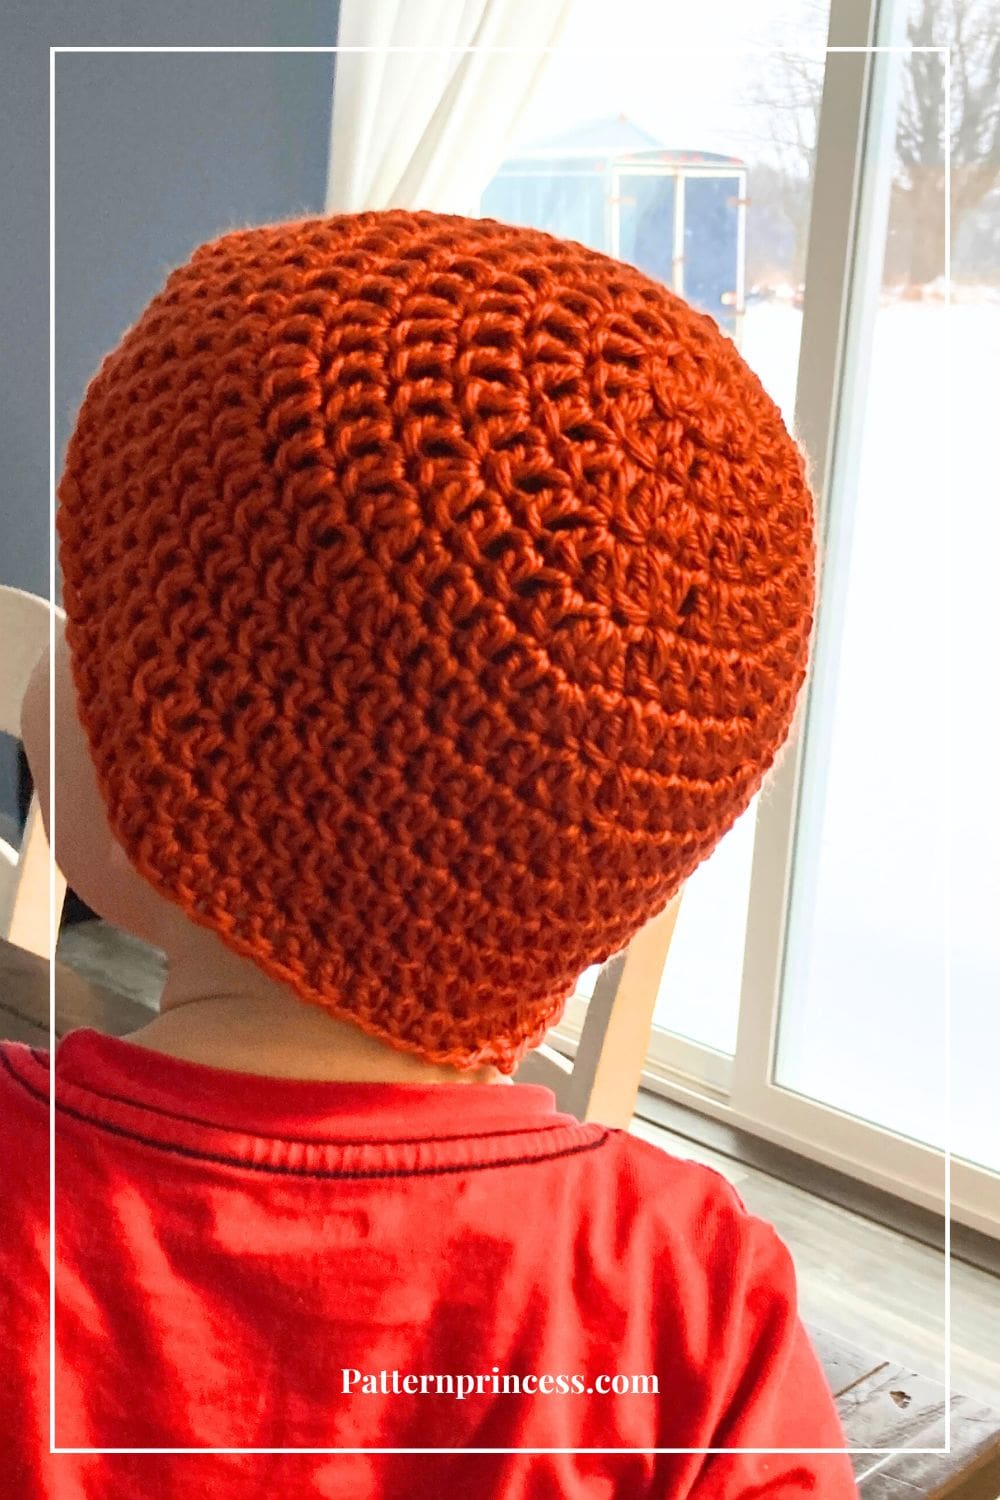
This simple double crochet beanie is a practical and stylish piece that you can customize with different yarns, colors, and sizes. Make this easy crochet hat pattern in 6 different sizes, from baby to X-large.
It’s easy, whether you’re a newer crocheter or a seasoned crocheter looking for a quick and cozy project.
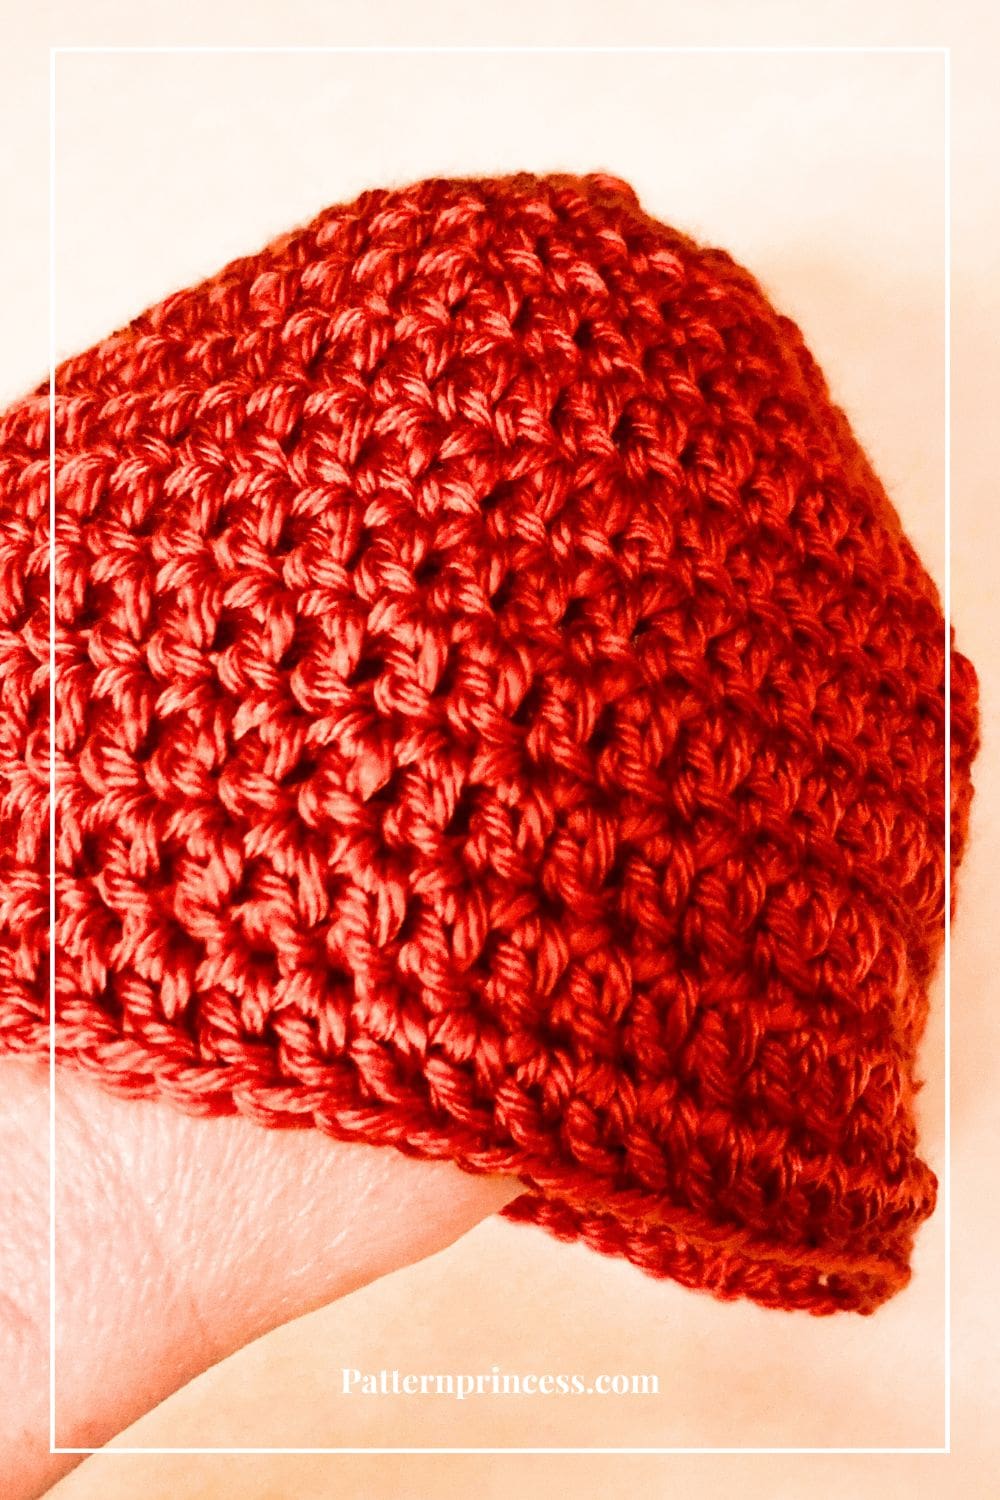
Made from the top of the hat down and worked in the round. It works up quickly with basic stitches like the double crochet. You’ll whip up a stylish, snug-fitting beanie in no time.
It’s a great project for an afternoon.

Sizing for Crochet Hats
If you are wondering what size hat to make it’s best to make a hat just a little smaller than your head size. Every hat I’ve ever made always stretches 1 to 2 inches. By making it just a bit smaller, it will fit your head perfectly.
To find your perfect hat size width, use a tape measure to measure the widest part of your head. This will give you your head circumference measurement. Subtract 1 to 2 inches from this measurement to adjust for the stretch.
To determine the length (hat height), measure from the top of the head to the top of your eyebrow line if you won’t be folding the hat’s edge for a brim. If you plan to fold the edge for a brim, measure from the crown of the head to the tip of your nose.
Use One Skein of Medium Weight Yarn
Is there a best yarn for this basic beanie? This pattern works well with any soft, medium-weight yarn that offers good stitch definition and drape. A smooth, worsted-weight acrylic or wool-blend yarn is ideal for a comfortable and durable beanie.
Anti-pilling yarns help maintain the hat’s appearance over time, while a slightly stretchy or soft yarn enhances the overall fit and feel.
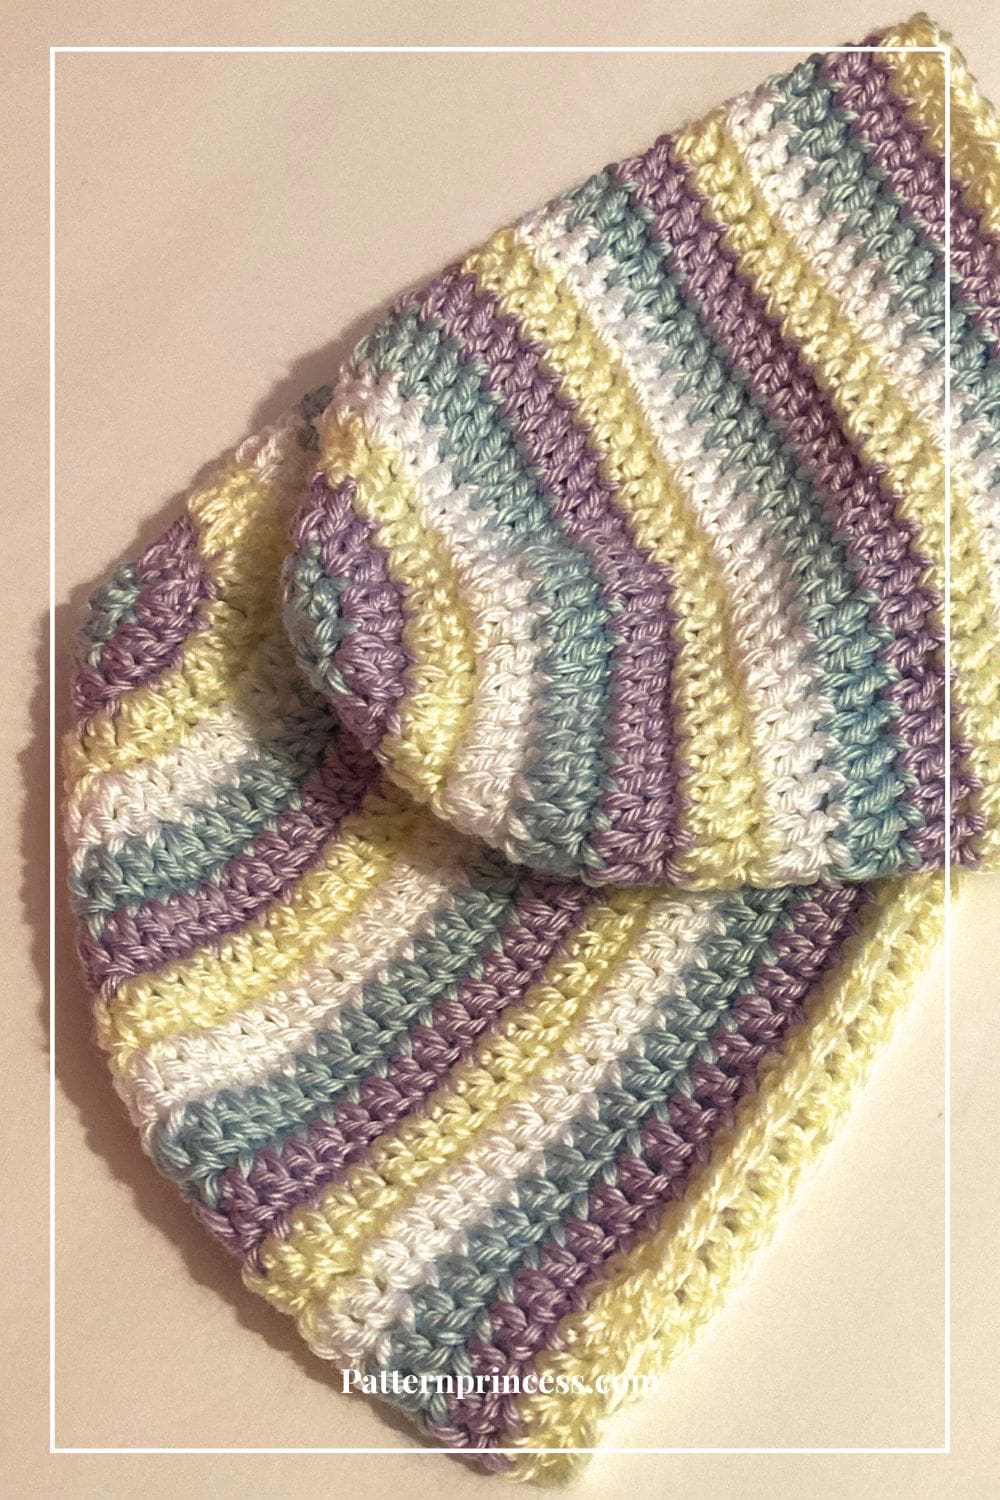
You can choose between solid or variegated yarn, depending on the look you want. Solid colors highlight the texture of the double crochet stitches, making them stand out clearly, while variegated or self-striping yarns add visual interest with unique color transitions.
A heathered or tweed yarn can also add subtle depth and texture, giving the beanie a cozy, rustic look.
Whether you prefer a classic neutral, a bold pop of color, or a playful mix of shades, this pattern adapts well to different yarn choices, allowing you to customize the beanie to suit any style.
Get Your Ad Free Printable PDF in our Etsy Shop.
Directions: Simple Double Crochet Beanie Pattern for Beginners
Skill Level
Easy, Beginner-Friendly
Gauge
12 stitches and 8 rows of double crochet every 4 inches.
Sizing will vary based on different yarn brands. Make sure to use a tape measure to determine the size of your hat.
Sizes
- Baby. Infant 3 months to 15 months old. It fits up to 15 inches circumference and 5 ½ inches height.
- X-Small. Child 2 to 5 years old. It fits up to 18 inches circumference and 7 inches height.
- Small. Child 6-12 years old. It fits up to 19 inches circumference and 8 inches height.
- Medium. Teenager/adult small. It fits up to 20 inches circumference and 8.5 inches height.
- Large. Adult medium. It fits up to 22 inches circumference and 9 inches height.
- X-Large. Adult large. It fits up to 24 inches circumference and 10 inches height.
The hat does stretch, so make the circumference about 2 inches less than final measurement desired.
Abbreviations
- CH = Chain
- DC = Double Crochet
- SL ST = Slip Stitch
- ST = Stitch
- STs = Stitches
- [ ] = Repeat Between
Crochet Project Materials Needed
Any medium worsted yarn weight number 4. About 100-150 yards.
For the solid color, I used Lion Brand Basic Stitch Anti-Pilling in color pumpkin. Each skein is 185 yards. I used about half a skein.
For the striped hat, I used Caron Simply Soft in four colors, white, orchid, soft blue, and off white. It was leftover yarn scraps from other crochet projects. I changed color each round, then weaved in all the yarn ends.
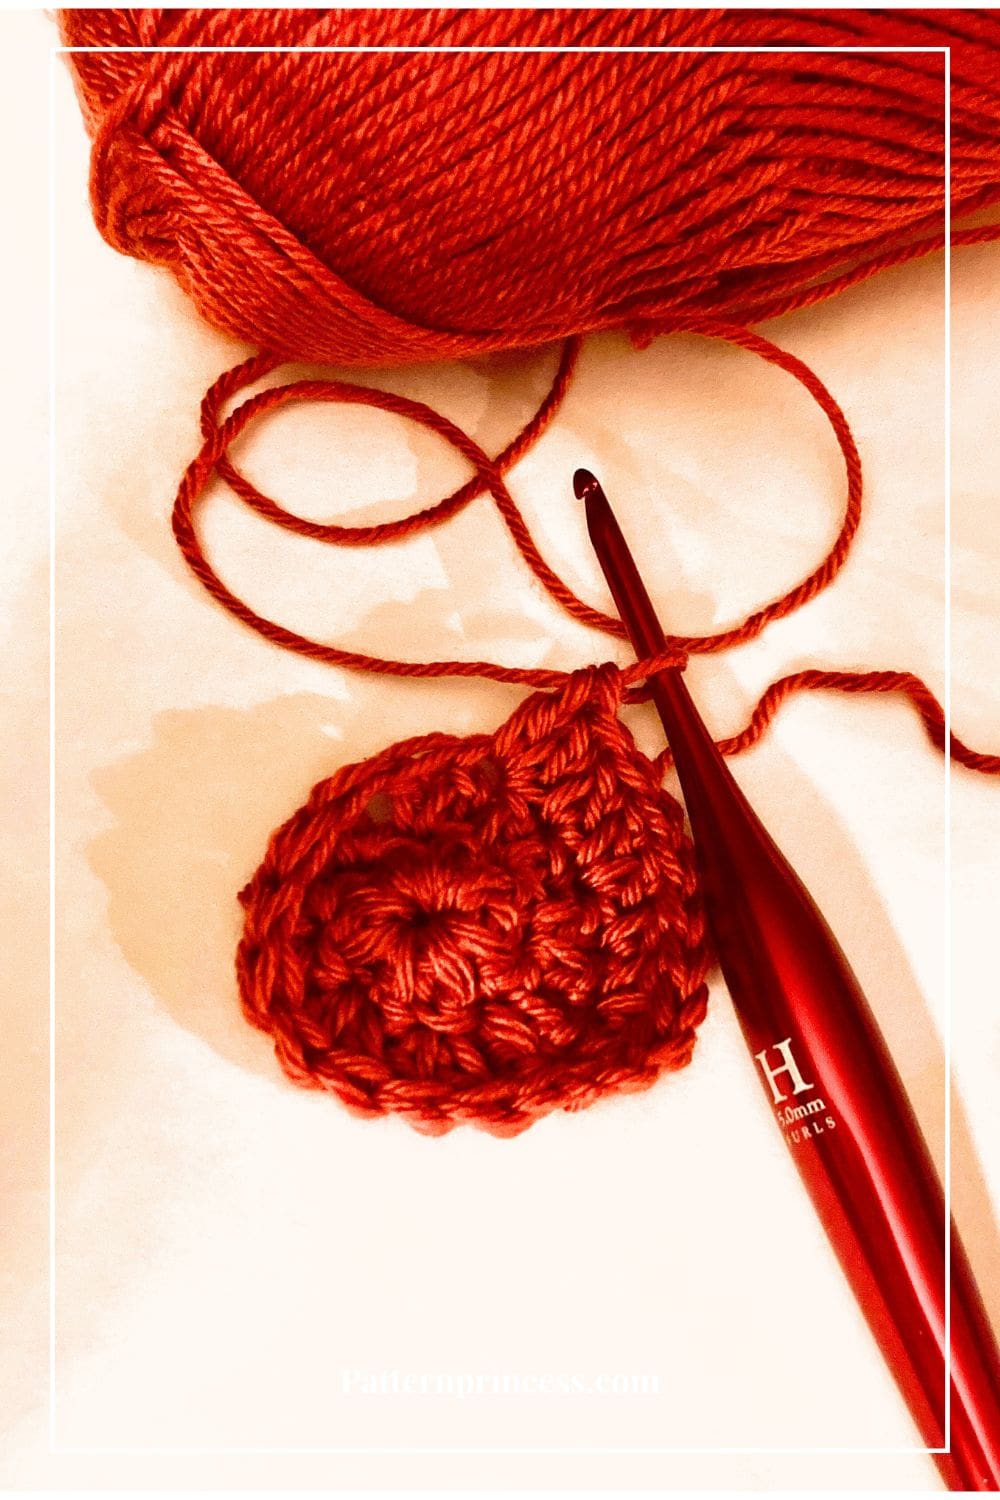
Crochet Hook Size H 5.0 mm
Tapestry Needle. To weave in yarn ends.
Scissors to snip off the excess yarn.
Stitch Markers. If you are a beginner crocheter, these are helpful to place in the first stitch of the row. It helps know exactly where to place your stitches.
Tape Measure. For measuring head circumference and the hat size.
Pattern Notes
Written in US Terms
This pattern is worked in the round from the top down.
Join each round with a slip stitch into the first stitch worked in the round.
When measuring the hat, lay it flat. Measure the height from the top to the bottom. Measure the circumference across the last row crocheted. Note. It will measure half of the total width when folded flat.
The chain two at the beginning of each round is optional. When used, it does not could as a stitch. It is used as a filler to hide the joining of each round. If your yarn is plush enough, it may not need the chain two at the beginning of each round. If that is the case, you can skip this step in each round.
Crochet Beanie Video Tutorial is located below the written pattern. The video shows beginning rounds for the Large and X-Large size. Just change the number of stitches in the circle for round 1 and the subsequent rounds.
Use the magic ring also called magic circle rather than the chain four with a slip stitch into the first stitch. I have a whole tutorial on how to do this if you prefer this method.
How to Crochet a Magic Circle.
Today, I did not make a yarn pom pom or use a faux fur pom pom for the top of the hat. However, you can make one and attach it to the hat as a finishing embellishment.
Crochet Stitches
Chain Stitch (CH)
Begin the chain stitch by making a slip knot on the crochet hook. Leave about a 5-inch tail on the yarn. This will be weaved in later.
Next snug up the yarn loop that is on the crochet hook; while it should be firm, it should also be loose enough to slide on the hook with ease.
Keeping the loop on the hook, insert the hook in the stitch, wrap the yarn over the crochet hook from back to front. Draw the yarn through the loop. Yarn over again and draw the yarn through both loops that are currently on the hook. (The first chain stitch is complete).
HOW TO CROCHET THE CHAIN STITCH video tutorial
Double Crochet (DC)
Yarn over, insert the hook through both loops and pull up a loop. Next, yarn over and pull through two loops on the hook. Lastly, yarn over again and pull through the last two loops on the hook.
HOW TO CROCHET THE DOUBLE CROCHET STITCH video tutorial
Crochet Pattern
Sizes: Baby, X-Small, Small, Medium
Start by making a slip knot and adding the loop on the hook.
CH 4, join with a SL ST into the first CH to form a ring.
Round 1
CH 3 (Counts as a ST). 7 DC in the ring. Join with a SL ST to the first DC. (8 STs).
The chain two at the beginning of each round is optional. See the Notes Section.
Round 2
CH 2 (Doesn’t Count as a ST). 2 DC in the first ST and each ST around. Join with a SL ST to the first DC. (16 STs).
Round 3
CH 2 (Doesn’t Count as a ST). [1 DC in the first ST and 2 DC in the next ST]. Repeat between [ ] around. Join with a SL ST to the first DC. (24 STs).
Round 4
CH 2 (Doesn’t Count as a ST). [1 DC in the first ST, 1 DC in the next ST, and 2 DC in the next ST]. Repeat between [ ] around. Join with a SL ST to the first DC. (32 STs).
Round 5
CH 2 (Doesn’t Count as a ST). [1 DC in the first ST, 1 DC in the next 2 STs, and 2 DC in the next ST]. Repeat between [ ] around. Join with a SL ST to the first DC. (40 STs).
Round 6
CH 2 (Doesn’t Count as a ST). [1 DC in the first ST, 1 DC in the next 3 STs, and 2 DC in the next ST]. Repeat between [ ] around. Join with a SL ST to the first DC. (48 STs).
Round 7
CH 2 (Doesn’t Count as a ST). [1 DC in the first ST, 1 DC in the next 4 STs, and 2 DC in the next ST]. Repeat between [ ] around. Join with a SL ST to the first DC. (56 STs).
Round 8
CH 2 (Doesn’t Count as a ST). [2 DC in the first ST, 1 DC in the next 13 STs]. Repeat between [ ] 3 more times. Join with a SL ST to the first DC. (60 STs).
Round 9
CH 2 (Doesn’t Count as a ST). 1 DC in the first ST and each ST around. Join with a SL ST to the first DC. (60 STs).
Round 9 and Beyond
- Round 10. Baby Size repeat round 9.
- Rounds 10-13. X-Small Size repeat round 9.
- Rounds 10-15. Small Size repeat round 9.
- Rounds 10-16. Medium Size repeat round 9.
Finishing
After you work the last stitch, cut off the yarn leaving about a 12-inch long tail. Pull the yarn tail through the last loop on the hook.
Thread the yarn needle with the yarn tails and weave them through the crochet stitches back and forth until the yarn feels secure. Snip off the excess yarn.
- Baby. Infant 3 months to 15 months old. It fits up to 15 inches circumference and 5 ½ inches height.
- X-Small. Child 2 to 5 years old. It fits up to 18 inches circumference and 7 inches height.
- Small. Child 6-12 years old. It fits up to 19 inches circumference and 8 inches height.
- Medium. Teenager/adult small. It fits up to 20 inches circumference and 8.5 inches height.
Crochet Pattern
Sizes: Large, X-Large
Start by making a slip knot and adding the loop on the hook.
CH 4, join with a SL ST into the first CH to form a ring.
Round 1
CH 3 (Counts as a ST). 9 DC in the ring. Join with a SL ST to the first DC. (10 STs).
Round 2
CH 2 (Doesn’t Count as a ST). 2 DC in the first ST and each ST around. Join with a SL ST to the first DC. (20 STs).
The chain two at the beginning of each round is optional. See the Notes Section.
Round 3
CH 2 (Doesn’t Count as a ST). [1 DC in the first ST and 2 DC in the next ST]. Repeat between [ ] around. Join with a SL ST to the first DC. (30 STs).
Round 4
CH 2 (Doesn’t Count as a ST). [1 DC in the first ST, 1 DC in the next ST, and 2 DC in the next ST]. Repeat between [ ] around. Join with a SL ST to the first DC. (40 STs).
Round 5
CH 2 (Doesn’t Count as a ST). [1 DC in the first ST, 1 DC in the next 2 STs, and 2 DC in the next ST]. Repeat between [ ] around. Join with a SL ST to the first DC. (50 STs).
Round 6
CH 2 (Doesn’t Count as a ST). [1 DC in the first ST, 1 DC in the next 3 STs, and 2 DC in the next ST]. Repeat between [ ] around. Join with a SL ST to the first DC. (60 STs).
Round 7
CH 2 (Doesn’t Count as a ST). [1 DC in the first ST, 1 DC in the next 4 STs, and 2 DC in the next ST]. Repeat between [ ] around. Join with a SL ST to the first DC. (70 STs).
Round 8
CH 2 (Doesn’t Count as a ST). [2 DC in the first ST, 1 DC in the next 7 STs]. Repeat between [ ] 7 more times. Work 1 DC in the last 7 STs. Join with a SL ST to the first DC. (78 STs).
Round 9 and Beyond
CH 2 (Doesn’t Count as a ST). 1 DC in the first ST and each ST around. Join with a SL ST to the first DC. (78 STs).
- Rounds 10-17. Large Size repeat round 9.
- Rounds 10-18. X-Large Size repeat round 9.
Finishing
After you work the last ST, cut off the yarn leaving about a 12-inch long tail. Pull the yarn tail through the last loop on the hook.
Thread the yarn needle with the yarn tails and weave them through the crochet stitches back and forth until the yarn feels secure. Snip off the excess yarn.
- Large. Adult medium. It fits up to 22 inches circumference and 9 inches height.
- X-Large. Adult large. It fits up to 24 inches circumference and 10 inches height.
Crochet Beanie Video Tutorial
Shows beginning rounds for the Large and X-Large size. Just change the number of stitches in the circle for round 1 and the subsequent rounds.
We hope you’ve enjoyed this free pattern for a simple hat. It’s a fun quick project. Here are a few more ideas to inspire your next crochet project.
Get the Printable PDF pattern along with others on our Free PDFs page.

You can find Victoria crocheting, quilting, and creating recipes. She has cooked in restaurants for over 20 years, including many larger parties. She learned to crochet when she was just 11 years old and has been crocheting ever since; over 50 years now. Over 40 years ago, she loved her first class in sewing and continues to hone her skills in quilting. Many have enjoyed the handmade gifts over the years. In her professional career, she has worked in management in a wide variety of businesses including higher education as a dean of a division. All the while attending college part-time to achieve her doctorate in higher education with an emphasis in e-learning.