Last updated on February 20th, 2025 at 04:06 pm
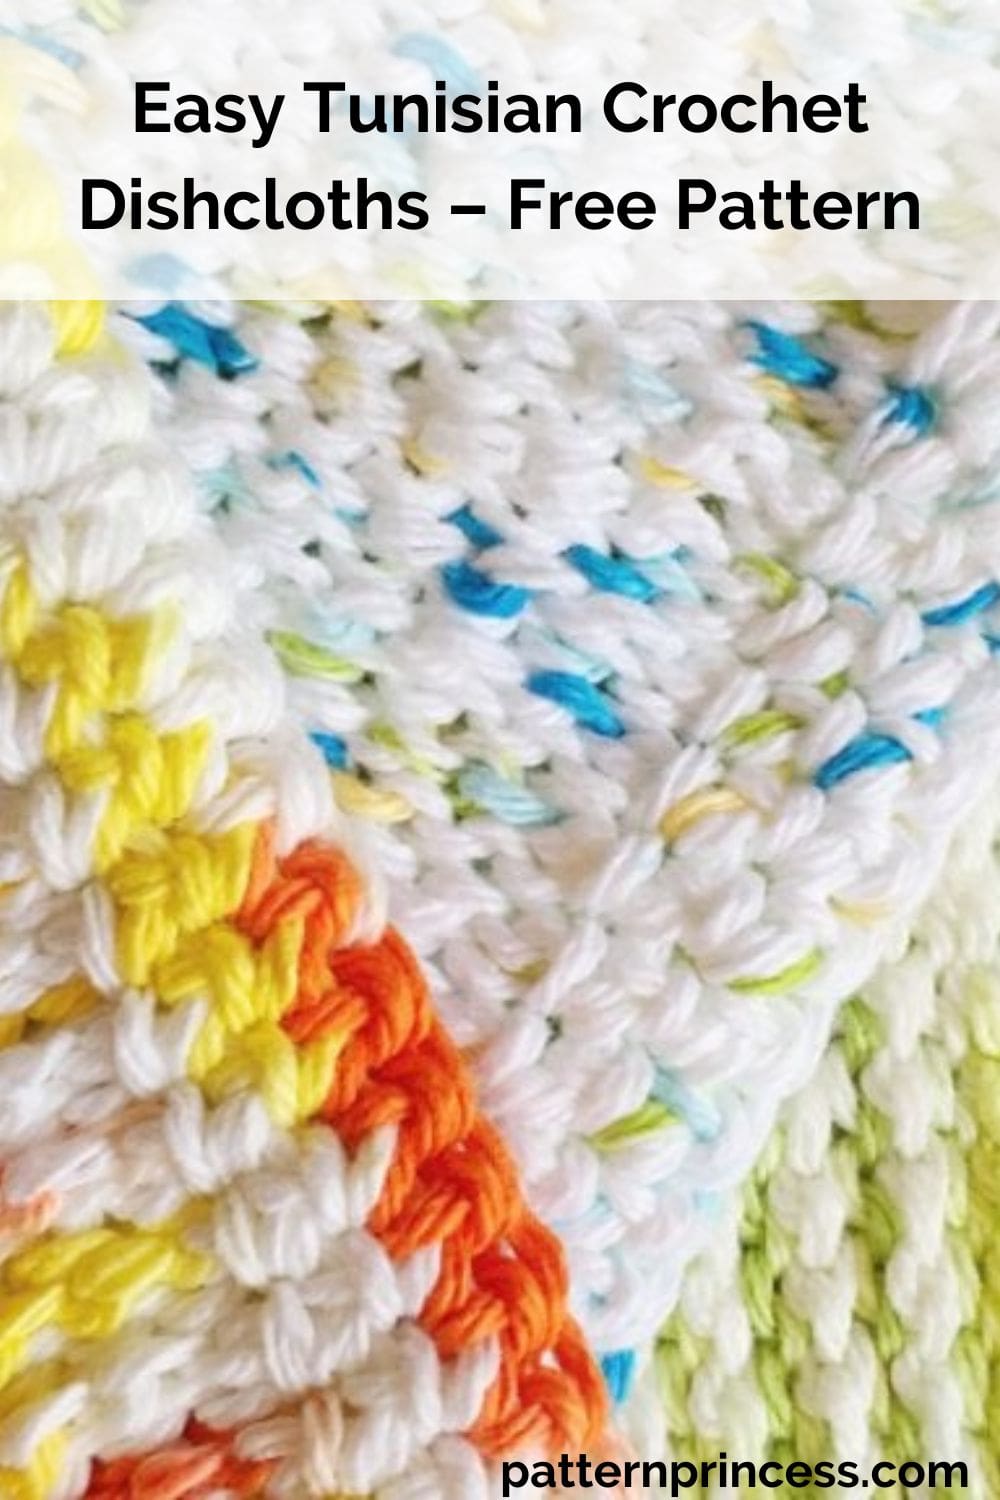
If you love the look of knitting but prefer the ease of crochet, Tunisian crochet is the perfect technique to explore. Learn how simple this technique can be. Once you get past the first few rows, you will be moving along effortlessly.
Tunisian crochet dishcloths are not only fun to make but also practical for everyday use. With their unique texture and extra thickness, they’re highly absorbent and durable. Perfect for scrubbing dishes or wiping down countertops.
Photo Tutorials and Video Tutorials
Whether you’re a beginner or an experienced crocheter, this project is a great way to practice new stitches while creating something useful for your home. You’ll find step-by-step photo and video tutorials with detailed instructions to help get you started.
Tunisian Crochet is a Very Easy Technique with Lovely Results
It kind of feels a bit like you are knitting because of adding the loops onto the crochet hook, yet at the same time, you are only using one crochet hook to achieve these results. The stitch is a close weave and is great for dishcloths, spa washcloths, pot holders, pillows, cowls, baby washcloth, and much more.
One of my favorite beginner projects was a simple dishcloth, and it quickly became a kitchen staple. The texture, the durability, and the handmade charm make Tunisian crochet dishcloths a joy to use and gift.
Tunisian Simple Stitch Basics
This is the most basic stitch to start with if you want to learn how to crochet this unique, yet easy stitch pattern. If you are looking for beginner free tunisian crochet patterns, this one is for you.
Tunisian crochet, sometimes called Afghan crochet, is a unique type of crochet that creates a beautiful and dense fabric. It combines some aspects of knitting with some elements of crochet.
When working this crochet stitch, you’ll use a long, straight hook called a Tunisian crochet hook. There is a stopper at the one end to keep the stitches from falling off. Just like regular hooks, they come in a variety of sizes. From simple projects to cozy blankets.
Each row is completed using two passes, working from the right to the left, then left to the right again. (That is if you are a right hand crocheter, If you are a left hand crocheter, it would be opposite). Additionally, there is no need to turn your work simple stitch.
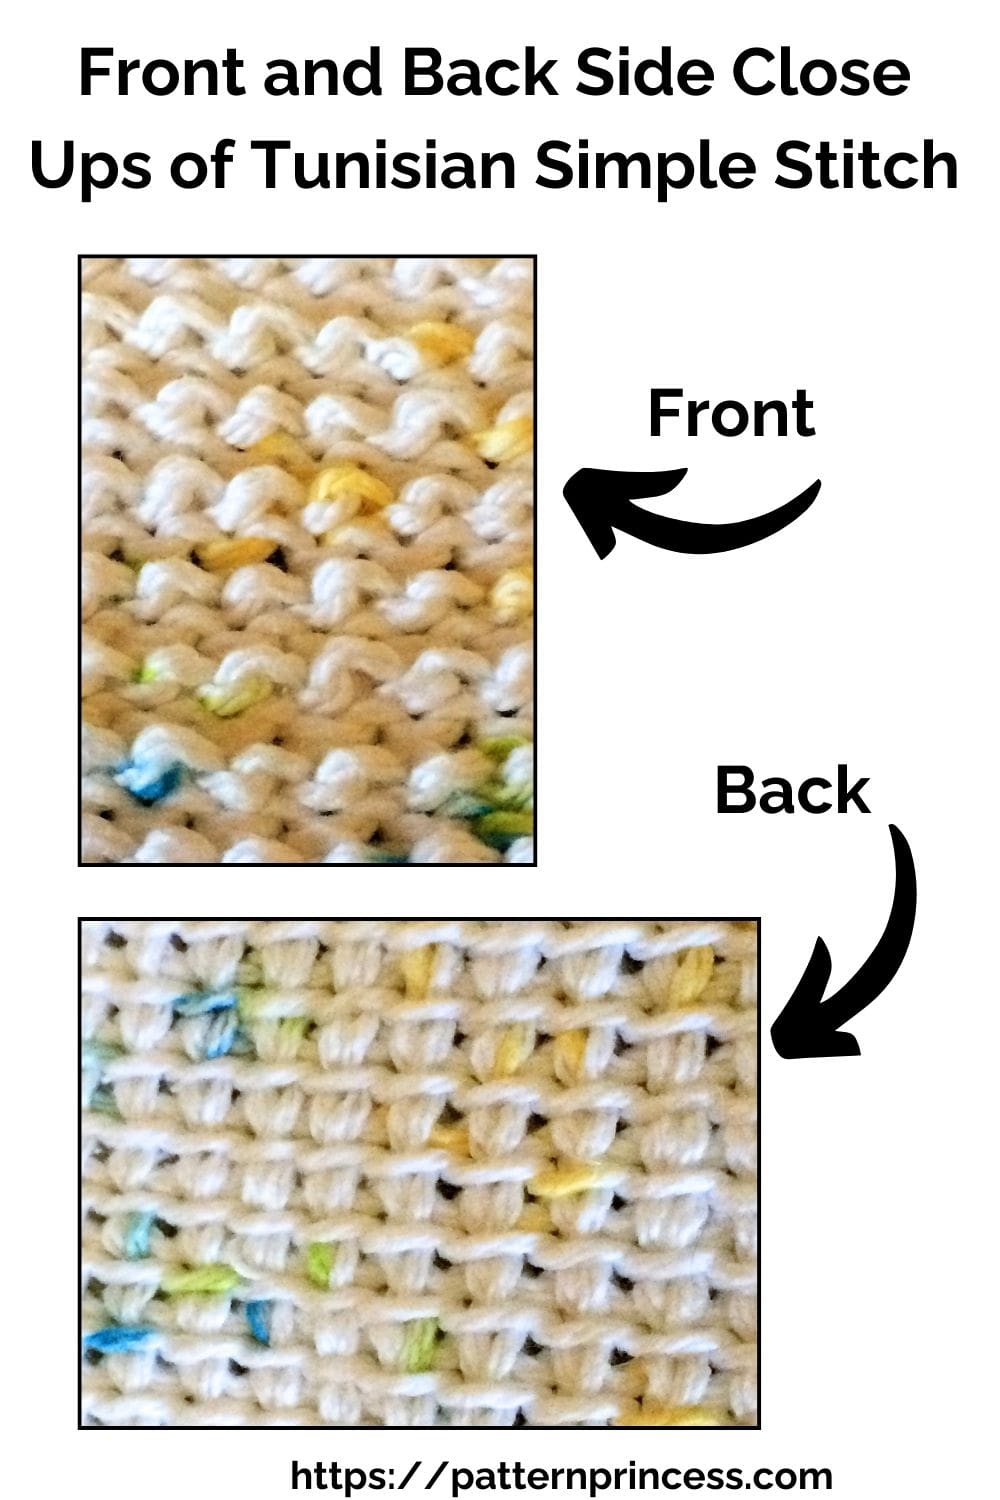
Front and Back Side Close Ups of Tunisian Simple Stitch
Notice how this forms a close knit looking crochet stitch? I love the beautiful texture that this creates. Some folks may not understand when I say “it feels wonderful”; however, I am betting that you understand if you work with your hands and yarn. Sometimes, there is a certain feel to a crochet pattern that is just lovely. This, to me is one of those stitches.
Notice how there is a weaved look to the backside of the work. This may look difficult; however, it is not as hard as you may think. It is a unique type of fabric that is formed with this crochet method.
Beautiful Handmade Bridal Shower Gifts for Guests
The stack of handmade crochet dishcloths below is just a small sample of how many of these I made for my daughter’s bridal shower. There were quite a few people attending and I wanted to make sure that people went home with something nice to remember our wonderful time together. As a thank you to the special people in our lives that attended, each person got a washcloth and full-size bottle of hand lotion. I made over 100 of these…
Good Memories for All
We did have other party and prize gifts for those fun bridal shower games that we played. My son-in-law attended the shower too, so it was extra fun involving him in the activities. To top that off, both fathers and a handful of other husbands that drove their wives to the event attended too. All I can say is so much fun! This was the first bridal shower for all of the men. Of course, we sat them all at the same table. It just added a whole different level of entertainment. Good memories.
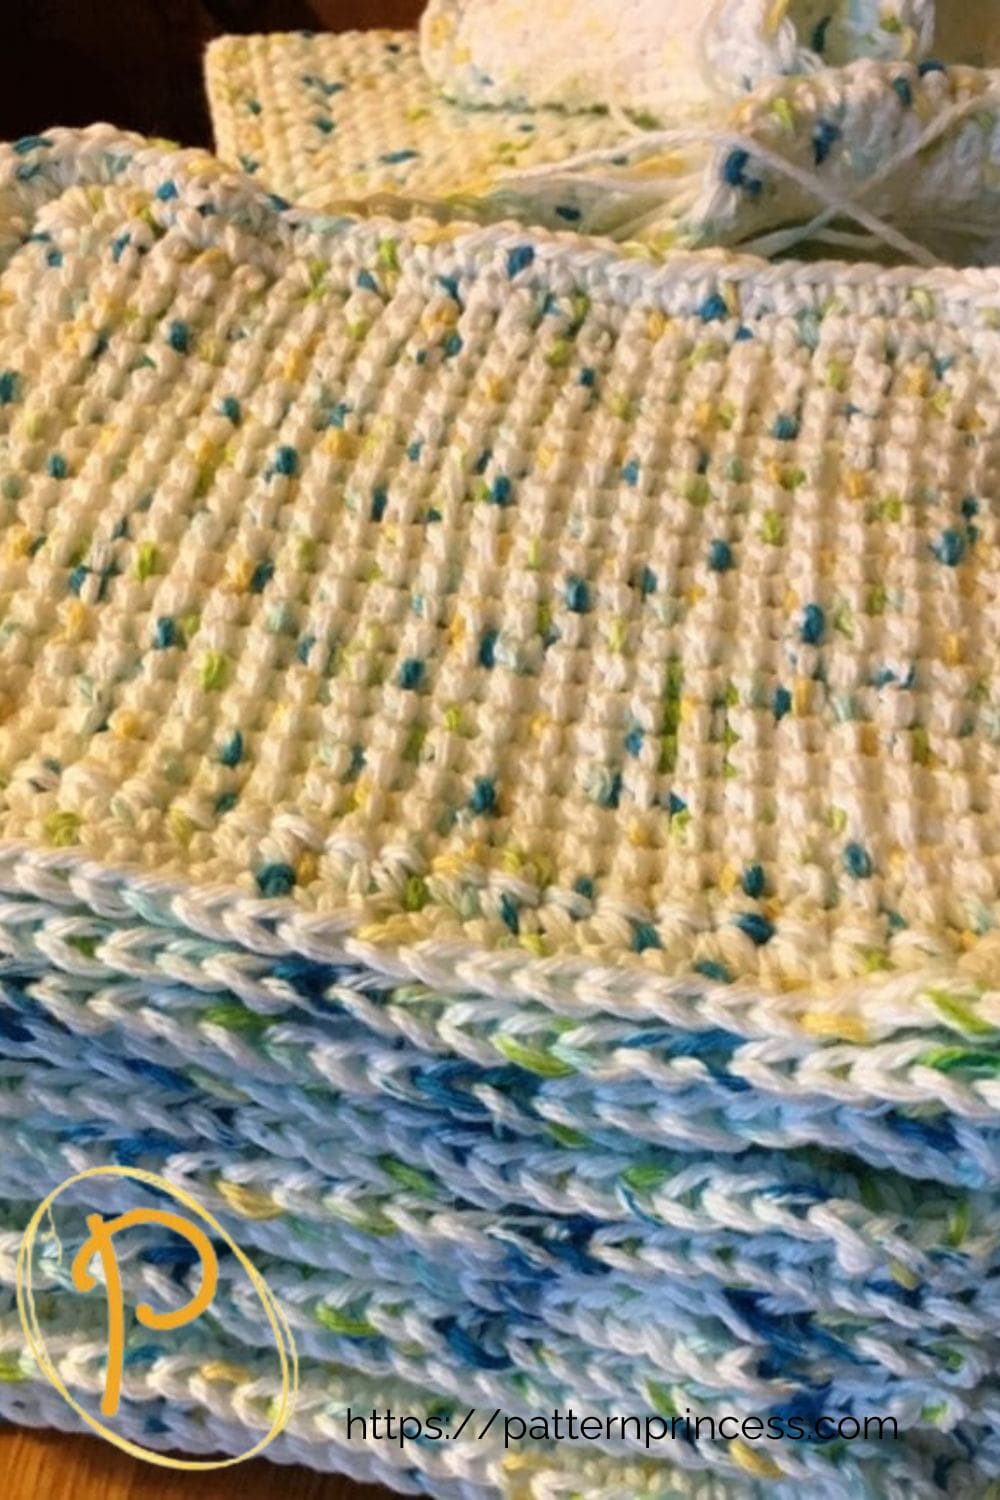
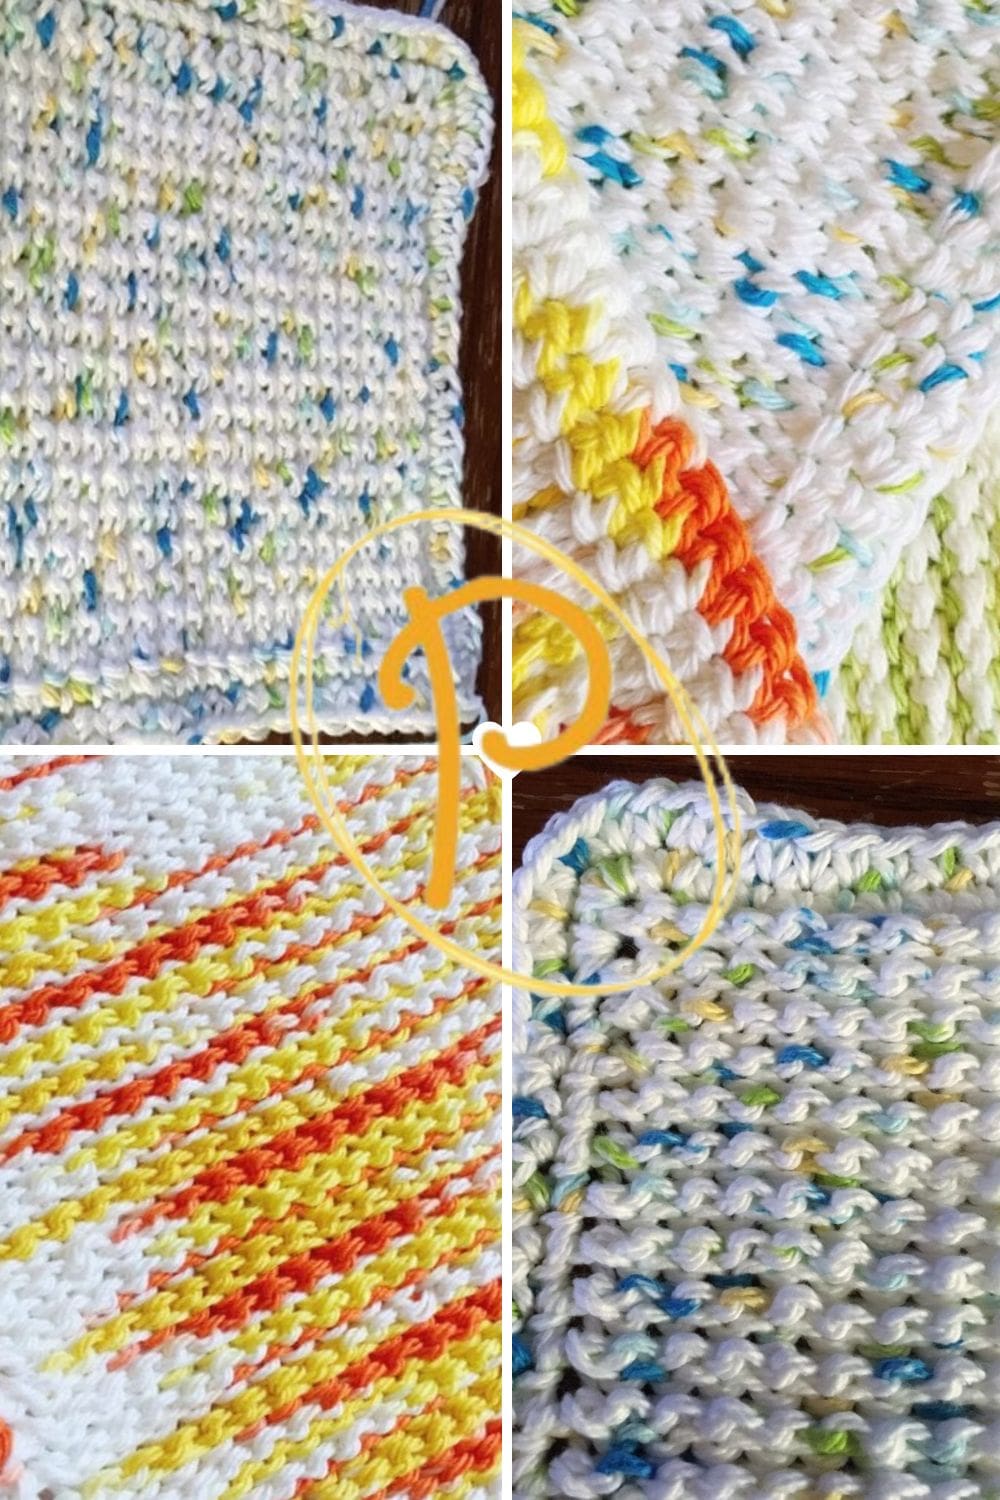
Stopping the Curl of the Stitch
Back onto the Tunisian dishcloths. The stack shown has a single crochet border around each one. This is done because the Tunisian crochet tends to curl. However, rather than having to block each one, I added this crochet border and it not only took care of the problem, it finishes off the look of the pattern nicely.
How to Work the Tunisian Simple Stitch Crochet Lesson
If you prefer learning from a video, I have links to our You Tube Channel for both a left hand and right hand crochet tutorial of the Tunisian Simple Stitch below the written pattern.
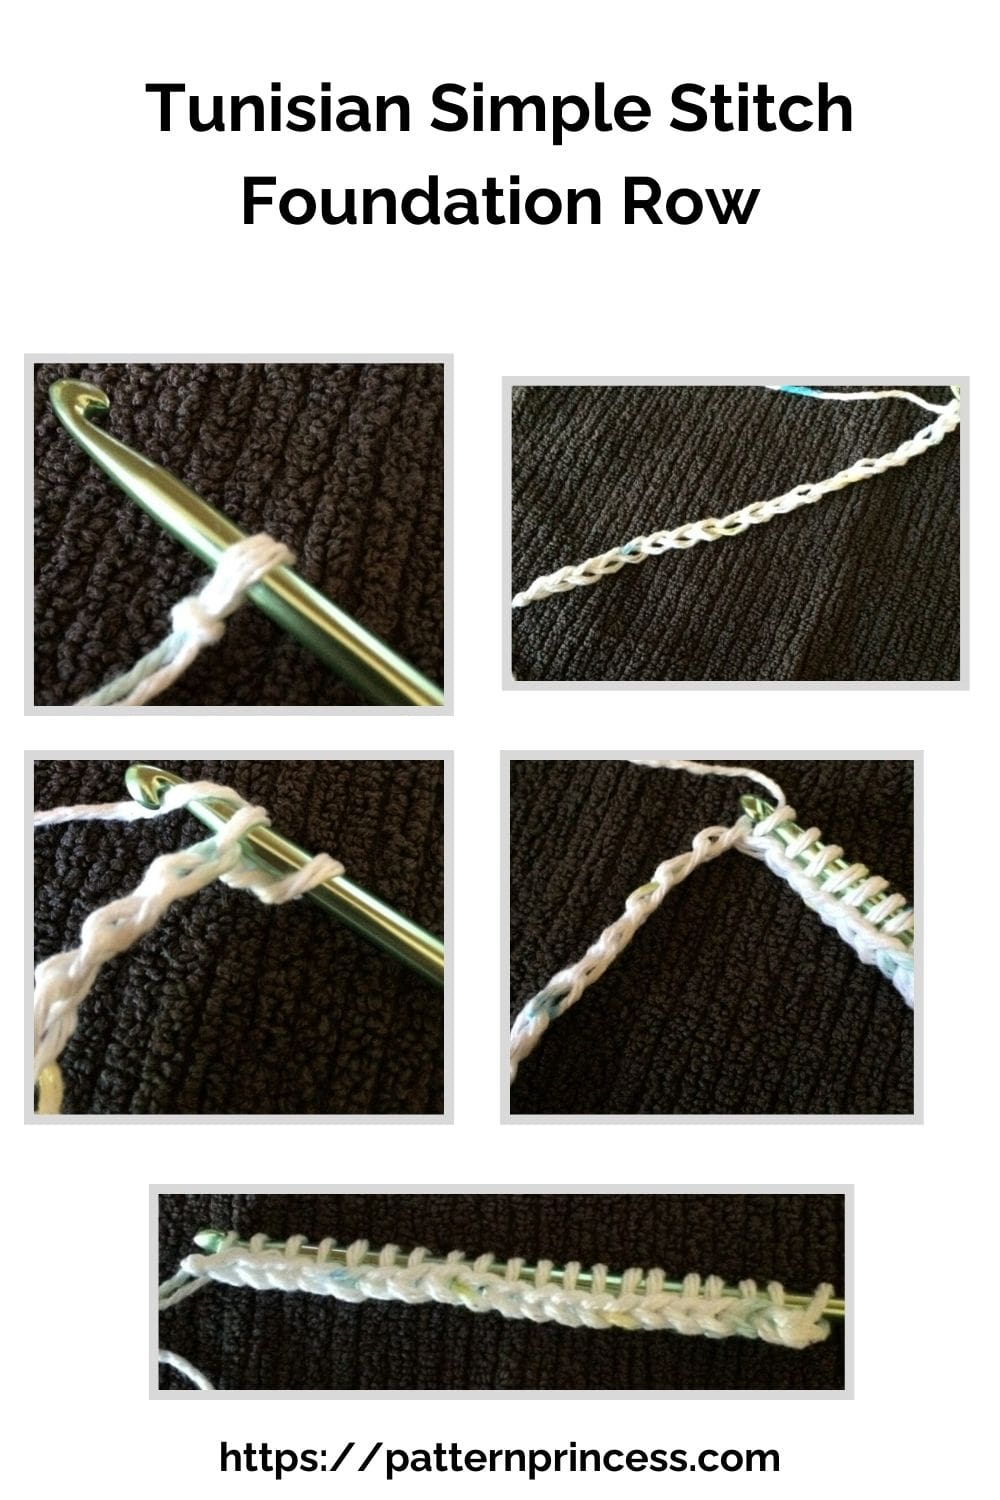
Foundational Row Also Called the Forward Pass
Begin with the slip knot on the hook. Make a chain to your desired length.
Starting from second chain from the hook, insert hook into the back loop of your chain, yarn over, pull up loop and keep on hook.
Continue this way across until the end; keeping all loops on the hook.
I made each dishcloth 20 stitches wide. There are 20 stitches on the hook. Make sure to count your stitches on your hook when you get to the end of each row. That helped me know that I did not miss a stitch.
Now, it is time for the second part of the row; also known as the return pass for this row.
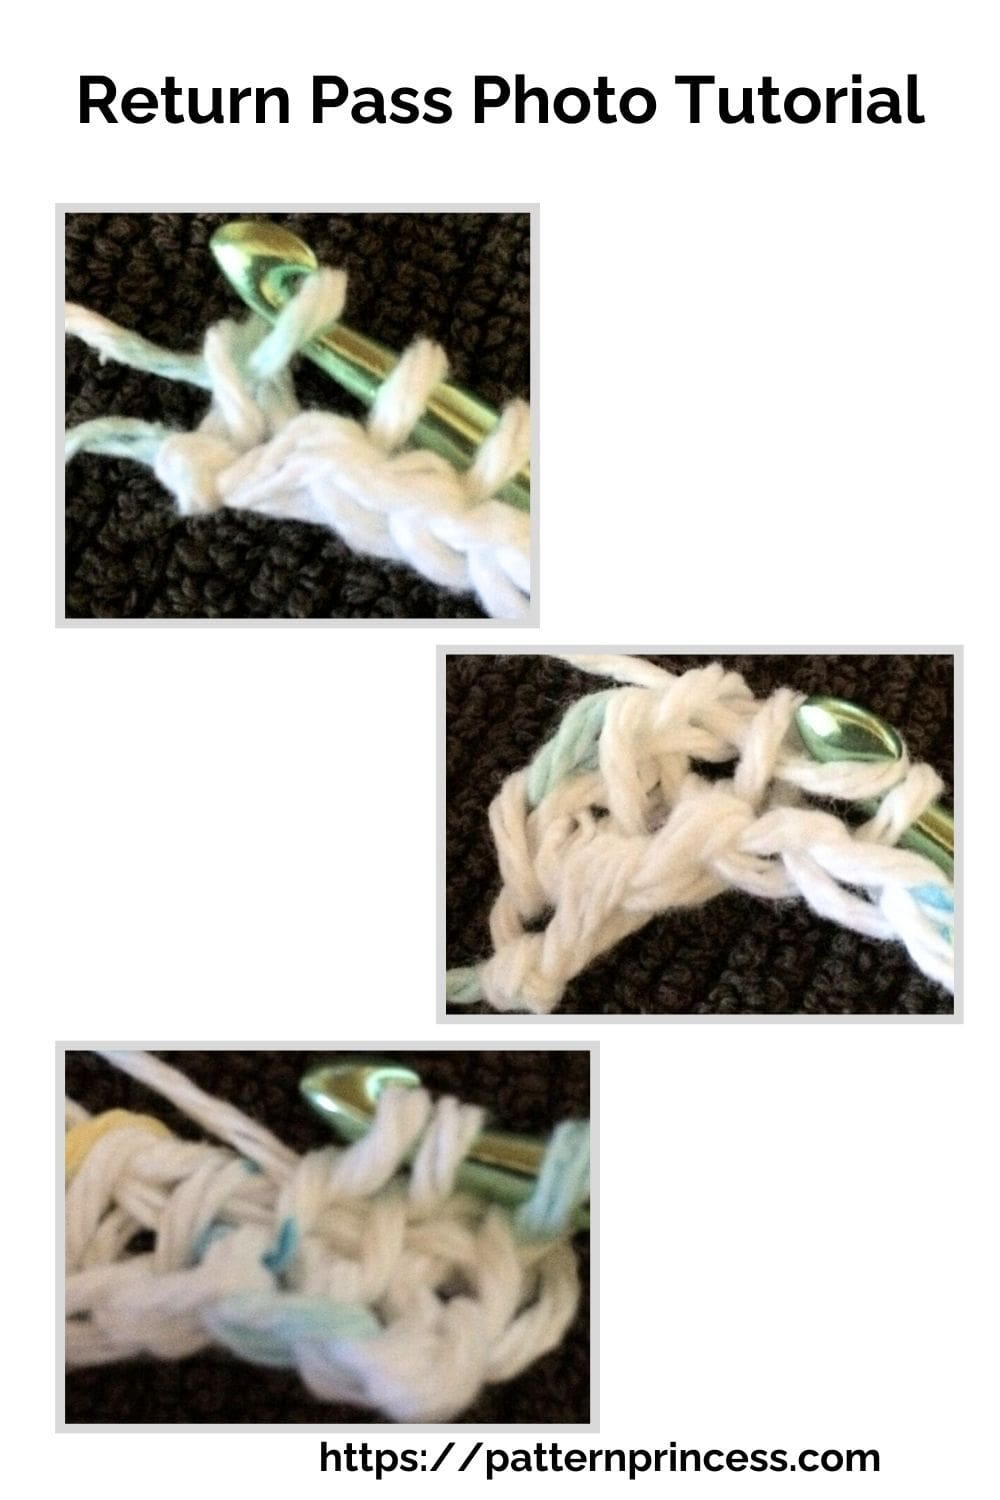
Crocheting the Return Pass
Yarn over and pull through one loop (the first stitch on the hook). Yarn over and pull through 2 loops. Repeat across to the end. The row is when there is one loop left on the hook, you are at the end of the row.
To start the next row and every row after this
Start with the forward pass.
Slide the hook through the 2nd vertical bar from the previous row, yarn over and pull the loop through. There are now two loops on the hook. Continue to repeat this across to the last stitch.
At the end of the row, begin the return pas.
Continue alternating between the forward and return pass for each row until your dishcloth is the desired length. I did mine for 24 rows.
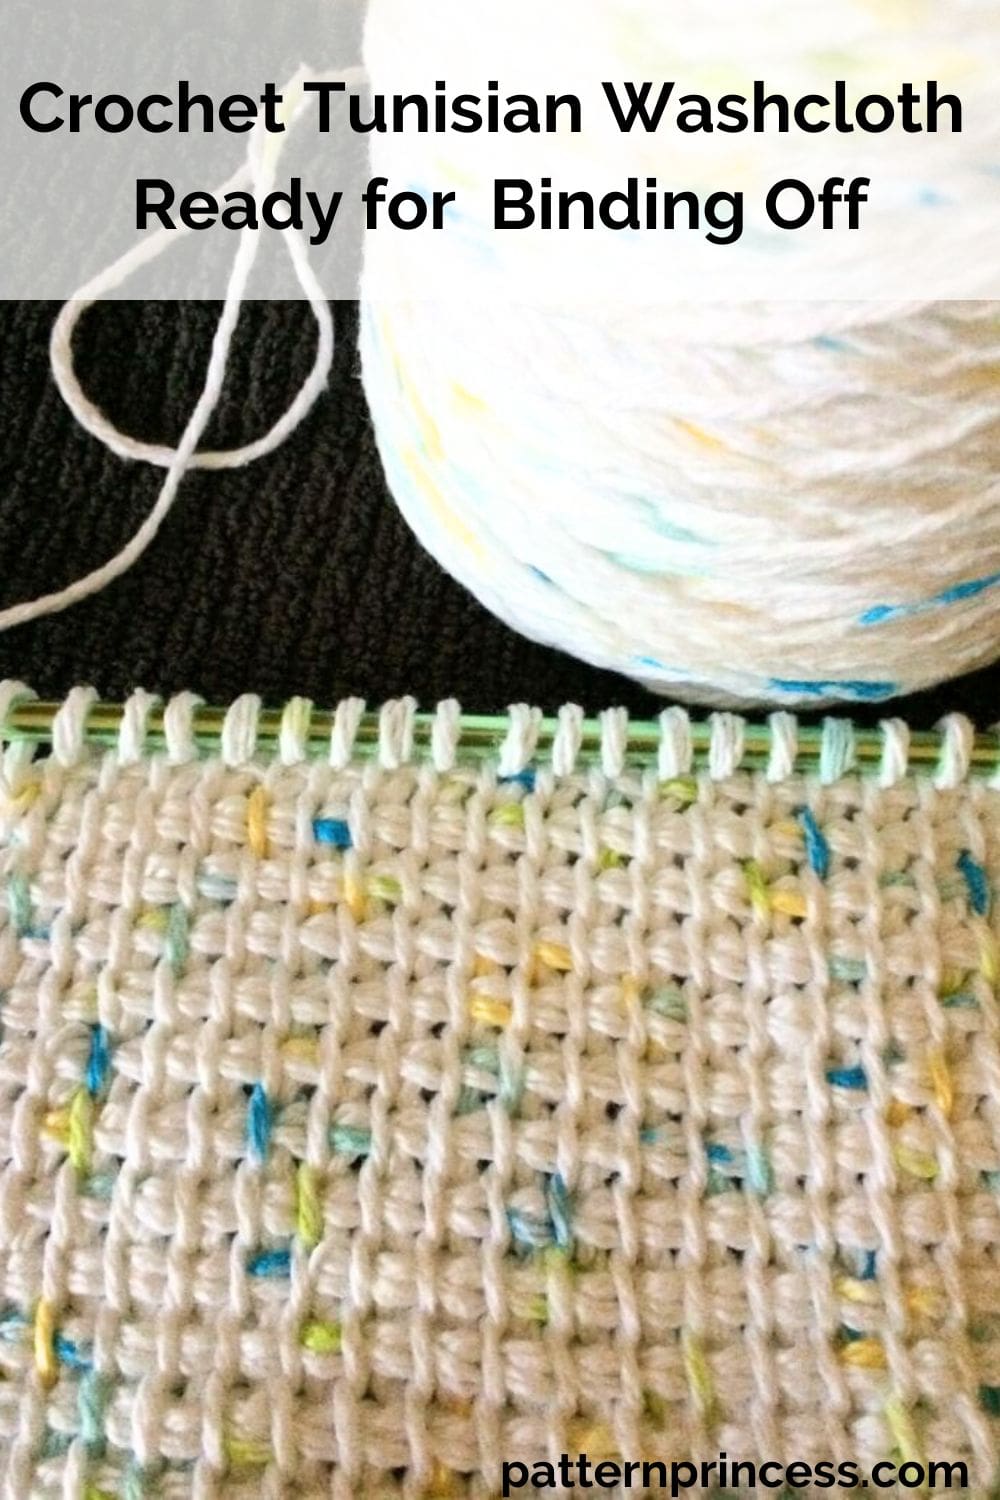
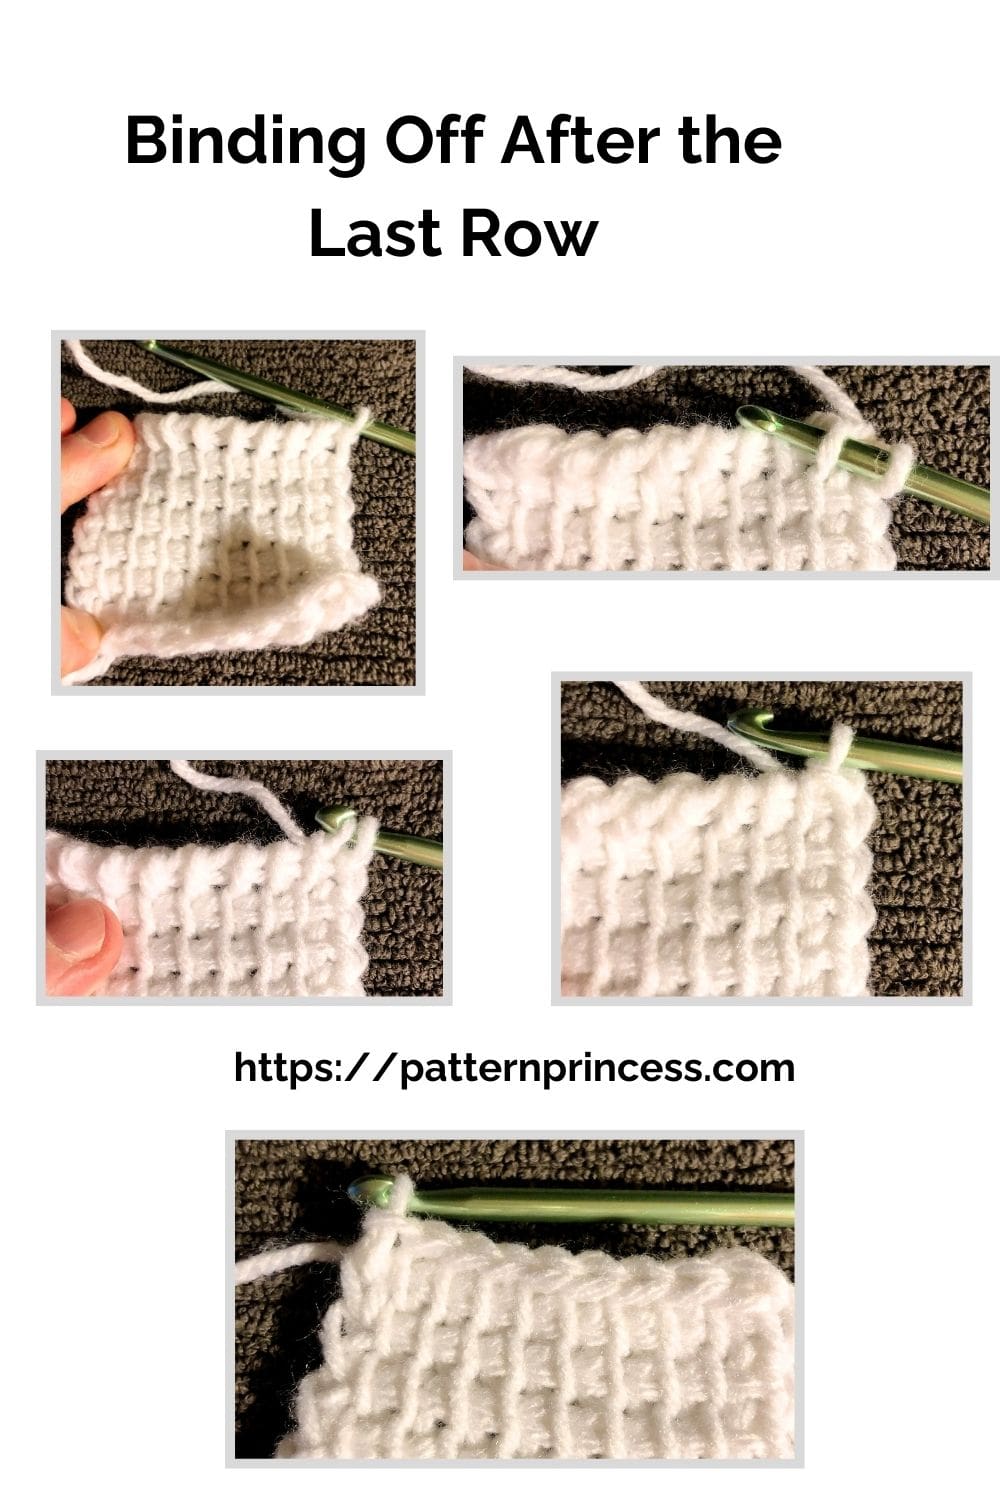
Binding Off After the Last Row
When the last row has been completed and there is one loop left on the hook, it is time to bind off your Tunisian Crochet.
Step 1
Insert the hook in the first bar. Yarn over and bring the yarn under the bar and through the loop on the hook. (this completes a slip stitch).
Step 2 to the end of the row
Continue to slip stitch under each bar until your each the end with one loop left on the hook. Your Tunisian Crochet is bound off and you are ready to add on your crochet border or pull the yarn through the last lop and weave in your yarn.
Easy Tunisian Simple Stitch Success
Make sure to count the number of loops on your crochet hook at the end of each row. This will save time and stress from having to redo a row because of a missed stitch.
Tunisian crochet is known for having a curl at one if of the work. Some have had good success with blocking the finished product. Others, like myself have found adding a simple border can stop the curl.
The Tunisian crochet stitches can become a bit tight and hard to get a crochet hook through for some crocheters. If you are one that tends to crochet a bit tighter,go up a crochet hook size and try and crochet a bit looser and see if that helps.
Counting rows. If you look on the back side of the work, the side that has the weaved look to it, you will notice that there are small bars across. Each row of vertical bars represents one row.
Tunisian Crochet Hooks. These hooks can come in many styles and sizes. You may have to try a few to get something that you like the feel and length of for your crochet projects.
Get Your Ad Free Printable PDF Pattern in our Etsy Shop.
Directions: Tunisian Crochet Dishcloths
Skill level
Beginner Friendly
Size
Approximately 5 1/2 inches wide X 7 inches long without border. Add 3/4 of an inch all the way around if you add the 2 rounds of SC border.
Make this in different sizes. Increase or decrease the width by increasing or decreasing the beginning chain by 1. Increase or decrease the length by increasing or decreasing the rows.
Gauge
14 Single Crochet stitches per 4 inches.
Materials
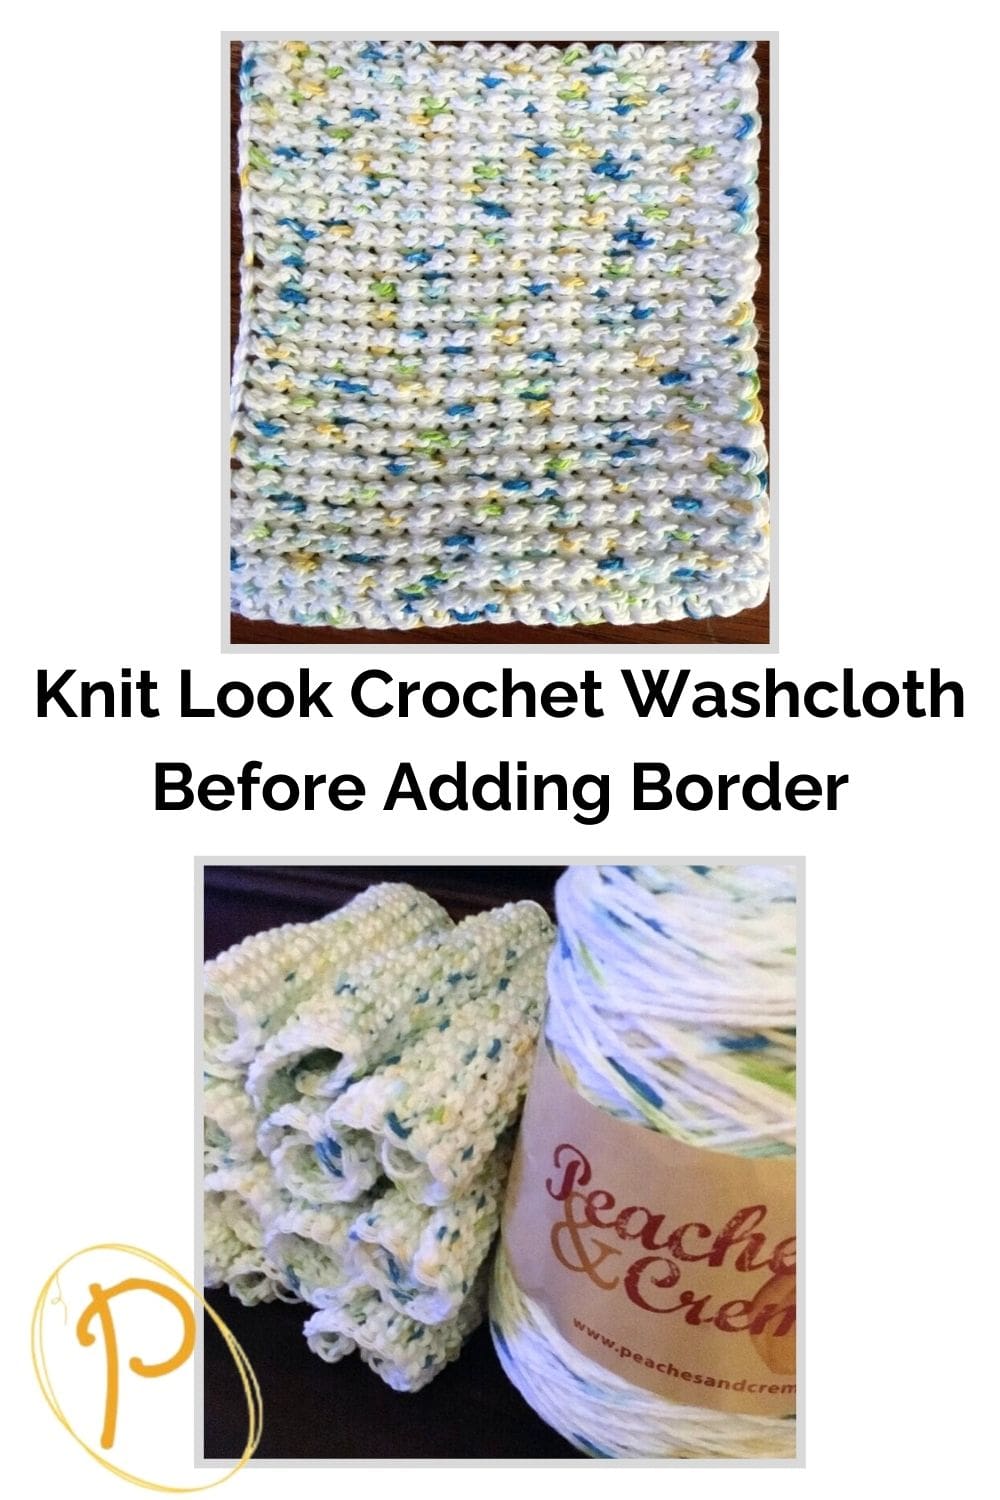
1 ball of Peaches & Cream cotton yarn. You can use any absorbent cotton 4 ply medium/worsted weight yarn number (4). This is perfect for different colors of yarn from solid to speckled to gradient yarn colors.
5.0 mm Tunisian Crochet Hook
5.0 mm Crochet Hook (regular hook) for crocheting the border
Yarn Needle
Scissors
Post contains affiliate links, and we earn commissions if you shop through the links on this page. For more information, please read the disclosure section under the About Us page.
Crochet Tunisian Hooks on Amazon
Abbreviations
- CH = Chain
- YO = Yarn Over
- SC = Single Crochet
- SL ST = Slip Stitch
- ST = Stitch
Pattern Notes
Written in US Terms.
You do not turn at the end of the row.
Each row consists of a forward pass and return pass.
Directions
CH 20
Rows 1 – 24
Forward Pass
Starting from 2nd CH from hook, insert hook into the back loop of your chain, yarn over, pull up loop and keep on hook. Continue this way across until the end; keeping all loops on the hook.
Return Pass
Yarn over and pull through one loop (the first stitch on the hook). Yarn over and pull through 2 loops. Repeat across to the end. When there is one loop left on the hook, you are at the end of the row.
Finishing
Bind off last row. Weave in yarn ends and cut off excess.
Completed Dishcloth Without Crochet Border
Here is a dishcloth complete without the border. As you can see, there is not too much curl on this one.
Single Crochet Border
Change back to your crochet hook size 5.0 mm
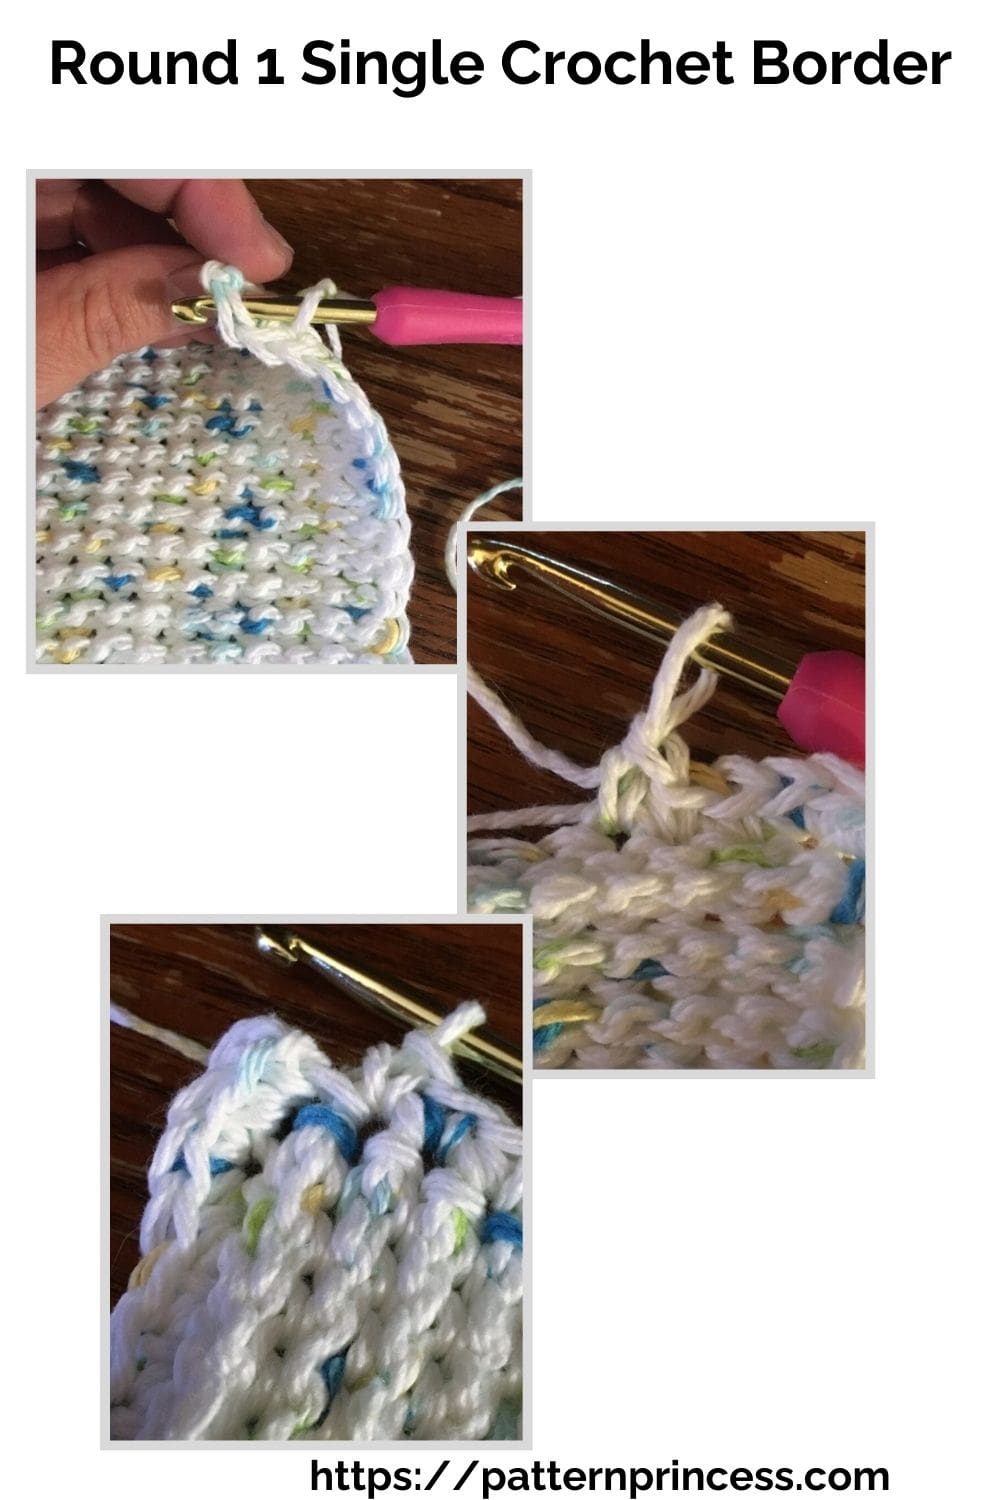
Round 1
Slip stitch onto the crochet hook, insert into the top two loops of a stitch on one of the sides or corner. (does not matter where you start). Yarn Over, Pull through the slip stitch. Tighten the slip stitch. Complete a SC in each ST around with 3 SC in each corner ST. End with a SL ST into the first SC.
Round 2
CH 1, Complete a SC in each ST around with 3 SC in each corner ST. End with a SL ST into the first CH.
Finishing
Weave in yarn ends and cut off excess yarn.
Tunisian Crochet Video Tutorial
Left hand Tunisian Simple Stitch Tutorial
Right Hand Tunisian Simple Stitch Tutorial
If you loved this post, please share. It helps to show me that these types of posts are helpful – thank
you!
I hope that you liked this free crochet pattern. If you are looking for more ideas for a new pattern or just a quick project, here are a few others you may enjoy.

You can find Victoria crocheting, quilting, and creating recipes. She has cooked in restaurants for over 20 years, including many larger parties. She learned to crochet when she was just 11 years old and has been crocheting ever since; over 50 years now. Over 40 years ago, she loved her first class in sewing and continues to hone her skills in quilting. Many have enjoyed the handmade gifts over the years. In her professional career, she has worked in management in a wide variety of businesses including higher education as a dean of a division. All the while attending college part-time to achieve her doctorate in higher education with an emphasis in e-learning.
Several of the photos have switched front and back of the piece.
For anyone just learning Tunisian crochet:
The front is the side with the vertical bars, the side that is facing you the entire time you’re working this piece. The back is the side that resembles knit garter stitch.