Last updated on January 19th, 2026 at 09:53 pm
Transform your space with our Vintage Vibes Cozy Buttercup Crochet Blanket Pattern. Create a warm and inviting atmosphere with this timeless design. Perfect for snuggling up on chilly nights or adding a touch of nostalgia to any room.
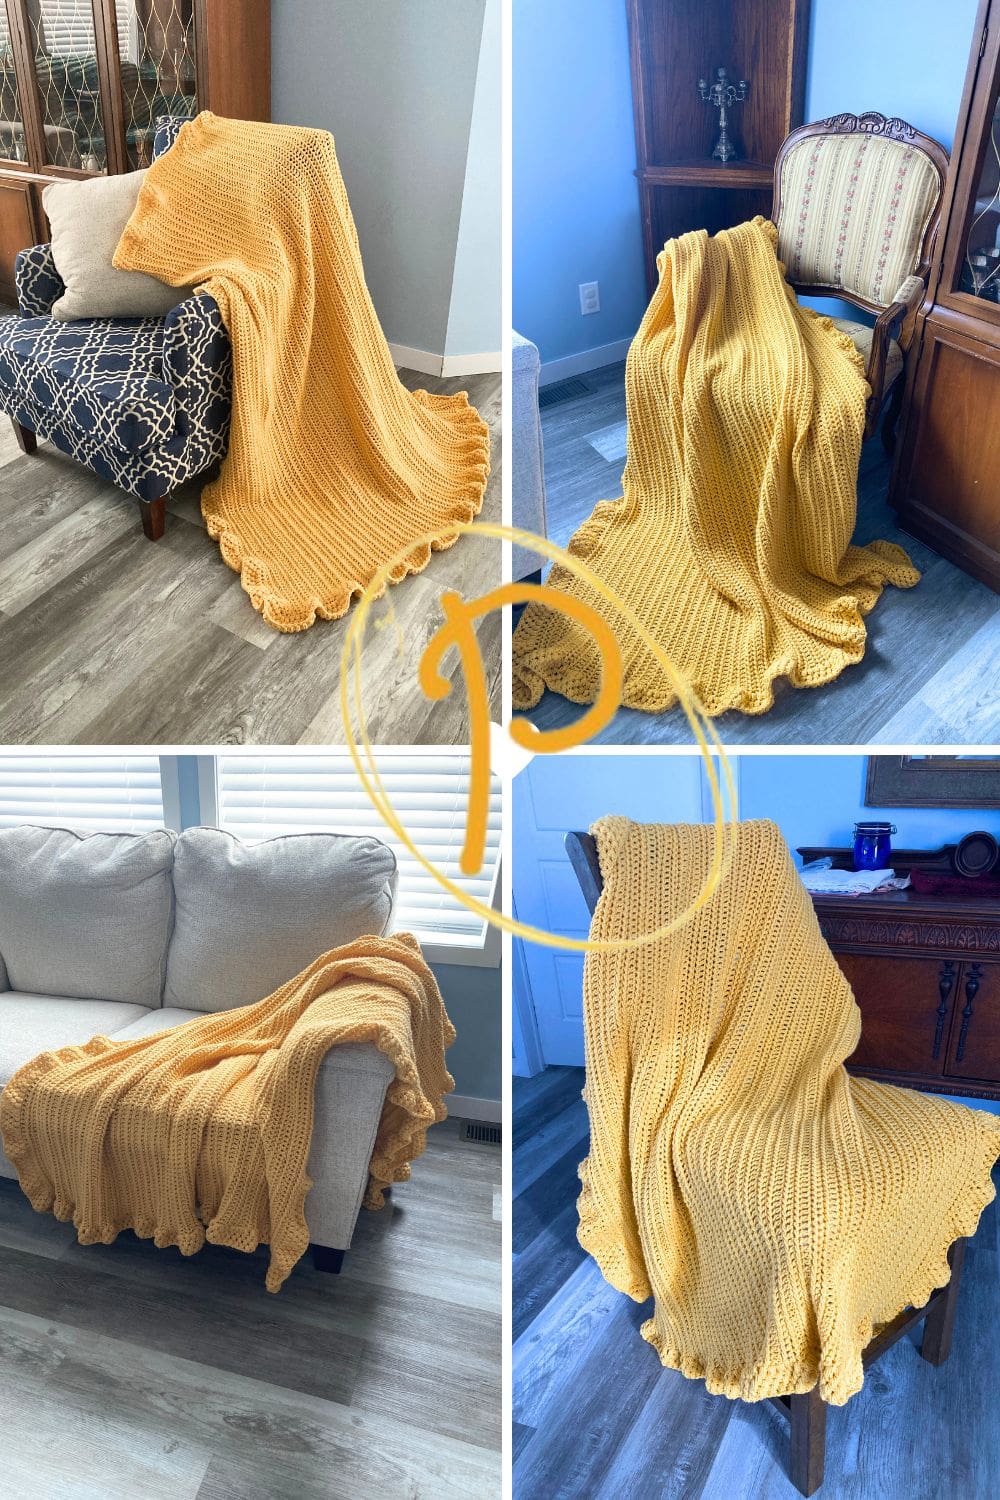
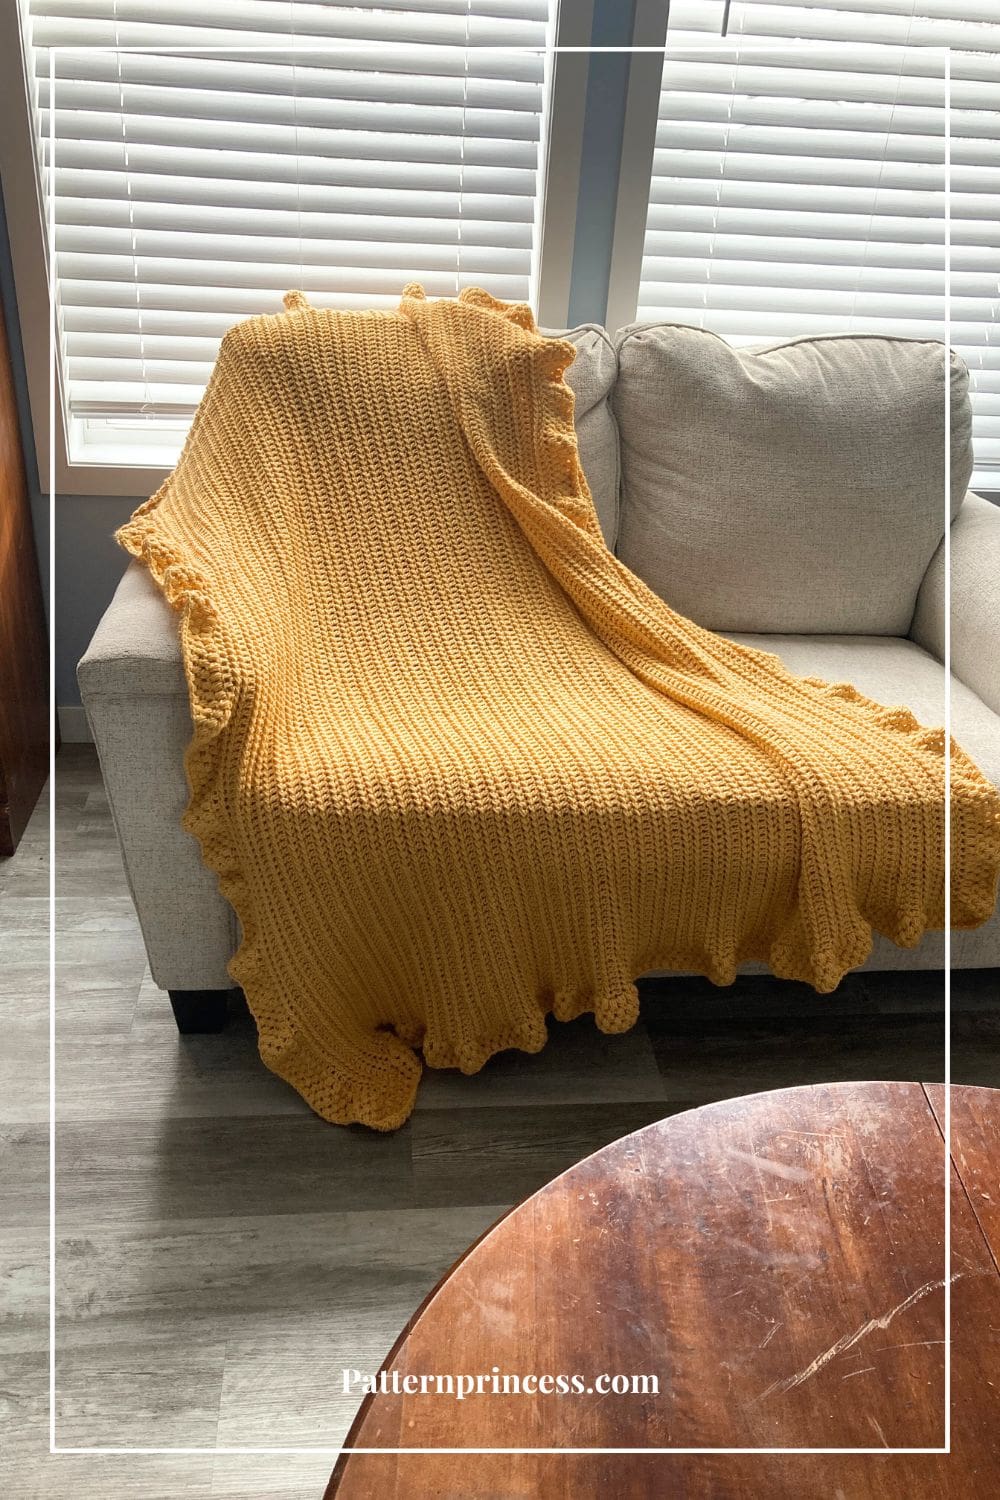
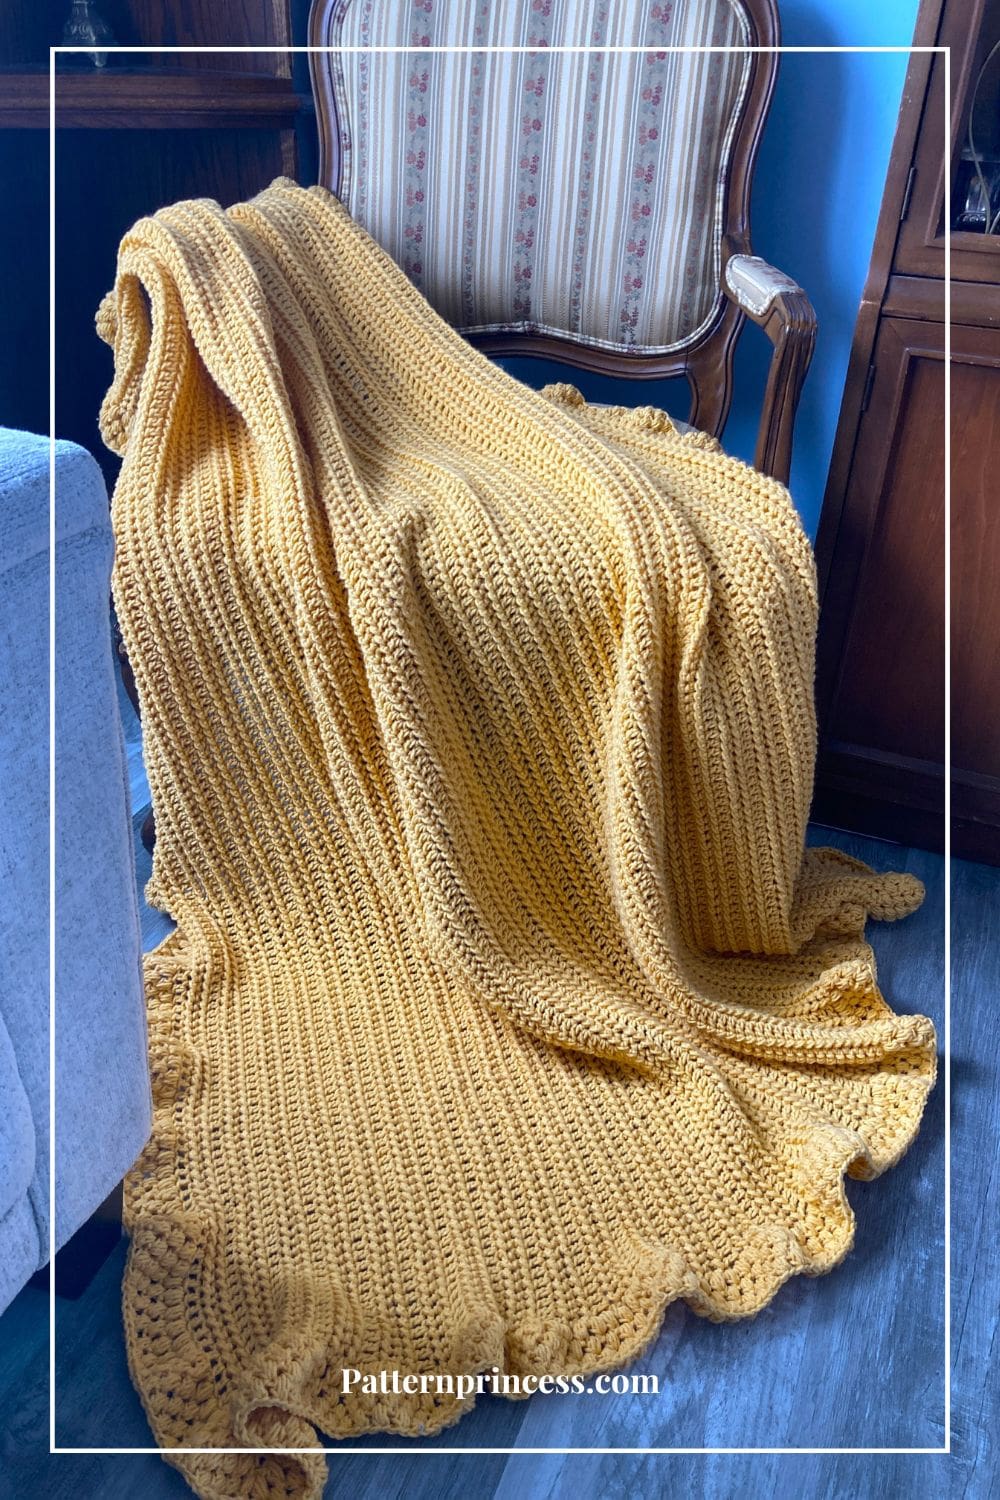
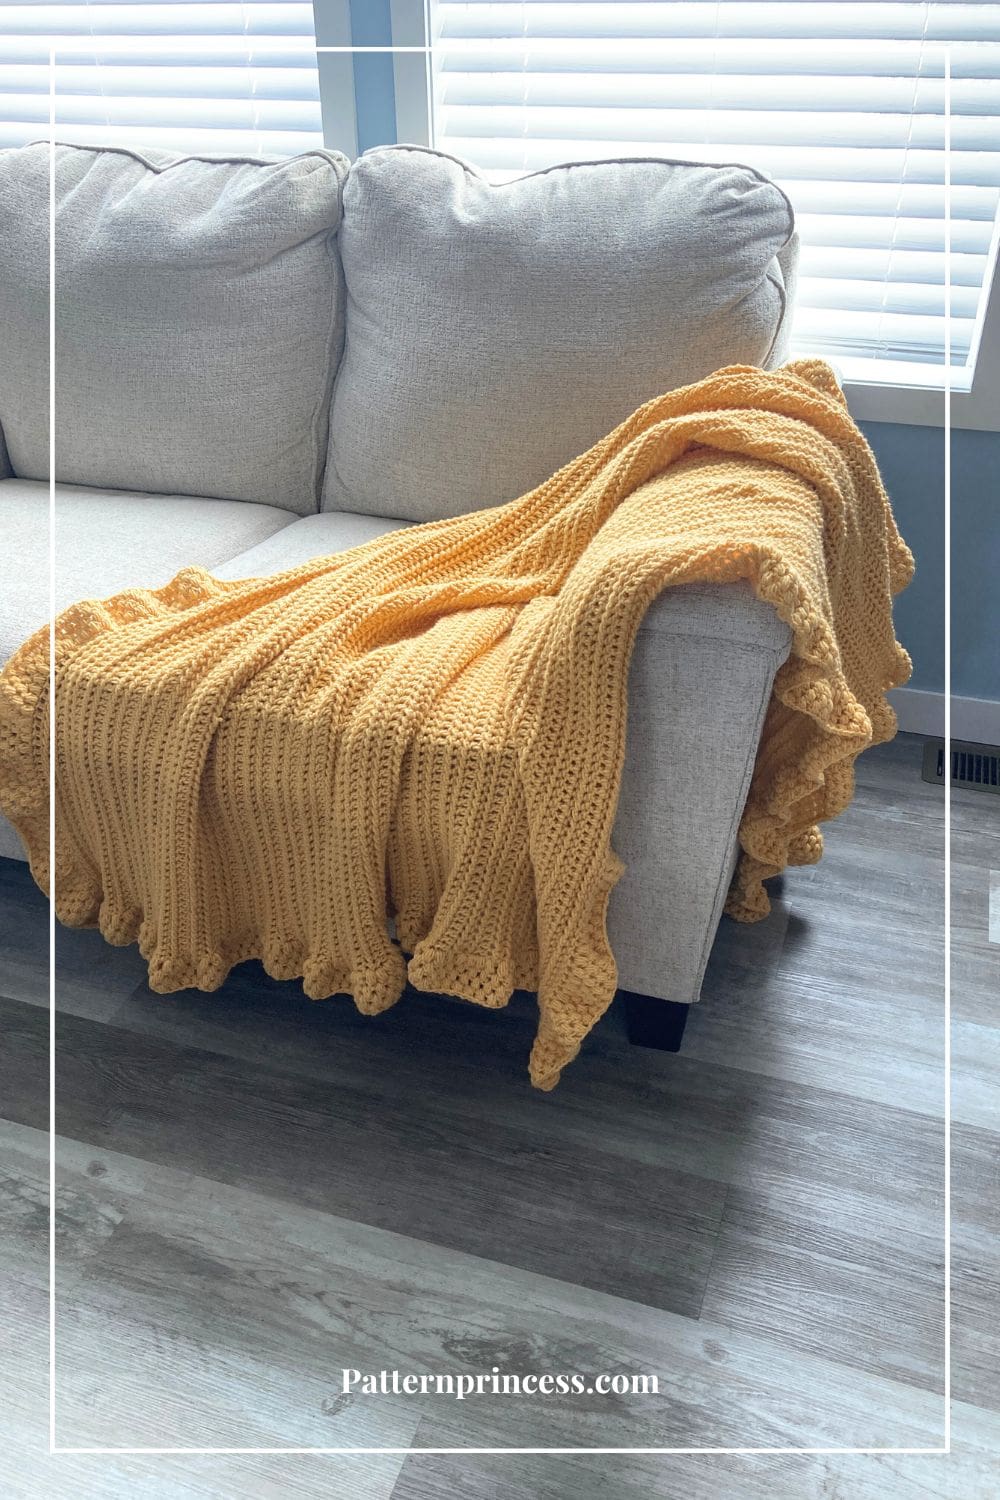
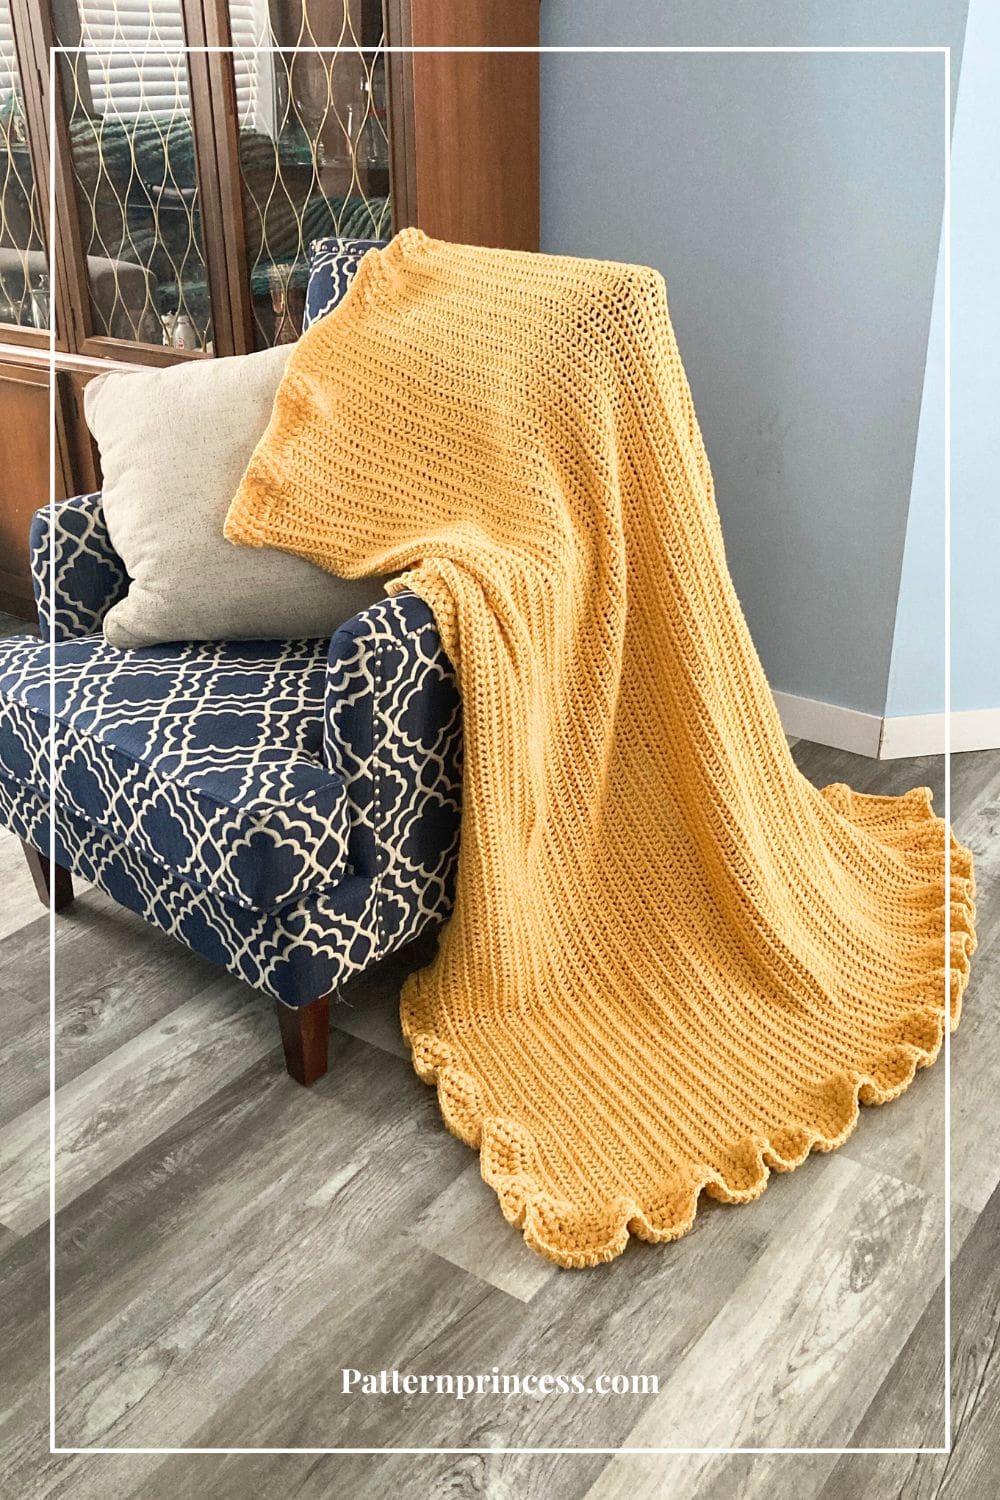
Created with luxurious gold yarn and adorned with raised rows of intricate stitching, this blanket exudes timeless charm. The finishing touch? A delicately ruffled crochet border featuring plush puff stitches, adding a touch of vintage allure to any space. Whether draped over a favorite chair or spread across a bed, this blanket is sure to bring comfort and style to your home.

Why Buttercup?
Buttercup is a flower that represents joy. It is a very beautiful flower. It often blooms beside the roadways and in the fields during the summer.
The idea behind the name is shown by the softness of the petals and the blooming golden color. While it comes in other colors, the classic golden yellow color is the variety we see most often along the roadside in Wisconsin.
Runner-Up Names for Vintage Vibes Cozy Buttercup Crochet Blanket
The winning name is a combination of submissions and what I kept thinking the entire time I was crocheting. To me, it gives off the vintage vibes with the color and the ruffled crochet border. However, a number of ideas came in showcasing the buttercup flower.
During our creative journey in crafting the perfect name for our latest crochet blanket pattern, we were overwhelmed by the outpouring of imagination and inspiration from our community. Each submission brought its own unique charm and resonance, making the task of choosing just one name a fun challenge.
Today, we’re thrilled to share with you the top ten runner-up names that we loved. Many of these names were suggested multiple times. It really showcases the boundless creativity of our community members. Thank you! It was so fun to have you all take part in naming this beautiful blanket.
Top 10 Runner-up Blanket Names
- Golden Sunshine
- Sunny Days Ahead
- Sunshine Blanket
- Gentle Waves
- Amber Waves
- Mustard Field
- Golden Waves
- Daffodils in the Sun
- Desert Sand Waves
- Sunny Days
We hope you all enjoy this free crochet pattern. With its rich, golden hue and beautifully textured raised stitches, this blanket radiates warmth, charm, and a touch of nostalgia. The plush puff stitch ruffled border gives it a delicate, vintage-inspired finish, making it a perfect addition to any cozy space.
Get Your Ad Free Printable PDF Pattern in our Etsy Shop.
Confident Beginner-Friendly Using Basic Stitches
With just four rows in the repeat, it’s easy to get into a meditative rhythm. Basic stitches such as the double crochet and half double crochet slip stitch are used for the blanket itself.
The border is worked using puff stitches can take some getting used to for a beginner crocheter. However, once you get the hang of it, you can crochet the whole border using this stitch.
Make this Throw Any Size
To change the width of this blanket, you can adjust the beginning stitches using any stitch count. Then just crochet as many rows as you desire for the length. However, I do have six suggested blanket sizes with the starting chains and the yardage to help you choose your size. You can find more details in the written pattern.
- Lovey Blanket 20 x 20 inches.
- Square Baby Blanket 31 X 31 inches.
- Toddler Blanket or Lapghan 36 X 48 inches.
- Throw Blanket (small) 48 X 48 – 60 inches.
- Throw Blanket (medium) (shown) 58 X 62 inches.
- Throw Blanket (large) 60 X 72 inches.
Yarn Used for This Crochet Blanket
I’ve this pattern with chunky yarn and a thinner number 3 weight yarn and it just didn’t show the stitch texture as nice as this yarn does. You can see the chunky yarn blanket using the dual ridge stitch.
Therefore, I recommend, when choosing yarn for this pattern using a number 4 worsted weight yarn to achieve the best results. It provides just the right amount of thickness for this design and the ridges really pop. Medium weight yarn brings out the best in this pattern.
Directions: Vintage Vibes Cozy Buttercup Crochet Blanket Pattern
Skill Level
Confident Beginner-Friendly
You should be able to work the double crochet stitch and work it around the posts of the stitches below. Once you have mastered this method, you are ready for this pattern.
Finished Size
With the Border. 58 inches wide X 62 inches long
Without the Border. 54 inches wide X 58 inches long. The crochet border will add approximately 4 inches to the length and width.
To change the width of this blanket, you can adjust the beginning stitches using any stitch count. Then just crochet as many rows as you desire for the length.
Gauge
11 stitches across every 4 inches. 8 rows of the pattern every 4 inches.
Materials
Herrschners Worsted Yarn. In Soft Gold color number 1052. It’s a number 4 medium weight yarn with 489 yards per skein. I used a total of 5 1/2 skeins for 2,900 yards.
Crochet Hook Size I, 5.5 mm hook
Tapestry Needle
Scissors
Tape Measure for measuring your project throughout.
Other Crochet Blanket Sizes
Reminder. The crochet border will add approximately 4 inches to the length and width. The sizes given below include the border.
- Lovey Blanket 20 x 20 inches. Starting chain will be about 55-60 chain stitches and about 40-45 rows. Plan on about 300 yards of yarn.
- Square Baby Blanket 31 X 31 inches. The beginning chain will be about 85-90 chain stitches and about 62-75 rows. About 700 yards of yarn.
- Toddler Blanket or Lapghan 36 X 48 inches. The starting chain is about 99-105 chain stitches and about 95-105 rows. Plan about 1,300 yards of yarn.
- Throw Blanket (small) 48 X 48 – 60 inches. The starting chain is approximately 122-125 chain stitches and about 112-124 rows. Plan on about 2,600 yards of yarn.
- Throw Blanket (medium) (shown) 58 X 62 inches. Starting chain 150 and work 129 number of rows. 6 skeins or 2,900 yards.
- Throw Blanket (large) 60 X 72 inches. Plan a starting chain about 161-170 chain stitches and work about 149-152 rows. Plan for approximately 4,000 yards of yarn.
Looking for ideas on different sizes to make your blanket? This Crochet Guidelines for Standard Bed and Blanket Sizes may help.
Abbreviations
- CH = Chain
- DC = Double Crochet
- HDC SL ST = Half Double Crochet Slip Stitch
- PS = Puff Stitch
- SK = Skip
- SL ST = Slip Stitch
- SP = Space
- ST = Stitch
- STs = Stitches
- [ ] = Repeat Between…Today it means information for the different sizes.
Pattern Notes
As you are crocheting the border, you will notice the sides of the throw blanket are ever so slightly ruffly. I kind of like that element in this pattern.
Turn at the end of each row.
Written in US terms.
This blanket pattern uses the Dual Ridge Stitch. There are video tutorials for both right hand and left hand crocheters after the written pattern for this stitch.
When working the first double crochet in the rows, I worked my version of a standing double crochet.
You can work the row 1 stitches in the top loop of the chain stitch or the back bump. In the video tutorial, I show working in the back bump.
When changing skeins of yarn, I change it where I ran out using the Russian yarn join. If you are unsure how to do this, I have a blog post on Mastering How to Join Yarn: A Comprehensive Guide.
When working the puff stitch, each round begins with a partial puff stitch.
Special Stitches Used
Chain Stitch CH
Begin the chain stitch by making a slip knot and adding the loop on the crochet hook.
Keeping the loop on the hook, wrap the yarn over the crochet hook from back to front using the hook to draw the yarn through the loop that is currently on the hook. (The first chain stitch is complete).
HOW TO CROCHET THE CHAIN STITCH video tutorial
Double Crochet (DC)
Yarn over, insert the hook through both loops and pull up a loop. Next, yarn over and pull through two loops on the hook. Lastly, yarn over again and pull through the last two loops on the hook.
HOW TO CROCHET THE DOUBLE CROCHET STITCH video tutorial
Half Double Crochet Slip Stitch (HDC SL ST)
Yarn over, insert the hook through both loops of the next stitch and pull up a loop. Pull the loop through all three loops on the hook. For height, this stitch is between the single crochet and double crochet.
Puff Stitch (PS)
Also sometimes called a 3 HDC Cluster Puff Stitch. To make a puff stitch, it’s as if you’re crocheting a group of half-double crochet stitches all together in the same stitch. These instructions are for a puff stitch with 3 stitches.
Remember, you can have any number of stitches in your puff stitch, depending on how puffy you want your texture to look. Today, we will be using the 3 stitches for the puff.
A regular puff stitch in this pattern is to yarn over, insert hook into a stitch, yarn over again and pull up a loop. You will need to do this a total of three times.
So, yarn over insert the hook in the stitch and pull up a loop. Now you’ve done it twice. At this point, you should have five loops on your hook. You have one more time to go. Yarn over insert the hook in the same stitch and pull up another loop.
Now there should be seven loops on your hook. In this pattern, every regular puff stitch should have seven loops on the hook. Now you’re ready to yarn over and pull through all seven loops on your hook. Work a chain one to close the top. That’s it.
I do have a tutorial on How to Crochet Puff Stitch in the Round for Beginners. It can be helpful for you to see how to complete the stitch itself.
Partial Puff Stitch
CH 2 (counts toward your first puff stitch). Now you need to a partial puff stitch. To do this, yarn over, insert your hook in the stitch and pull up a loop. Then yarn over again and insert the hook in the same stitch and pull up a loop. At this point, you should have 5 loops on your hook. Yarn over and pull through all five loops. Finish with a chain one to close the puff stitch.
Standing Double Crochet Stitch
Yarn over, insert the hook through both loops and draw up loop. Then yarn over and draw through 1 loop. Yarn over and draw through 2 loops. Finally, yarn over and draw through the last 2 loops on the hook.
Begin Crochet Pattern
Start by making a slip knot and adding the loop on the hook.
Chain 150 chain stitches for the blanket shown. Suggested chains for all the blanket sizes [55, 85, 99, 122, 150, 161].
Row 1
Skip 3 CH STs (Counts as a DC). In the 4th chain from the hook work DC in the back bump. DC in each back bump ST across. Turn
Row 2
CH 1 (Does not count as a ST). Work a HDC SL ST in the first ST and in each ST across. Turn
Row 3
Repeat row 2
Row 4
Repeat row 2
Row 5
CH 1 (Does not count as a ST). Work a standing DC in the first ST. Work 1 DC in each ST across. Turn
Rows 6 and Beyond
Repeat rows 2 through 5 until your project reaches the desired length.
I worked rows 2-5 a total of 31 times plus the first row for a total of 129 rows for the blanket shown.
Rows for all the blanket sizes [40, 62, 95, 112, 129, 149].
Finishing
After you work the last ST, cut off the yarn leaving about a 12-inch long tail. Pull the yarn tail through the last loop on the hook.
Thread the yarn needle with the yarn tails and weave them through the crochet stitches back and forth until the yarn feels secure. Snip off the excess yarn.
If you are a beginner crocheter, you can find more detail on finishing your crochet project on the website.
Crochet Border
Join the yarn in any stitch.
Begin
Round 1
Work a partial puff stitch. CH 2 (counts toward your first puff stitch). Now you need to a partial puff stitch. To do this, yarn over, insert your hook in the stitch and pull up a loop. Then yarn over again and insert the hook in the same stitch and pull up a loop. At this point, you should have 5 loops on your hook. Yarn over and pull through all five loops. Finish with a chain one to close the puff stitch.
In the next stitch and each stitch around work a full puff stitch.
A regular puff stitch in this pattern is to yarn over, insert hook into a stitch, yarn over again and pull up a loop. You will need to do this a total of three times.
Now there should be seven loops on your hook. Yarn over and pull through all seven loops on your hook. Work a chain one to close the top.
On the top and bottom work a PS in each ST across. Ease stitches along the sides about the same distance you worked for the top and bottom. Work 2 PS STs in each corner.
End the first round with a SL ST into the top CH of the first CH 2.
Round 2
Begin by working a SL ST into the CH ST SP. Work a partial PS. Move to the next CH SP and work a full PS. Continue working a PS in each CH SP around working 2 PS STs in each corner ST. End the first round with a SL ST into the top CH of the first CH 2.
Round 3 and 4
Repeat round 2.
Finishing
After you work the last ST, cut off the yarn leaving about a 12-inch long tail. Pull the yarn tail through the last loop on the hook.
Thread the yarn needle with the yarn tails and weave them through the crochet stitches back and forth until the yarn feels secure. Snip off the excess yarn.
YouTube Tutorials
This pattern uses Dual Ridge Easy Stitch. Here are video tutorials to help with the pattern.
Here are video tutorials for the Puff Stitch. Again, while it is worked in the round, it is the same process just worked in a stitch.

We hope you have enjoyed this lovely free crochet pattern. Here are a few more ideas for your next project.
- Continuous Granny Square Crochet Blanket with Dot Border
- Royal Icing Blanket Crochet Pattern
- Blushing Ruffle Granny Square Blanket

You can find Victoria crocheting, quilting, and creating recipes. She has cooked in restaurants for over 20 years, including many larger parties. She learned to crochet when she was just 11 years old and has been crocheting ever since; over 50 years now. Over 40 years ago, she loved her first class in sewing and continues to hone her skills in quilting. Many have enjoyed the handmade gifts over the years. In her professional career, she has worked in management in a wide variety of businesses including higher education as a dean of a division. All the while attending college part-time to achieve her doctorate in higher education with an emphasis in e-learning.