Last updated on May 13th, 2026 at 08:02 am
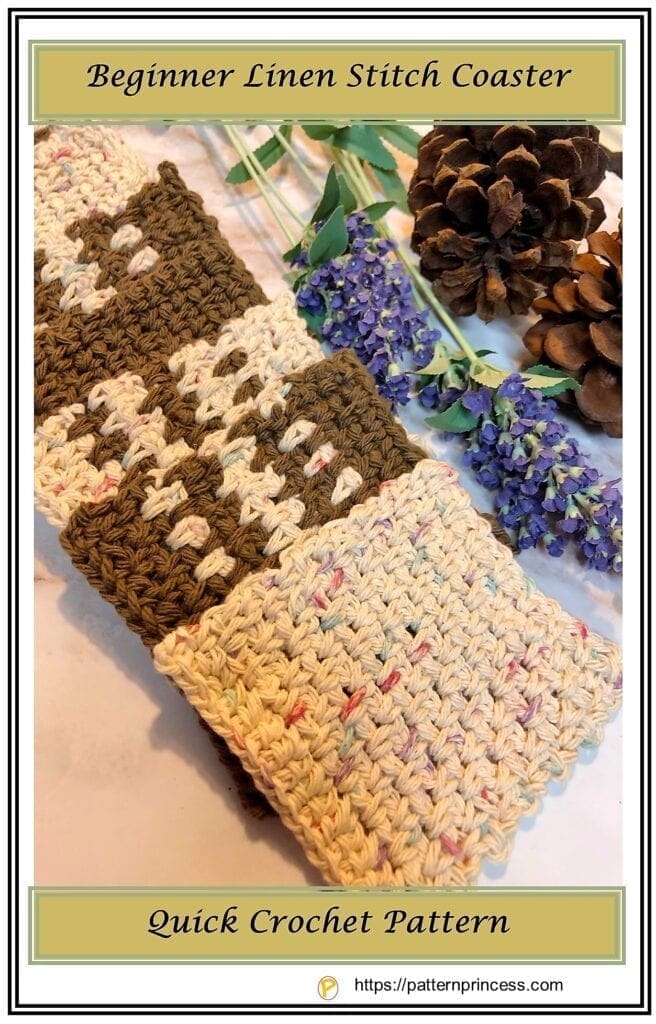
Learn how to crochet an easy beginner linen stitch coaster using cotton yarn. Free crochet pattern with video tutorials, and step-by-step instruction.
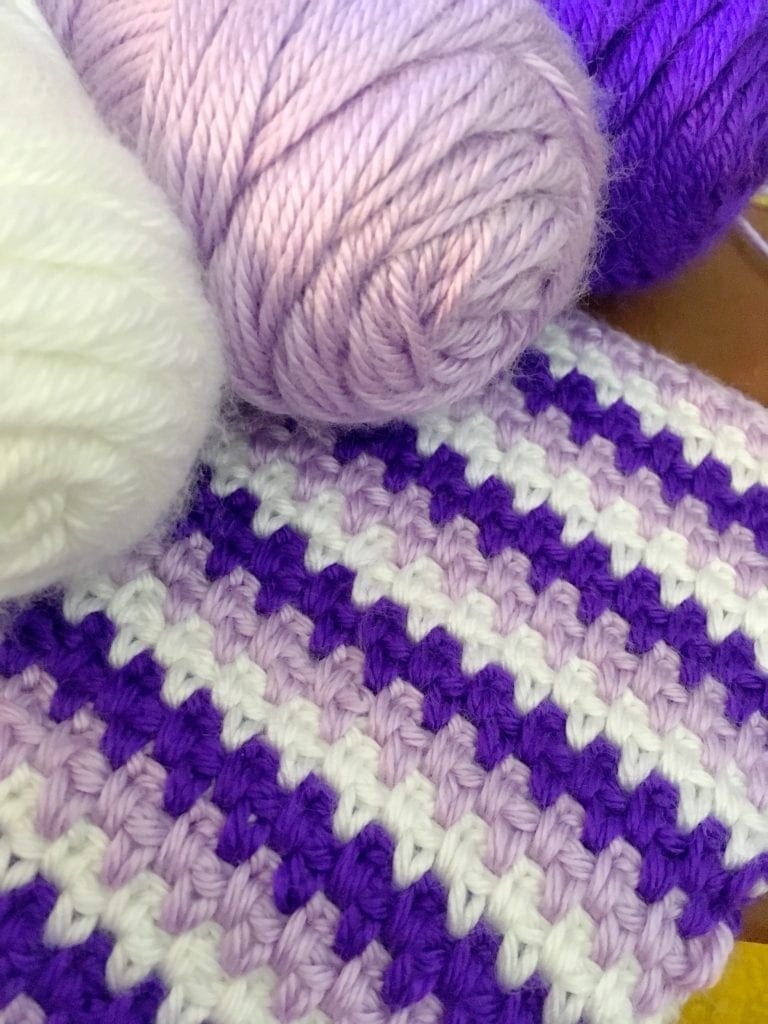
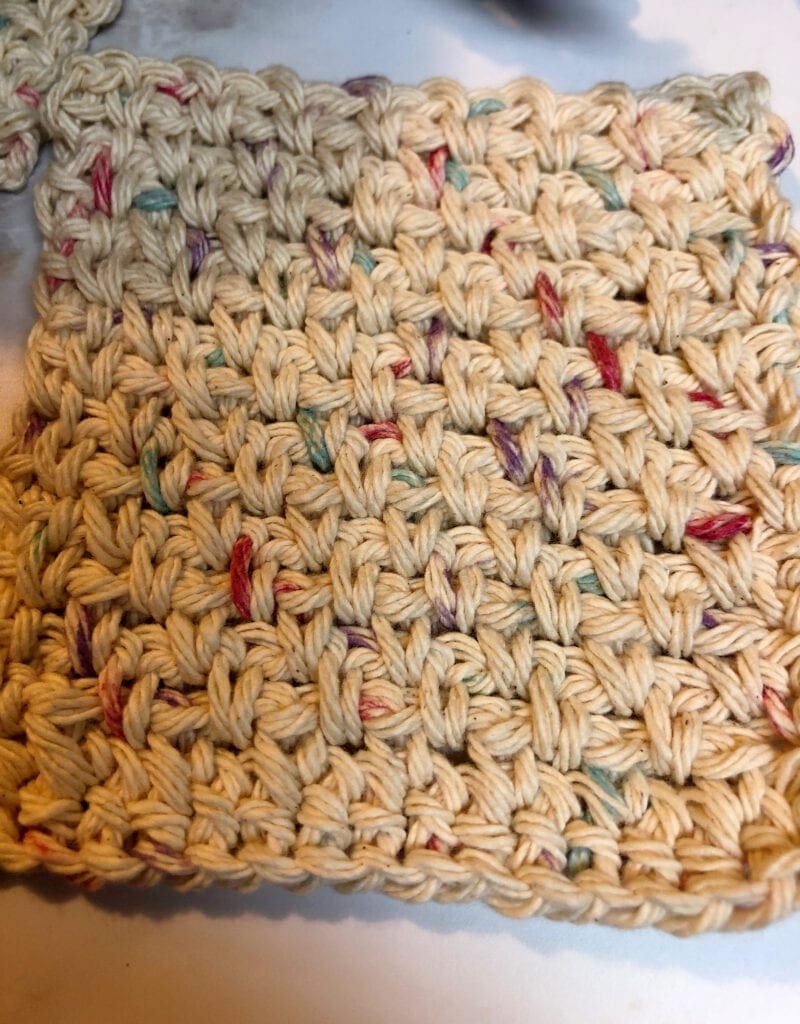
There’s something especially satisfying about creating a beautiful crochet project with just a few basic stitches. This Beginner Linen Stitch Coaster is a quick and relaxing pattern that uses single crochet and chain stitches to create a soft, woven texture that looks much more advanced than it really is. Also known as the moss stitch or granite stitch, the linen stitch is one of the best crochet techniques for beginners because it is easy to learn, repetitive, and creates a polished finish.
If you’re looking for a practical project to practice your stitches, these easy crochet coasters are a perfect choice. Made with absorbent cotton yarn, they are durable enough for everyday use and work up quickly, making them ideal for handmade gifts, craft fairs, or using up leftover yarn from your stash.
Whether you are just learning how to crochet or searching for a simple free crochet pattern for your home, these beginner-friendly linen stitch coasters are both useful and rewarding to make.
Linen Stitch, Moss Stitch, Granite Stitch, or Woven Stitch
You might be wondering what the difference is between all of the crochet stitches I just listed. Well, this crochet stitch has many names. It took me a few years to figure this out! So, if you see a pattern for the linen, moss, granite, or woven stitch, they are all the same thing.
However, I must say, I love this stitch pattern for the textured look and feel. This project is for a coaster and we have a handful of blankets shown below we’ve made using this stitch.
Why Beginners Love the Linen Stitch
The linen stitch is one of the best crochet stitches for beginners because it uses only chain stitches and single crochet stitches. The finished fabric has a woven appearance that looks much more advanced than it actually is.
Beginner Friendly Crochet Pattern
This free crochet pattern is chocked full of crochet tutorials to help you master this project. There are video tutorials for crochet stitches, crocheting over yarn ends, color charts, as well as, some photo tutorials. Further, there are other crochet project ideas using this crochet stitch.
Best Yarn for Crochet Coasters
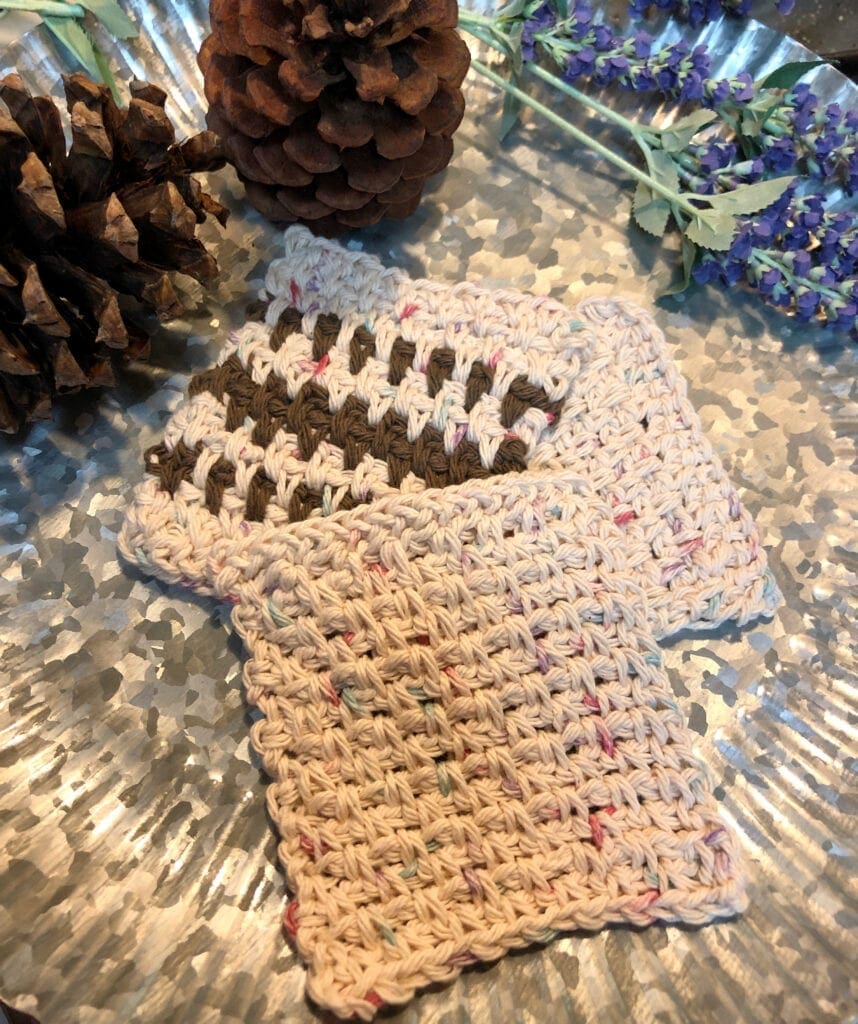
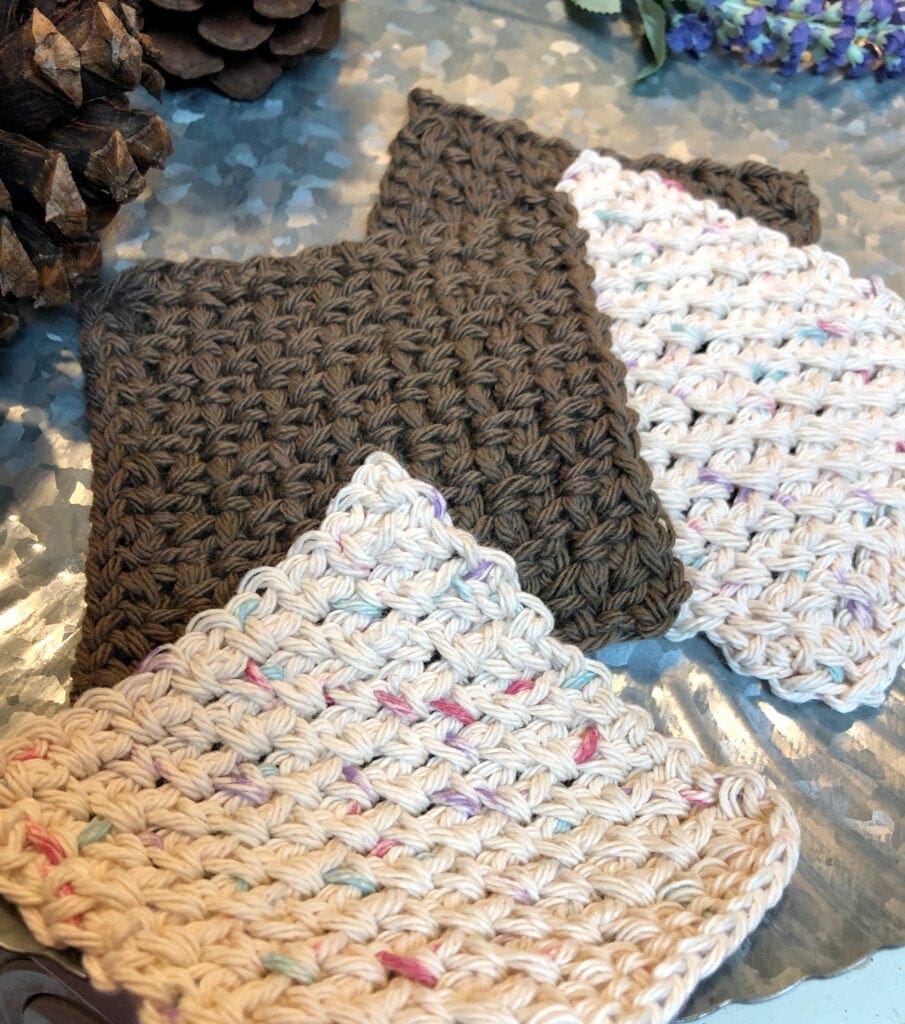
Cottom yarn is best for coasters. Today, I used yarns that had a bit more earth tones in them. This pattern will lend itself well to both a solid color or variegated yarn. Make this with one color or alter the rows for a different look. I find that cotton yarn works the best. It is sturdy and washes up well too.
Changing Color Easily using the Linen Stitch
Sometimes, changing color in crochet can be intimidating if you are new to crochet. No worries. I have a video tutorial link for a blanket that I made using this linen stitch and I will show you how to change color and crochet over the ends so that your work will look clean. It is easier to accomplish than you may think.
Video for Learning How to the Crochet Linen Stitch is below the written pattern

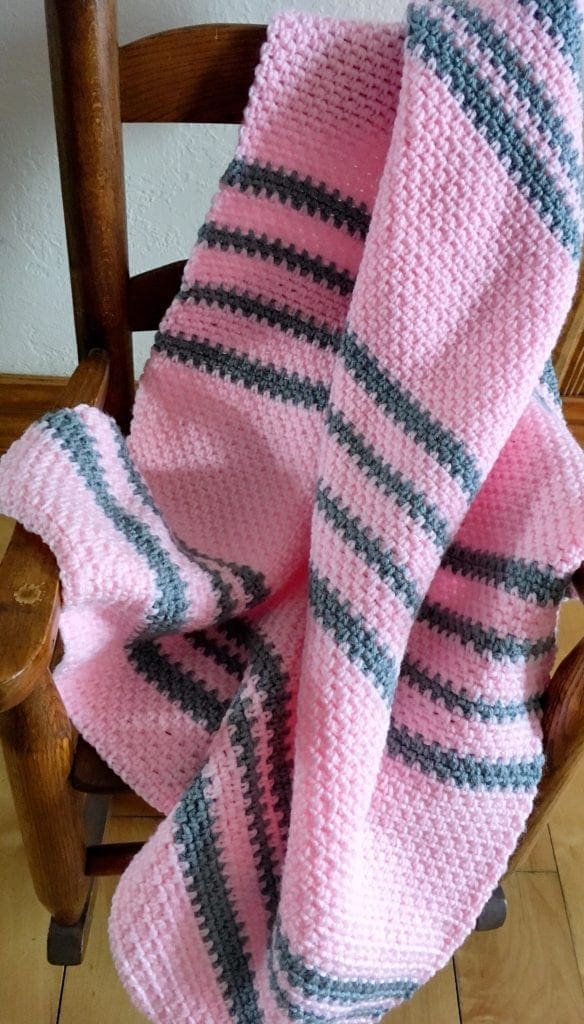
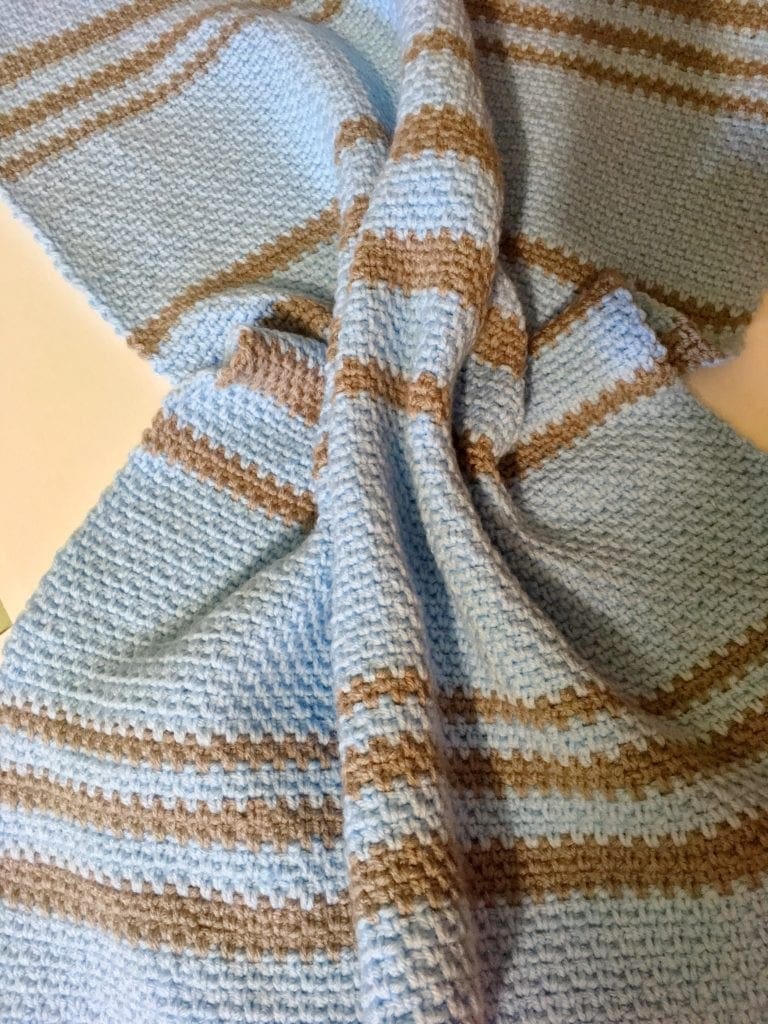
Crocheting a Blanket using the Stitch Pattern
Once you have mastered how to crochet the linen stitch, you might be wanting to make something a bit larger. Here are a few crochet pattern ideas for baby blankets using this stitch. Enjoy!
Modern Heirloom Baby Blanket
Treasured Moss Stitch Baby Blanket
How to Crochet the Linen Stitch Baby Blanket

How to Crochet a Moss Stitch Baby Blanket
Back to the Beginner Linen Stitch Coaster
This crochet pattern uses just a little bit of yarn. Using just 2 small skeins of Peaches and Creme Cotton Yarn, I was able to make 8 coasters. Each skein is 120 yards. If you are short on funds and want to make sure that your loved ones have gifts for their birthdays or the Holiday, this is a perfect handmade gift.
Directions: Beginner Linen Stitch Coaster
Skill Level
Beginner friendly
Crochet Pattern Notes
This crochet pattern is worked in rows.
Written in US Terms.
The last single crochet stitch at the end of the row should be placed in the turning chain 2 area.
The chain 2 at the beginning of the row does not count at the first stitch.
Using just 2 skeins of cotton yarn – total of 240 yards, I was able to make 8 crochet coasters.
This crochet pattern would look great as a Crochet Mug Rug too. Just add fringe to the ends.
Special Stitches
This pattern starts with the Chainless Foundation Single Crochet. While you can start with a normal chain, it tends to leave unsightly gaps that are noticeable in this crochet coaster. (If you would prefer to use a chain stitch, then start the first ST in row 1 in the 4th ST from the Hook)
If you have yet to try this stitch, I urge you to give it a try.
Crochet Tutorials for the chainless foundation single crochet and the crochet coaster are located below the written pattern.
Size
Approximately 4 inches X 4 inches. A nice size square for a coaster.
Gauge
Approximately 16 stitches per 4 inches. However, gauge is not critical to this crochet pattern. To increase or decrease the width, this pattern is worked in multiples of 2. In other words start with an even number of chains. To increase or decrease the length, add or reduce the number of rows.
Materials
Dark Taupe Peaches and Creme Cotton Yarn Skein, 120 yards.
Potpourri Sugar and Cream Cotton Yarn Skein, 120 yards.
If you are not able to find the yarn locally, you can purchase it online. Savings Center – Pattern Princess
Size H Crochet Hook 5.0mm
Yarn Needle
Scissors
Abbreviations
- CH = Chain
- SC = Single Crochet
- SK = Skip Stitch
- SP = Space
- ST = Stitch
- [ ] = Repeat Between
Get Your ad free Printable PDF in our Etsy Shop
Directions
16 Chainless Foundation Single Crochet Stitches. (If you would prefer to use a chain stitch, then start the first ST row 1 in the 4th ST from the Hook)
Row 1
CH 2, SC in the next ST, [CH 1, SK 1, SC in the next ST]. Repeat across between the [ ]. End with a SC in the last ST. Turn
Row 2
CH 2, SC in first CH-1 SP in previous row (Note: not in the stitch itself, but in the space that was created by the CH. To do this, insert your hook in the space, yarn over and pull through the yarn and complete your SC), [CH 1, Skip 1 ST, SC in next SP]. Repeat between to last CH where you end with a SC, turn.
Rows 3-14
Repeat row 2
Finishing
Weave in yarn ends and cut off the excess yarn.
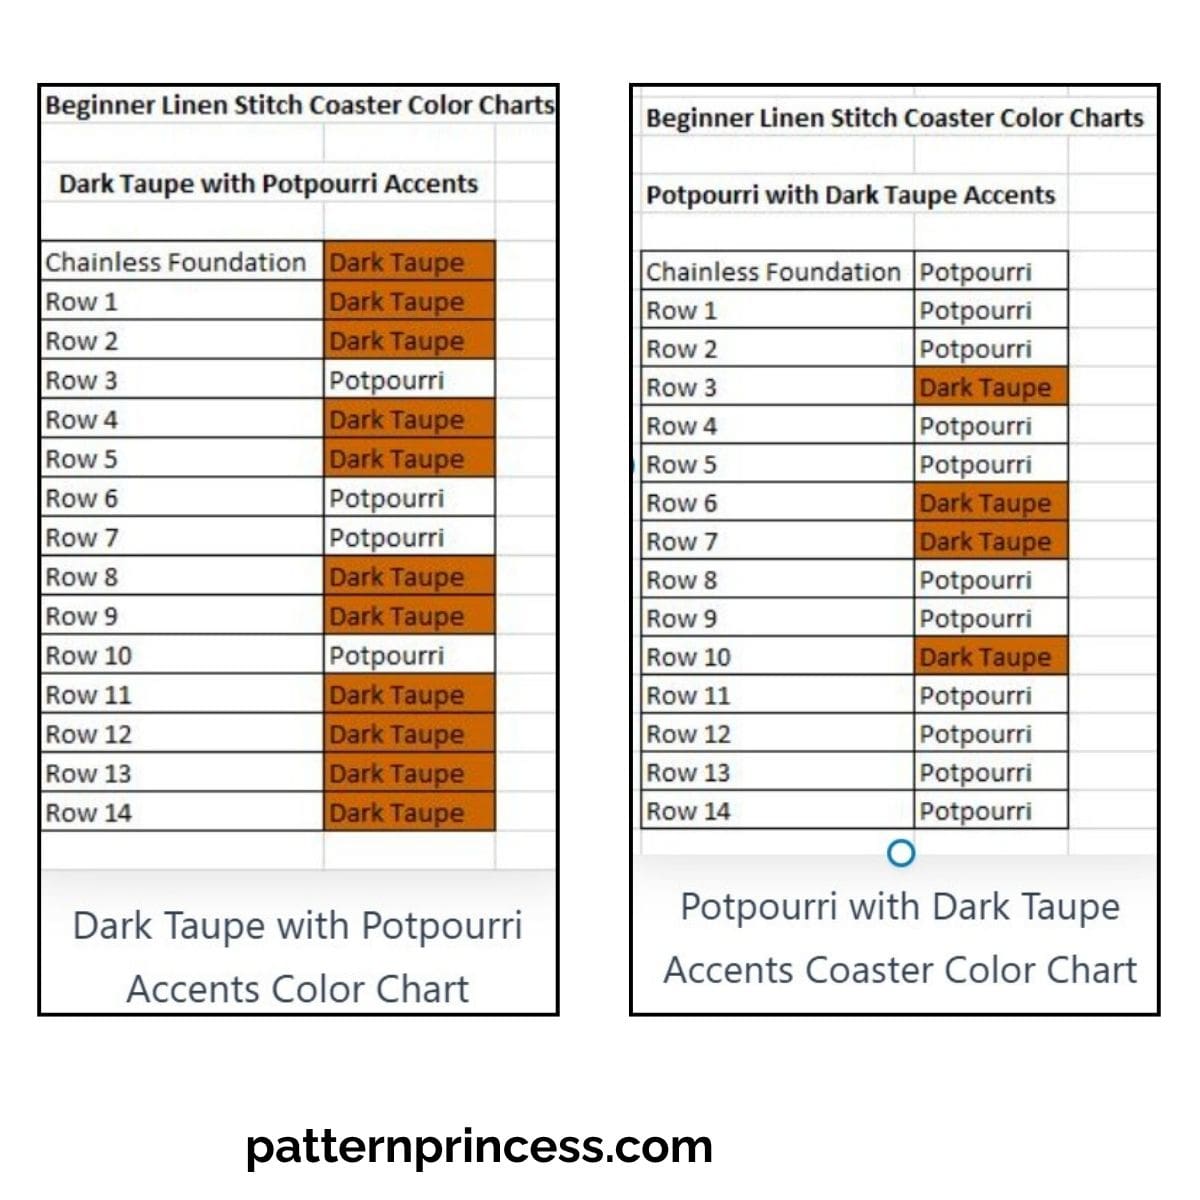
Crochet Coaster Color Charts
I made two solid color dark taupe, two solid color potpourri, two dark taupe with potpourri accents, and two potpourri with dark taupe accents. The color charts for changing colors are provided next.
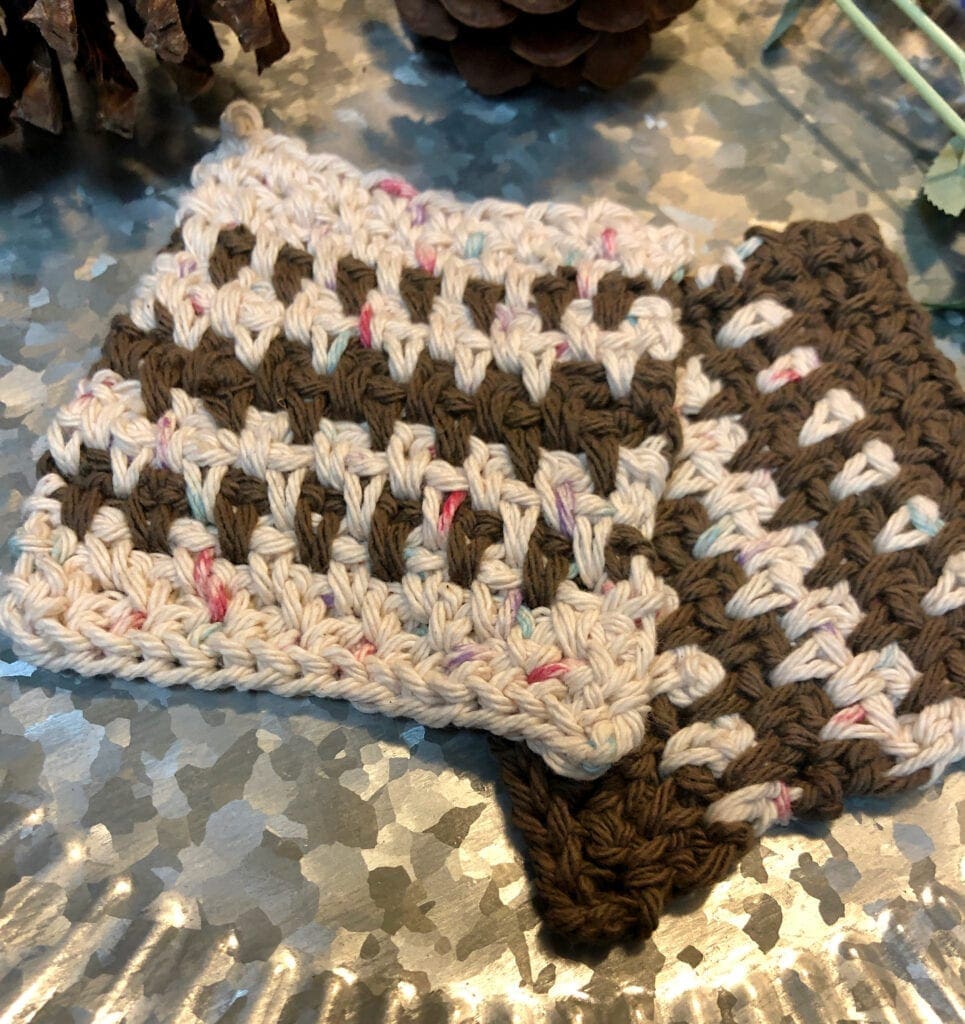
Color chart for the Dark Taupe with Potpourri Accent color and Potpourri with Dark Taupe Accent color.
Making the Coasters and Changing Colors using the Linen Stitch
Learn how to change colors and crochet over the ends so you have a lovely, finished look to your crochet coaster.
I have provided a photo tutorial for you below on this process – Note: it is the tutorial I made when crocheting a baby blanket.
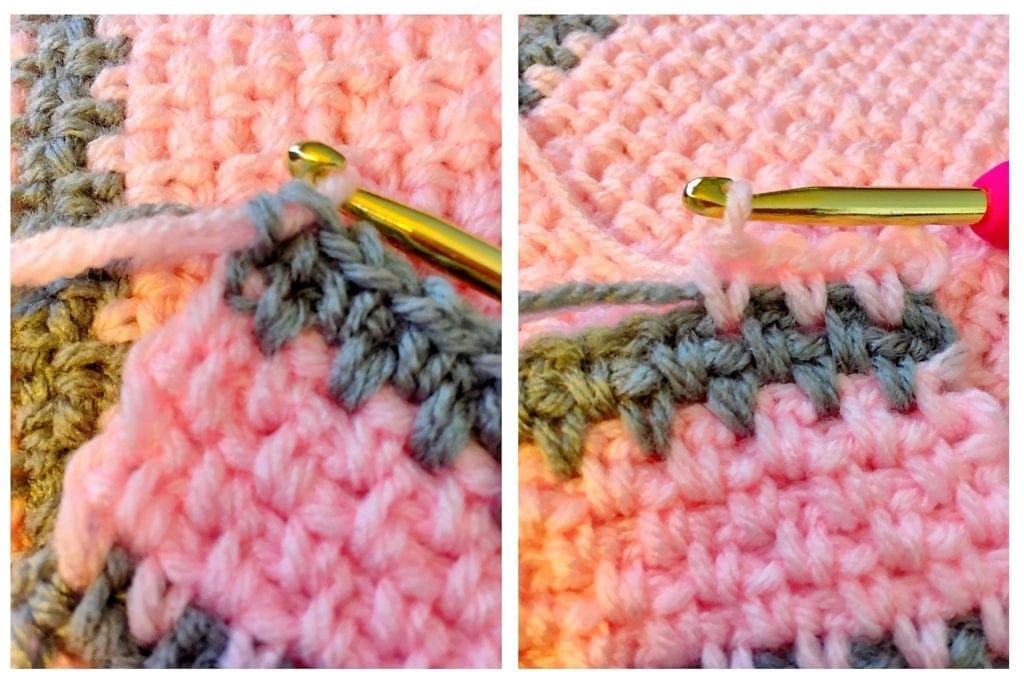
Changing color:
In the photos below, you will see that the new color is added by adding the yarn with the hook in the last two loops on the hook. Yarn over with the new color and pull through both loops on your hook. Then continue with the linen stitch.
Securing the Yarn Tails
I would recommend securing the yarn tails by crocheting over them. This is a two-step process.
- Hold the yarn in front of the stitches of the previous row and when you insert your hook into the CH 1 SP, make sure to include the two strands of yarn. This secures the yarn under the SC. I do this for about 6 inches of the yarn tail, then I stop incorporating them and continue on with the linen stitch. See the photo tutorials below.
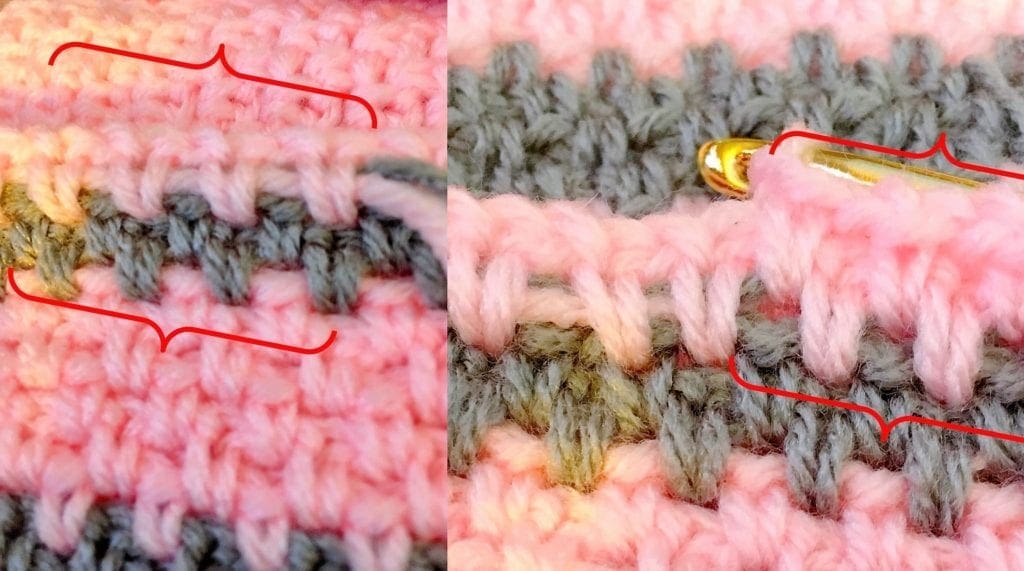
Adding new color and crocheting over the tails
- Notice below how the yarn tails in the pictures on the left are quite visible? After you have completed the row after the color change and are on the return row. It is time to pick up the yarn into the stitches of this row. If this was not done, the yarn would be very visible as it is on the left. Therefore, when making your SC, pick up the two strands of yarn again as you work along the row. It looks neat on the right with the yarn tails tucked up nicely into the stitches.
I have put brackets around the areas to help you see the areas.
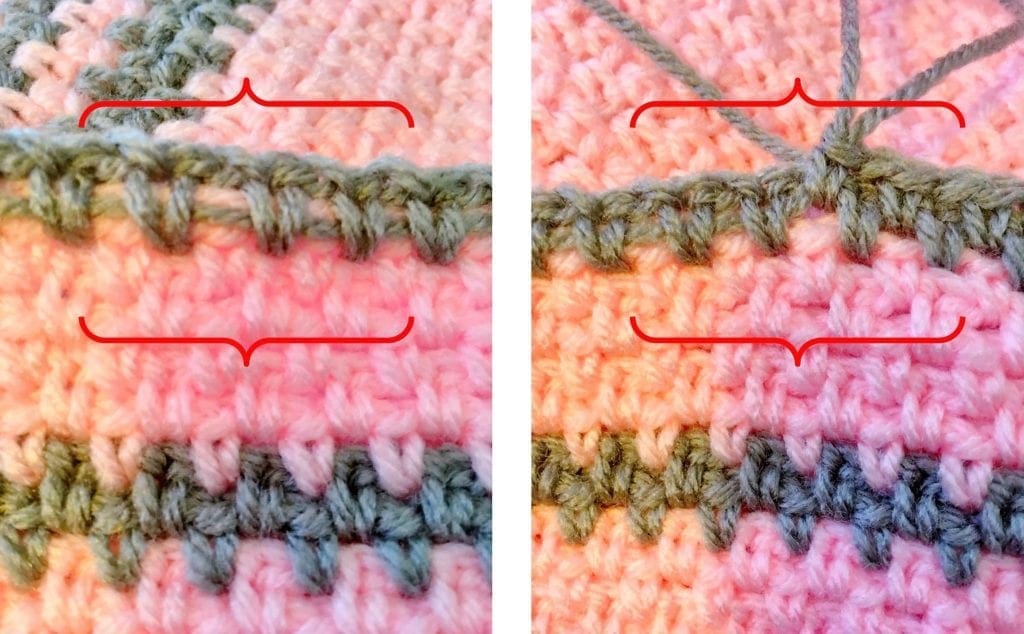
Here is another photo to help you see the difference this technique can make.
Crochet Pattern Video Tutorials
Chainless Foundation Single Crochet
Learn How to Crochet the Linen Stitch
If you loved this post, please share. It helps to show me that these types of posts are helpful – thank you!
Is linen stitch the same as moss stitch?
Yes. Linen stitch, moss stitch, and granite stitch are all names for the same crochet stitch pattern.
What yarn is best for crochet coasters?
100% cotton yarn is the best choice because it is absorbent, durable, and machine washable.
How much yarn do I need for one coaster?
Most coasters use less than 20 yards of worsted weight cotton yarn.
Are crochet coasters good for beginners?
Yes. Crochet coasters are quick projects that help beginners practice tension and basic stitches.
I hope that you liked this pattern. If you are looking for more ideas for crocheted projects, here are a few others you may enjoy.

You can find Victoria crocheting, quilting, and creating recipes. She has cooked in restaurants for over 20 years, including many larger parties. She learned to crochet when she was just 11 years old and has been crocheting ever since; over 50 years now. Over 40 years ago, she loved her first class in sewing and continues to hone her skills in quilting. Many have enjoyed the handmade gifts over the years. In her professional career, she has worked in management in a wide variety of businesses including higher education as a dean of a division. All the while attending college part-time to achieve her doctorate in higher education with an emphasis in e-learning.