Last updated on May 10th, 2026 at 10:14 pm
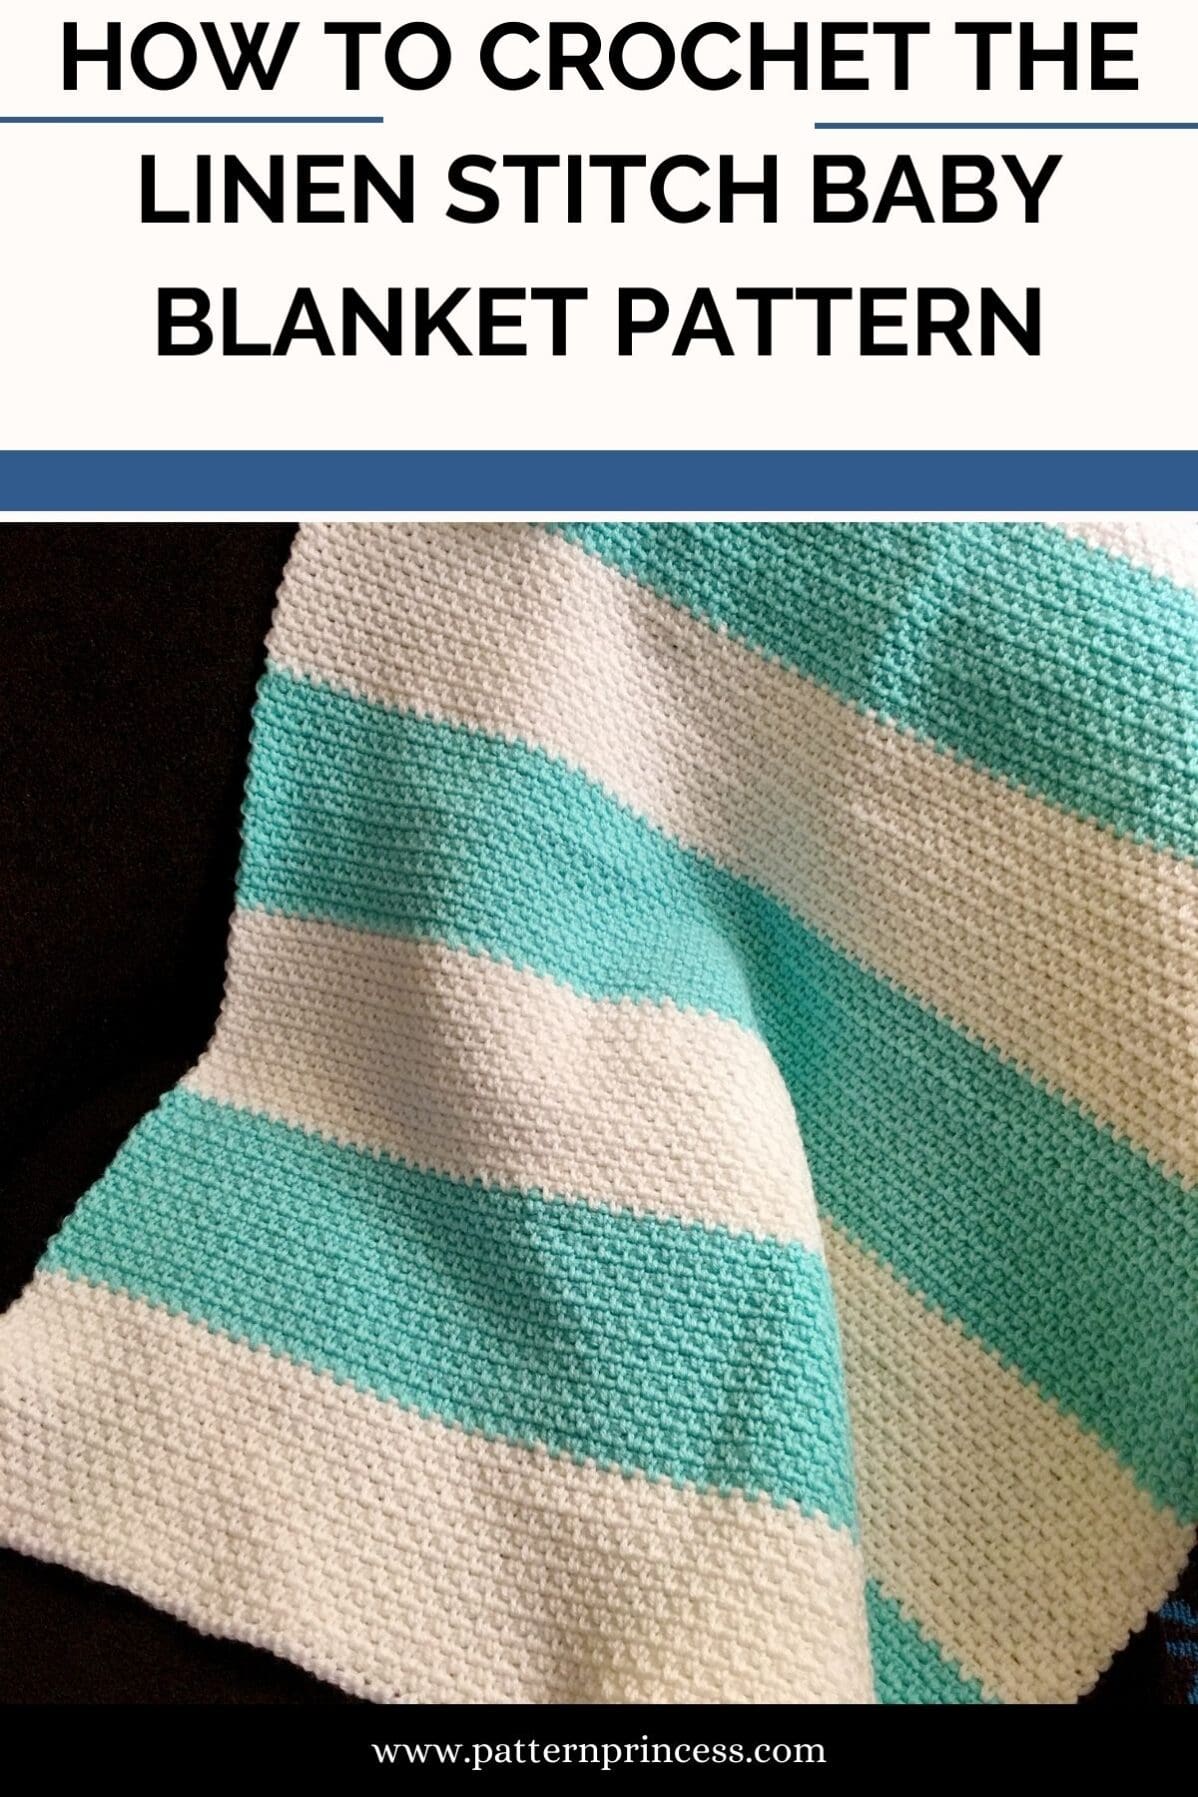
Learn how to crochet the linen stitch. Step-by-step directions and video tutorial to help you learn how to master the linen stitch and make a baby blanket at the same time. The texture of the linen stitch is woven and compact fabric, but still very pliable.
Why is the Linen Stitch So Simple?
First, this simple pattern consists of single crochet and the chain stitch. It is a perfect crochet stitch for a beginner. Second, you don’t even have to know how to work into the loops of the single crochet stitches. You will be working into the chain spaces between single crochet stitches.
Is the Linen Stitch Good for a Blanket?
Yes, the Linen Stitch can be a good choice for a blanket, depending on your preferences and the overall aesthetic you’re aiming for. The Linen Stitch, also known as the woven stitch, granite stitch, moss stitch or fabric stitch. It is crochet pattern that creates a light textured fabric with a woven-like appearance.
However, here are some things to consider when deciding if the Linen Stitch is suitable for your blanket:
Texture: Create a beautiful texture that resembles woven fabric. If you like the look of this texture, it can make your blanket visually appealing and unique.
Warmth: The fabric created can provide warmth, making it suitable for a cozy blanket.
Durability: The stitch pattern results in a sturdy fabric that can withstand regular use, making the blanket durable and long-lasting.
Yarn Choice: The Linen Stitch works well with a variety of yarn types, from lightweight yarn, to medium weight yarn, to bulky yarn. Thicker yarns can create a chunkier, warmer blanket, while finer yarns will produce a lighter, drapier blanket.
Skill Level: Perfect for beginner crocheters using basic crochet stitches; single crochet and chain stitches.
Variation: You can experiment with color changes to create stripes, gradients, or other color patterns within to add visual interest to your blanket.
Does the Crochet Linen Stitch Use More yarn?
The linen stitch uses less yarn than the single crochet because of the chain stitch. However, it does use more yarn than a taller stitch such as the double crochet and treble crochet.
Video Tutorial Near Bottom of Post
Hint: when completing the stitches used in this pattern, make sure to keep the chain one space the same size as the single crochet. This will ensure an even look throughout your beautiful project.
Uses for the Linen Stitch
I love making things using this pattern. Once I get the foundation row completed, I get into the rhythm of the pattern and don’t really have to pay much attention to what I am doing. I can watch a television show with my family and have my crochet therapy at the same time.
This linen stitch would be great for so many things. Once you learn how to crochet the linen stitch, your world will open to new possibilities. Here are some ideas for crochet projects.
- Dish Towel
- Hand Towel
- Baby Blanket
- Cowl
- Scarf
- Lap Afghan
- Pillow Covering
- Face Cloth
- Rug (make sure to use non-skid mat underneath for safety)

Is the Linen Stitch the Same as the Moss Stitch?
Yes, it is that same. This particular pattern is also known by several other names due to its textured and woven-like appearance. It is a one row repeat worked in straight lines. Some of the alternate names for the Linen Stitch in crochet include:
- Fabric Stitch: This name emphasizes the way the stitch pattern creates a fabric that resembles woven fabric.
- Woven Stitch: Similar to “fabric stitch,” this name reflects the interlocking and woven appearance of the stitch pattern.
- Moss Stitch: In some contexts, the Linen Stitch is referred to as the Moss Stitch. However, note that the Moss Stitch can also refer to a different crochet stitch pattern that alternates single crochet and chain stitches to create a textured, bumpy fabric.
- Granite Stitch: This name might be used interchangeably with the Linen Stitch. The term “granite” suggests a textured and sturdy appearance.
Is the Linen Stitch Good for a Blanket?
It is a beautiful and versatile stitch that can be used for a variety of projects, including blankets. However, whether or not it is a good choice for a blanket depends on what you are looking for in terms of the final results.
One of the benefits is that it creates a dense fabric that is great for warm and cozy blankets. It also creates a lovely texture that adds interest to the finished product. However, because the use of single crochet stitches, it can be a bit time-consuming and slow-going, especially if you are making a large blanket.
Another thing to consider is that if you are looking for a blanket with a lot of drape or one that is lightweight and airy, you may want to choose a different stitch pattern.
Overall, if you are looking for a warm, cozy, and textured blanket, the linen stitch can be a great choice.
Free Crochet Blanket Pattern
As a bonus to learning the linen stitch, Here is a free pattern for you to make as you learn the stitch. Make this beautiful baby blanket. This is an easy pattern to get started using the linen stitch.
Written Directions: How to Crochet the Linen Stitch Baby Blanket Pattern
Beginner-Friendly
You should know how to complete the single crochet and chain stitch.
Gauge
Approximately 19 stitches and 18 rows every 4 X 4 inch square in the linen stitch.
Materials
2 Skeins Red Heart Soft White yarn approximately 728 yards
1 Skein Red Heart Minty yarn approximately 364 yards
Size H Crochet Hook 5.0mm
Scissors
Tapestry Needle
Tape Measure
Stitch Markers
Size
The baby blanket finished size is approximately 26″ wide X 30″ long.
Varying the Size
To make the blanker longer or narrower, increase or decrease by 2 stitches. This afghan uses even stitches. To make this longer or shorter, simply increase or decrease the number of rows.
However, to keep the symmetrical look of the afghan, be sure to count out the rows and whatever you do on one end, you should repeat on the other end.
Note, if you use a different yarn or different crochet hook, you may get a slightly different finished size.
Abbreviations
- CH = Chain
- SC = Single Crochet
- SK = Skip
- SP = Space
- ST = Stitch
- STs = Stitches
- * means that you should repeat all instructions between the *
Pattern Notes
Written in US Terms.
This pattern uses the Linen Stitch.
Work into chain spaces, not stitches
Keep your chain stitches the same height as your SC stitches for even tension
Start new yarn at the beginning of a row for cleaner color changes.
Tips for Success (Beginner Friendly)
- Use stitch markers to track your edges
- Count stitches every few rows
- Keep even tension for a smooth, woven look
- Don’t rush—this is a relaxing, rhythmic stitch
Crochet Stitches Used
Chain Stitch (CH ST)
Begin the chain stitch by making a slip knot on the crochet hook. Leave about a 5-inch tail on the yarn. This will be weaved in later.
Next snug up the yarn loop that is on the crochet hook; while it should be firm, it should also be loose enough to slide on the hook with ease.
Keeping the loop on the hook, wrap the yarn over the crochet hook from back to front. Draw the yarn through the loop. (The first chain stitch is complete).
HOW TO CROCHET THE CHAIN STITCH video tutorial
Single Crochet (SC)
Insert the hook in a stitch and pull up a loop. Yarn over and pull through the two loops on the hook.
HOW TO CROCHET THE SINGLE CROCHET STITCH video tutorial

Pattern Notes
The key to the Linen Stitch is working a single crochet into the chain spaces from the previous row and chaining 1 to create the textured appearance.
Each row consists of alternating single crochets and chain-1 spaces, which creates the woven look.
Remember that the first single crochet of each row is made into the first single crochet of the previous row, not the turning chain. End with a single crochet in the last stitch at the end of the row.
You can experiment with color changes to create stripes or other patterns within the Linen Stitch.
Turn at the end of row.
Pattern is written in US Terms.
Directions
Begin:
Foundation Chain 126
Row 1:
SC into 4th CH from hook, [Ch 1, Skip 1 CH, SC in next SP]. Repeat between [ ] across. End with a SC in the last ST. Turn.
Row 2:
CH 2, SC in first CH-1 SP in previous row (Note: not in the stitch itself, but in the space that was created by the CH ST. To do this, insert your hook in the space, yarn over and pull through the yarn and complete your SC), [CH 1, SK 1 ST, SC in next SP]. Repeat across between [ ] to last CH where you end with a SC, Turn.
Rows 3 and beyond:
Continue to repeat row 2 until your desired length.
In the baby blanket that I made, I did a total of 140 rows.
Here is how I made each color section
White yarn = 20 rows
Teal yarn = 20 rows
Continue alternating the yarn colors until your desired length.
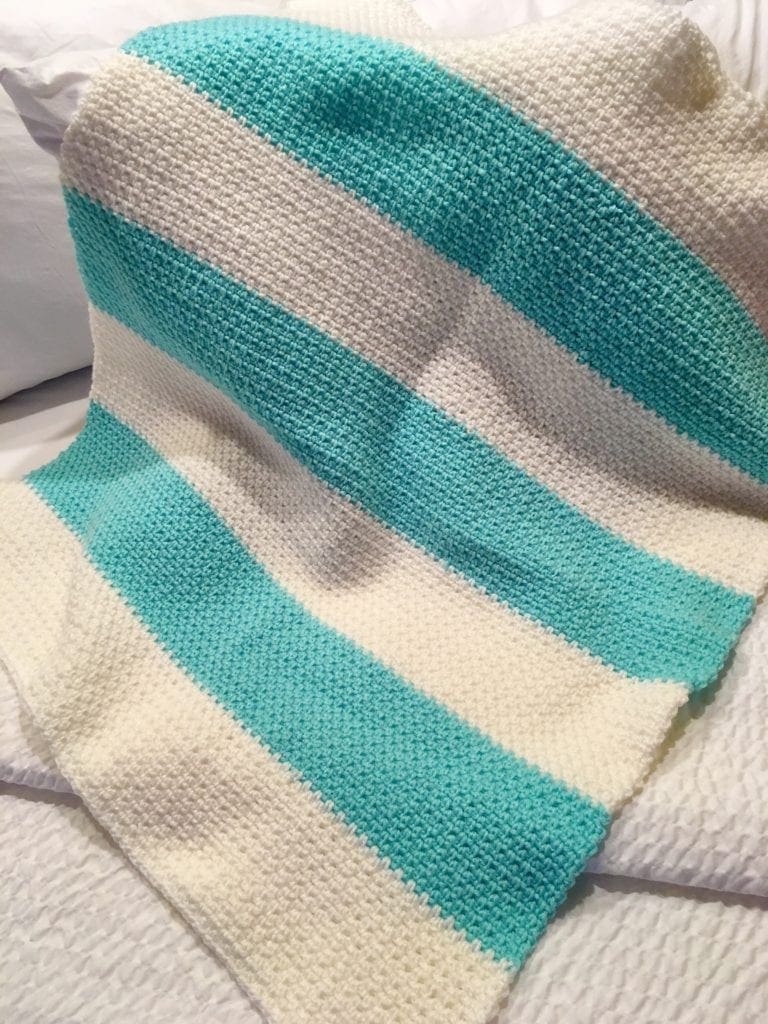
Linen Stitch Baby Blanket
Here is another view of the finished linen stitch baby blanket. You can see how lovely it drapes. While the linen stitch creates a closely stitched blanket, it is still pliable and has a very nice feel to it.
Changing Colors
While this stitch looks beautiful in one color as the stitch ads a lot of texture to the crochet project, you can change colors quite easily too. Here is a photo tutorial on how to change colors in the linen stitch.
In the photos below, you will see that the new color is added by adding the yarn with the hook in the last two loops on the hook. Yarn over with the new color and pull through both loops on your hook. Then continue on with the linen stitch.
This is a wonderful way to change up colors and make your own color pattern.
Securing the Yarn Tails
I would recommend securing the yarn tails by crocheting over them. This is a two-step process.
- Hold the yarn in front of the stitches of the previous row and when you insert your hook into the CH 1 SP, make sure to include the two strands of yarn. This secures the yarn under the SC. I do this for about 6 inches of the yarn tail, then I stop incorporating them and continue on with the linen stitch. See the photo tutorials below.
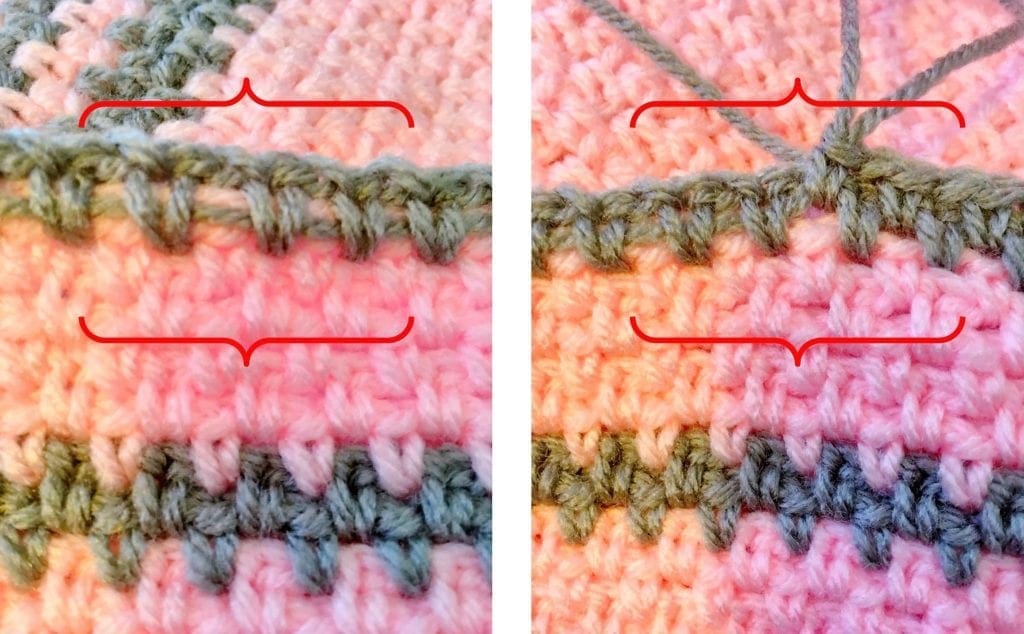
Adding new color and crocheting over the tails.
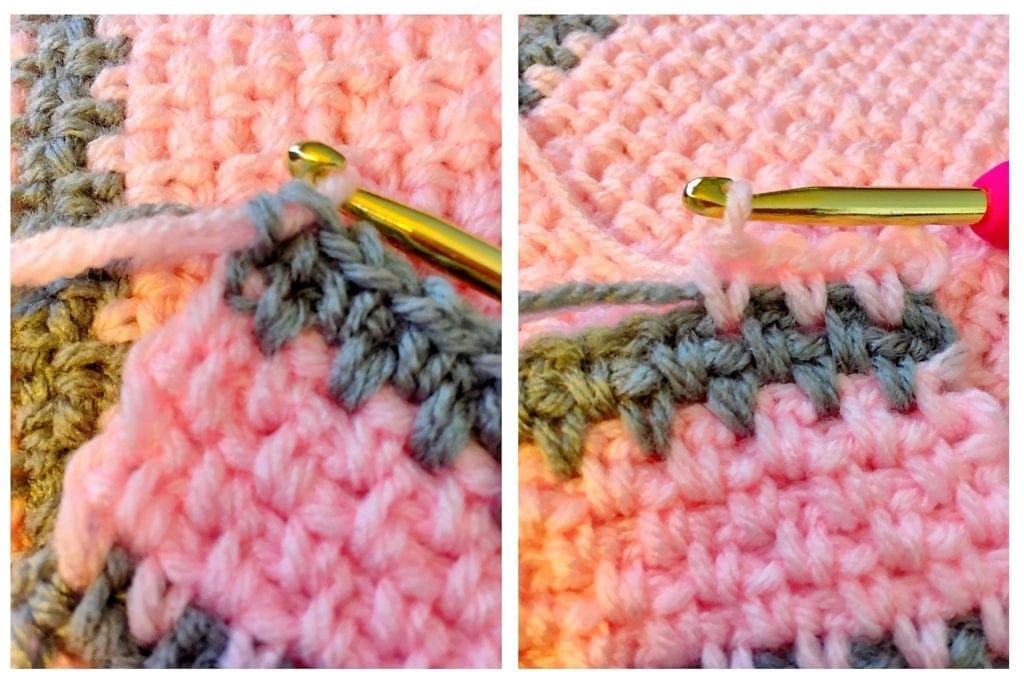
2. Notice below how the yarn tails in the pictures on the left are quite visible? After you have completed the row after the color change and are on the return row. It is time to pick up the yarn into the stitches of this row. If this was not done, the yarn would be very visible as it is on the left. Therefore, when making your SC, pick up the two strands of yarn again as you work along the row. It looks neat on the right with the yarn tails tucked up nicely into the stitches.
I have put brackets around the areas to help you see the areas.
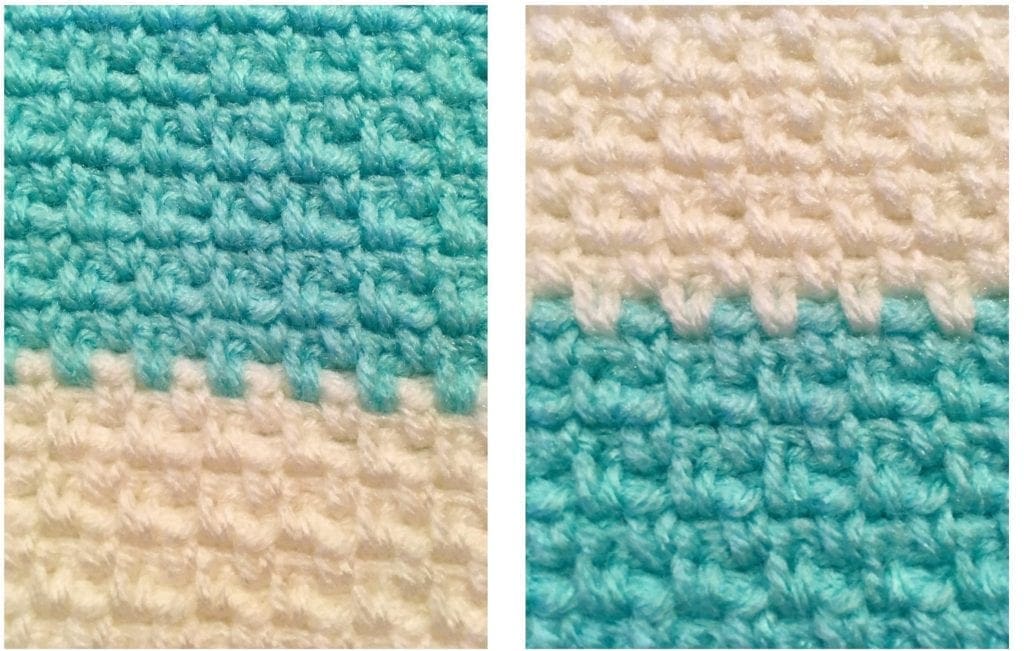
Here is another photo to help you see the difference.
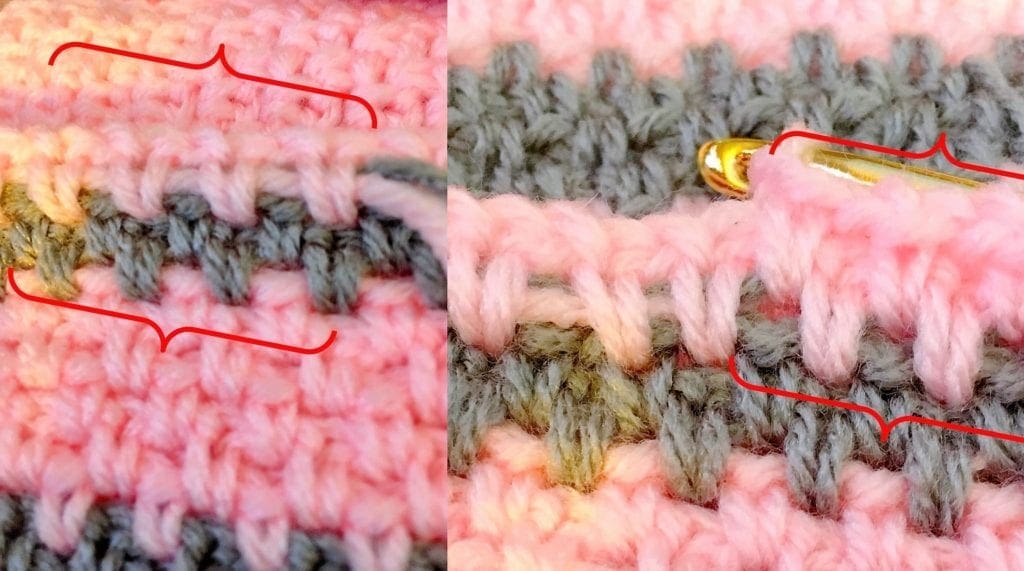
Here is one more closeup picture of the stitches. Notice that you are not able to tell where I changed colors?
Crochet Tutorial Video on How to Crochet the Linen Stitch
If you liked the video, please give me a thumbs up and add me to your viewing list. Thank you so much.
Is the linen stitch good for beginners?
Yes! It uses simple stitches and has an easy repeat, making it perfect for beginners.
Why does my blanket look uneven?
Most likely tension differences between your chain and single crochet stitches—try to keep them the same height.
Can I use a different yarn?
Absolutely. Just note that your finished size may vary depending on yarn weight and hook size.
Storage & Care Tips
To keep your baby blanket soft and beautiful:
- Machine wash on gentle cycle
- Use mild detergent
- Lay flat or tumble dry low
This Beginner Linen Stitch Baby Blanket is more than just a pattern—it’s a relaxing project that builds confidence with every row. Whether you’re making your very first crochet project or creating a heartfelt handmade gift, this blanket is one you’ll come back to again and again.
I hope that you have found this tutorial useful. You can find other free crochet stitch patterns.
You may also be interested in these free crochet patterns using one of my favorite crochet stitches.

You can find Victoria crocheting, quilting, and creating recipes. She has cooked in restaurants for over 20 years, including many larger parties. She learned to crochet when she was just 11 years old and has been crocheting ever since; over 50 years now. Over 40 years ago, she loved her first class in sewing and continues to hone her skills in quilting. Many have enjoyed the handmade gifts over the years. In her professional career, she has worked in management in a wide variety of businesses including higher education as a dean of a division. All the while attending college part-time to achieve her doctorate in higher education with an emphasis in e-learning.