
The Canyon Ridge Waffle Stitch Crochet Scarf combines rich texture with timeless, everyday style. The waffle stitch creates a beautifully dimensional fabric with raised squares that give the scarf a cozy, substantial feel, while the ribbed edging adds a polished finish and a touch of stretch.
Designed with both comfort and versatility in mind, this scarf is a wonderful handmade accessory for anyone. The classic texture and simple color palette make it easy to style, whether you’re bundling up for a chilly winter day or looking for a thoughtful handmade gift. With four sizes included, you can make a slim scarf for everyday wear or a generously sized wrap for extra warmth.
Beautiful Scarf with Loads of Squishy Texture
The scarf is worked in three simple sections: a ribbed edge, a textured waffle stitch body, and a matching ribbed edge. Once you get into the rhythm of the waffle stitch, the repeating pattern is relaxing to crochet and creates a finished project that looks far more intricate than the techniques used to make it.
This scarf is also part of our growing collection of textured crochet scarf patterns, each featuring a different stitch pattern and a timeless, unisex design. If you enjoy learning new stitches while creating practical projects you’ll actually wear, this series is a wonderful place to explore.
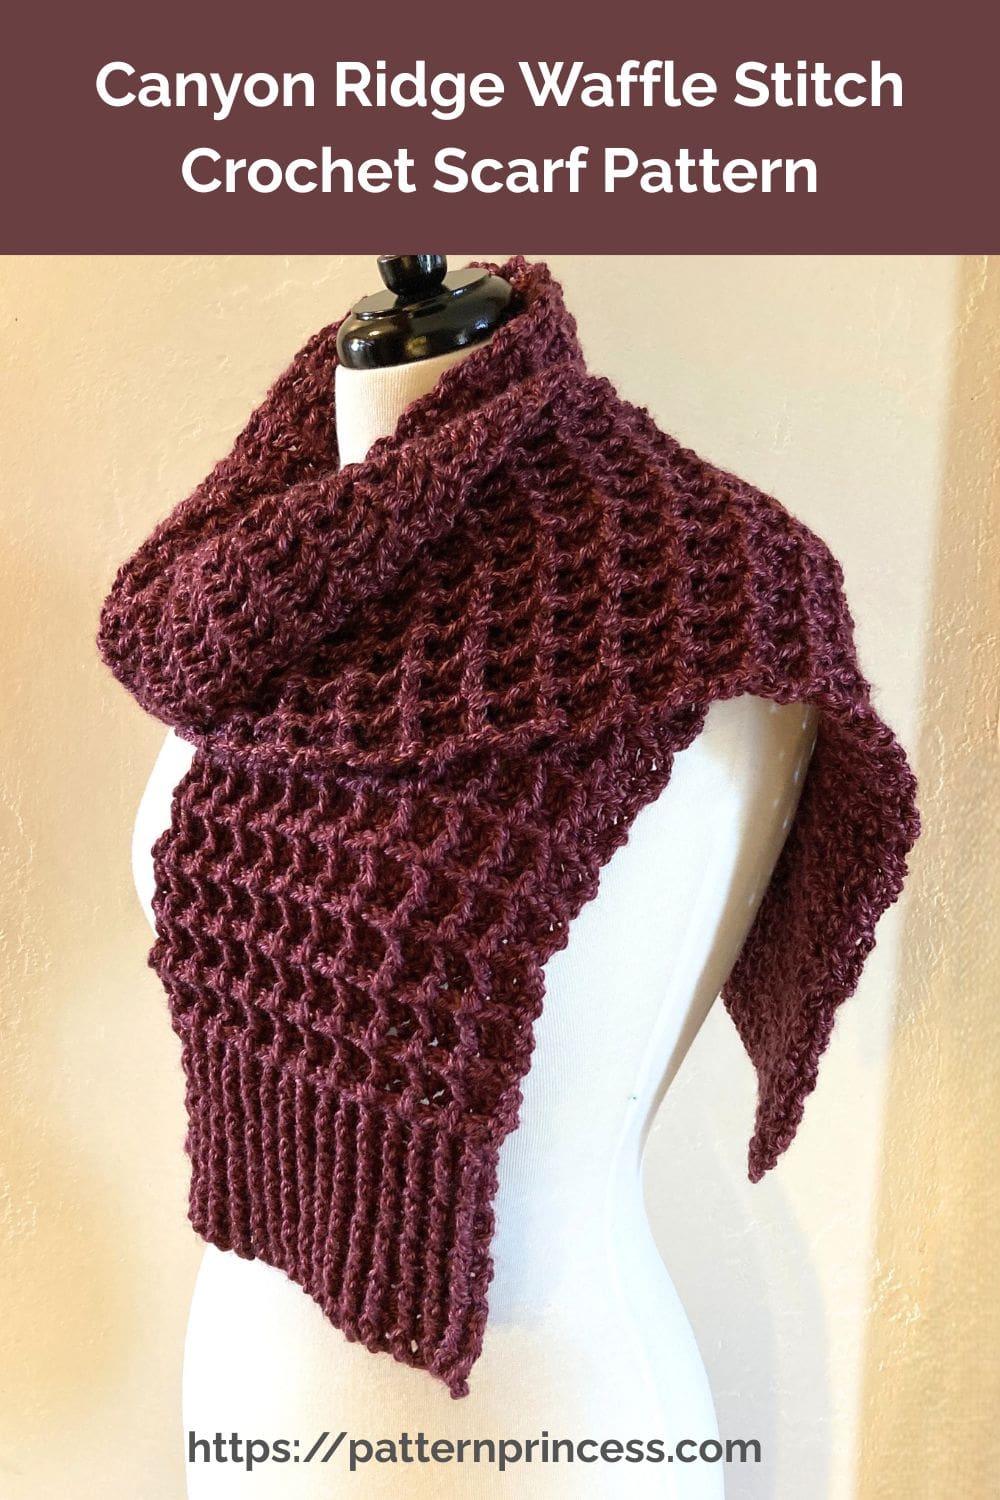
Why We Love the Waffle Stitch
The waffle stitch is one of those crochet stitches that looks complicated but is surprisingly approachable once you understand the stitch placement. Alternating regular double crochet stitches with front post double crochet stitches creates raised sections that form the signature waffle texture.
I love how much dimension this stitch adds to a project without requiring complicated color changes or intricate stitch combinations. The texture catches the light beautifully and gives the finished scarf a cozy, substantial look that is perfect for cooler weather.
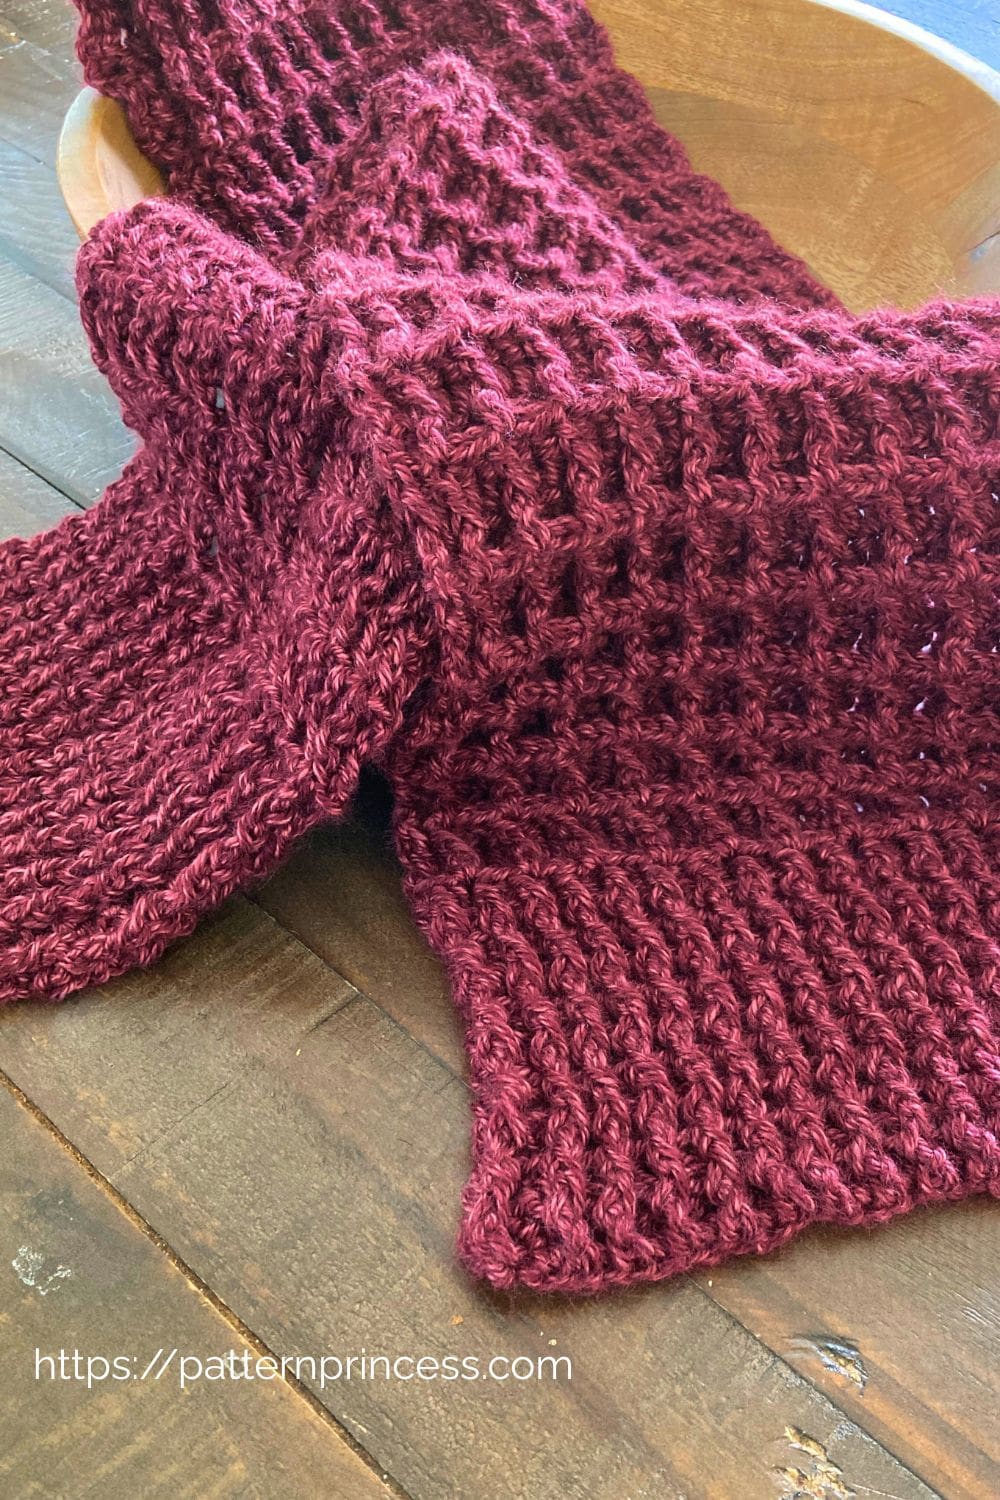
The waffle stitch also works especially well with a solid-color yarn. The single color allows the raised texture to take center stage, making it easy to appreciate the depth and detail of the stitch pattern.
Choosing Your Size
This scarf is available in four sizes, making it easy to choose the style and amount of coverage you prefer. Whether you’re looking for a smaller scarf that tucks neatly into a coat or a larger wrap that can be draped around your shoulders, there’s an option to suit your needs.
- Neck Scarf – A slim, lightweight option that sits comfortably around the neck and tucks easily into a jacket or coat.
- Classic Scarf – An everyday size with a little more width and coverage, perfect for wrapping once or twice around your neck.
- Cozy Scarf – A wider, warmer option that showcases the waffle stitch texture beautifully. This is the size pictured.
- Wrap Scarf – A generous size with extra length and width for wrapping, draping, or wearing as a cozy shoulder wrap.
Choose the size that best fits your personal style and how you’d like to wear your scarf. The pattern also includes notes for adjusting the width and length if you’d like to customize the finished dimensions.
A Versatile Unisex Crochet Scarf
The Canyon Ridge Waffle Stitch Crochet Scarf has a classic, timeless look that makes it a wonderful unisex crochet pattern. The textured stitch adds visual interest without feeling overly decorative, while the simple ribbed ends give the scarf a clean, finished appearance.
Choose a favorite color to make a scarf that suits your own wardrobe, or select a neutral shade for a handmade gift that will work for almost anyone. The four included sizes also make it easy to create a scarf that fits the recipient’s preferred style.

Pattern Features
- Four wearable scarf sizes
- Richly textured waffle stitch design
- Matching ribbed edging on both ends
- Unisex design suitable for anyone
- Worked in one piece from one end to the other
- Step-by-step written instructions
- Photo tutorial
- Video tutorial for the Waffle Stitch
- Video tutorial for the Front Post and Back Post Double Crochet Ribbing
- Easy to customize the length and width
- Written in US crochet terms
Yarn Choice
I used Lion Brand Heartland, a medium weight #4 yarn, to crochet the Canyon Ridge Waffle Stitch Crochet Scarf. This yarn has a soft feel and excellent stitch definition, which makes it a great choice for showcasing the raised texture of the waffle stitch.
The waffle stitch creates a dense, textured fabric, so a smooth medium weight yarn works particularly well. It allows the raised stitches to stand out clearly while keeping the finished scarf comfortable and wearable.
For this sample, I used the color Badlands, a rich burgundy shade that gives the scarf a warm, rustic feel. The waffle stitch looks beautiful in solid colors, but you could easily choose a different shade to match your personal style.
When choosing another yarn, look for a smooth #4 medium weight yarn with good stitch definition. Avoid very fuzzy or highly textured yarns, as they can hide some of the beautiful detail created by the waffle stitch.

A Thoughtful Handmade Gift
A textured scarf is one of my favorite crochet projects to make as a gift. It’s practical, easy to personalize with a favorite color, and something the recipient can enjoy throughout the colder months.
Because this pattern includes four sizes, you can choose the finished dimensions based on the person you’re making it for. The Neck Scarf makes a lovely smaller gift, while the Cozy Scarf and Wrap Scarf are wonderful choices for someone who loves extra warmth and plenty of texture.
The classic, unisex design also makes this a great handmade gift for birthdays, holidays, Father’s Day, Mother’s Day, or simply as a thoughtful “just because” project.
Get Your Ad Free Printable PDF in our Etsy Shop.
Directions: Canyon Ridge Waffle Stitch Crochet Scarf
Skill Level
This stitch is perfect for an advanced beginner to intermediate crocheter.
You should be able to crochet the double crochet stitch.
Gauge
Approximately 17 stitches and 8 rows every 4 X 4 inches.
Size
- Neck Scarf = 4 × 43 inches
- Classic Scarf = 6 × 47 inches
- Cozy Scarf (pictured) = 8 × 53 inches
- Wrap Scarf = 10 × 71inches
Note. To change the width, use multiples of 3+2. Chain 3, then add 2 extra chain stitches. To change the length, add or decrease rows. For the ribbing it can be any number of rows. For the waffle stitch increase or decrease by 2 rows at a time.
Scarf Construction at a Glance
| Size | Beginning Ribbing | Waffle Stitch Body | Ending Ribbing |
| Neck Scarf | 8 rows | 78 rows | 8 rows |
| Classic Scarf | 8 rows | 88 rows | 8 rows |
| Cozy Scarf | 10 rows | 96 rows | 10 rows |
| Wrap Scarf | 10 rows | 136 rows | 10 rows |
Each scarf is worked in three sections: Beginning Ribbing, Waffle Stitch Body, and Ending Ribbing. Follow the row counts shown above for your chosen size.
Materials
Lion Brand Heartland. 100% acrylic, #4 medium weight yarn. 251 yards per skein
Color: Badlands
- Neck Scarf = 550 yards or 3 skeins
- Classic Scarf = 600 yards or 3 skeins
- Cozy Scarf (pictured) = 650 yards or 3 skeins
- Wrap Scarf = 1,100 yards or 4 skeins
If you are not able to find the yarn locally, you can purchase it online. Pattern Princess Savings Center.
Crochet Hook Size I 5.5mm
Scissors
Tapestry needle
Tape Measure
Abbreviations
- CH = Chain
- BPDC = Back Post Double Crochet
- DC = Double Crochet
- FPDC = Front Post Double Crochet
- SK = Skip
- SL ST = Slip Stitch
- SP = Space
- ST = Stitch
- STs = Stitches
- [ ] = Repeat Between
Crochet Stitches
Chain Stitch (CH ST)
Begin the chain stitch by making a slip knot on the crochet hook. Leave about a 5-inch tail on the yarn. This will be woven in later.
Next snug up the yarn loop that is on the crochet hook; while it should be firm, it should also be loose enough to slide on the hook with ease.
Keeping the loop on the hook, wrap the yarn over the crochet hook from back to front. Draw the yarn through the loop. (The first chain stitch is complete).
How to Crochet the Chain Stitch Video
Double Crochet (DC)
To work a regular double crochet, yarn over, insert the hook through both loops and pull up a loop. Next, yarn over and pull through two loops on the hook. Lastly, yarn over again and pull through the last two loops on the hook.
How to Crochet the Double Crochet Stitch Video
How to Work a Front Post or Back Post Double Crochet Stitch
If you are unfamiliar with crocheting the front post and back post double crochet stitches, we have a whole blog post dedicated to showing you the details.
Back Post Double Crochet (BPDC)
The back post stitches appear to recede on the side of the crocheted fabric that is facing you.
1. Yarn over, insert the hook from back to front between the posts of the first and second double crochet of the row below.
2. Then insert the hook from the front to the back front between the posts of the second and third stitches. (The hook should now be positioned horizontally in front of the double crochet that you are working around).
3. Yarn over, pull the yarn over the post of the stitch.
4. There should now be 3 loops on the hook. Yarn over, pull the yarn through 2 loops on the hook.
5. Last, yarn over again and pull through the last two loops on the hook.
Front Post Double Crochet (FPDC)
Front post stitches are raised crochet stitches on the surface of the fabric facing you.
When you work front post stitches, you will insert your hook from the front of your work to the back. Insert your hook the front to the back, so that the post you want to crochet around is in front of your hook.
1. Yarn over, insert the hook from front to back between the posts of the first and second double crochet of the row below.
2. Then insert the hook from the back to the front between the posts of the second and third stitches. (The hook should now be positioned horizontally in back of the post that you are working around).
3. Yarn over, pull the yarn around the post of the stitch. There should now be 3 loops on the hook.
4. Yarn over, pull the yarn through 2 loops on the hook.
5. Lastly, yarn over again and pull through the last two loops on the hook.
How to Crochet the Front Post Double Crochet and Back Post Double Crochet Video
Pattern Notes
Written instructions in US terms.
This pattern looks the same on both sides.
You can find a step-by-step video tutorial for both a left and right hand crocheter and photos after the written pattern.
In each row, you’ll always end with a double crochet on the top of the chain 3.
If this is your first time crocheting the waffle crochet stitch, practice on a small swatch first. Making a 6-row sample helps you get comfortable with the front and back post technique before committing to a full project.
Use a stitch marker if needed. Marking the first and last stitch of each repeat can prevent mistakes.
Don’t pull too tightly. Tension that’s too tight can make it hard to get your crochet hook into the stitches. A relaxed, even tension gives the best woven effect.
Check your stitch placement. Always insert your hook around the correct post from the previous row. Twisting or skipping posts can make the weave uneven.
Turn at the end of each row.
The scarf is worked in three sections:
- Section 1 – Beginning Ribbed Edge
- Section 2 – Waffle Stitch Body
- Section 3 – Ending Ribbed Edge
Choose your size before beginning and follow the row counts listed throughout the pattern.
Begin Crochet Pattern
Begin Chain Stitches
Start with a Slip Knot. Place a slip knot on your crochet hook.
Work a starting chain using a Stitch multiple of 3 + 2.
- Neck Scarf = chain 20
- Classic Scarf = chain 26
- Cozy Scarf (pictured) = chain 35
- Wrap Scarf = chain 44
Section 1 – Ribbed Edge
Work Rows 1-8 for the neck scarf and classic scarf (or 1-10 for the Cozy and Wrap sizes).
Row 1
In the 4th CH from the hook work a DC and each ST across. Turn
Row 2
CH 3 (Counts as DC). Work a FPDC in the first ST. work a BPDC in the next ST. [FPDC in the next ST, BPDC in the next ST]. Repeat between [ ] across. End with a DC in the top CH of the first 3 SK CH STs. Turn
Row 3
Note: For the rest of the ribbing rows, complete a FPDC in the previous row BPDC and a BPDC in the previous row FPDC. This elongates that stitch and creates the beautiful, ribbed look.
CH 3 (Counts as DC). (I ended row 2 with a BPDC and DC in the last ST). Therefore, I will start this row with a FPDC, the next ST will be a BPDC. Continue alternating between the FPDC and BPDC across. Ending with a DC in the top CH of the first CH 3 of the previous row. Turn
Rows 4 – 8 or 10
Repeat row 3
Work Rows 1-8 for the neck scarf and classic scarf (or 1-10 for the Cozy and Wrap sizes).
Section 2 – Waffle Stitch Body
Repeat the Waffle Stitch until you’ve completed the required number of rows for your size.
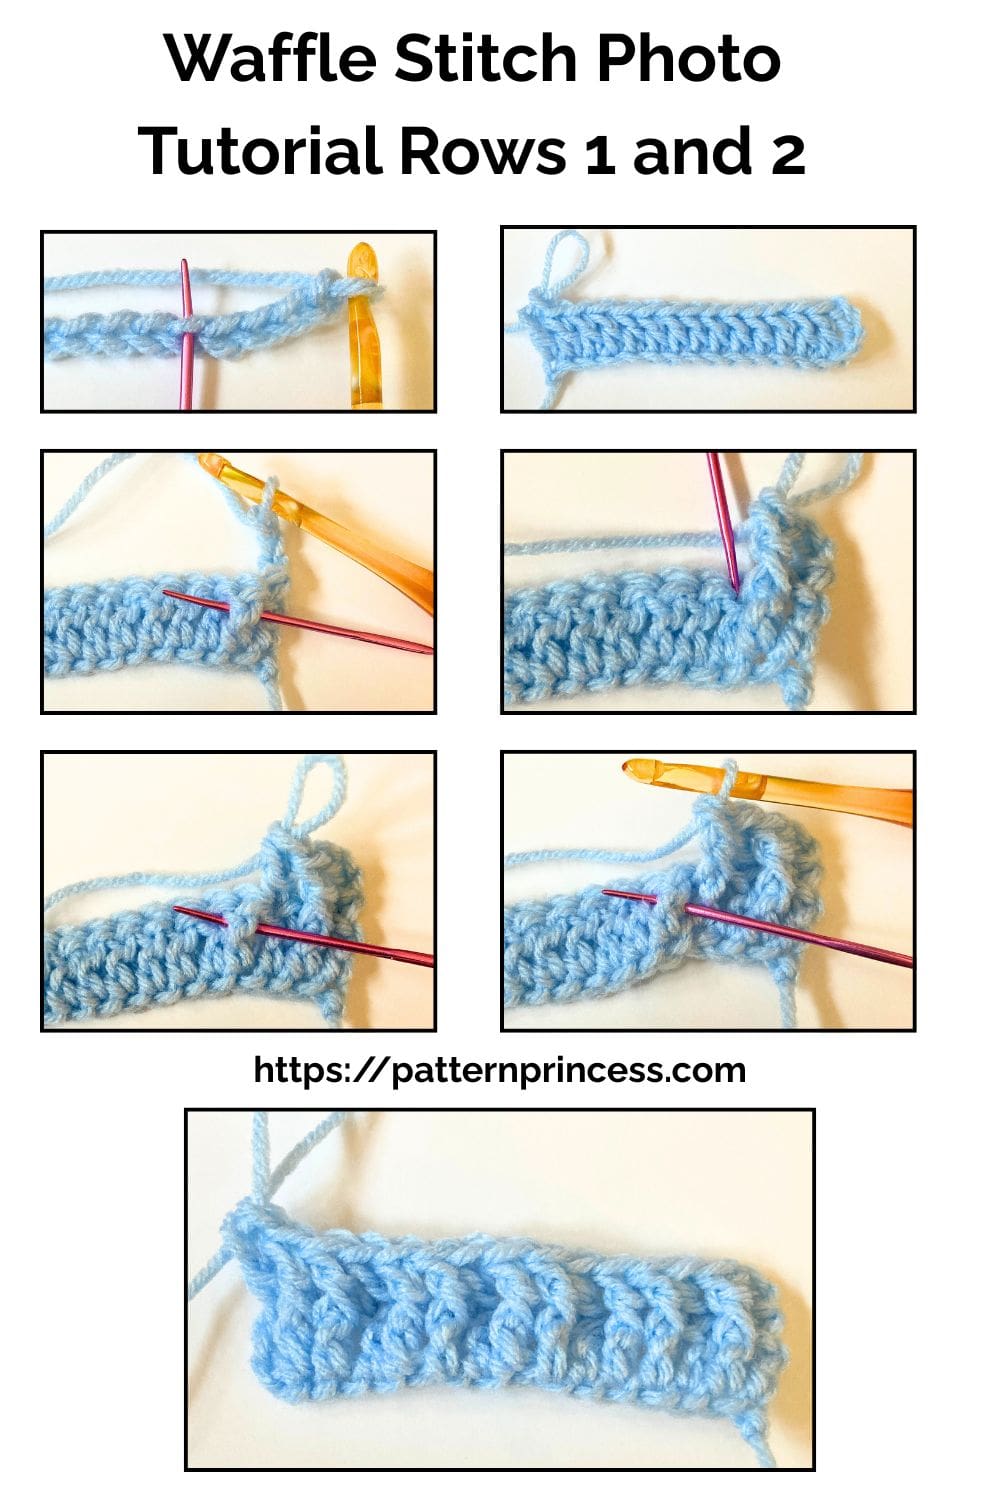
Row 1 of the Waffle Section
CH 3 (Counts as a DC). In the 2nd ST work 1 FPDC. In the 3rd ST work a DC. [1 FPDC, 1 FPDC, 1 DC]. Continue working the three stitches across between [ ]. Ending with a DC in the last ST. (Which is the top CH of the previous row CH 3). Turn
Row 2
CH 3 (Counts as a DC). In the 2nd ST, work 1 DC. In the 3rd ST, work 1 DC. For the rest of the row, thinking in groups of 3, work. [1 FPDC, 1 DC, 1 DC]. Repeat the three stitches across between [ ]. Ending with a DC in the top CH of the first CH 3 of the previous row. Turn
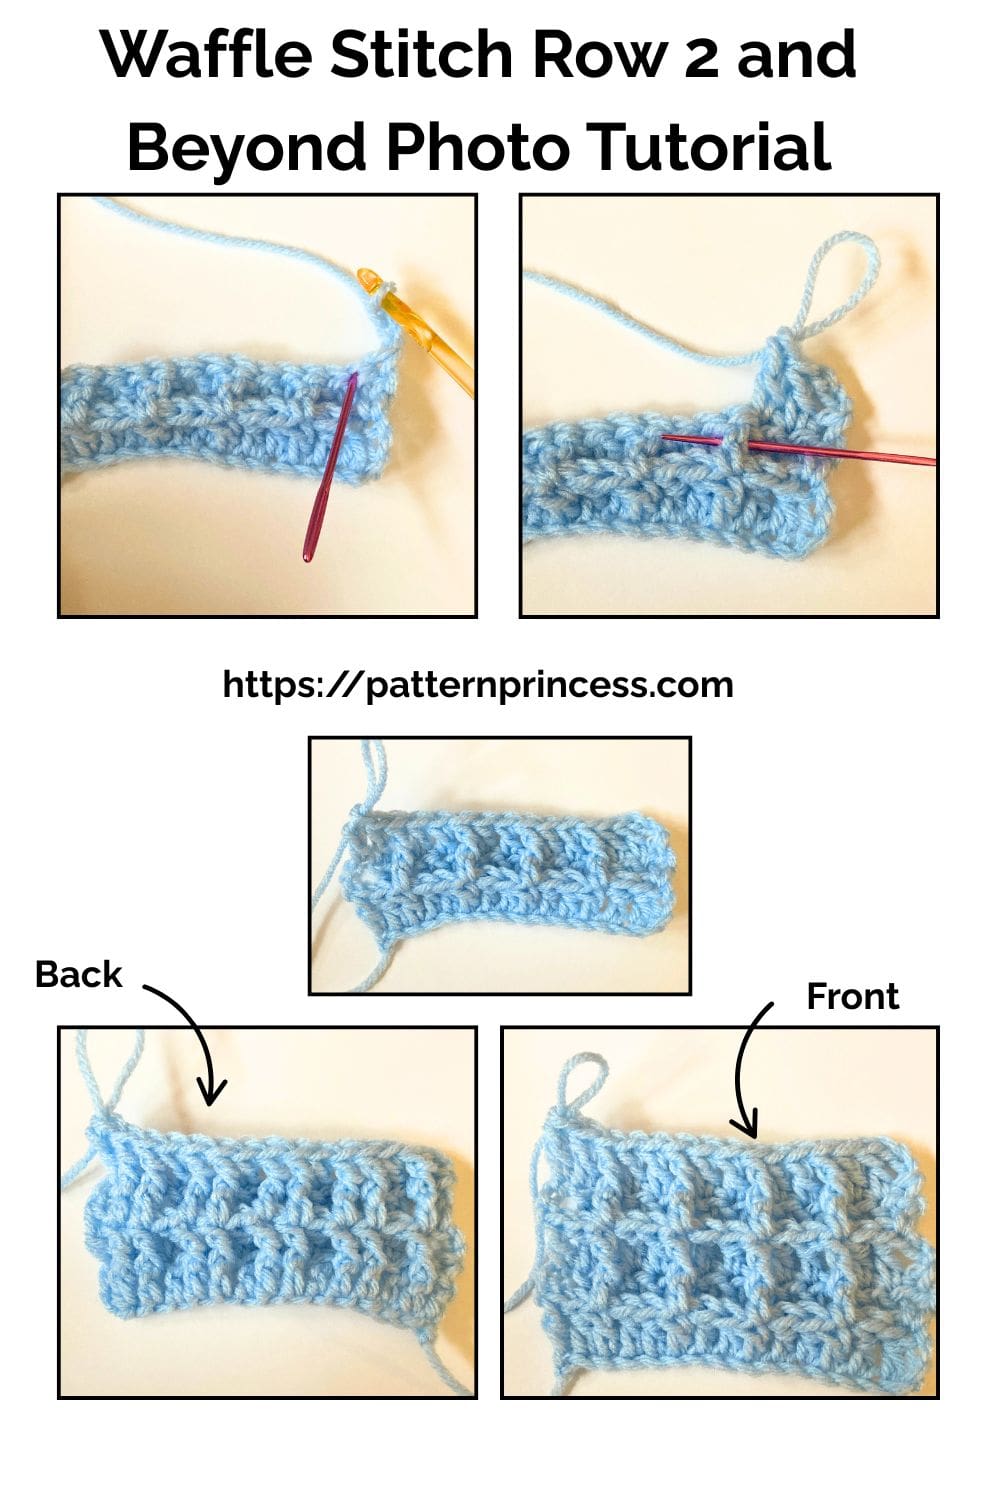
Rows 3 and Beyond
Continue repeating Rows 1 and 2 until you have worked the total number of waffle stitch rows for your size.
- Neck Scarf = work 94 rows of the waffle stitch
- Classic Scarf = work 104 rows of the waffle stitch
- Cozy Scarf (pictured) = work 116 rows of the waffle stitch
- Wrap Scarf = work 156 rows of the waffle stitch
Section 3 – Ribbed Edge
Row 1 of the Ribbed Edge
CH 3 (Counts as DC). Work a FPDC in the first ST. work a BPDC in the next ST. [FPDC in the next ST, BPDC in the next ST]. Repeat between [ ] across. End with a DC in the top CH of the first 3 SK CH STs. Turn
Row 2
Note: For the rest of the ribbing rows, complete a FPDC in the previous row BPDC and a BPDC in the previous row FPDC. This elongates that stitch and creates the beautiful, ribbed look.
CH 3 (Counts as DC). (I ended row 2 with a BPDC and DC in the last ST). Therefore, I will start this row with a FPDC, the next ST will be a BPDC. Continue alternating between the FPDC and BPDC across. Ending with a DC in the top CH of the first CH 3 of the previous row. Turn
Rows 3 – 8 or 10
Repeat row 2
Work Rows 1-8 for the neck scarf and classic scarf (or 1-10 for the Cozy and Wrap sizes).
Finishing
Use the tapestry needle to weave in any loose ends on the back side of the work. I like to weave back and forth 3 to 5 times. Cut off the excess yarn.
Video Instructions on our YouTube channel of the Crochet Waffle Stitch
Whether you’re making a quick gift, crocheting for a winter wardrobe, or simply looking for a relaxing textured project, we hope this scarf brings you as much enjoyment to make as it has brought us.

Care Instructions
This scarf is made with 100% acrylic yarn, making it easy to care for. Machine wash on a gentle cycle using cool or warm water. Tumble dry on low heat or lay flat to dry if preferred. Avoid high heat to help maintain the blanket’s shape and softness for years to come.

You can find Victoria crocheting, quilting, and creating recipes. She has cooked in restaurants for over 20 years, including many larger parties. She learned to crochet when she was just 11 years old and has been crocheting ever since; over 50 years now. Over 40 years ago, she loved her first class in sewing and continues to hone her skills in quilting. Many have enjoyed the handmade gifts over the years. In her professional career, she has worked in management in a wide variety of businesses including higher education as a dean of a division. All the while attending college part-time to achieve her doctorate in higher education with an emphasis in e-learning.
Stay connected with Pattern Princess
Add Pattern Princess as a preferred source in Google Search to make it easier to find our crochet patterns, recipes, quilt patterns, and other creative projects when you're looking for something new to make.
