Last updated on July 4th, 2024 at 11:35 pm
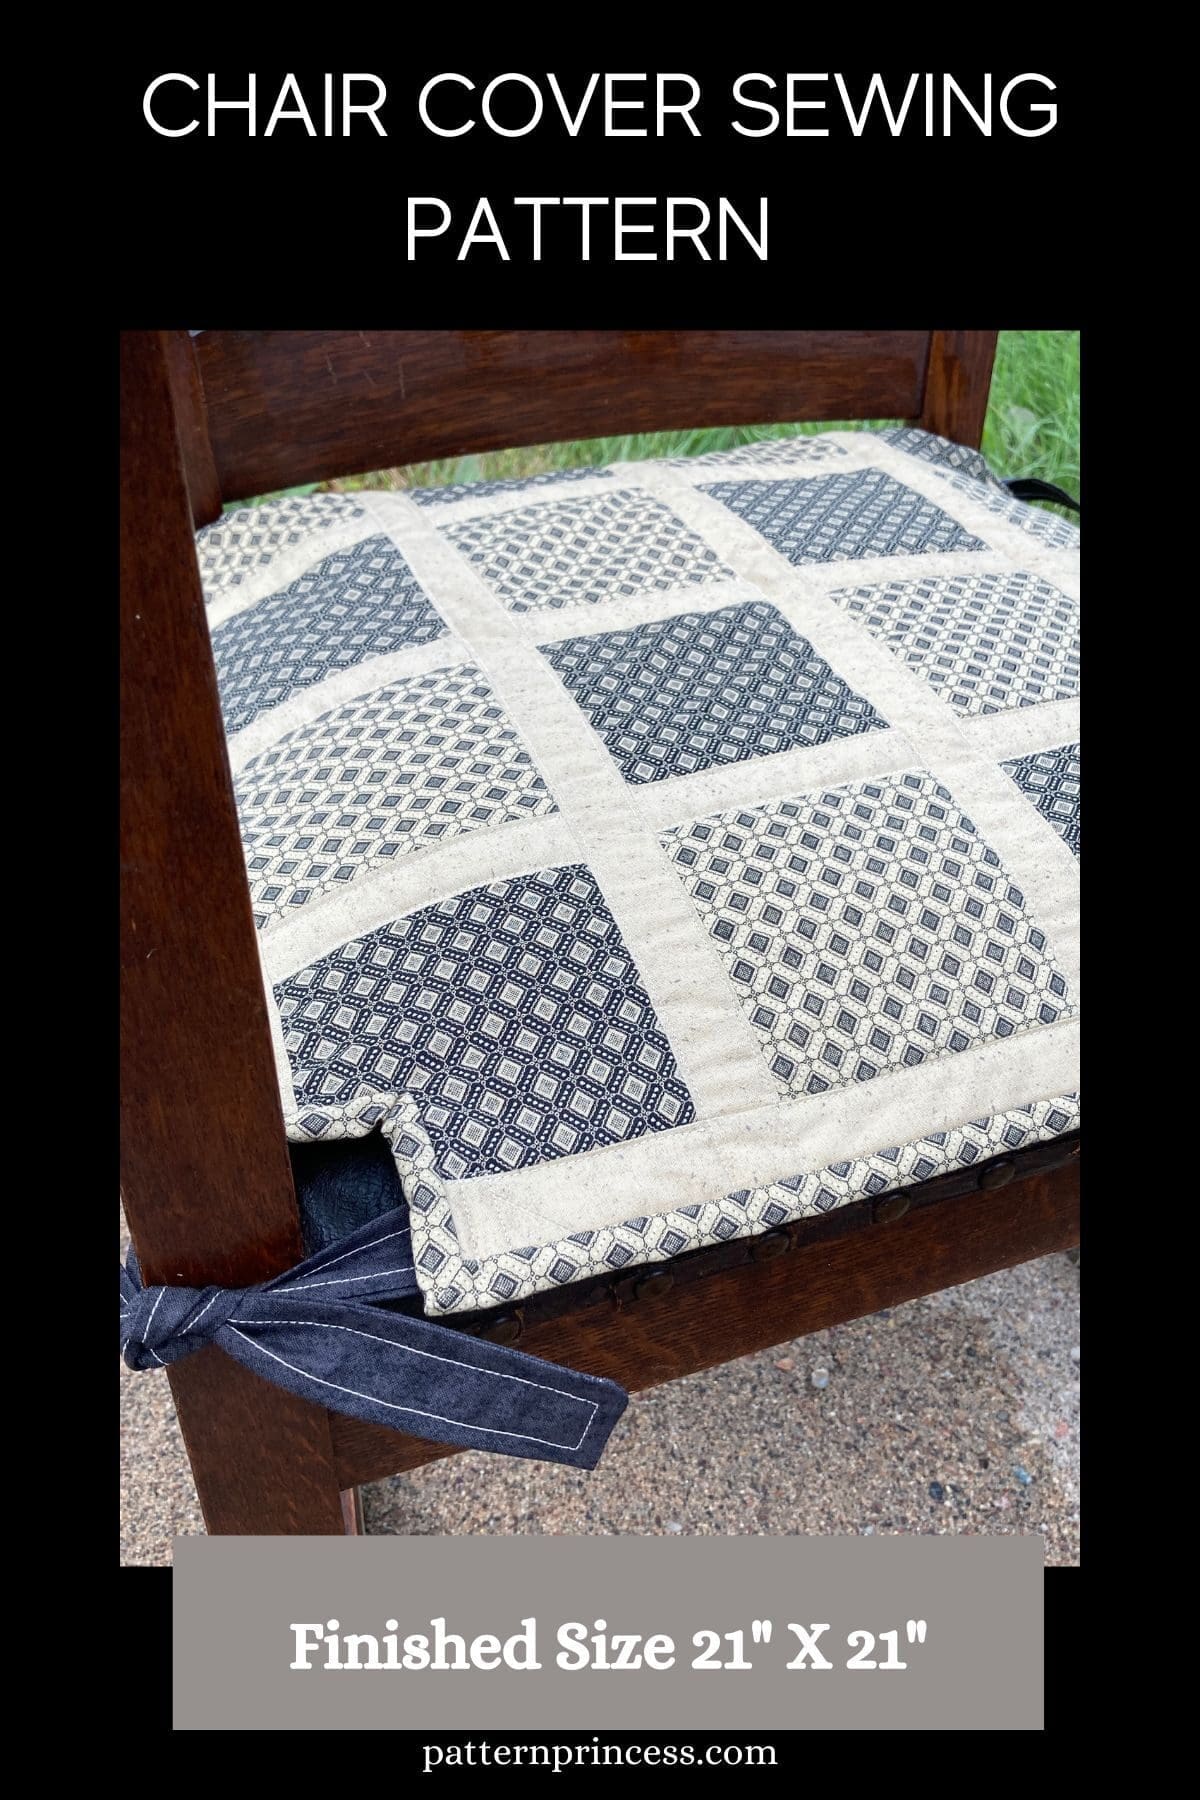
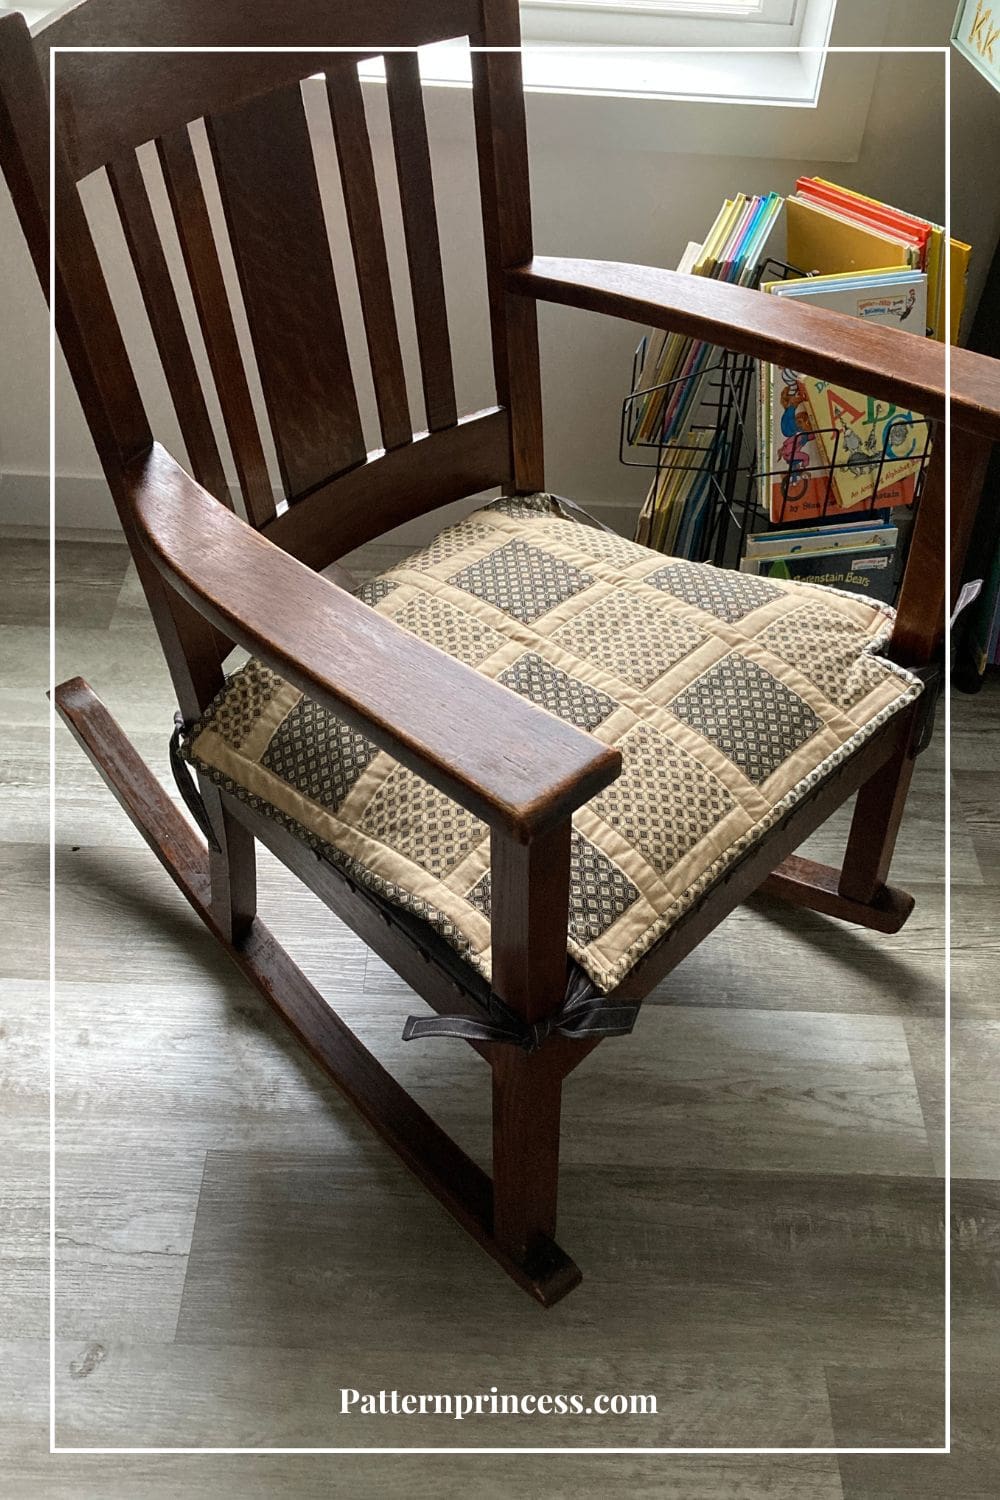
I am sharing this chair cover sewing pattern with you today that I made for a very special antique rocking chair. Coverings can make a huge impact in any space while adding an element of comfort. But with so many different fabrics, designs, and shapes available, it can be hard to find just the right pattern.
Once you know how to make diy chair covers, there are so many design options you can use for color coordination within your home or even office chairs or dining chairs.
Post contains affiliate links, and we earn commissions if you shop through the links on this page. For more information, please read the disclosure section under the About Us page.
Picking Out the Fabric and Design
My daughter was instrumental in choosing the fabric colors for this chair. This rocking chair is a very old chair, and it will be used in her baby’s nursery in a few months. While there are new chairs we could get, this chair has special meaning for her.
It was owned by her great grandfather, and she is due with her first baby, which will also be a boy. We do not know anything about upholstery. If you look closely at the dirty chair, the leather on the seat is starting to crack. She really wants to keep as much of the original chair intact as possible.
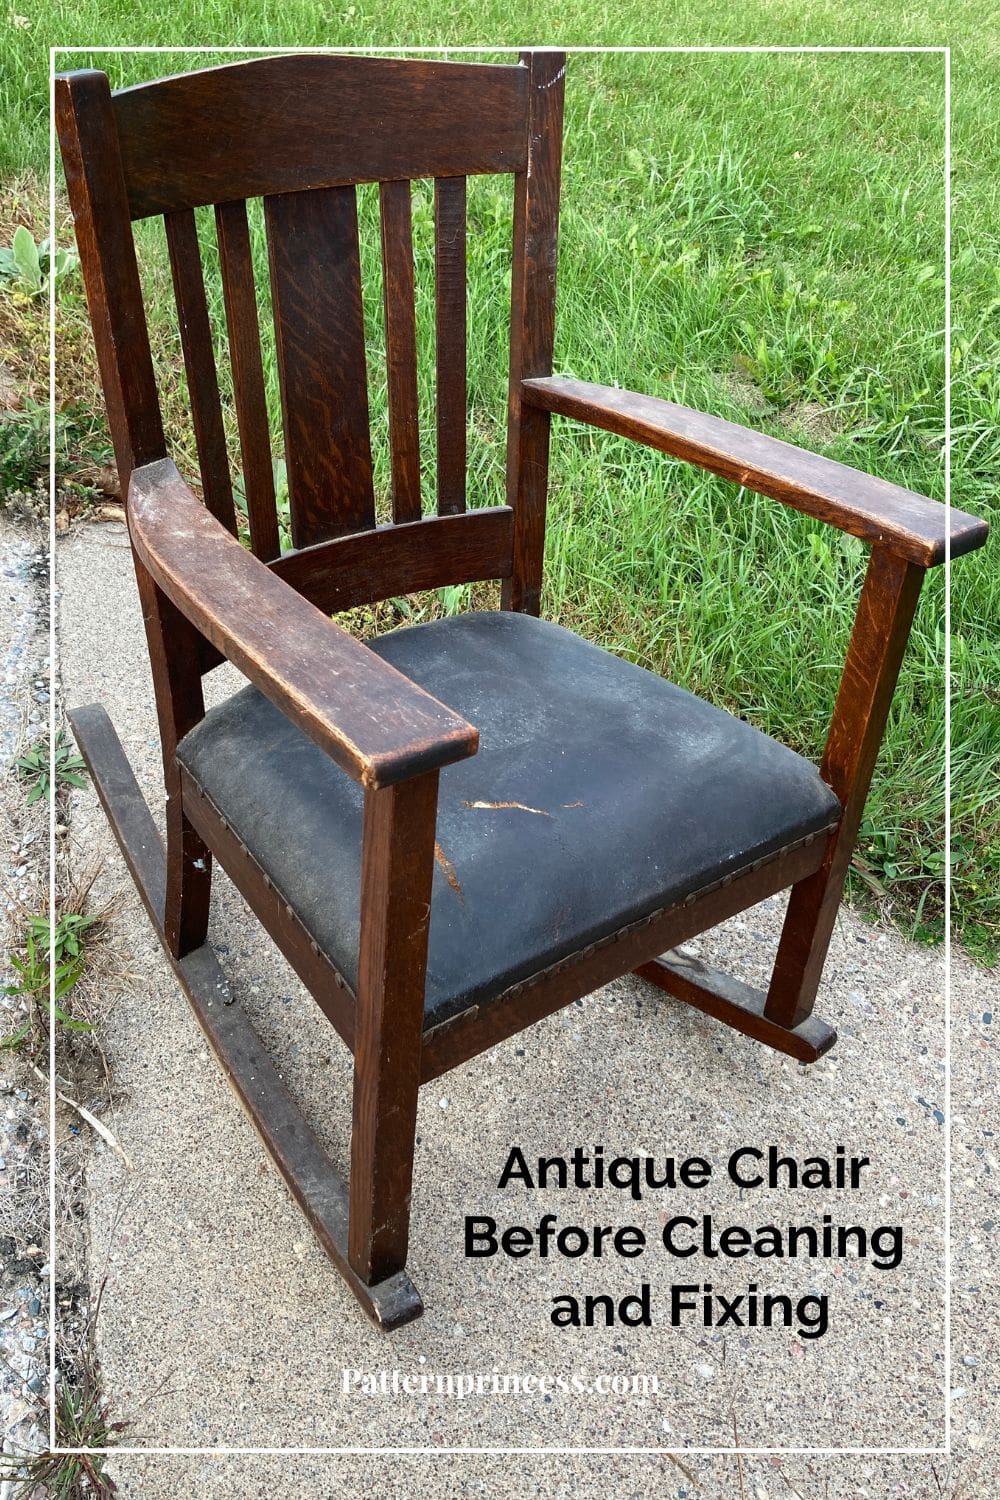
My husband, her dad, had to fix a few loose rungs. Other than that, it needs to be cleaned up and something needs to be done about the seat. I thought I could make a slightly padded chair cover so we would not make things crack more on the cushion cover. Worse yet, we don’t want to catch our pants on the cracked seat cushion and tear them.
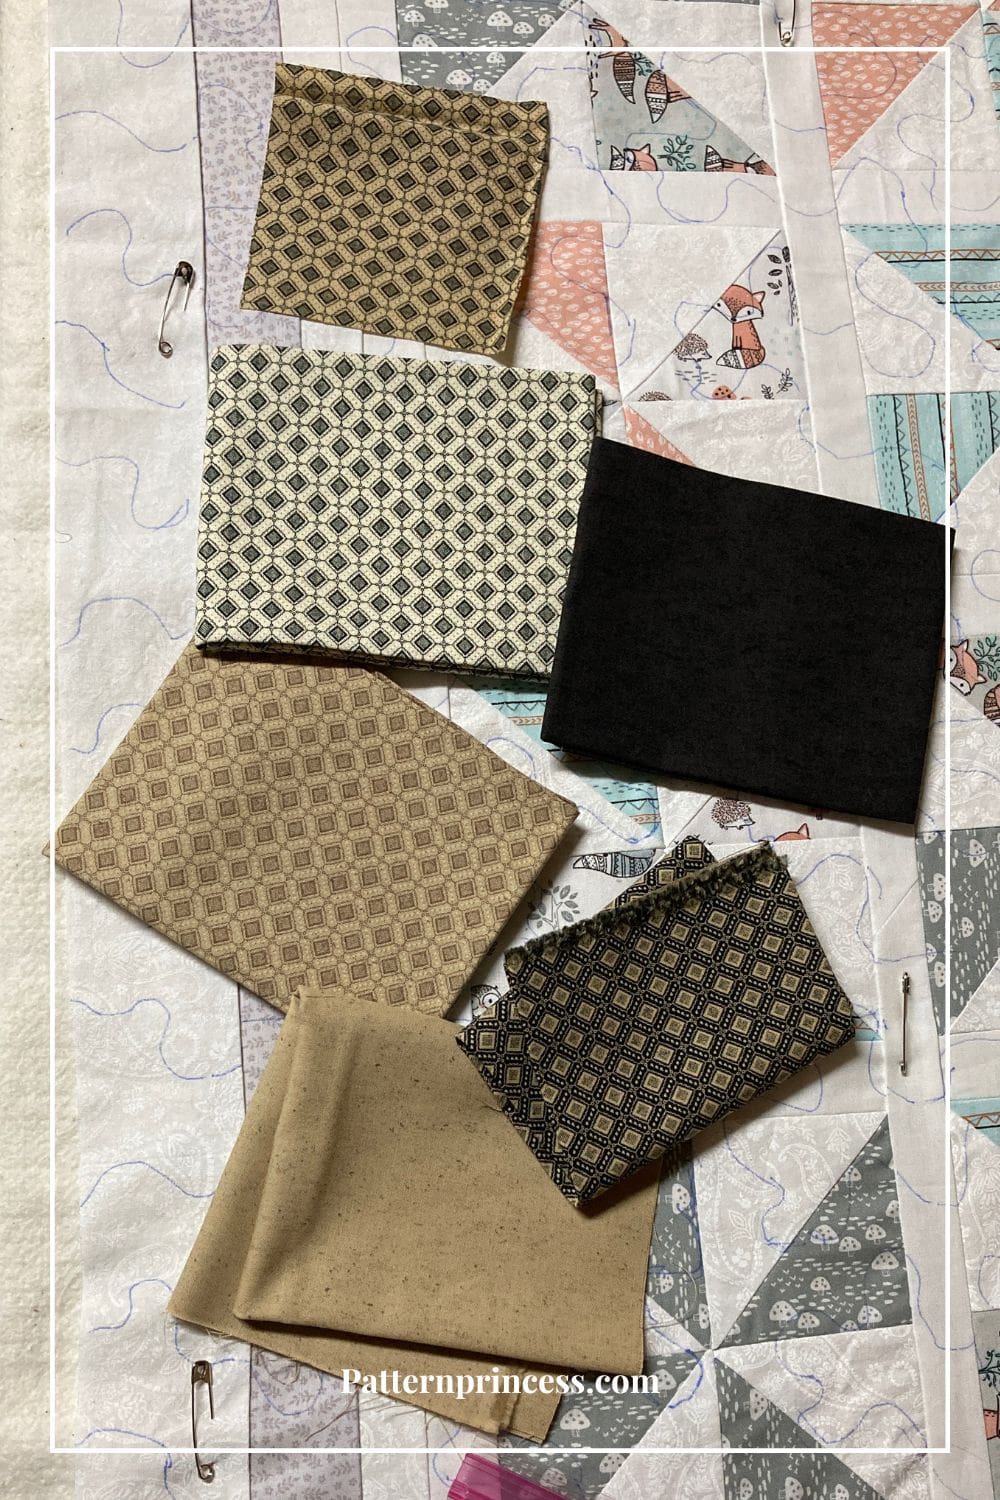
I had purchased six fat quarters at a local fabric store that I just fell in love with. If you are a quilter reading this, you know how addictive it can be buying that gorgeous fabric.
This particular fabric had more of a manly print on it. So, without any project in mind, I purchased a fat quarter of each. When my daughter went through my fabric stash, this is what she picked out.
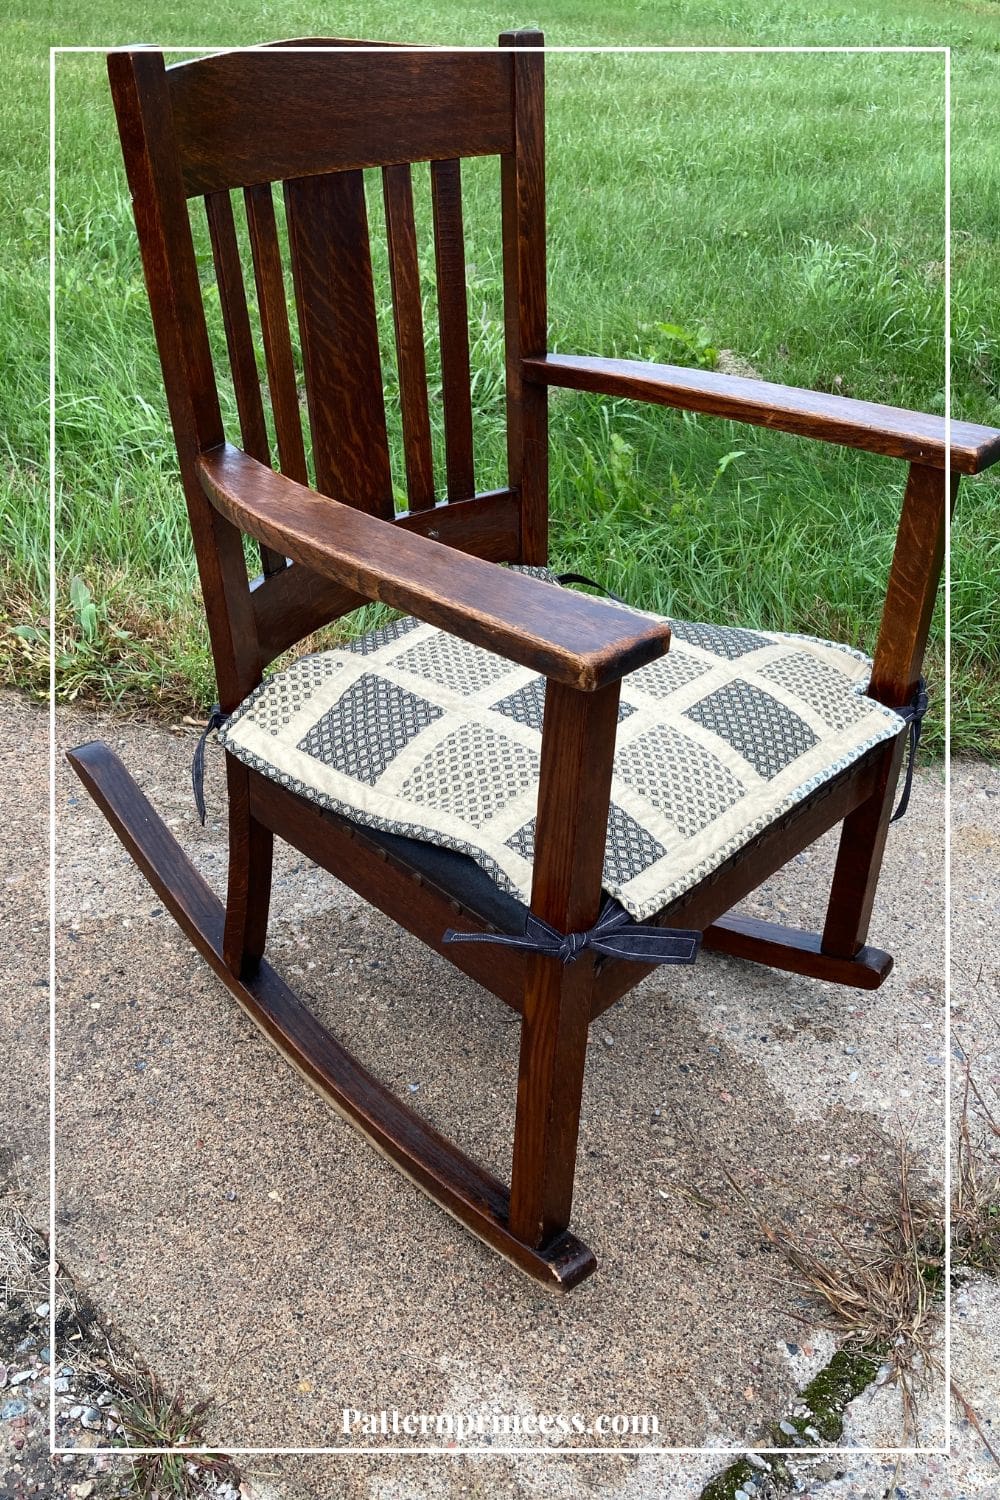
While this rocking chair will be in a nursery, she wanted it to fit with home décor for many years to come.
Now, I had to figure out an easy design that will help showcase the material.
Easy Simple Quilted Chair pad
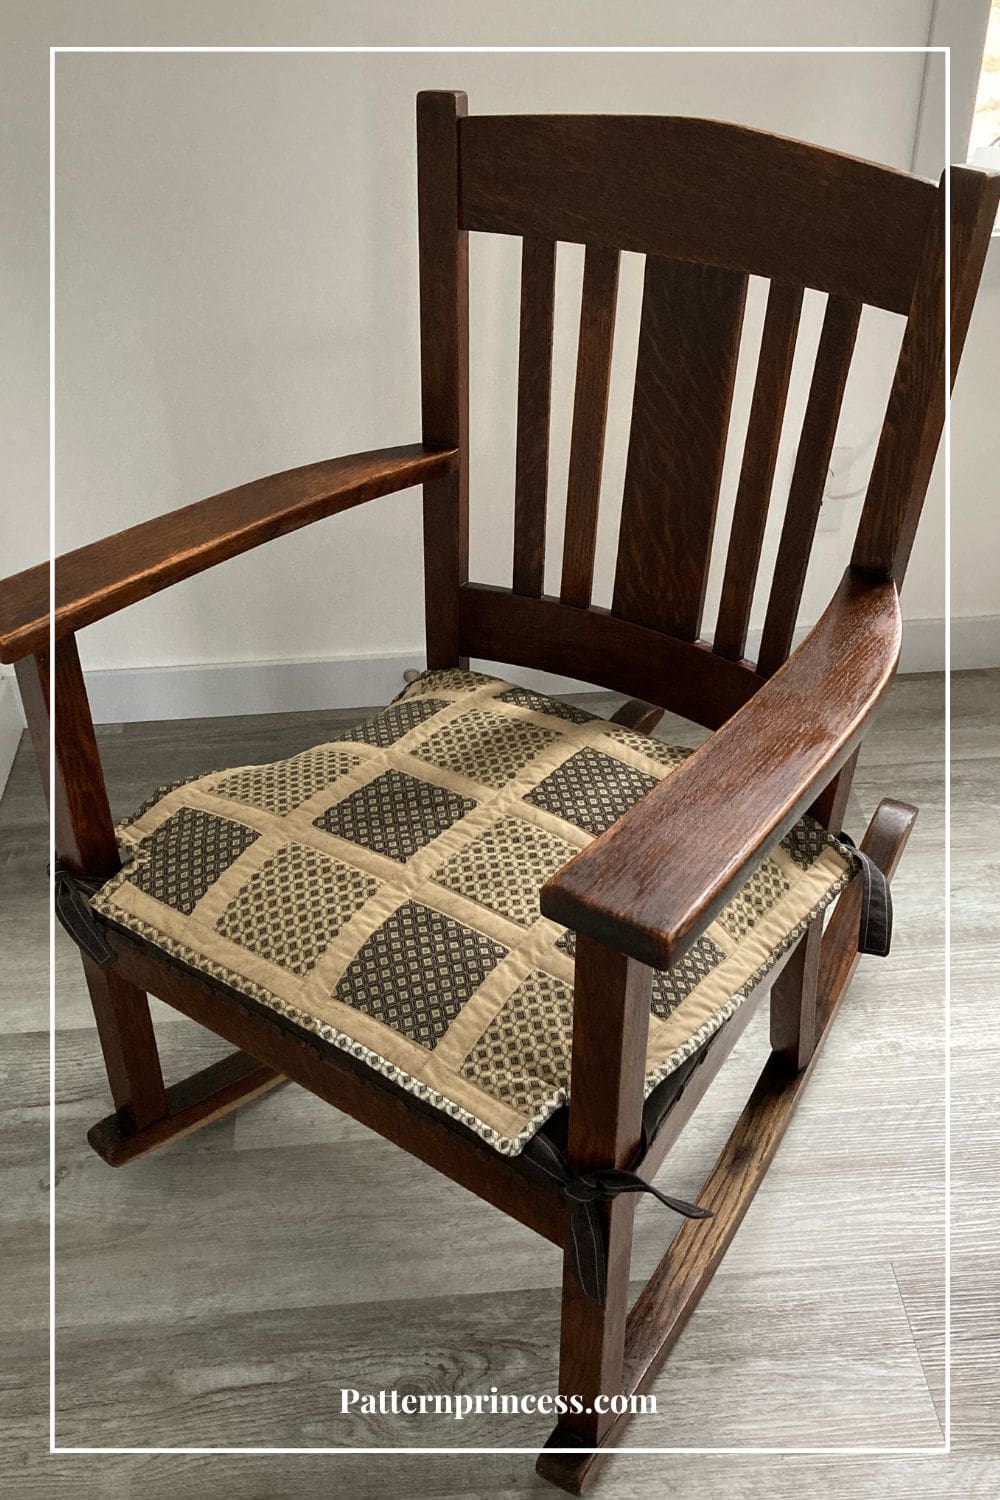
Make this by sewing squares together, adding sashing, padding, a backing fabric, and finishing with a binding for the edge and cute ties to hold it on. You can quickly stitch up something beautiful to turn your ordinary wooden chair into an elegant piece of decor.
Using Six Fat Quarters for Sewing Pattern
It was a bit challenging to figure out how to use just these six fat quarters of fabric for this pattern. I am quite pleased with the results.
This pattern has a sashing between each square to break up the brown fabric colors. Each row has four squares of brown fabric. Two of medium brown/Tan and two darker brown/tan colored fabrics.
For the backing of the chair pad, I used three of the fat quarters sewn together.
The border and the ties are made using all the leftover fabric.
If you’re looking for a simple chair seat cover sewing pattern to sew up a fast and easy using fabric mixing you probably already have on hand, this free sewing pattern is for you.
Directions: Chair Cover Sewing Pattern
Skill Level
This quilted chair pad top is great for a beginner at quilting. However, adding the binding in the notched corners of the chair pad may be challenging for a beginner.
You should be comfortable with sewing squares together. Measuring and using a rotary cutter. Nesting seams together and pressing seams.
Finished Size Information
The finished size of the pillow cover will be approximately 21-inches x 21-inches.
Note: all four corners have a 2-inch square cut out to accommodate the wooden chair corners. Depending on your chair type, you may not need to cut out the 2-inch squares on the corners. This was more of a tailored fit for this antique rocking chair.
Materials
Six Fat Quarters
Cut the following squares from the medium color and dark color fabrics.
- Cut 8 pieces, medium color fabric 4 ½-inches X 4 ½-inches.
- Cut 8 pieces, darker color fabric 4 ½-inches X 4 ½-inches.
Sashing
Cut the following sashing fabric pieces using the lighter fabric. I used a tan color fabric.
- Cut 12 pieces, 1 1/2-inches x 4 1/2-inches. (Vertical sashing between the squares).
- Cut 3 pieces, 1 1/2-inches x 19 1/2-inches. (Horizontal sashing between the rows).
- Cut 2 pieces, 1 1/2-inches x 19 1/2-inches. (Vertical sashing on the sides).
- Cut 2 pieces, 1 ½-inches x 21 ½-inches. (Horizontal sashing on the top and bottom).
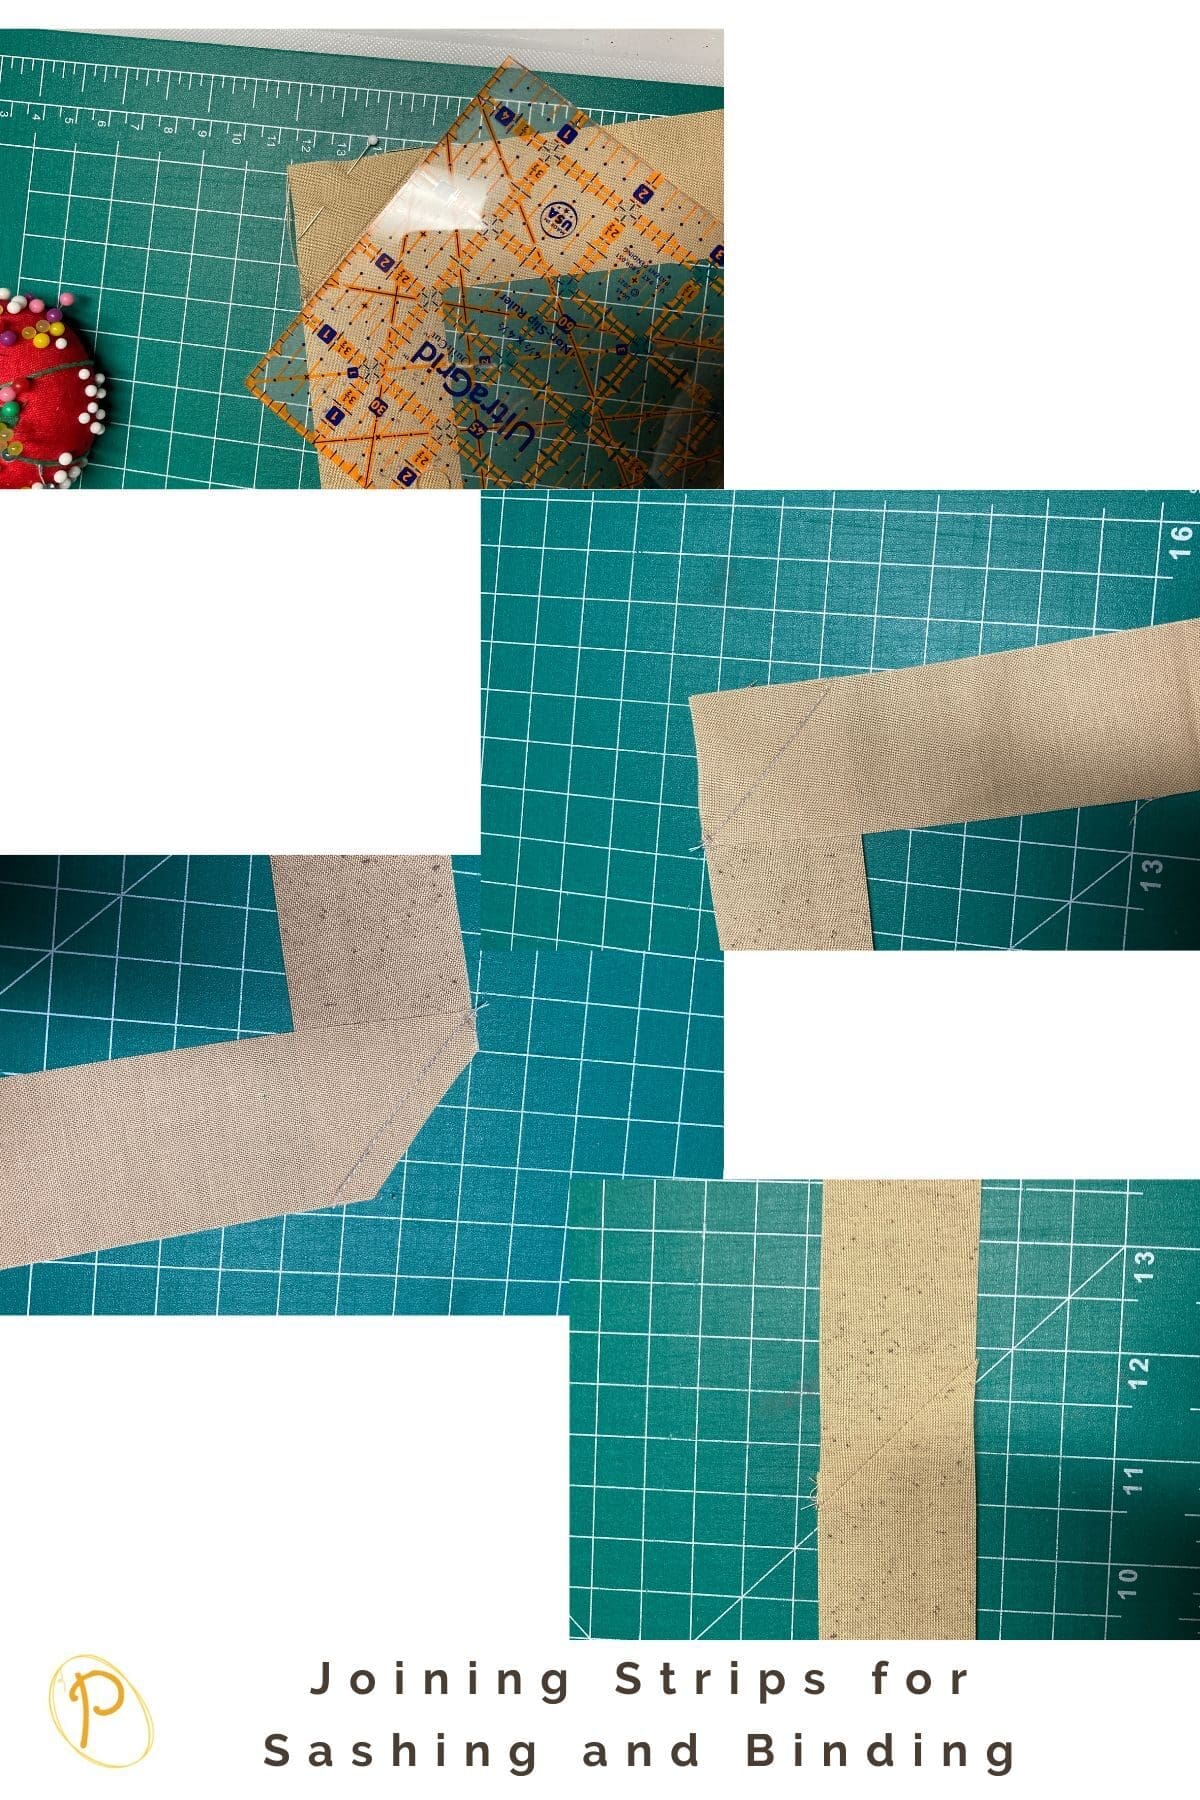
Note: My fabric pieces were not long enough. Therefore, I had to join pieces together to make them long enough. I did this just like you would join the fabric for making your binding.
Backing for chair pad
I used strips of the remaining three fat quarters for the backing. When sewn together and trimmed the backing measured 22-inches x 22-inches.
Batting
Cut a piece of batting 22-inches square.
Ties
Cut 8 pieces, 2 1/2-inches x 11-inches. Use any remaining fabric.
Binding
2 1/2-inches x 96-inches. Using the Remaining Fabric, make the binding by alternating the fabric colors.
Thread
Equipment/Tools
Rotary Cutter
Quilting Ruler
Cutting Mat
Rotating Cutting Mat
Iron
Ironing Board or Pressing Mat
Pins
Sewing Machine
Pattern Notes
This pattern is for a 21 x 21-inch pillow form. The chair has wooden posts on the corners, which required me to make a 2-inch square cut in each corner. If your chair does not have this problem, skip this step.
Use a ¼-inch seam allowance. I recommend using a special presser foot with a ¼-inch guide if you have one for your machine. This will help you get uniform seams, and matching seams.
Nest your seams. This means that the seams of each row are aligned, and the pieces fit together almost like the pieces of a puzzle.
Right Sides Together. Sew fabric together with right sides together. Unless otherwise noted.
Start with the Chair Pad Top Fabric Design
Begin with the following fabric squares and sashing pieces.
- Cut 8 pieces, medium color fabric 4 ½-inches X 4 ½-inches.
- Cut 8 pieces, darker color fabric 4 ½-inches X 4 ½-inches.
- Cut 12 pieces, tan color fabric 1 1/2-inches x 4 1/2-inches. (Vertical sashing between the squares).
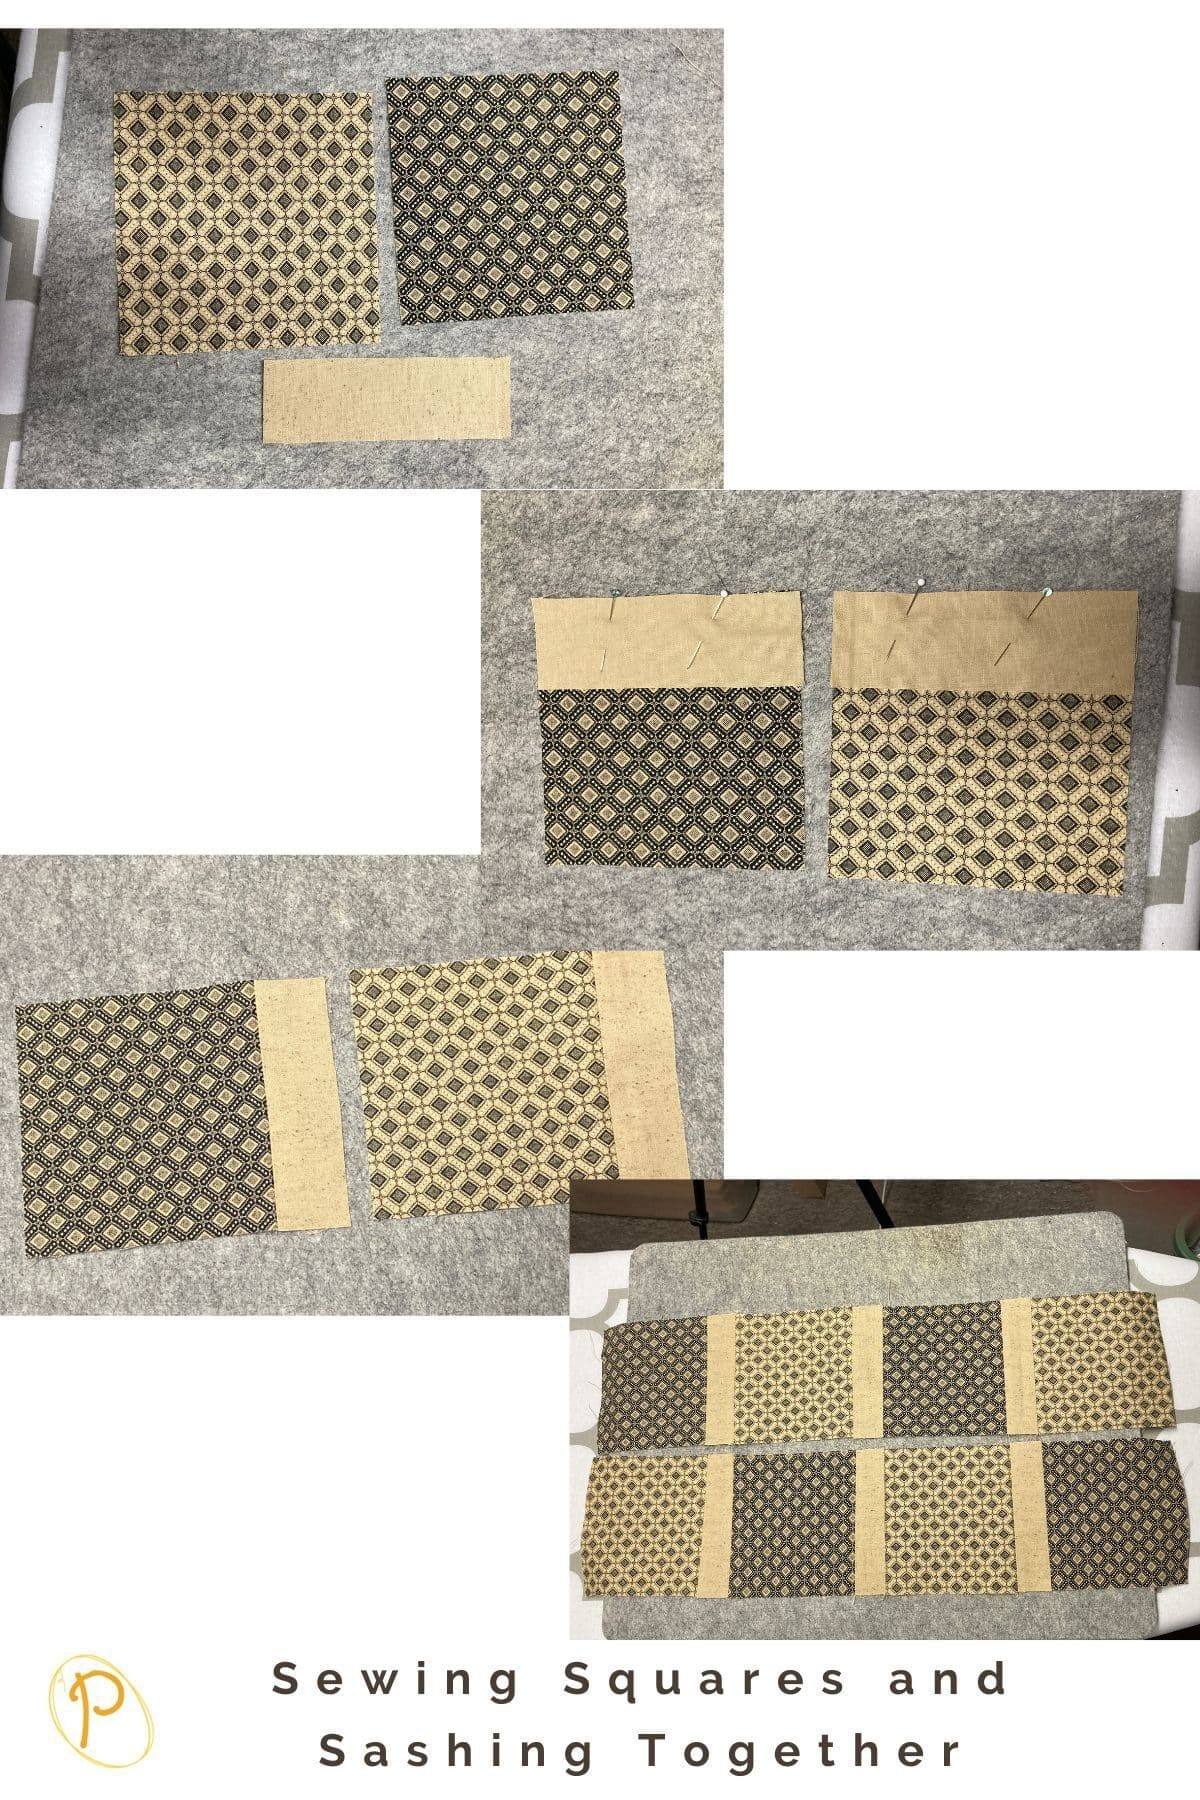
With right sides together using ¼-inch seams, sew a sashing strip to one side of 12 squares (6 medium color and 6 darker color). At this point, there will be 4 squares left, 2 of the medium and 2 of the darker fabric squares. Set those aside for the moment.
Alternating the dark and medium color, sew the other side of the square (side without the sashing) to the sashing of one of the other squares. There should now be a square, sashing, another square, and another sashing.
Add another square onto the sashing in the alternating color.
Next take one of the 4 squares in an alternating color that were set aside and sew that onto the sashing to complete the row.
This row should now have two darker color squares, two medium color squares, and three sashing pieces between the squares.
Repeat this process three more times.
Press all seams to one side or open.
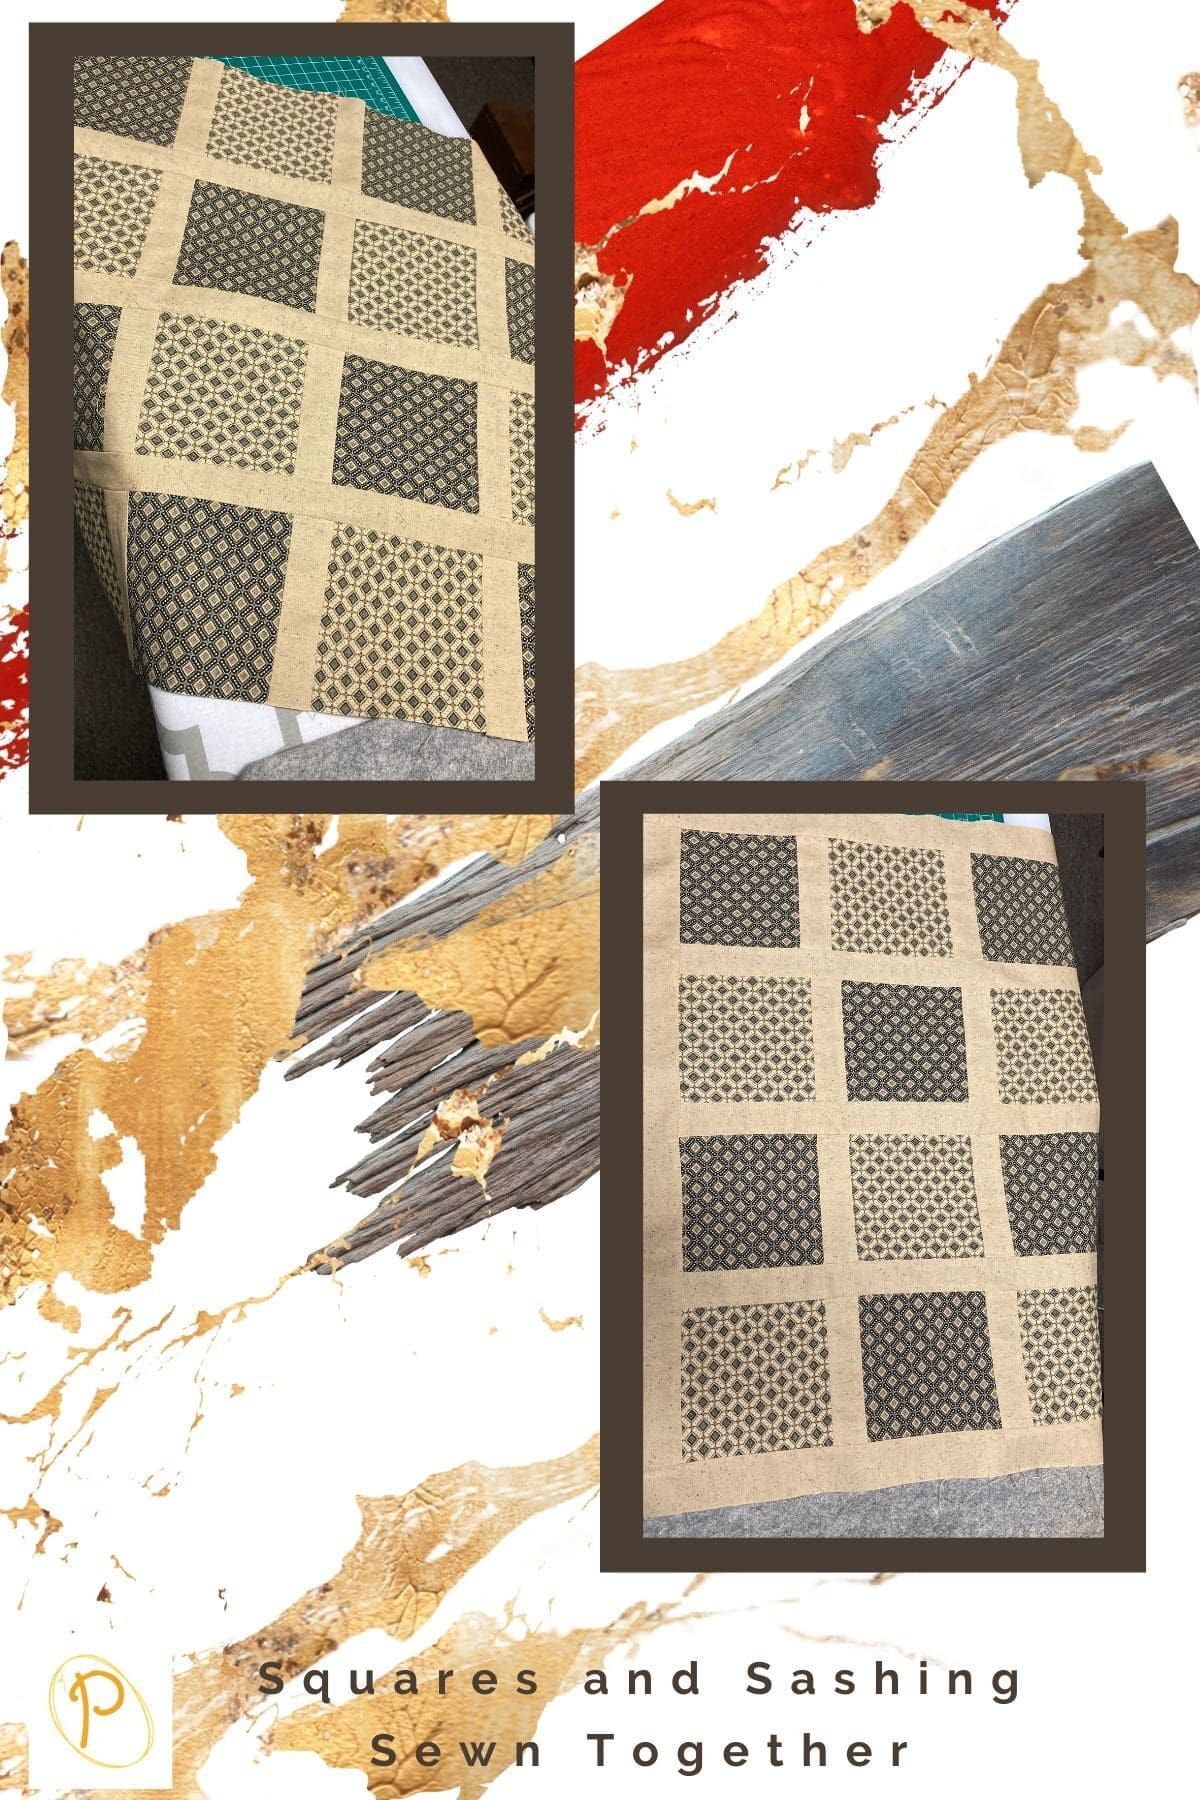
Add Horizontal Sashing Strips
In this next step, you will be using 3 pieces of sashing measuring 1 1/2-inches x 19 1/2-inches. (Horizontal sashing between the rows).
With the right sides together using ¼-inch seam allowance. Sew 1 sashing strip onto the bottom of the top row. Note: Make sure to align the vertical sashing pieces on either side of this horizontal sashing. Kind of like you would when nesting seams. Just so that they are not off a little on either side.
Repeat adding the sashing to the bottom of the next two rows.
At this point, there should be three rows with sashing attached to the bottom and one row without any sashing.
Next attach the rows without the sashing to the opposite sides of the sashing and attach the bottom row to the bottom sashing piece.
Press all seams to one side or open.
Vertical Sashing Pieces on the Sides
In this next step, use 2 pieces of sashing 1 1/2-inches x 19 1/2-inches. (Vertical sashing on the sides).
With the right sides together using ¼-inch seam allowance. Sew 1 sashing strip to each side of the chair cover top.
Press all seams to one side or open.
Horizontal Sashing Pieces on the Top and Bottom
In this step, use 2 pieces of sashing 1 ½-inches x 21 ½-inches. (Horizontal sashing on the top and bottom).
With the right sides together using ¼-inch seam allowance. Sew 1 sashing strip to the top and 1 sashing strip to the bottom of the chair cover top.
Press all seams to one side or open.
Quilting the Chair Cover
Follow the directions below to quilt the chair cover to the 22-inch square piece of batting and the 22-inch square piece of backing fabric.
As mentioned above, I used the six fat quarters to make this. Therefore, I needed to piece the backing fabric to make the square.
Cut strips in the desired size. Sew with right sides together and iron the seams open or to one side. If you have other scrap fabric that is a one piece large enough to be used as this size square, feel free to do so.
Layering the Top, Batting, and Back
I refer to layering the quilt as “sandwiching” the pieces. You need to sandwich the top fabric and back fabric with the batting in the middle.
Tape the Backing Down
On a hard surface such as a table or floor, use painter’s tape to tape down the backing fabric. The right side of the backing fabric should be facing out.
As you tape the back down, make sure the fabric is smooth. Run your hands over the fabric to smoother out the wrinkles before taping all four sides down.
Add the Batting
Next, lay the batting on top of the taped-down backing fabric. Again, smooth with your hands to make sure all the wrinkles are removed. This also helps adhere the batting to the backing fabric and keeps it from slipping as you add your top.
Place the Chair Cover Top
Finally, center the chair cover top you just sewed together in the previous instructions over the top of the batting. This should be centered with the right side facing up.
You will notice that the batting and the back piece of fabric are extending approximately 1-inch beyond the top fabric. This is good practice to have this a little larger when sewing the pieces together just in case there is any slippage.
Once you are done sewing the pieces together, the backing and batting are trimmed to the chair cover top size.
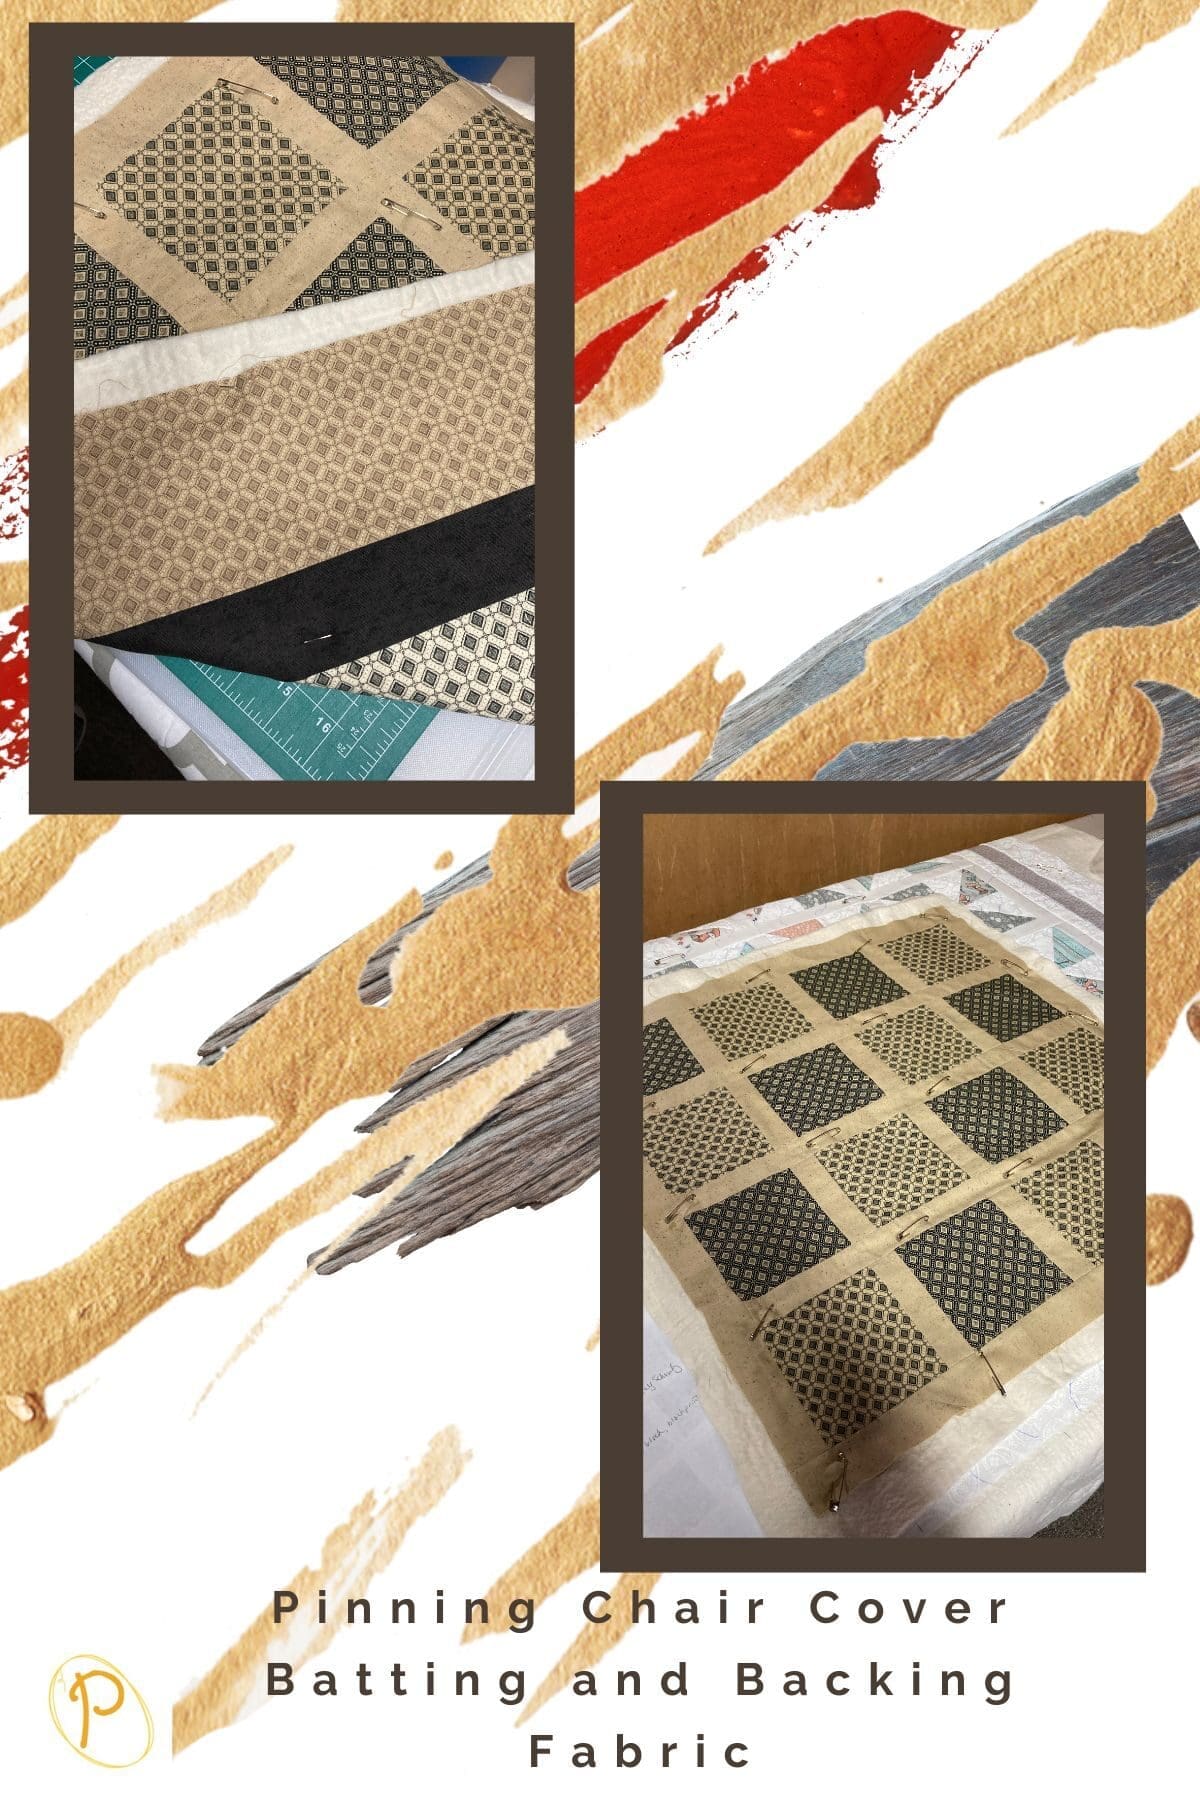
Baste the Layers Together
I used safety pins placed about every 4 or 5 inches to baste the layers together.
Make sure all wrinkles are smoothed out. Adjust basting if needed to remove any wrinkles.
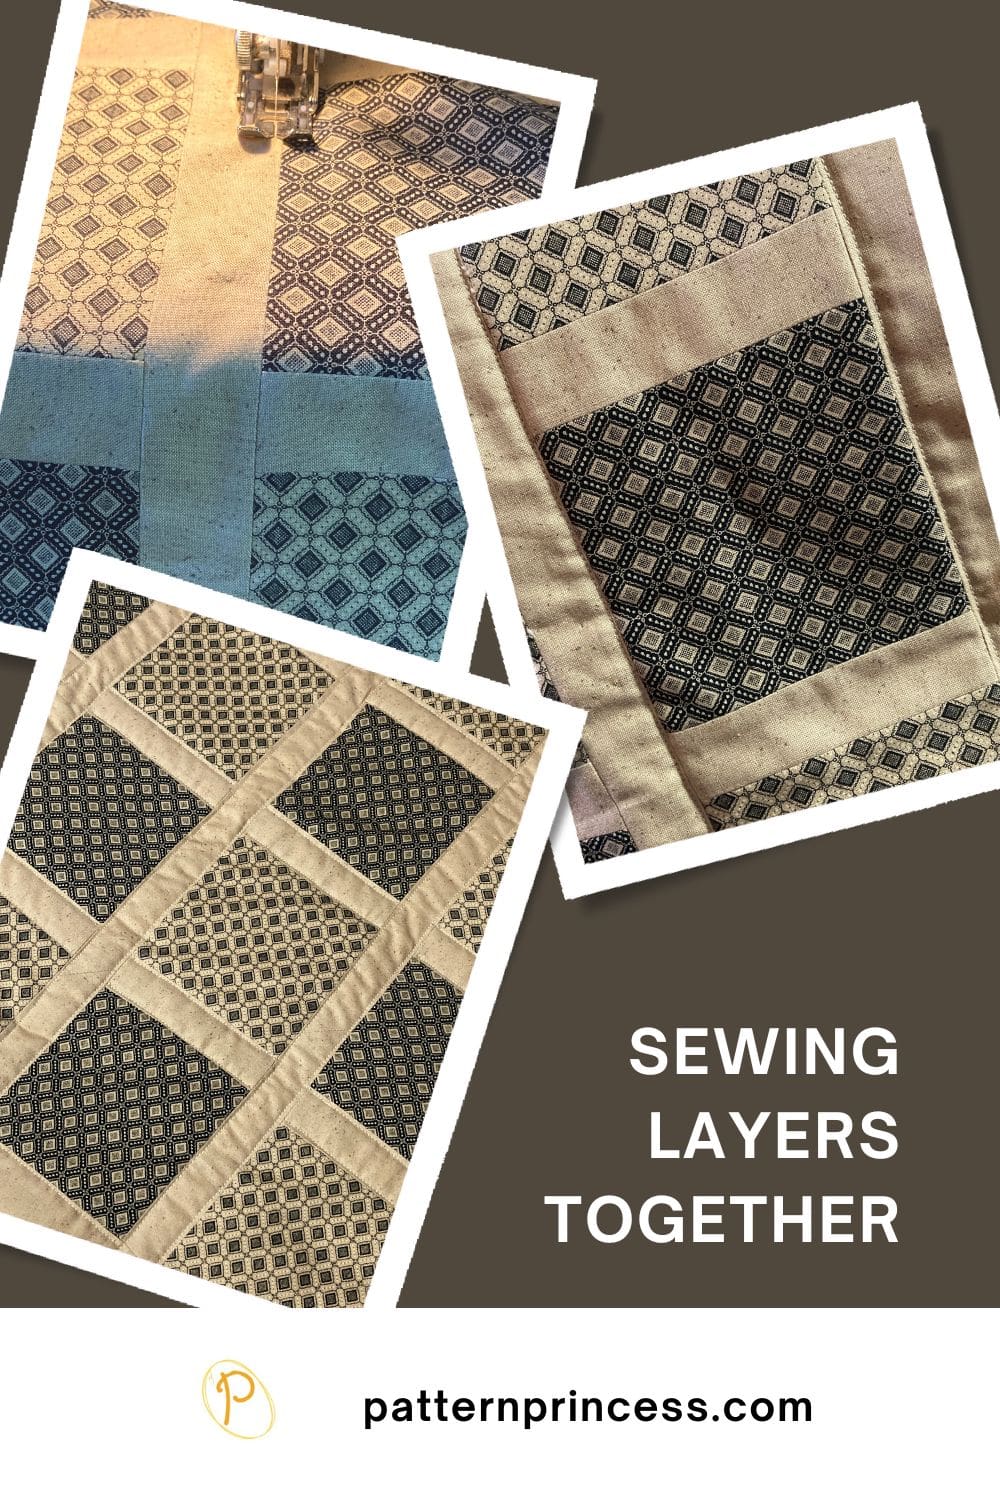
Sewing the Layers Together
You can use whatever free-motion stitch you’d like or use a straight stitch to quilt in the ditches or along the seams.
I chose to sew along all the sashing lines in the middle of the chair cover top. Both vertically and horizontally. Pro Tip. A walking foot works well for this application as it helps move the top fabric through. Therefore, there is less bunching and fabric movement.
As you sew through the layers, remove the basting safety pins as you come up to them.
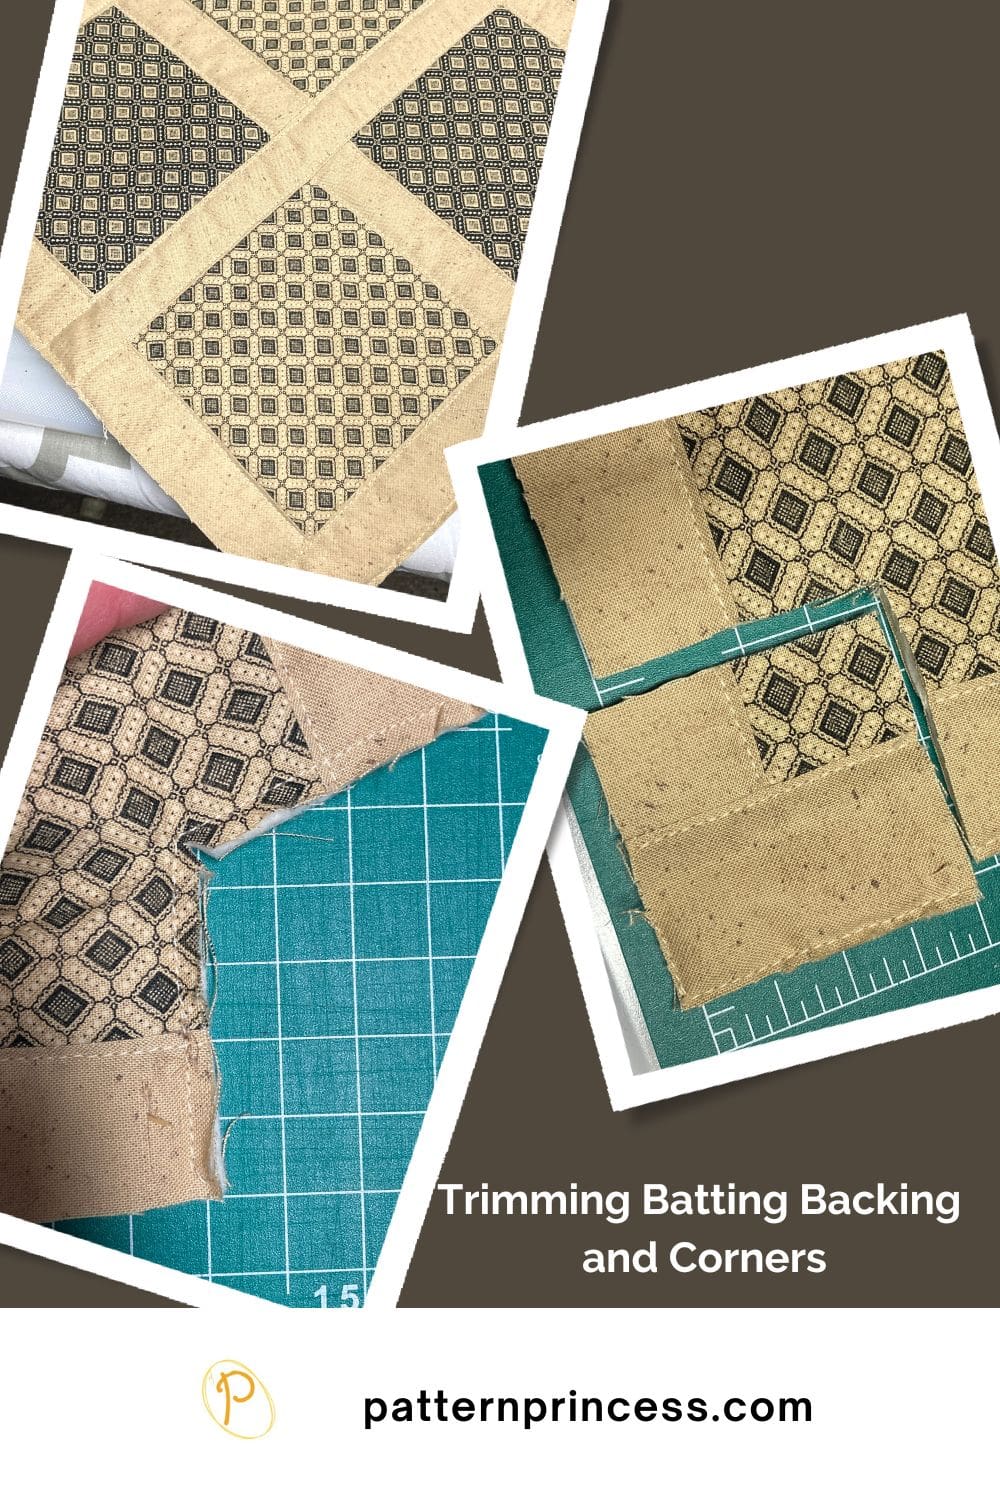
Trim the Batting and Back
Trim the batting and backing to the edge of the chair pad top. I use a ruler and a rotary cutter to accomplish this task. Work carefully, so you don’t cut into your project.
Optional Step: Making Space for the Chair Rung
If you don’t have a chair made like ours, you may not need to cut out a 2-inch square out of each corner. If that is the case, skip this step.
Since this antique chair has the runs in the end, I needed to measure to determine the clearance needed. Our chair needed a 2-inch square cut out of each corner.
Using ¼-inch seam allowance baste the corners where you just cut the square pieces out to secure.
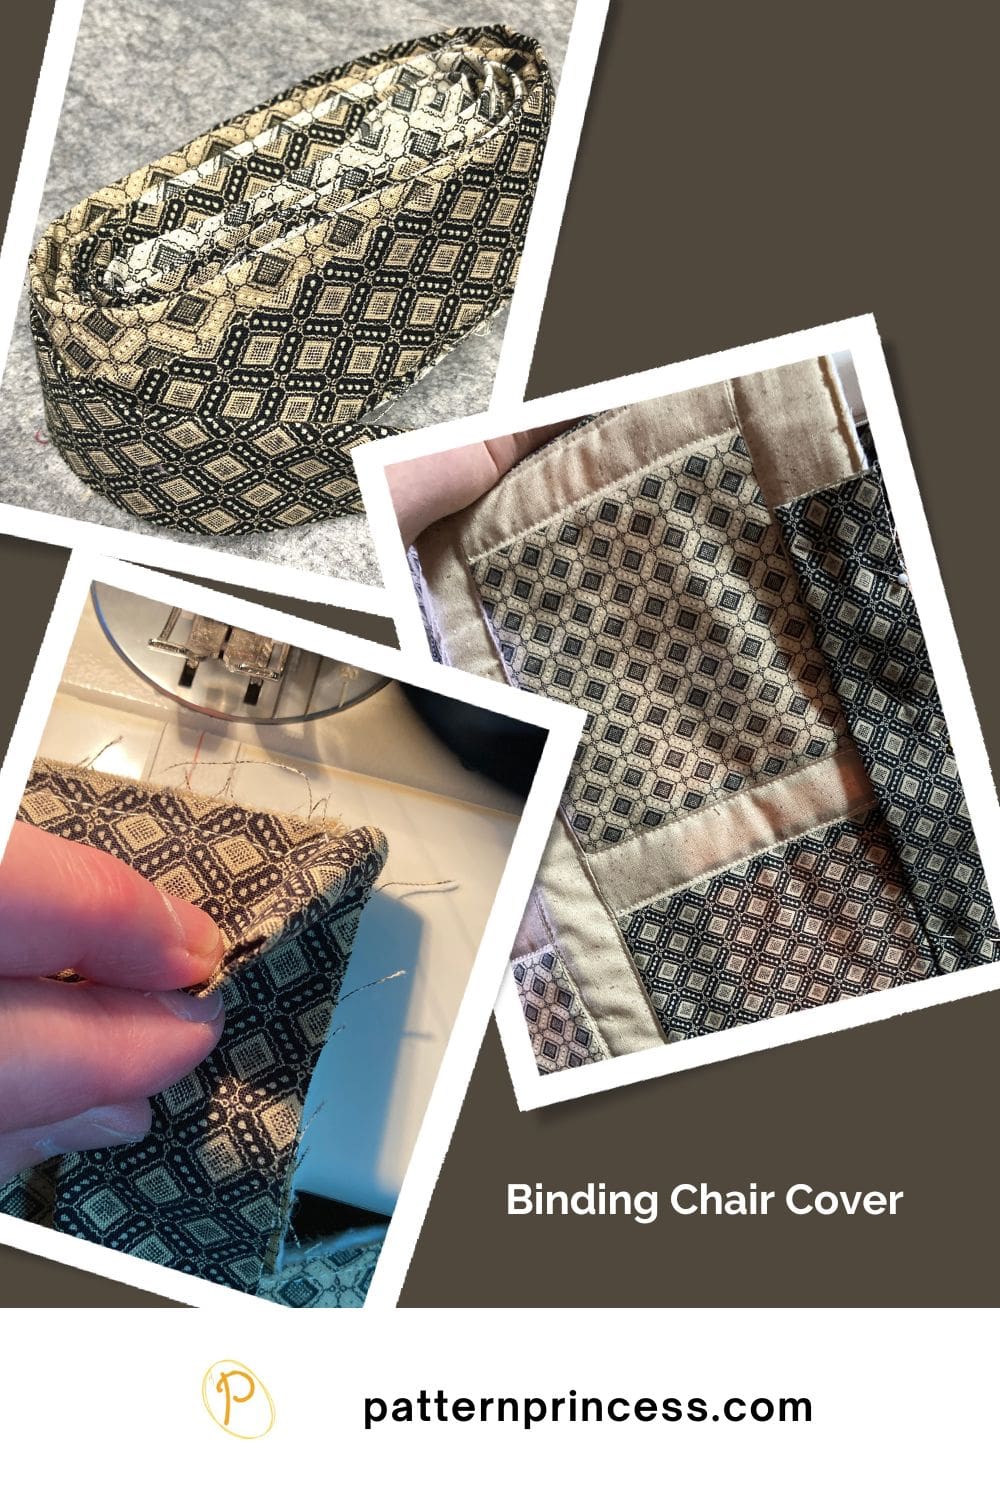
Sew the Binding to the Chair Cover Pad
Binding
2 1/2-inches x 96-inches. Using the Remaining Fabric, make the binding by alternating the fabric colors.
First, prepare the binding strips. I have a tutorial on how to make your own binding if this is new to you.
Once the strips are sewn together, fold in half lengthwise with wrong sides together and press.
Pin the raw edge of the binding onto raw edge of the bottom edge of the chair cushion. I generally start in the middle of a side. Leave approximately a 3” tail hanging.
Note: This hanging part will be used to sew to the other end of the binding strip when you have finished sewing all four sides of the binding onto the chair pad.
Sew the binding onto all four sides of the chair cover making sure to miter the corners.
How to Miter Corners
Since I had to cut out a 2-inch square on each corner. There are not regular corners to miter and inside corners. Let’s walk through doing both so you have sharp points going out and sharp points coming in.
A regular mitered corner.
As you are sewing on your binding, stop sewing ¼ inch from the corner. You may want to mark this spot with a pin ahead of time or a marking pencil. Back stitch a few stitches and cut the thread making sure NOT to cut the cover or the binding.
Remove the cover from the sewing machine and fold the binding strip up straight so it is vertical from the side you were just sewing on.
Next, fold the binding strip back down on itself and align it to the edge of the side of the cover you just sewed and the edge of the cover you are going to sew next.
Continue sewing the binding on the cover edge.
Repeat this process until all four sides and corners have the binding sewn on. When you are on the last side of the cover close to where you started with the binding it is time to connect the ends of the binding.

How do you miter an inside corner on a quilt?
Previously, you should have based the corner sections using ¼-inch seam allowance. This provides extra stability to the fabric as you work through adding the binding to the inside corner.
Next, in the inside corner, make a snip through the top fabric, batting, and the backing fabric just to the basting line you just sewed. (Make sure not to go past your threads).
As you come to the first inside corner, continue stitching the binding to the cover top until you are about 1-inch from the center point of the corner, where you made your snip in the layers.
Next, carefully sew to the center of the corner where you snipped up to the threads. It is time to make a straight edge for you to continue sewing. Lift up your presser food and leave your needle down.
Move the edge where you just sewed backward while holding the fabric to be sewed on yet steady. When the fabric is straight and you have the raw edge of the binding lined up with the raw edge of the chair cover. Lower the presser foot and carefully continue sewing.
Repeat this process for mitering all four inside corners.
How to Join the Binding
It is easy to make your own binding. Here is an easy tutorial on how to make quilt binding.
If you know how to join the binding to make a continuous strip, go ahead and do that process. To be honest, I have tried many times and have yet to master this.
Here is what I do.
Stop stitching a few inches away from where you started. Overlap the starting and ending binding about 2 inches. Cut the ending binding at this point.
Fold the end of one of the binding strips over about 1 inch. Then tuck the raw edge of the other binding inside. Continue stitching until you meet up with the starting point.
Hand-Stitch the Binding to the Chair pad
Hand-stitch the folded edge onto the back of the chair pad.
I like to use a few small clips to hold the binding as I sew. Continue moving them along just ahead of where you are sewing.
When you get to the corners, turn them right side out and miter the corner for both tie inside corners and regular outside corners.
I sew right into the corners to help hold the binding in place.

Adding the Ties
For this last step. Use the 8 pieces of fabric measuring 2 1/2-inches x 11-inches. Use any remaining fabric.
Fold the strips in half with the right side together and press. Sew along the raw edge on the long side and the bottom. Leaving the top open.
Do this for all 8 fabric strips.
Trim the corners on the bottom. Turn the sewn ties inside out. Use a turning device or the blunt end of a scissors or a skewer to gently poke out the bottom corners.
Next press flat with the seam on the bottom.
Tuck the top fabric inside about ½-inch and pin into place.
Next sew a top stitch all the way around each tie near the edge.
The last step is to sew the ties on the chair cover.

Align a tie on the binding edge of each corner; 2 ties per corner. Pin in place and use a straight stitch to securely sew into place.
Your chair cover is ready to use on your favorite chair. Just tie in place.

National Craft Month 2023
This pattern is being featured on FaveCrafts for the National Craft Month 2023.
You can find a new free pattern featured from designers everyday of the month.

You can find Victoria crocheting, quilting, and creating recipes. She has cooked in restaurants for over 20 years, including many larger parties. She learned to crochet when she was just 11 years old and has been crocheting ever since; over 50 years now. Over 40 years ago, she loved her first class in sewing and continues to hone her skills in quilting. Many have enjoyed the handmade gifts over the years. In her professional career, she has worked in management in a wide variety of businesses including higher education as a dean of a division. All the while attending college part-time to achieve her doctorate in higher education with an emphasis in e-learning.
OMG! I have the same exact chair that was my great Uncles! The seat is in a bit worse condition but I think I’ll make this cover for it.
Thanks for sharing.
Oh my gosh! That is so neat! We just love how this turned out. Happy to be your inspiration.
Vicky