Last updated on January 19th, 2026 at 10:26 pm
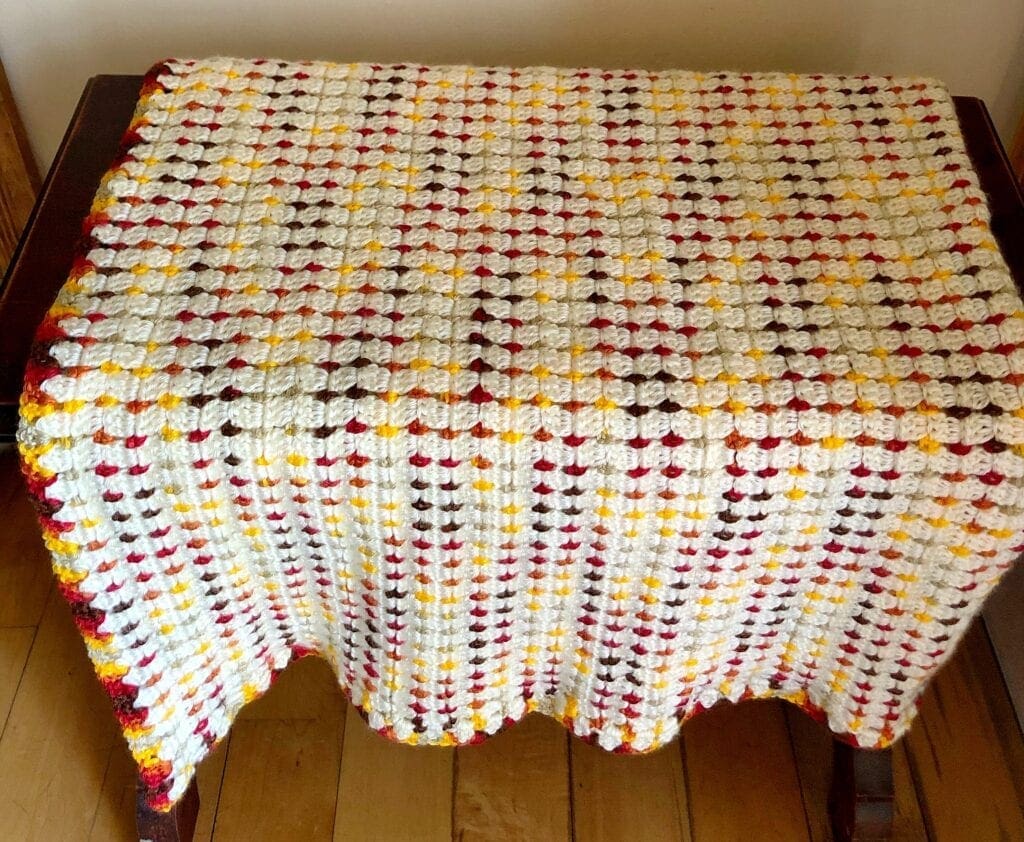
This crochet fireside throw blanket will look so beautiful this fall. The colors remind me of an autumn sunset or a warm fire burning in the fireplace. I love to use crochet items that are useful to help bring the colors of the season into my home decor.
Crochet enthusiasts know that there’s no better feeling than creating something beautiful and useful with your own two hands. And that’s exactly what you’ll get with the Fireside Throw Blanket. Not only will you enjoy the process of making it, but you’ll also be left with a stunning finished product that you’ll cherish for years to come.
Easy Crochet Blanket Pattern for the Whole Family to Enjoy
There’s something special about curling up under a cozy, handmade blanket. And if you’re a fan of crochet, the Fireside Throw Blanket is a must-have project. With its warm, inviting texture and timeless design, this blanket is perfect for snuggling up with on chilly nights.
*Post contains affiliate links* for more information please read the disclaimer on the About Us page.
Letting the Yarn Choose the Pattern
If you’re looking for a crochet project that’s both practical and stylish, look no further than the Fireside Throw Blanket. This versatile piece can be customized to fit any decor style, and it’s sure to become a staple in your home. So grab your hook and some cozy yarn, and let’s get started!
Have you ever stood in the yarn store or in your yarn stash and let your yarn tell you what your next project will be? I do that often. Sometimes, I will have a project that I plan on doing; look through my yarn stash, and end up making something completely different. Seems crazy, right? At times, when digging through the yarn, a color combination will jump out at me and gives me inspiration.
Sunset Autumn Yarn
I was in the store a few weeks ago buying groceries and somehow I ended up standing in front of the yarn! Oops! Well, this Caron Simply Soft Sunset Autumn yarn jumped out at me. I thought the colors were not extremely appealing on their own in the yarn package; however, I thought how lovely they would look paired with off white yarn.
The thought of the beautiful fall colors peaking through the off white yarn was running through my head.
This Fireside Throw Blanket is the result of that inspiration
Modified Block Stitch
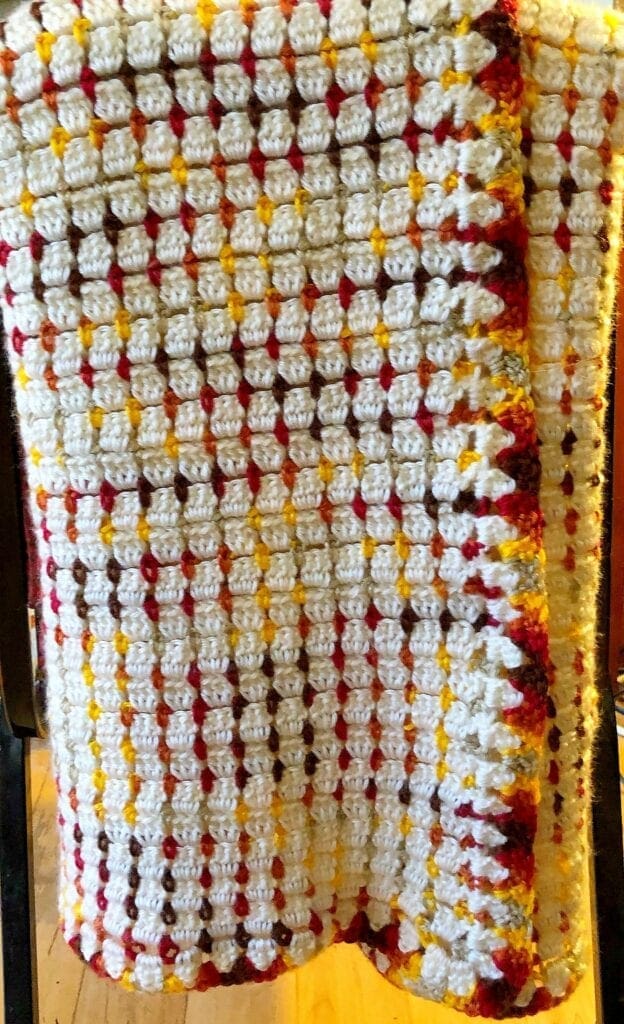
This blanket is made using the block stitch that has been slightly modified. In the past, when I have crocheted the block stitch, alternating the yarn colors every other row left a ton of yarn ends to be weaved in. Therefore, while I love the look of the block stitch, the sewing in of the yarn ends made me veer away from this beautiful stitch.
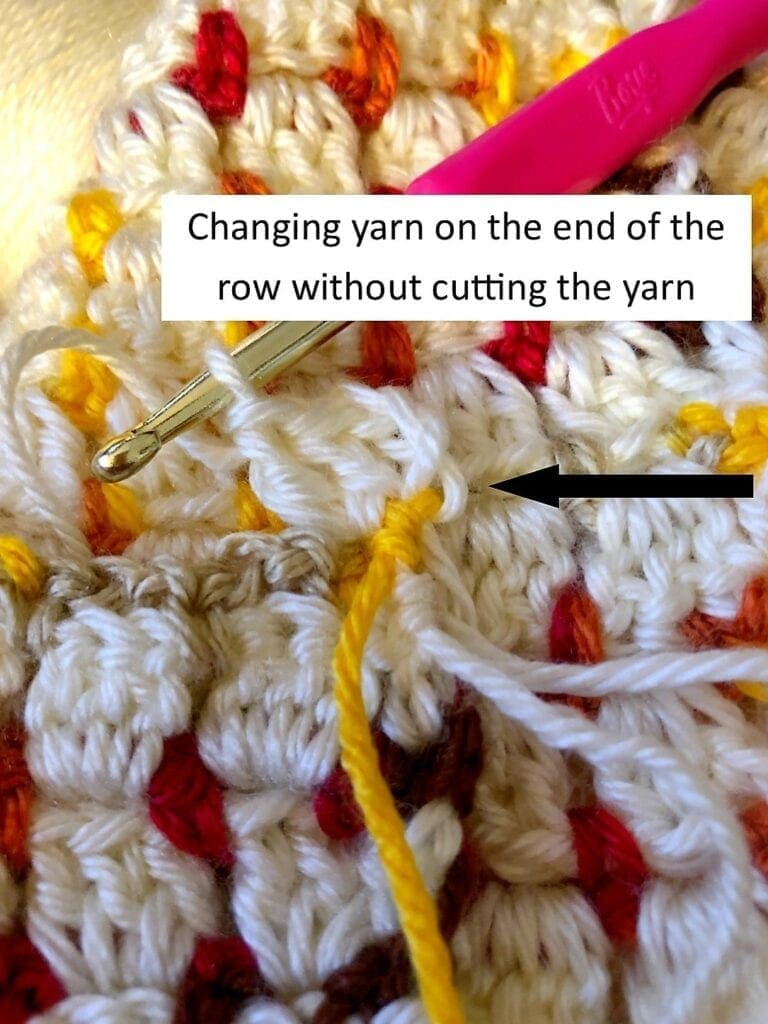
Carry the Yarn up the Side of the Blanket!
Yup, no more weaving in tons of yarn with each color change. It was not easy to figure out.
A few weeks ago, my daughter and I were at a conference. We were relaxing in the hotel room and of course, I started this blanket. I told my daughter that I wanted to see if I could figure out a way to carry the yarn up the side rather than cut it each row.
After the off white rows were done, it was time to change back to the sunset autumn; however, the yarn was over on the other side. Therefore, I cut the yarn and had to join it and complete the row.
Then it was time for the off white; however, it was back where I started; I cut that and joined it too. My daughter kept saying just crochet from that side over. Of course, I kept saying, the yarn needs to be on the same side. This went on for over ten rows! haha.
My daughter was laughing at me! She could see what I couldn’t. I finally understood what she was saying!
Finally, Eureka! I realized that when crocheting the rows; I could crochet from either side and join the yarn just fine.
Make sure to watch the video as I will show you how I carried the yarn up the side. Very few yarn ends to weave in later.
The video will show the crochet pattern, the border, and carrying the yarn up the side.
Video of Pattern
Makeover and refresh your rooms with fall handmade home decor
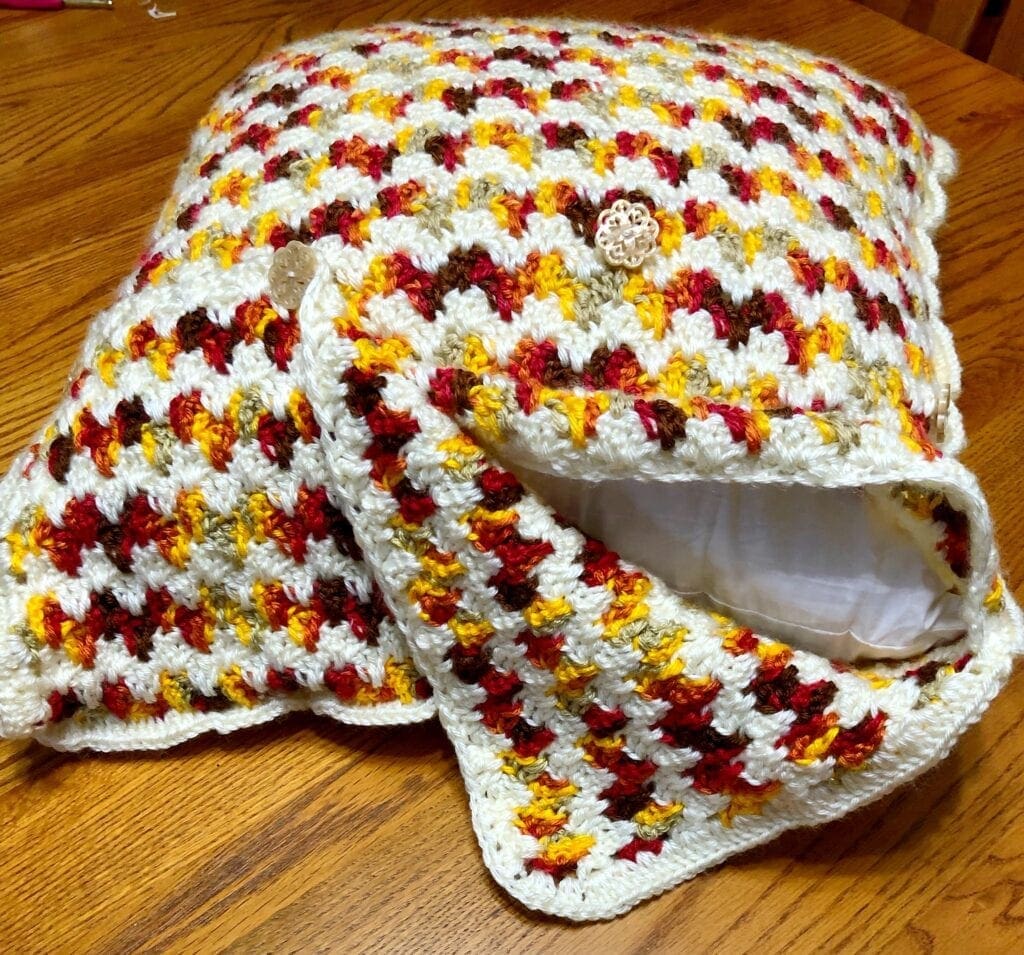
Last fall, I made a large pillow cover in fall colors to match this Fireside Throw. Just look how lovely this combination looks.
However, it was not complete until November. Since it was a bit too late to post the directions for the pillow, I waited until it was closer to fall to get this lovely pattern to you.
Talk about home decorating for the seasons. I just love this color combination. It really spruces up the sofa.
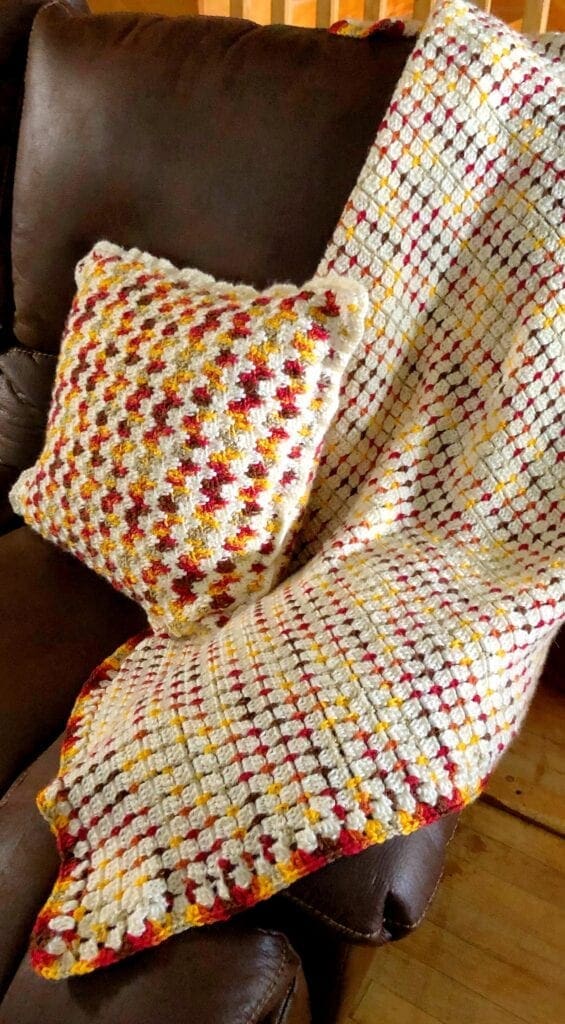
While the color combination is not the same, the yarn colors are. It is amazing how different something can look using the same yarn, but pairing it with a different crochet stitch.
If you would like to crochet the matching pillow, just click the link. Embrace Autumn Crochet Pillow Cover
Directions: Crochet Fireside Throw Blanket
Skill Level
Beginner Friendly
Finished Size of Throw
This throw is approximately 34 inches wide X 44 inches long.
There are 126 rows of crochet with 2 rounds for the border.
To change the length of this pattern, increase or decrease the rows. When changing the width of the blanket, increase or decrease the beginning chain. The pattern is worked in multiples of 3 plus 1. That means that the initial row of chains needs to be divisible by 3, then add 1 more stitch. This blanket is 135 chains plus 1 for a total of 136 chains.
Materials
3 Skeins of Yarnspirations Caron Simply Soft Sunset Autumn. There will be some left over. Total yarn needed 670 yards. You can get that here if you are not able to purchase it locally.
4 Skeins of Yarnspirations Caron Simply Soft Off White. There will be some left over. Total yarn needed 1,245 yards. You can get that here if you are not able to purchase it locally.
If you used all one color of yarn for this crochet blanket, plan on 7 skeins of yarn approximately 1.915 yards.
Size H 5.0 mm Crochet Hook
Scissors
Yarn Needle
This crochet set is a nice set of all the crochet hook, scissors, and yarn needles for this project.
Abbreviations
CH = Chain
DC = Double Crochet
SL ST = Slip Stitch
SP = Space
ST = Stitch

Crochet Pattern Directions
Begin with CH 136
Row 1:
With the Sunset Autumn SC in the 2nd CH from the hook and in the next CH stitch. [CH 2, SK 2, SC in next ST] repeat between the [ ] across the row. End with SC in the last ST.
Row 2:
Change yarn color to the Off White***do not snip off the Sunset Autumn yarn***watch the video to see how I carry the yarn up the side. CH 3 which counts as a DC ST. [3 DC in each CH 2 SP] repeat between the [ ] across the row. End with 1 DC in the last ST.
Row 3:
Change yarn color – CH 1, SC in first ST and next ST, [CH 2, SC between the previous row 3 DC groupings] repeat between the [ ] across the row. End with SC in the last ST just before the loop of the off white yarn. Change the yarn bringing the new color through the loop, tighten the loop and complete a SC in the last ST.
***Remember this is shown on the video tutorial***
Repeat rows 2 and 3 to desired length ending with the row 2 pattern.
Crocheting the Border
Round 1:
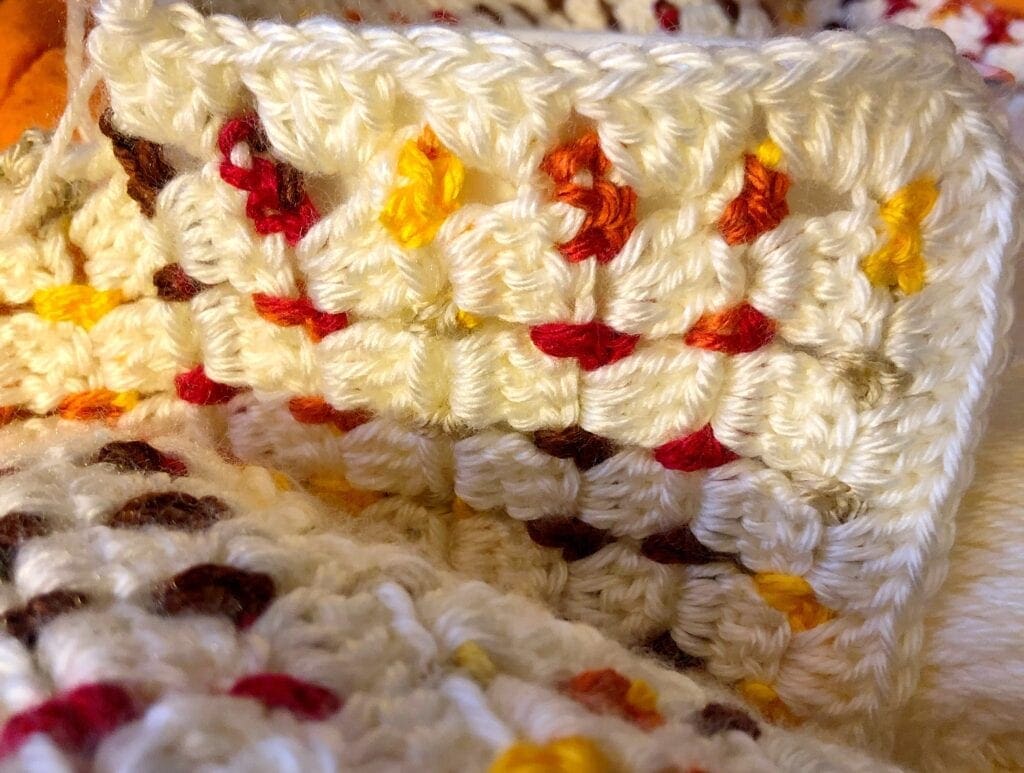
Join off white yarn in a corner where you ended the blanket stitches, CH 3, 2 DC. continue to do the 3 DC in each CH 2 SP. In the first corner complete 2 sets of 3 DC then continue up the first side – complete 3 DC in each of the off white rows. For the second corner complete 2 sets of 3 DC, continue to do the 3 DC in each CH 2 SP. In the third corner complete 2 sets of 3 DC, continue up the last side completing 3 DC in each of the off white rows. In the fourth corner – which is the one you started in; end with 3 DC and a SL ST into the top ST of the first CH 3. Bring the yarn through the last loop to secure.
Cut the yarn leaving a long tail to be weaved in.
I almost stopped with the off white round of the border. Below is a photo of the blanket with just one round of the off white.
Round 2:
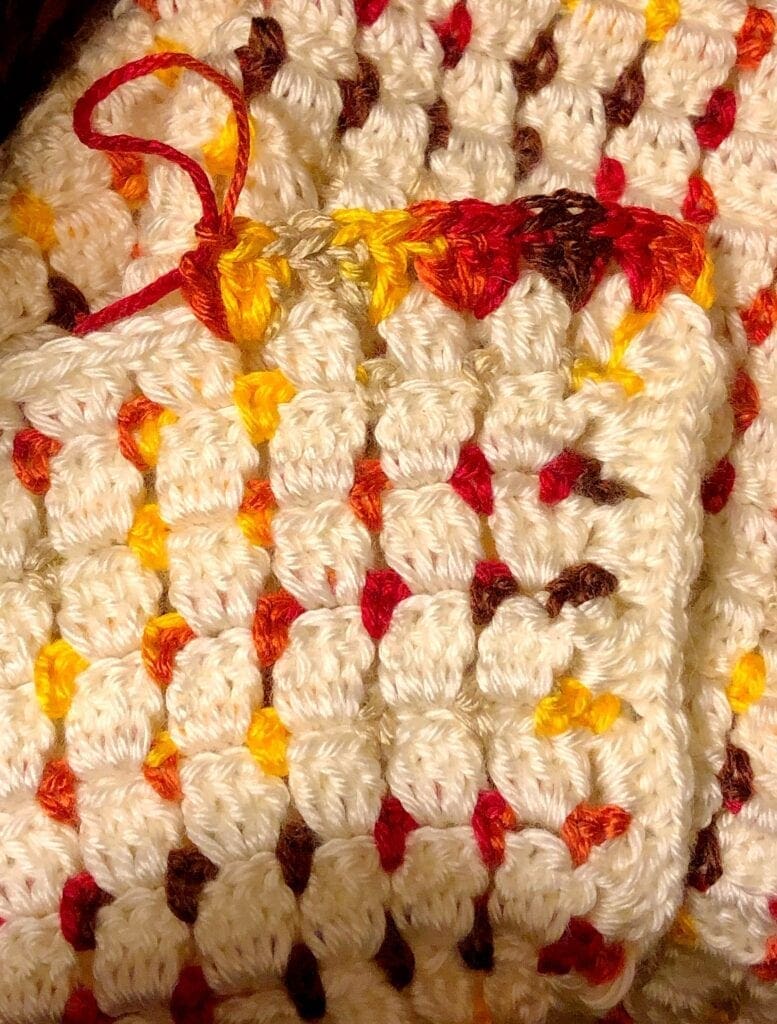
Change to the Sunset Autumn yarn. CH 3, 2 DC. complete 3 DC between the previous row sets of 3 DC. In each corner complete 6 DC. continuing on with the 3 DC between the previous row sets of 3 DC on each side. In the fourth corner – which is the one you started in; end with 3 DC and a SL ST into the top ST of the first CH 3. Bring the yarn through the last loop to secure.
This is how the blanket looks with the colored yarn used in the second round of the border.
Finishing:
Weave in all – very few- yarn ends and cut off excess yarn.
Enjoy using your beautiful crochet fireside throw blanket.
If you loved this post, please share. It helps to show me that these types of posts are helpful – thank you!
I hope that you liked this pattern. If you are looking for more ideas for crocheted projects, here are a few others you may enjoy.

You can find Victoria crocheting, quilting, and creating recipes. She has cooked in restaurants for over 20 years, including many larger parties. She learned to crochet when she was just 11 years old and has been crocheting ever since; over 50 years now. Over 40 years ago, she loved her first class in sewing and continues to hone her skills in quilting. Many have enjoyed the handmade gifts over the years. In her professional career, she has worked in management in a wide variety of businesses including higher education as a dean of a division. All the while attending college part-time to achieve her doctorate in higher education with an emphasis in e-learning.

Pingback: 14 Fall-Inspired Free Crochet Blanket Patterns – Cream of the Crop
When counting the rows, do you just count the white rows for the 126 and both colors total?
It is a total of 126 rows counting both colors. However, this does not include the crochet border. Happy crocheting.
Thank you!