Last updated on October 4th, 2025 at 03:14 pm
The Josephine Twist Crochet Ear Warmer Headband is the perfect way to combine functionality and fashion in one quick and rewarding make. As the chill of the season sets in, there’s no better time to pick up your crochet hook and dive into a cozy, stylish project.
The best thing, whether you’re a seasoned crocheter or new to the craft, this pattern offers a fun twist (literally!) with its elegant design and practical warmth.
Crafted with love, the crochet ear warmer is ideal for keeping your ears snug while adding a chic accessory to your wardrobe. Its twist detail elevates the classic headband into something truly special, making it a versatile piece for both casual outings and winter festivities.
You can even whip up several in different colors to match your favorite coats or to give as heartfelt handmade gifts.
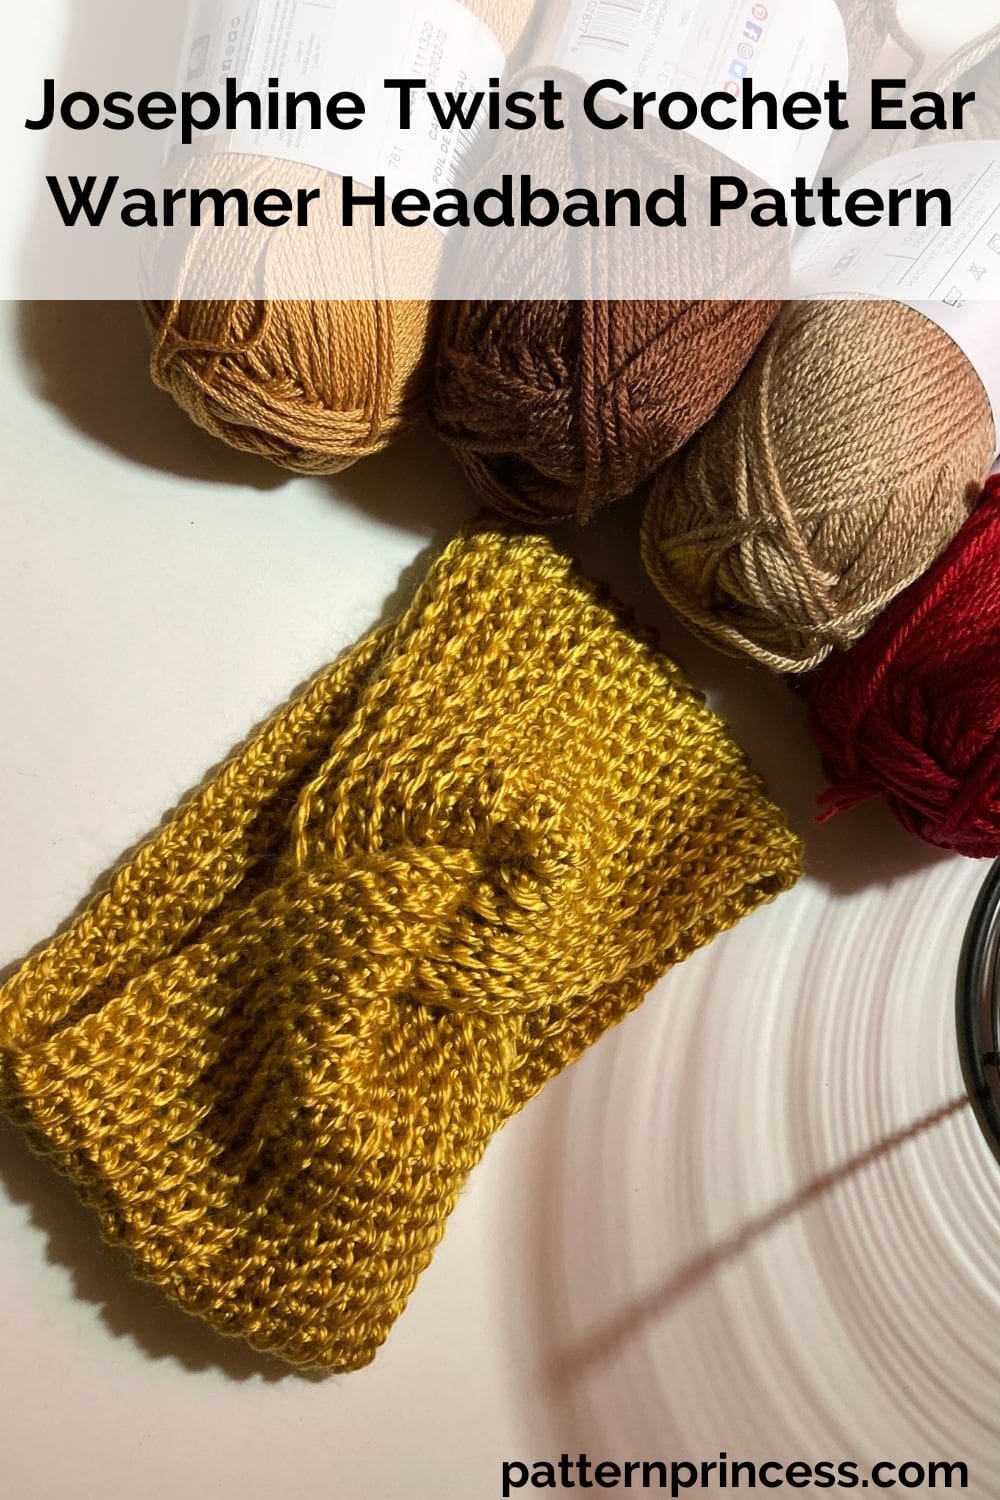
Use That Yarn Stash
What’s great about this pattern is its flexibility. It works up beautifully with yarn from your stash, making it an excellent stash-buster crochet project. Using medium-weight yarn or a soft, cozy blend, you’ll create a stretchy, comfortable fit that suits all head sizes.
Knit Look Ribbed Crochet Headband Pattern
The twist headband pattern provides just the right amount of texture to keep things interesting as you crochet. Crochet a flat rectangle and fold the ends in half. Tuck the folded ends in each other and sew together with your yarn needle.
Use the single crochet stitch placed in the back loop to create ribs that run the length of the rectangle. You will often see the single crochet back loop crochet abbreviated as (SC BLO). It’ssimple to do and is a great beginner technique to dip into to expand your crochet skills.
Working in the back loop with a single crochet will create a ridged texture that makes a crochet project look interesting and beautiful.
We have step-by-step pattern instructions including a video tutorial to help you get going. Get ready to create a DIY winter accessory that’s as stylish as it is functional. Let’s crochet the chill away.
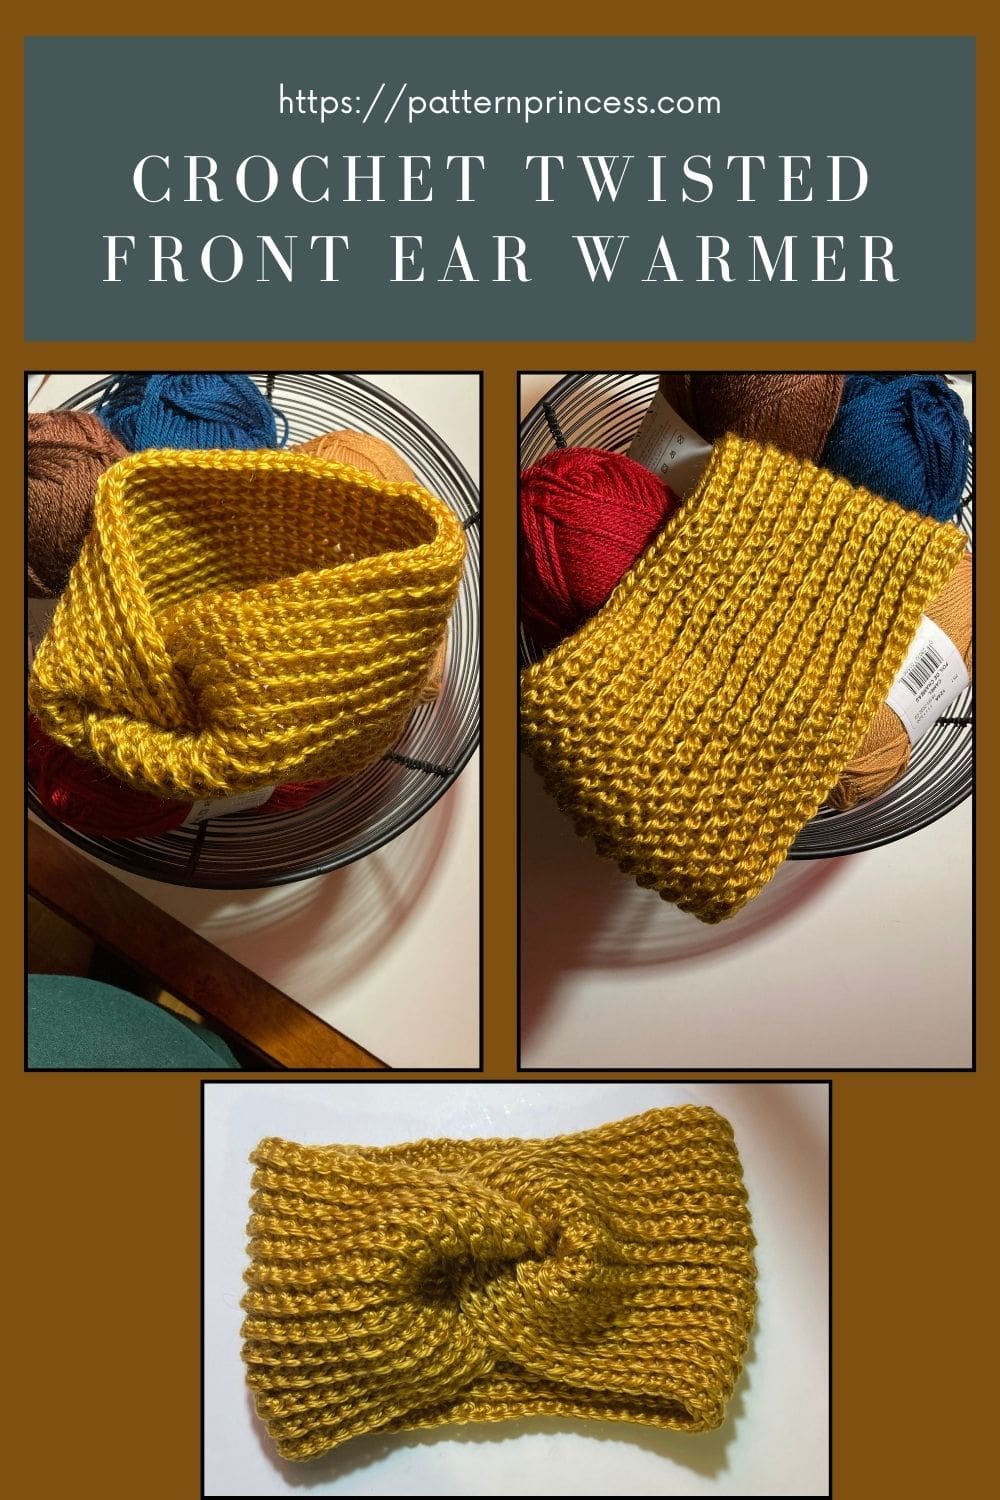
Directions: Josephine Twist Crochet Ear Warmer Headband Pattern
Skill Level
Beginner Friendly
Gauge
12 Single Crochet and 14 rows every 4 inches.
Size
5” X 19” long laying flat before joining. An average adult head size.
Changing the Size
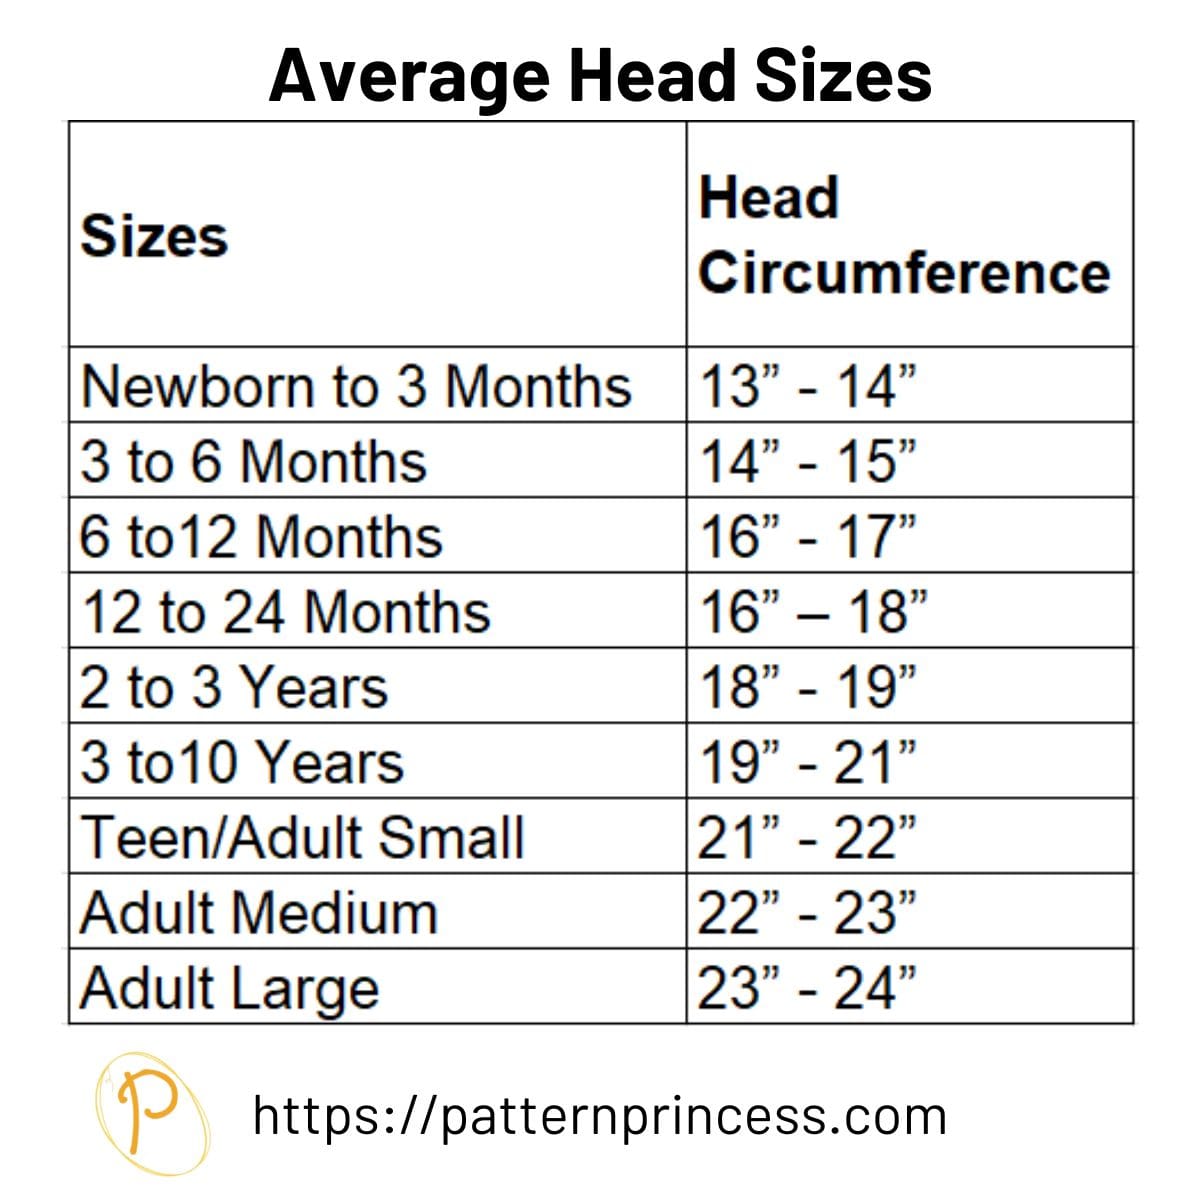
Measure as You Go. If you’re unsure about sizing, measure the headband around their head so you know how big around you need it. If you are not sure of what size to make it. I have a standard head size chart to help you.
You can make this with a different yarn rather than a medium weight. Just make sure you measure your beginning chain stitches to get the length and measure the width of the rows for the length.
This headband is slightly stretchy. The length will stretch 1-3 inches. If the yarn you are using isn’t as stretchy, make the band a little bit longer.
Here are my suggested sizes for the average head circumference sizes above.
- Newborn to 3 months = 6” around X 11” long. Laying flat 3” X 11”
- 3 to 6 months = 6” around X 12” long. Laying flat 3” X 12”
- 6 to 12 months = 6” around X 13” long. Laying flat 3” X 13”
- 12 to 24 months = 6.5” around X 14” long. Laying flat 3” X 14”
- 2 to 3 years = 6.5” around X 15” long. Laying flat 3” X 16”
- 3 to 10 years = 8” around X 15.5” long. Laying flat 4” X 17”
- Teen/Adult Small = 9” around X 17” long. Laying flat 4” or 5” X 18”
- Medium Adult = 9” around X 18” long. Laying flat 5” X 19”
- Large Adult = 9” around X 19” long. Laying flat 5” X 20”
Abbreviations
- CH = Chain Stitch
- SC = Single Crochet Stitch
- SC BLO = Single Crochet Back Loop
- SL ST = Slip Stitch
- ST = Stitch
- [ ] = Repeat Between
Materials
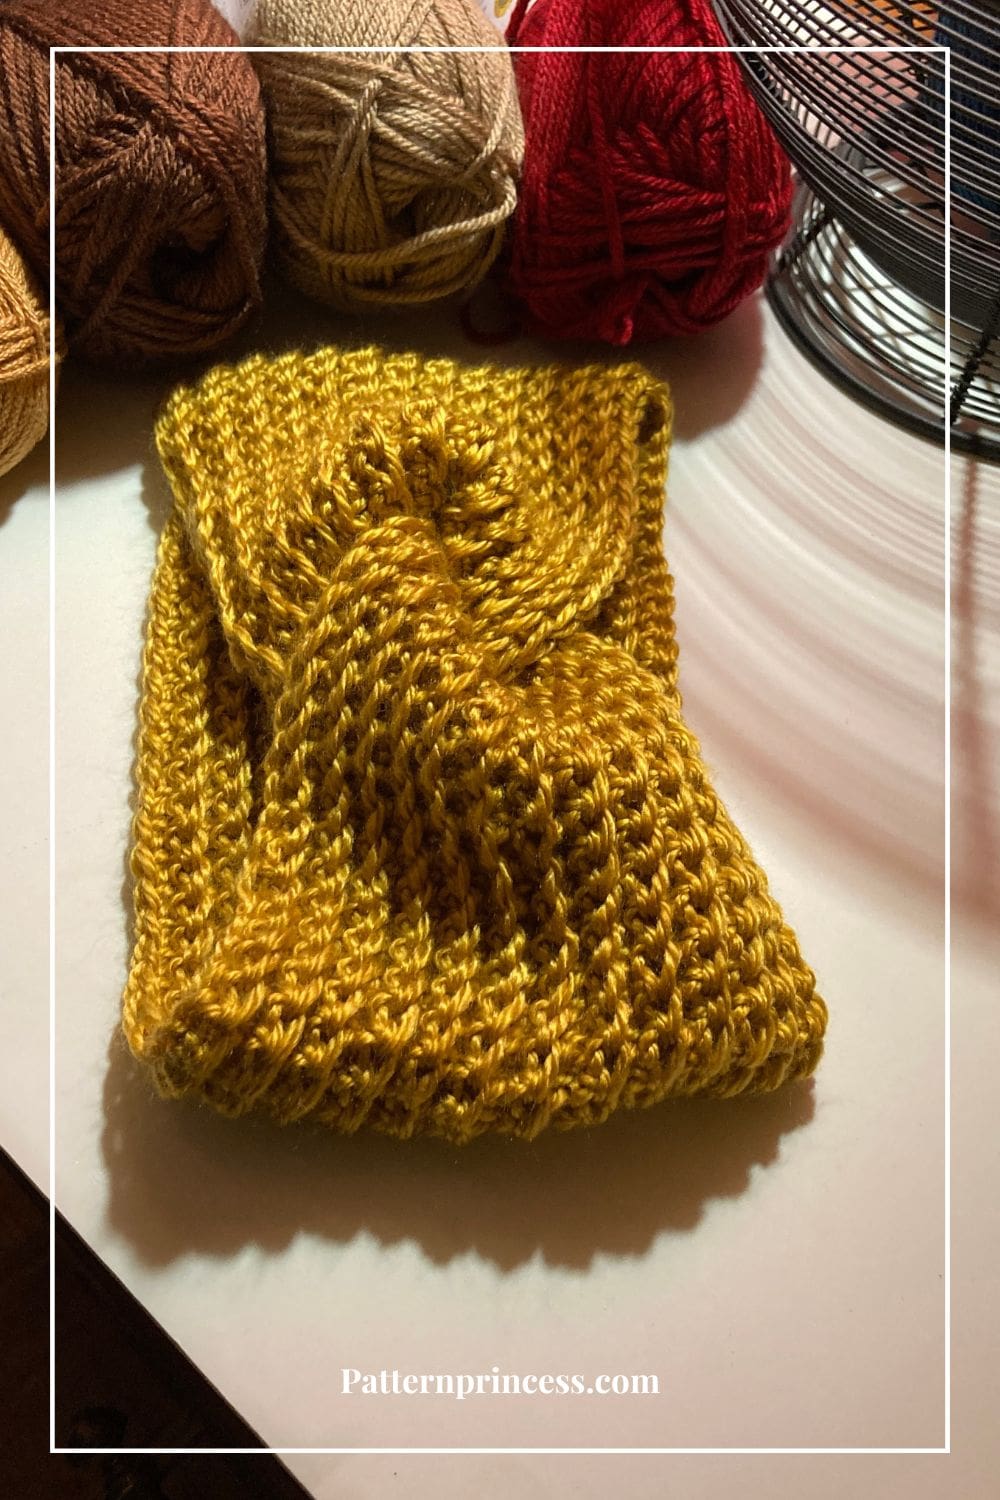
150 yards of any medium weight yarn. I made the white ear warmer in Yarn Bee Soft Secret yarn in the color Honey.
Crochet Hook Size I 5.5 mm
Tapestry Needle
Scissors
Tape Measure
Stitches
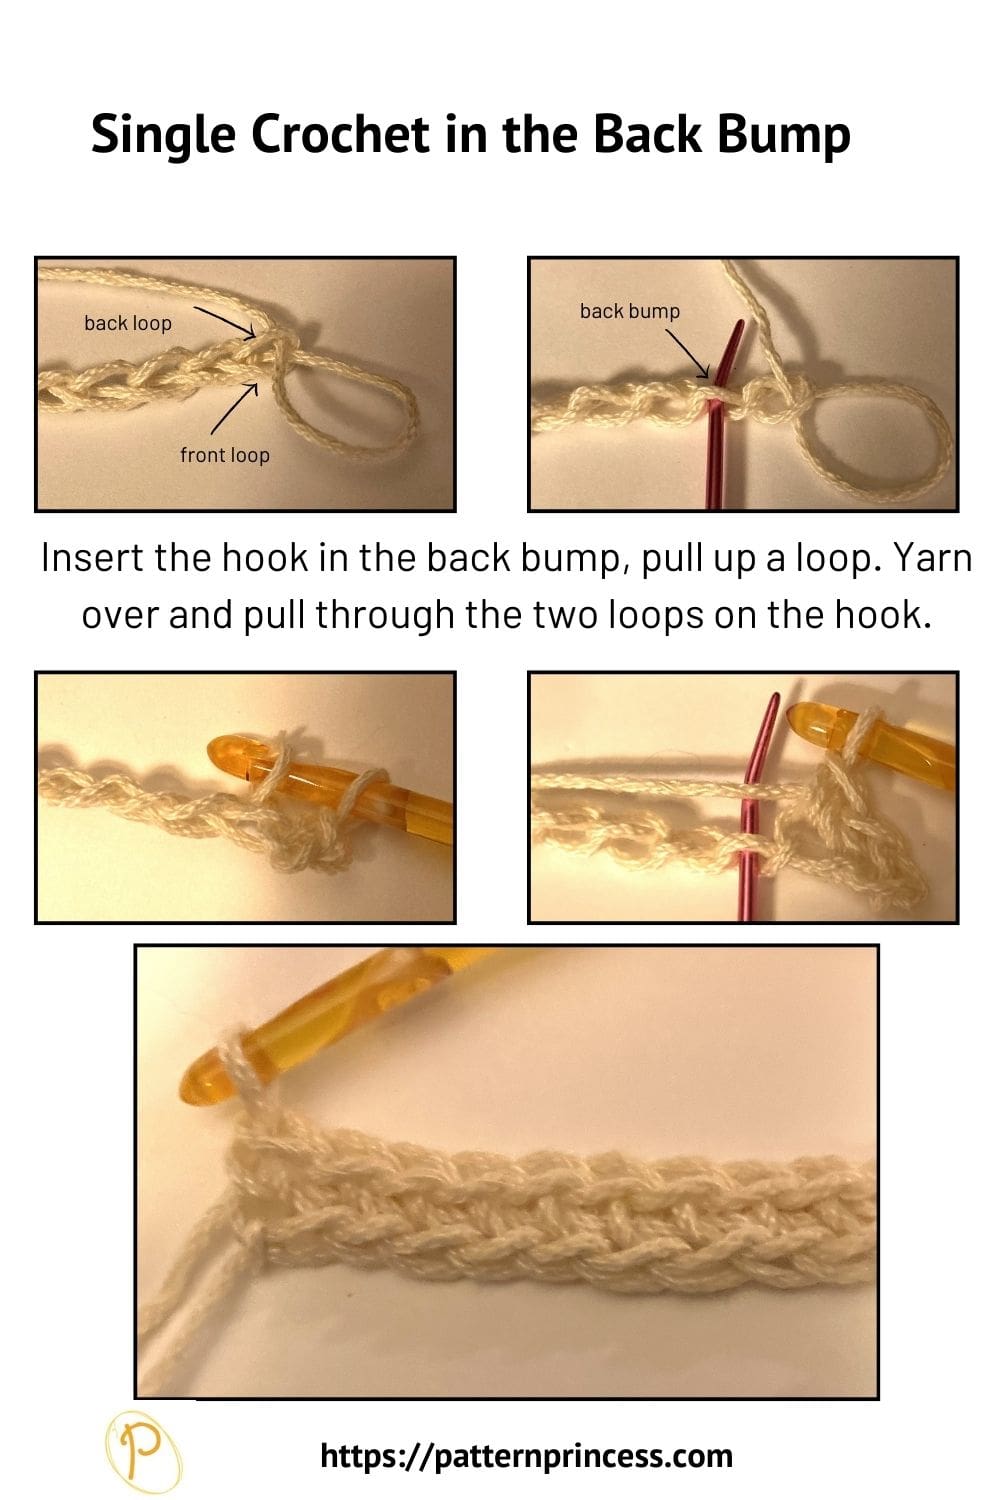
Single Crochet in the Back Bump of the Chain Stitch
Insert the hook in the back bump of the chain stitch, pull up a loop. Yarn over and pull through the two loops on the hook.
Single Crochet Back Loop Crochet (SC BLO)
Insert the hook in the back loop, pull up a loop. Yarn over and pull through the two loops on the hook.
Pattern Notes
Pattern is written in US crochet terminology.
Measure the headband rather than count the rows. This way, you can use any leftover yarn you happen to have.
You can find You Tube Video step-by-step tutorials for both left hand and right hand crocheters below the written pattern.
Turn after each row.
The chain stitch at the beginning of each row does not count as a stitch. Place the beginning stitch of each row in the very first stitch.
Since this pattern is reversible, there isn’t a right side and wrong side.
Pattern
Pattern is written for a medium adult head.
Medium Adult = 5” X 19” laying flat before joining.
Start by making a slip knot and adding the loop on the hook.
Work enough chains to make 19 inches in length. Join with a slip stitch to the first chain to form a circle. Making sure to not have any twists.
Note: For the Yarn Bee Soft Secret yarn, it took 55 chains. Use a tape measure to check.
However, here are some suggested starting chains for using a medium weight yarn.
- Ch 40 for 16”
- CH 45 for 17”
- CH 50 for 18”
- CH 55 for 19”
- CH 60 for 20”
- CH 65 for 21”
- CH 70 for 22”
Row 1
Work in the back bump for this row. In the 2nd chain from the hook work a SC in the back bump also called the back ridge loop and in each ST across. Turn
Row 2
CH 1 (Doesn’t count as a ST). Work a Single Crochet Back Loop Crochet (SC BLO) in the same ST and in each ST across. Turn
Row 3 and Beyond
Repeat row 2.
You can make this as wide as you like, I worked this pattern 27 rows. Which made mine 5 inches wide.
When you’re done, leave a long tail. About 15-20 inches. You will be using this to sew the ends together.
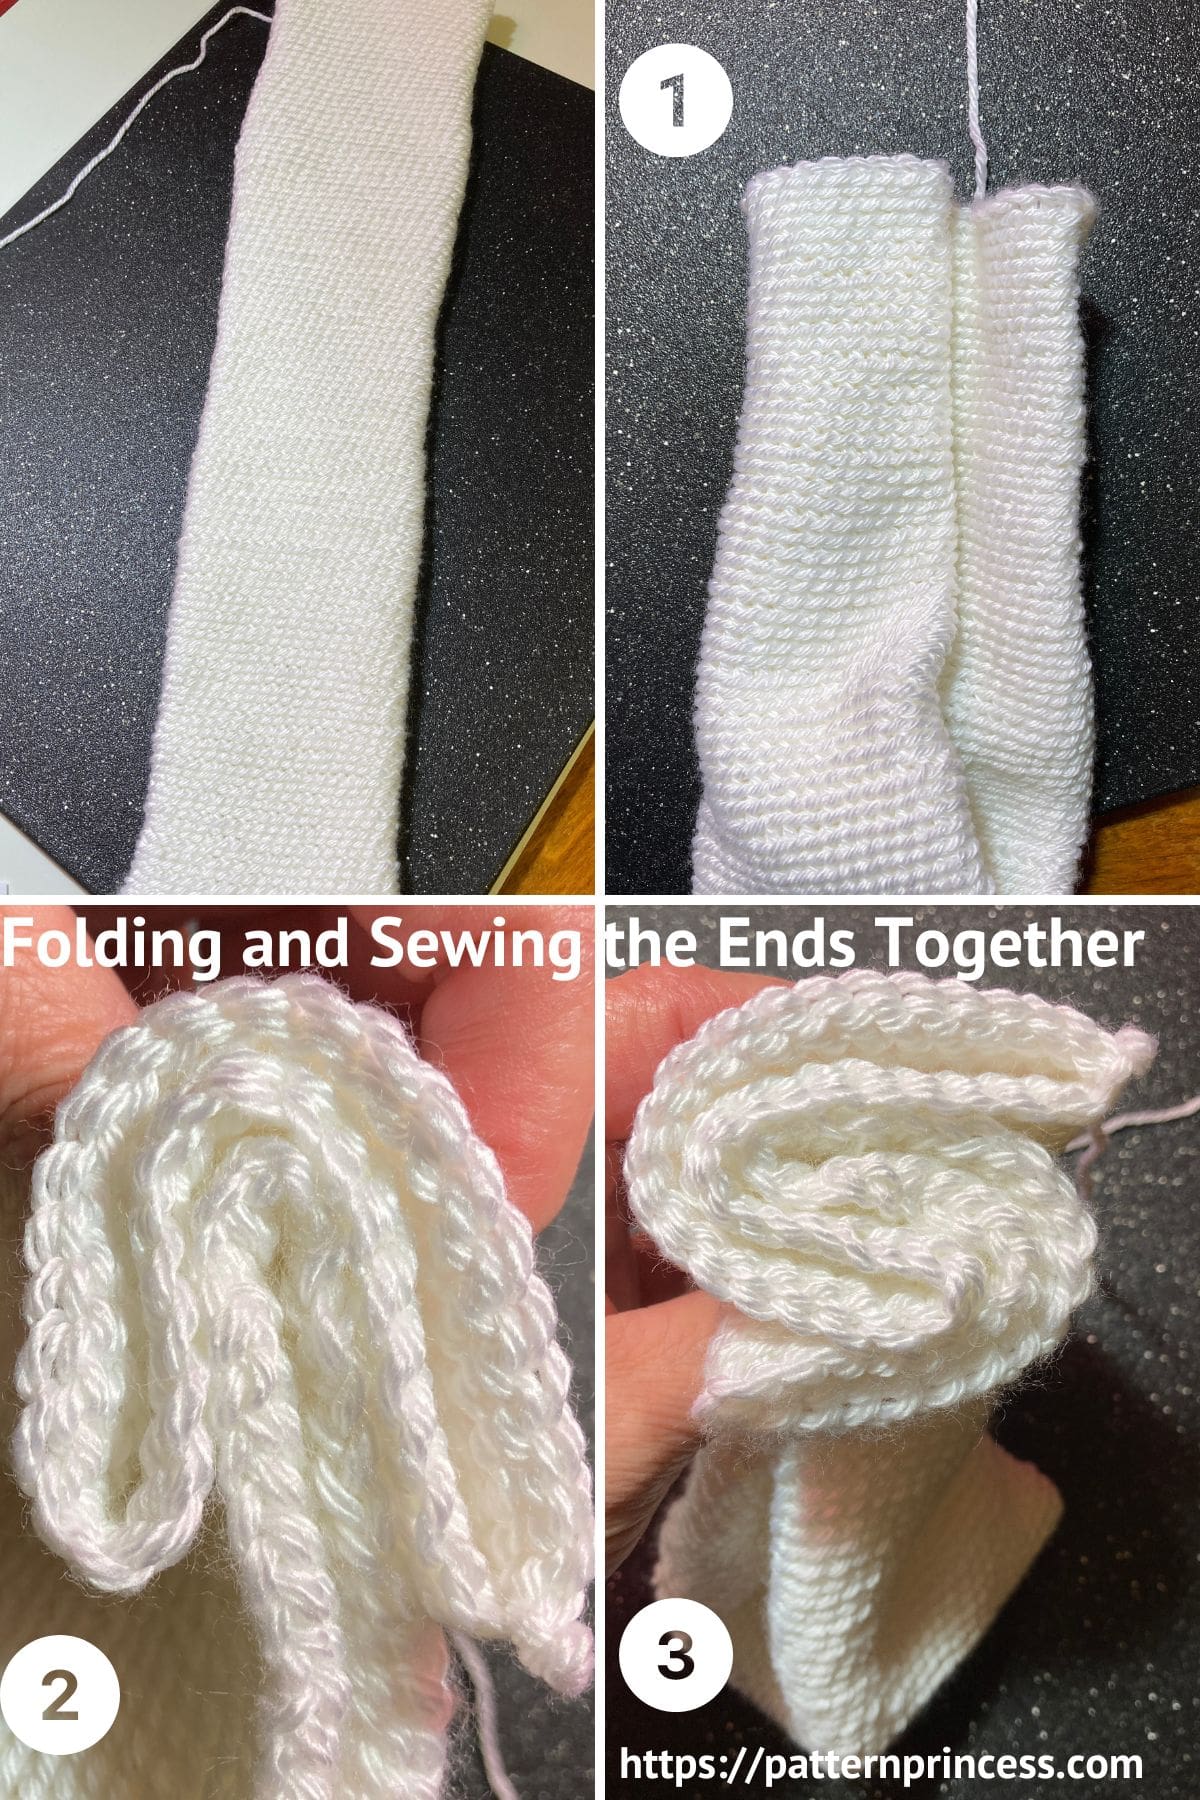
This photo is of a different headband, but it shows how to fold the ends together for seaming.
Final Steps
Seaming Instructions: Folding and Sewing the Ends Together
- Fold the band in half matching the ends together.
- Fold the ends in half matching one end to the center of the other band.
- The other band fold over the other side to the front.
- Use the long yarn tail and yarn needle to sew the ends together. Starting on one end, insert the hook through all four layers and pull out the other side. Moving the needle over a little, insert it back through the layers and out the other side. Continue working back and forth like this until you get to the other end.
When done, weave in the yarn ends and cut off the excess yarn.
Enjoy your beautiful twisted headband.
You Tube Video Tutorials of the Josephine Twist Crochet Ear Warmer
Josephine Twist Crochet Ear Warmer Headband Pattern
Equipment
- Crochet Hook Size I 5.5 mm
- Tapestry Needle
- Scissors:
- Tape Measure
Materials
- 150 yards of any medium weight yarn. I made the white ear warmer in Yarn Bee Soft Secret yarn in the color Honey. The tan one is made of Lion Brand Skein Tones in Almond.
Instructions
- Pattern is written for a medium adult head.
- Medium Adult = 5” X 19” laying flat before joining.
- Start by making a slip knot and adding the loop on the hook.150 yards of any medium weight yarn. I made the white ear warmer in Yarn Bee Soft Secret yarn in the color Honey. The tan one is made of Lion Brand Skein Tones in Almond.
- Work enough chains to make 19 inches in length. Join with a slip stitch to the first chain to form a circle. Making sure to not have any twists.
- Note: For the Yarn Bee Soft Secret yarn, it took 55 chains. Use a tape measure to check.
- However, here are some suggested starting chains for using a medium weight yarn.
- Ch 40 for 16”
- CH 45 for 17”
- CH 50 for 18”
- CH 55 for 19”
- CH 60 for 20”
- CH 65 for 21”
- CH 70 for 22”
- Row 1
- Work in the back bump for this row. In the 2nd chain from the hook work a SC in the back ridge loop and in each ST across. Turn
- Row 2
- CH 1 (Doesn’t count as a ST). Work a Single Crochet Back Loop Crochet (SC BLO) in the same ST and in each ST across. Turn
- Row 3 and Beyond
- Repeat row 2.
- You can make this as wide as you like, I worked this pattern 27 rows. Which made mine 5 inches wide.
- When you’re done, leave a long tail. About 15-20 inches. You will be using this to sew the ends together.
- Final Steps
- Seaming Instructions: Folding and Sewing the Ends Together
- Fold the band in half matching the ends together.
- Fold the ends in half matching one end to the center of the other band.
- The other band fold over the other side to the front.
- Use the long yarn tail and yarn needle to sew the ends together. Starting on one end, insert the hook through all four layers and pull out the other side. Moving the needle over a little, insert it back through the layers and out the other side. Continue working back and forth like this until you get to the other end.
- When done, weave in the yarn ends and cut off the excess yarn.
Notes
Pattern Notes
Pattern is written in US crochet terminology.Measure the headband rather than count the rows. This way, you can use any leftover yarn you happen to have.
You can find You Tube Video step-by-step tutorials for both left hand and right hand crocheters below the written pattern.
Turn after each row.
The chain stitch at the beginning of each row does not count as a stitch. Place the beginning stitch of each row in the very first stitch.
Since this pattern is reversible, there isn’t a right side and wrong side.


We have a few more free patterns for you to inspire your next project.

You can find Victoria crocheting, quilting, and creating recipes. She has cooked in restaurants for over 20 years, including many larger parties. She learned to crochet when she was just 11 years old and has been crocheting ever since; over 50 years now. Over 40 years ago, she loved her first class in sewing and continues to hone her skills in quilting. Many have enjoyed the handmade gifts over the years. In her professional career, she has worked in management in a wide variety of businesses including higher education as a dean of a division. All the while attending college part-time to achieve her doctorate in higher education with an emphasis in e-learning.


Thank you and Happy Thanksgiving ????
You are welcome. Enjoy
Vicky and Casey
This worked exactly as written, thanks!