Last updated on July 5th, 2024 at 12:36 am
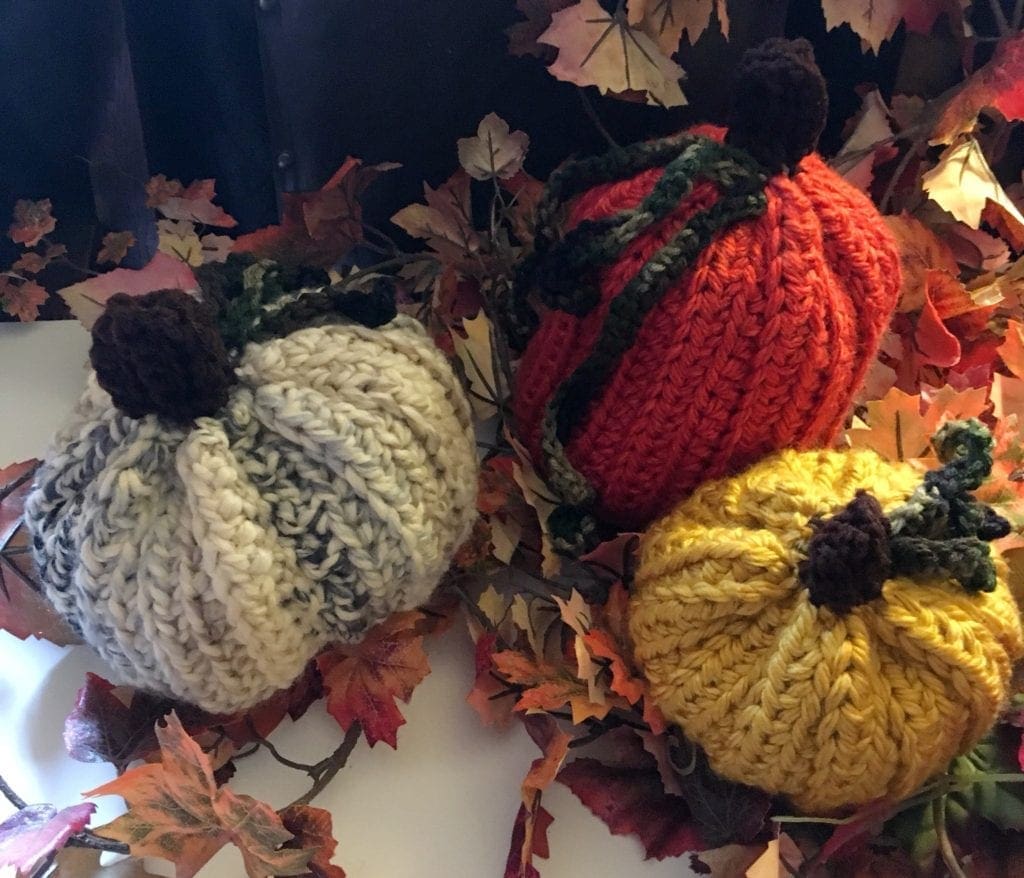
Crochet a rectangle, sew the ends together, and gather up the top and bottom. The end result is so cute. This is a super easy crochet gourds and pumpkins method.
*Post contains affiliate links* for more information please read the disclaimer on the About Us page.
Get Ready for Autumn with your Handmade Crochet Gourds and Pumpkins
Fall Home Décor
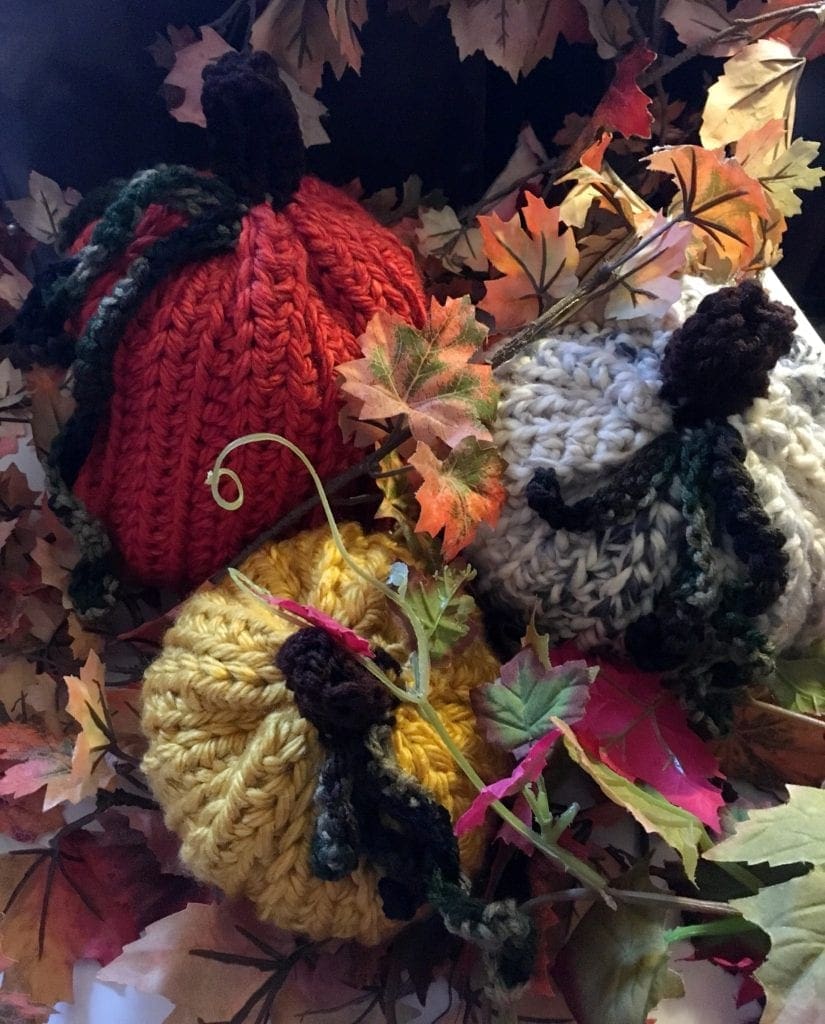
These gourds and pumpkins can be made in a wide variety of sizes.
Just change the stitch count, hook, or even the type of yarn used. Today, the pattern is shown using a thick chunky yarn. By using different non-traditional colors, your fall home decor display can match any color scheme. Some will even have a farm style look to it.
Easy Crochet Gourds and Pumpkins
The length of this pattern may look daunting! However, it is really easy to complete one. All three of these crochet gourds and pumpkins were made in a weekend while I was busy doing other things too.
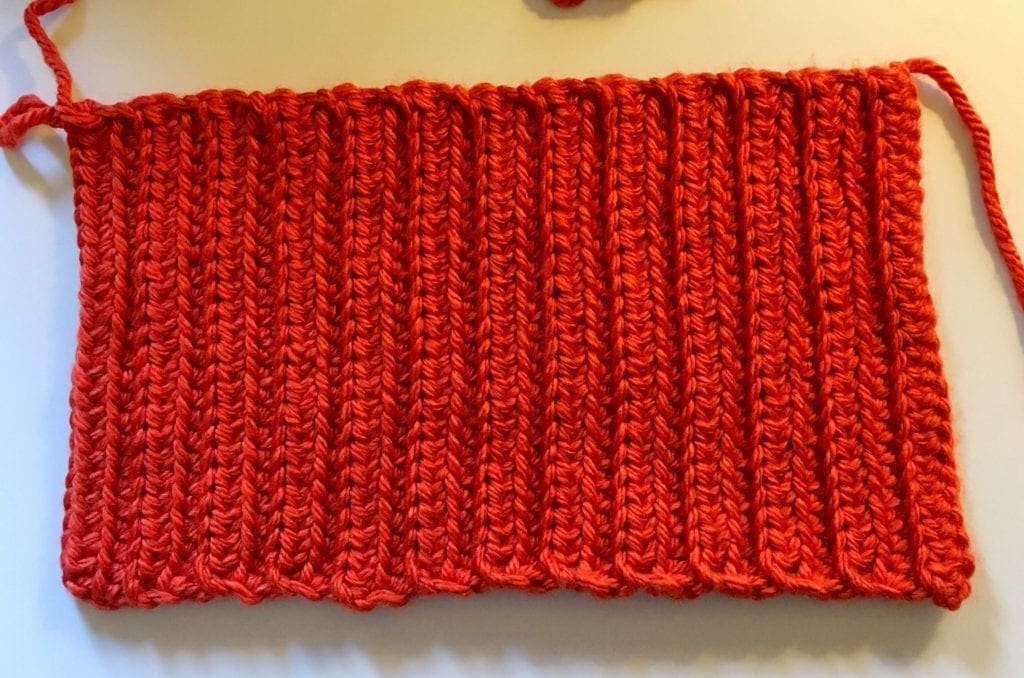
These pretty gourds and pumpkins are made out of rectangles. Yup! really easy too.
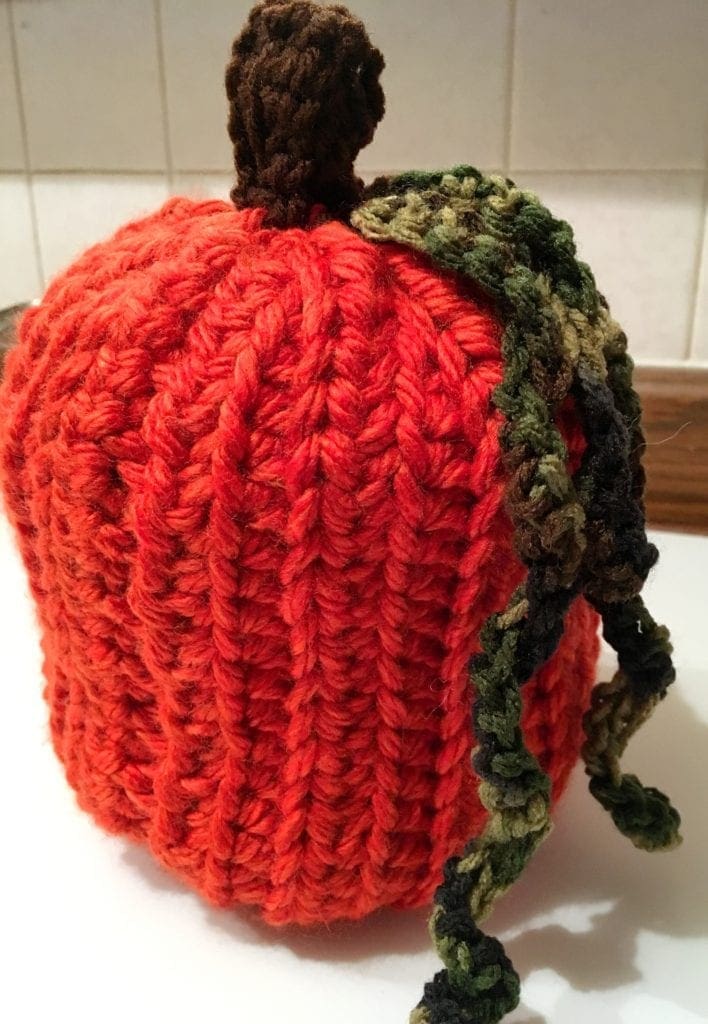
Directions to Crochet Pumpkin
Measurements
The completed crochet pumpkin should measure approximately 14.5 inches wide and 8.5 inches tall.
This pattern is very forgiving. Don’t worry if your measurements are not exactly the same. The pattern should still work out.
Leave a 10-inch tail for both the beginning and ending. This will make sure that you have enough yarn length to sew the seam and complete the gathering.
Materials
Hometown USA Super Bulky Portsmouth Pumpkin 1 skein
Size K Crochet Hook
Yarn Needle here is a nice assortment
Scissors this is the kind I use
Polyester Fiberfill this Poly-fill works nicely
Abbreviations
CH = Chain
HDC = Half Double Crochet
ST = Stitch
Directions
Chain 26
Row 1:
In the third CH from the hook, complete a HDC and in each ST across.
Row 2:
CH 2, HDC in the back loop in each ST across.
Row 3:
CH 2, HDC in the front loop in each ST across.
Rows 4-25:
Repeat rows 2 and 3
Joining:
Hold the beginning row and the ending row together. Note: you can join the right sides together and turn the work inside out or you can join the wrong sides together and no turn the work once joined. This pattern is very forgiving that way. Using the yarn needle, sew the side seam together.

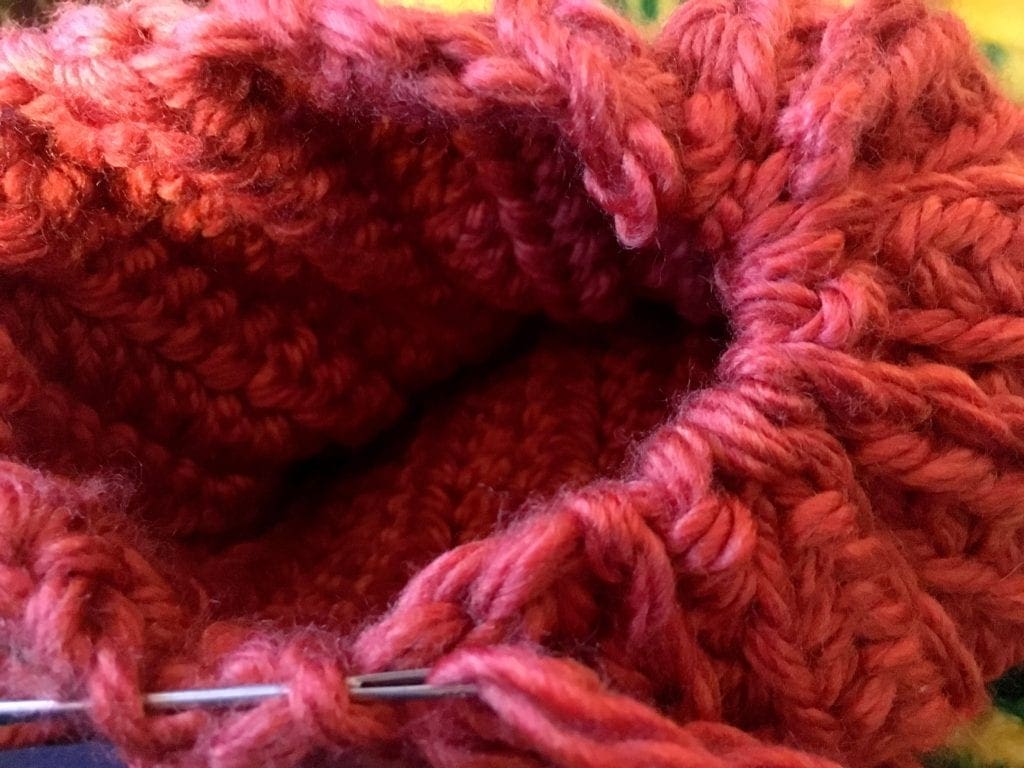
Gathering:
Using the yarn needle and one of the yarn ends, make a running stitch through one of the open ends on the very outer row of stitches through the open holes. As you sew, begin gathering. Once you have worked all the way around, weave the yarn back and forth and tuck inside the center hole. This helps the hole look closed all the way and keeps the fiberfill from peeking out. See the photo below.
Stuffing:
Next fill the pumpkin with the polyester fiberfill.
Gathering the Top Closed
Close the top of the pumpkin by gathering the same way as the bottom.
Crocheting the Vines and Stem

Vines:
Yarn: Red Heart Camouflage Yarn small amount
Longer Vine
CH 40
Row 1: SC
Leave enough yarn ends to attach to the pumpkin.
Medium size vine
CH 30
Row 1: SC
Leave enough yarn ends to attach to the pumpkin.
Smaller Vine
CH 20
Row 1: SC
Leave enough yarn ends to attach to the pumpkin.
Joining Vines:
One at a time, weave both yarn ends into the top of the pumpkin a bit on the side, tie together and tuck into the center hole.

Crocheting the Stem
Yarn: Use a scrap of brown yarn-about 5 feet
CH 6
Row 1: SC
Row 2: CH 1, SC in back loop in each ST across.
Row 3: CH 1, SC in front loop in each ST across.
Rows 4-8: Repeat rows 2 and 3.
Joining:
Using a yarn needle, join the first and last row together with wrong sides together by weaving back and forth between the loops in each row. Do not cut the yarn and do not close the top yet. This makes it easier to attach to the pumpkin.
Joining the Stem to the Pumpkin
Using a yarn needle, sew the stem onto the pumpkin by alternating the yarn between a loop of the pumpkin and a loop of the stem working all the way around. It is easier to hold the stem with one finger in the middle of the stem. This keeps it round while joining. Once joined, gather the top pulling just closed – do not pull too tight otherwise the stem will get distorted.
Enjoy showing off your handmade crochet pumpkin.

Directions: Medium Sized White Gourd
This could also be made with the Portsmouth pumpkin yarn to make another pumpkin.
Measurements
Should measure approximately 18.5 inches wide and 7 inches tall.
Leave a 10-inch tail for both the beginning and ending. This will make sure that you have enough yarn length to sew the seam and complete the gathering.
Materials
Wool-Ease Thick and Quick Moonlight 1 skein
Size K Crochet Hook
Yarn Needle here is a nice assortment
Scissors this is the kind I use
Polyester Fiberfill this Poly-fill works nicely
Abbreviations
CH = Chain
HDC = Half Double Crochet
ST = Stitch
Directions to Gourd
CH 20
Row 1:
In the third CH from the hook, complete a HDC and in each ST across.
Row 2:
CH 2, HDC in the back loop in each ST across.
Row 3:
CH 2, HDC in the front loop in each ST across.
Repeat rows 2 and 3 until 18.5 inches wide
Joining:
Using the yarn needle, sew the side seam together.
Gathering:
Using the yarn needle and one of the yarn ends, make a running stitch through one of the open ends on the very outer row of stitches through the open holes. As you sew, begin gathering. Once you have worked all the way around, weave the yarn back and forth and tuck inside the center hole.
Stuffing:
Next fill the pumpkin with the polyester fiberfill.
Gathering the Top Closed
Close the top of the pumpkin by gathering the same way as the bottom.
Making the Vines and Stem
Vines:
Yarn: Red Heart Camouflage Yarn small amount
Longer Vine
CH 20
Row 1: SC
Leave enough yarn ends to attach to the pumpkin.
Medium size vine
CH 15
Row 1: SC
Leave enough yarn ends to attach to the pumpkin.
Smaller Vine
CH 10
Row 1: SC
Leave enough yarn ends to attach to the pumpkin.
Joining Vines:
One at a time, weave both yarn ends into the top of the pumpkin a bit on the side, tie together and tuck into the center hole.
Stem
Use a scrap of brown yarn-about 5 feet
CH 4
Row 1: SC
Row 2: CH 1, SC in back loop in each ST across.
Row 3: CH 1, SC in front loop in each ST across.
Rows 4-10: Repeat rows 2 and 3.
Joining:
Using a yarn needle, join the first and last row together with wrong sides together by weaving back and forth between the loops in each row. Do not cut the yarn and do not close the top yet.
Joining the Stem to the Gourd
Using a yarn needle, sew the stem onto the pumpkin by alternating the yarn between a loop of the gourd and a loop of the stem working all the way around. Once joined, gather the top pulling just closed.
Enjoy showing off your handmade crochet gourd.
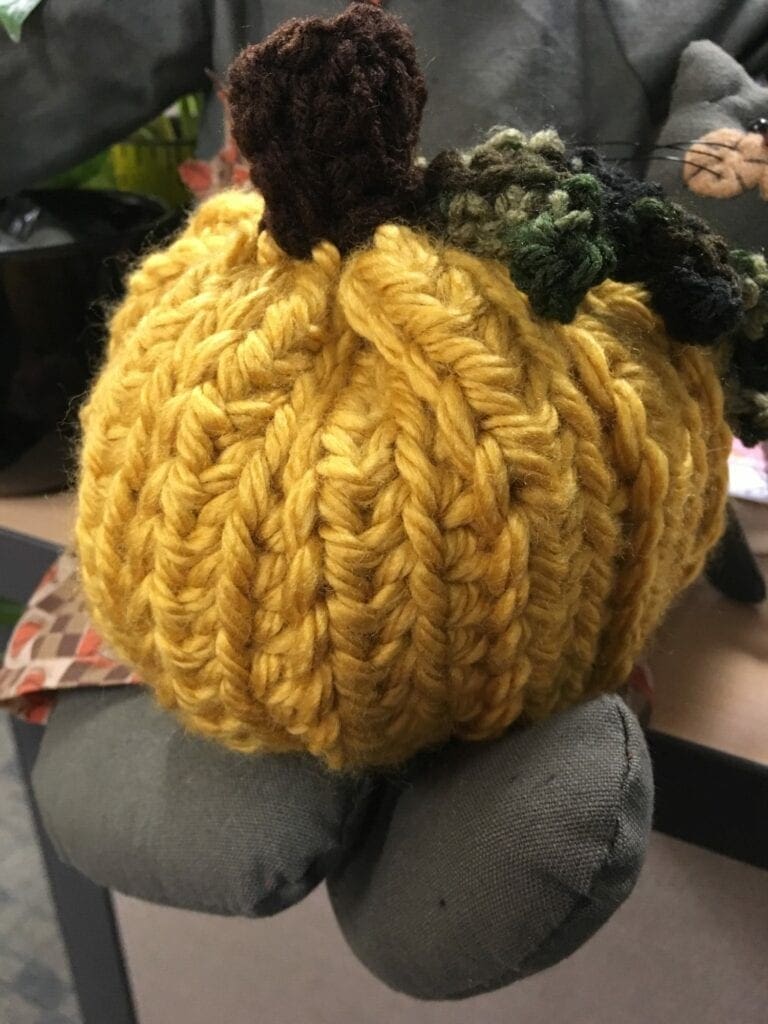
Directions: Smaller Yellow Gourd
Measurements
Should measure approximately 14.5 inches wide and 5.5 inches tall.
Leave a 10-inch tail for both the beginning and ending. This will make sure that you have enough yarn length to sew the seam and complete the gathering.
Materials
Hometown USA Super Bulky Madison Mustard 1 skein
Size K Crochet Hook
Yarn Needle here is a nice assortment
Scissors this is the kind I use
Polyester Fiberfill this Poly-fill works nicely
Abbreviations
CH = Chain
HDC = Half Double Crochet
ST = Stitch
Directions:
CH 16
Row 1:
In the third CH from the hook, complete a HDC and in each ST across.
Row 2:
CH 2, HDC in the back loop in each ST across.
Row 3:
CH 2, HDC in the front loop in each ST across.
Repeat rows 2 and 3 until 14.5 inches wide
Joining:
Using the yarn needle, sew the side seam together.
Gathering:
Using the yarn needle and one of the yarn ends, make a running stitch through one of the open ends on the very outer row of stitches through the open holes. As you sew, begin gathering. Once you have worked all the way around, weave the yarn back and forth and tuck inside the center hole.
Stuffing:
Next fill the pumpkin with the polyester fiberfill.
Gathering the Top Closed
Close the top of the pumpkin by gathering the same way as the bottom.
Making the Vines and Stem
Vines:
Yarn: Red Heart Camouflage Yarn small amount
Longer Vine
CH 15
Row 1: SC across
Leave enough yarn ends to attach to the pumpkin.
Medium size vine
CH 10
Row 1: SC across
Leave enough yarn ends to attach to the pumpkin.
Smaller Vine
CH 8
Row 1: SC across
Leave enough yarn ends to attach to the pumpkin.
Joining Vines:
One at a time, weave both yarn ends into the top of the gourd a bit on the side, tie together and tuck into the center hole.
Crocheting the Stem
Use a scrap of brown yarn-about 5 feet
CH 4
Row 1:
SC
Row 2:
CH 1, SC in back loop in each ST across.
Row 3:
CH 1, SC in front loop in each ST across.
Rows 4-8: Repeat rows 2 and 3.
Joining:
Using a yarn needle, join the first and last row together with wrong sides together by weaving back and forth between the loops in each row. Do not cut the yarn and do not close the top yet.
Joining the Stem to the Pumpkin
Using a yarn needle, sew the stem onto the pumpkin by alternating the yarn between a loop of the pumpkin and a loop of the stem working all the way around. It is easier to hold the stem with one finger in the middle of the stem. This keeps it round while joining. Once joined, gather the top pulling just closed.
Enjoy showing off your handmade crochet gourds and pumpkin.
If you loved this post, please share on your fave social media links at the bottom. It helps to show me that these types of posts are helpful – thank you!
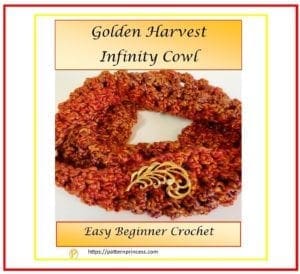
Here are a few other home decor DIY crochet patterns for you along with a pretty fall cowl or two.


You can find Victoria crocheting, quilting, and creating recipes. She has cooked in restaurants for over 20 years, including many larger parties. She learned to crochet when she was just 11 years old and has been crocheting ever since; over 50 years now. Over 40 years ago, she loved her first class in sewing and continues to hone her skills in quilting. Many have enjoyed the handmade gifts over the years. In her professional career, she has worked in management in a wide variety of businesses including higher education as a dean of a division. All the while attending college part-time to achieve her doctorate in higher education with an emphasis in e-learning.