Last updated on July 4th, 2024 at 11:46 pm
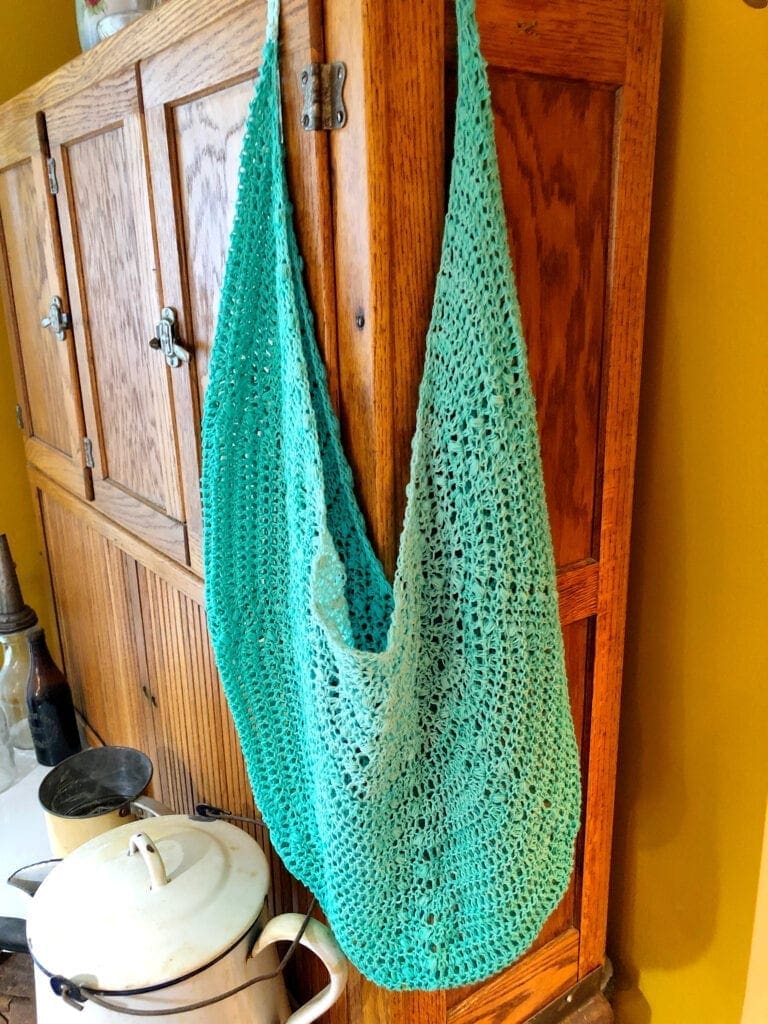
This large crochet mesh market bag is one of my favorite projects. It is so fun to make, and it feels good being eco-friendly bringing my own bag to carry items.
Post contains affiliate links and we earn commissions if you shop through the links on this page. For more information please read the disclaimer on the About Us page.

Crochet Sturdy Mesh Tote
This crochet tote is made from just one yarn cake! I used cotton string fingering yarn to crochet this lightweight mesh bag.
It is pretty and it folds up to stash in a handy place.
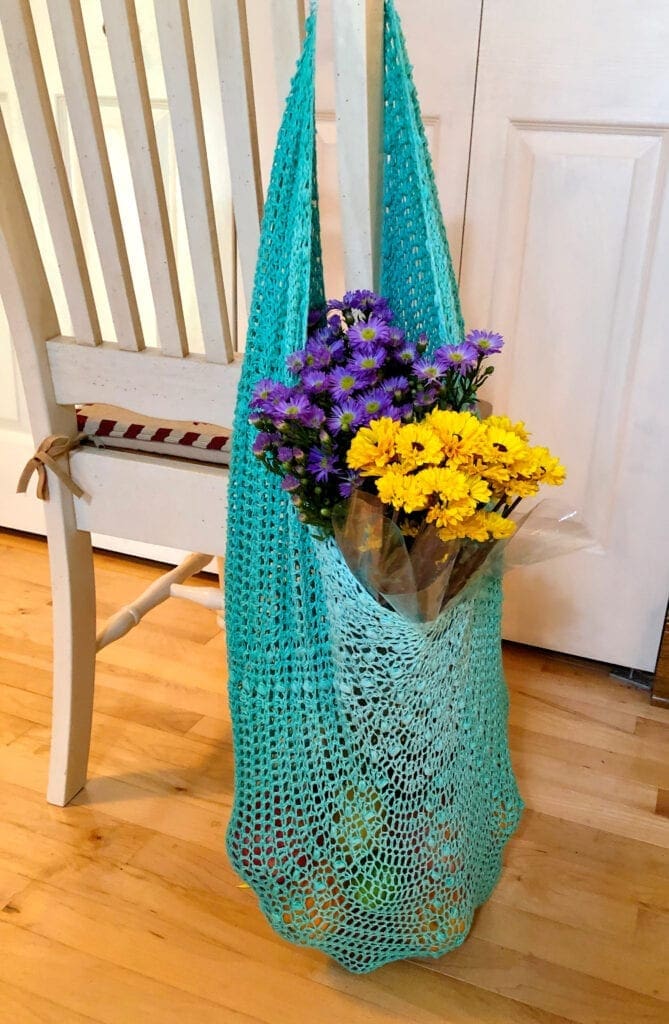
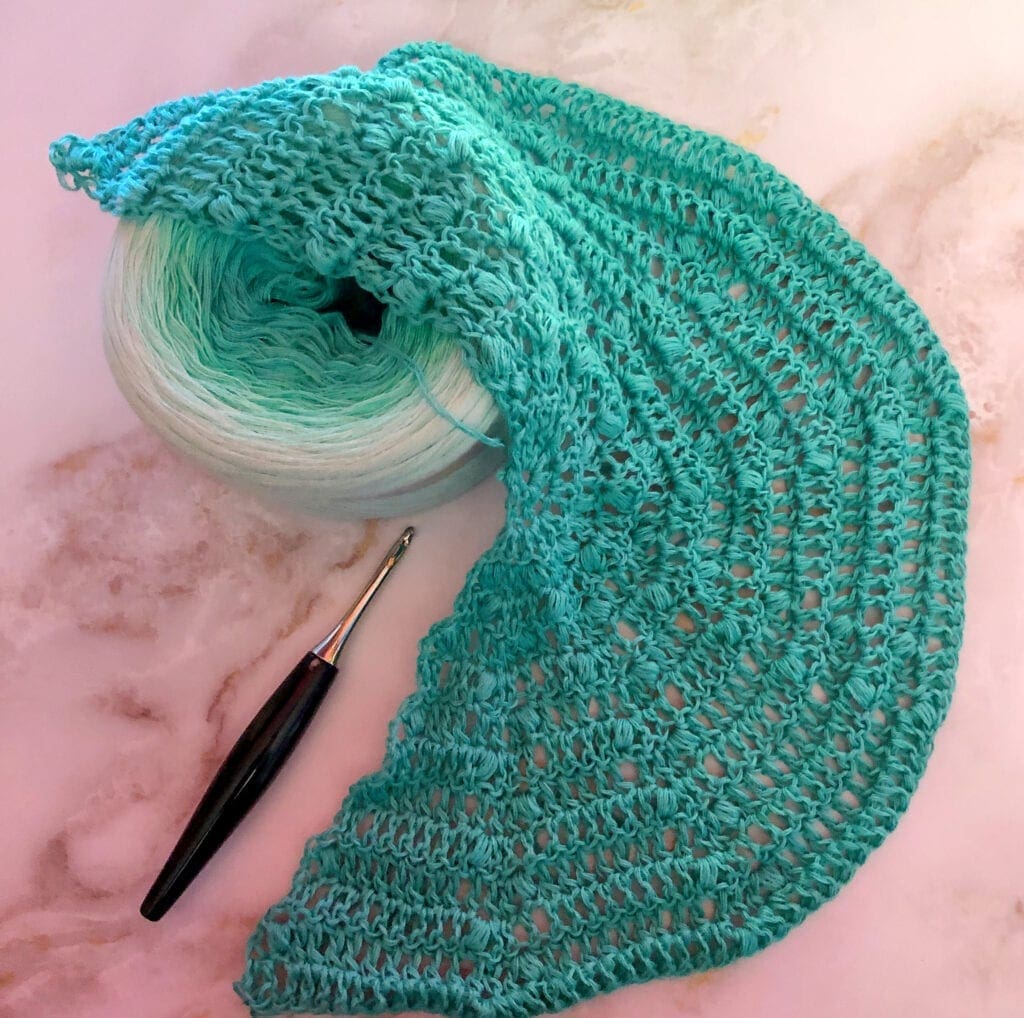
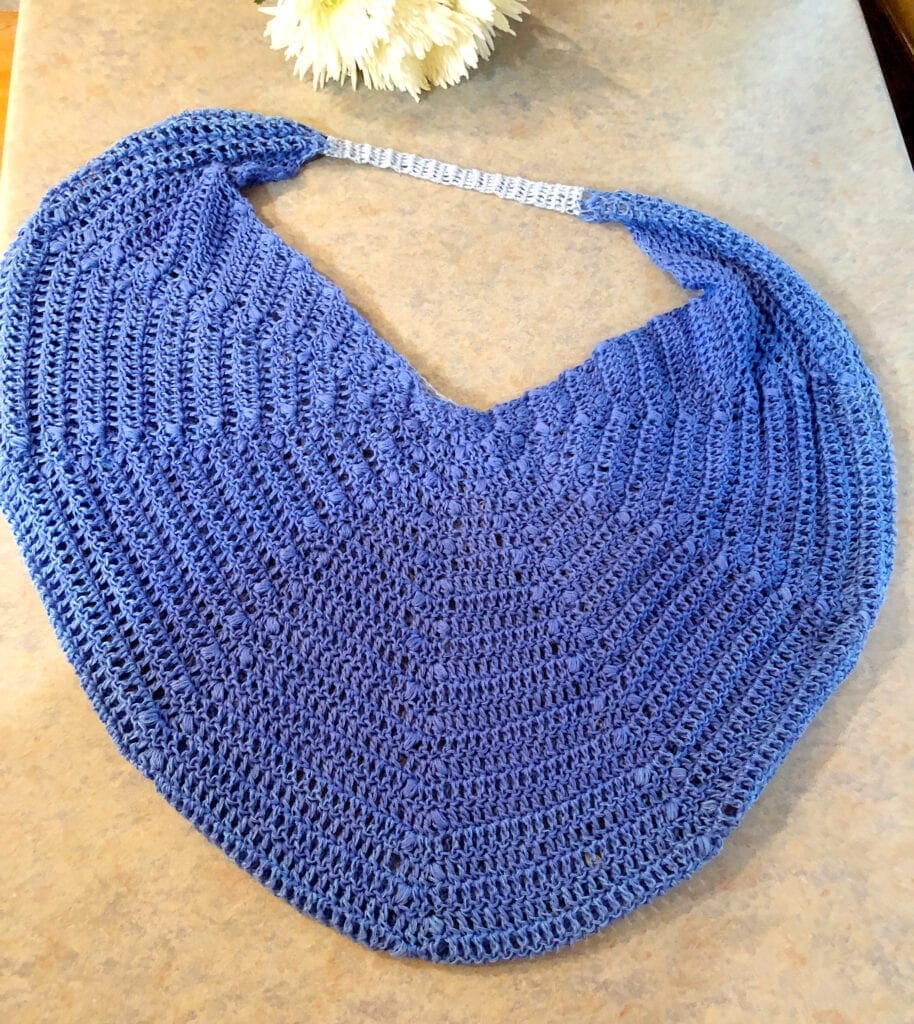
This one-piece crochet bag design is a semi-circle that increases with each row that is added. The crochet stitches used in this pattern are the double crochet stitch and the puff stitch.
Once you get to the desired width and length, just continue crocheting and decreasing the stitches with each row.
Add the handles on using the single crochet stitch and you are all set.
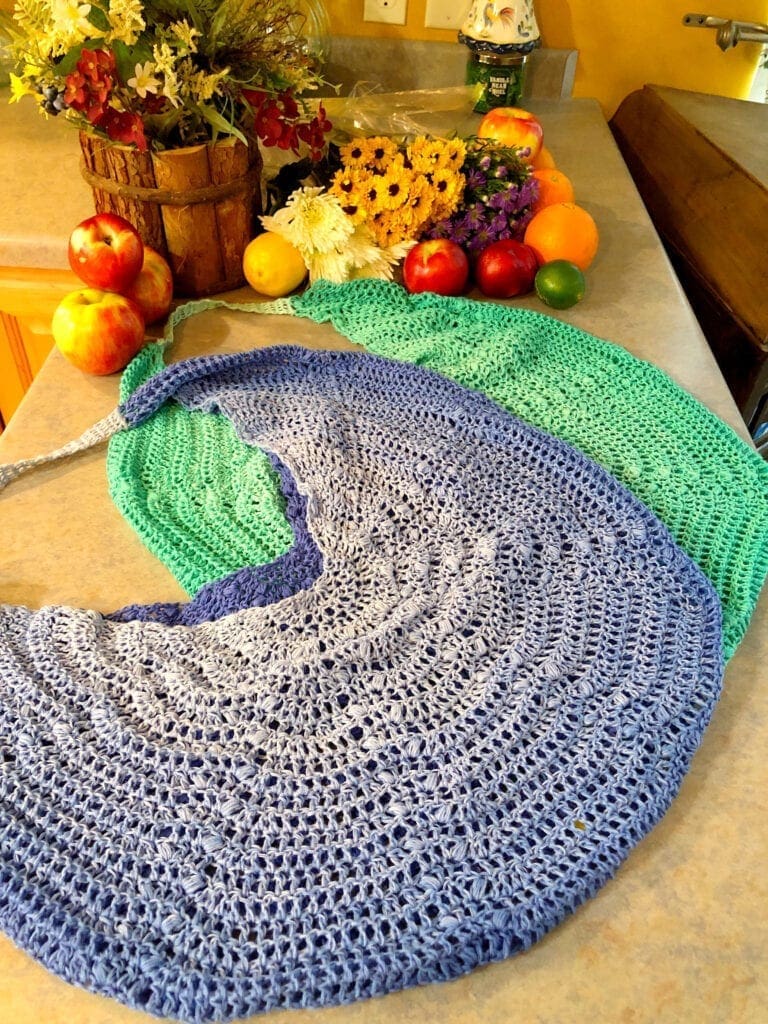
Elegant Crochet Market Bag
This beautiful carryall is perfect to fill with beautiful things; flowers, beach basics, loaves of bread, beautiful fruits, and vegetables, or that special something that just happened to catch your eye at the market.
It is a lovely lightweight carryall that looks gorgeous draped over a shoulder. As my friend said, I want to be one of those women in Paris walking around with baguettes and flowers protruding from their bags.
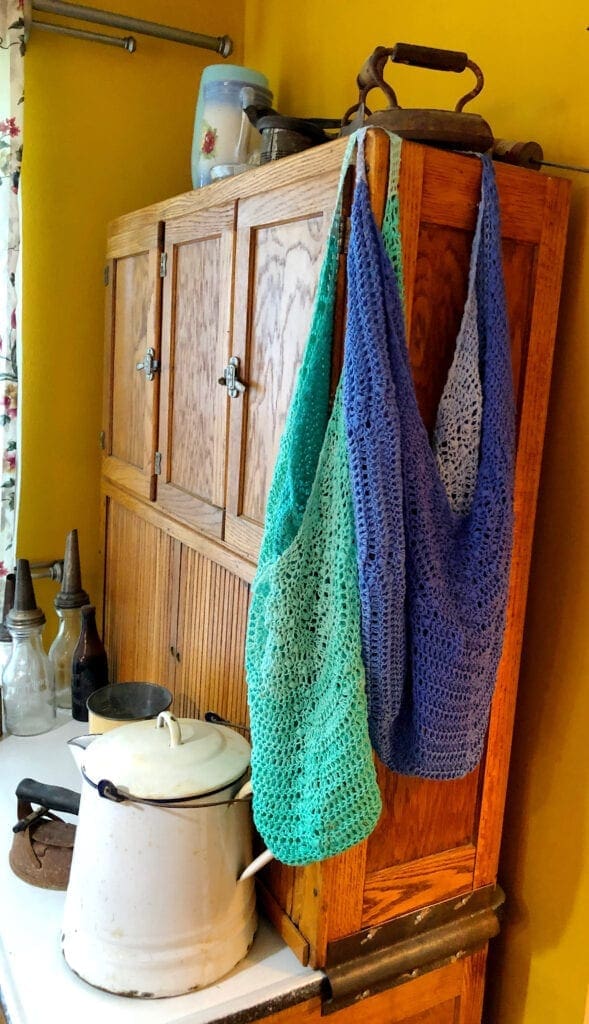
Eco-Friendly Shopping Bag
This eco-friendly shopping bag is made from a light, yet strong fingering yarn. Make this in a rainbow of colors and reuse them for years to come. When the stores eventually stop handing out the plastic and paper bags, you will be all set with your own stash of pretty totes.
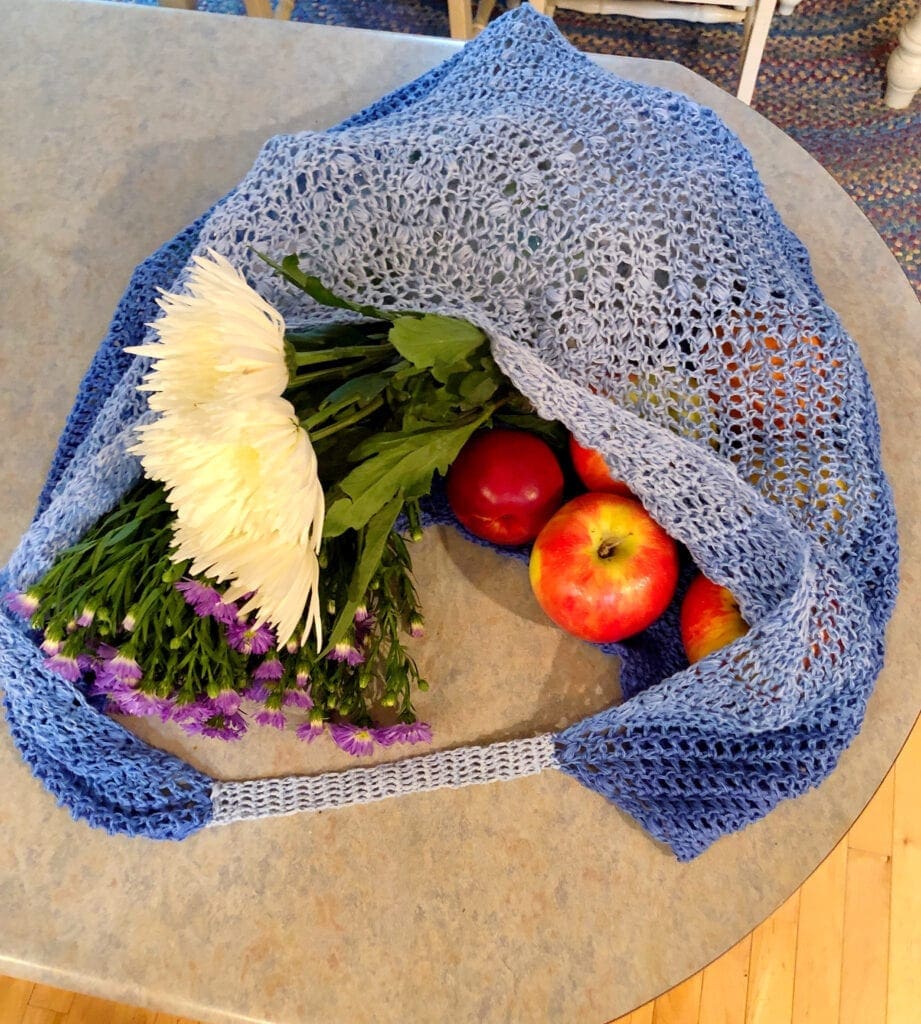
Generous Size Crochet Tote
As you can see, this large crochet bag is full of heavy fruit, there are apples, oranges, limes, lemons, peaches, and of course a bunch of flowers. It is a weightless bag that can be filled with a good amount of produce. While the stitch pattern will allow the bag to expand, it will return to its original shape when everything has been taken out and put away.
Customize the Bag Size
This is an easy crochet pattern grows by eight stitches with each round.
Today, I used a fine number 2 yarn cake that has 874 yards. However, I only used approximately 500 yards of this yarn. This makes for a nice size bag. However, if you want a smaller one, just stop the increasing rows sooner and start decreasing to make this the size you desire.
Crochet Shawl Pattern Used to Make this Market Bag
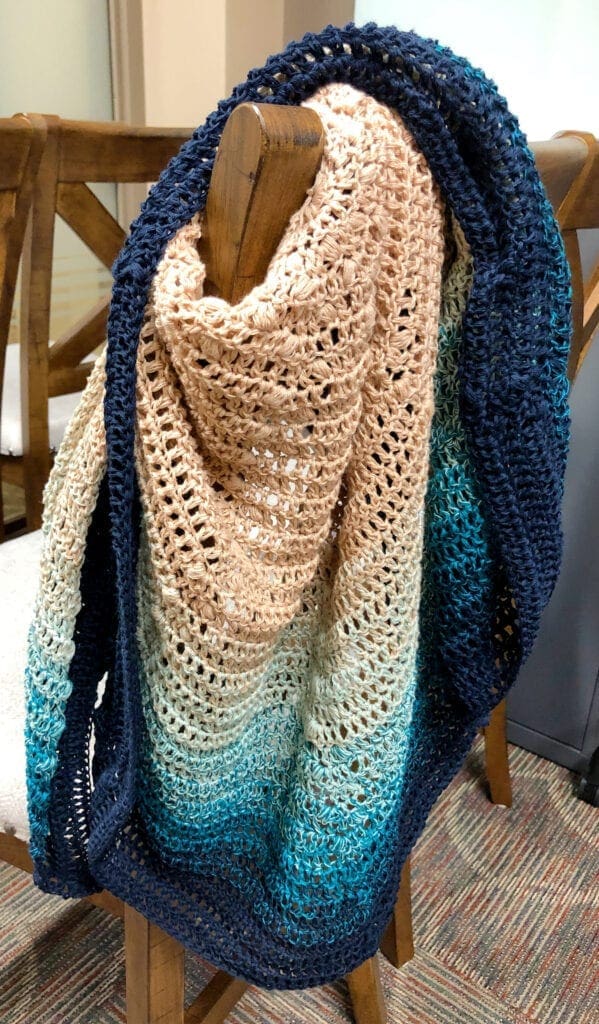
I loved the Footprints in the Sand Shawl so much that I used the stitch pattern as the basis for this market bag. As I was working the stitches, I realized how well this would work for a mesh bag and the sturdy lightweight fingering yarn is so beautiful with the delicate stitches.
Crochet Video Tutorials
I do have a video tutorial link right by the Puff Stitch directions.
However, at the bottom of the pattern there are crochet tutorials showing this pattern worked in a worsted weight yarn hoping it shows the stitches better. After the worsted weight part of the video I do show working in this fine yarn as well.
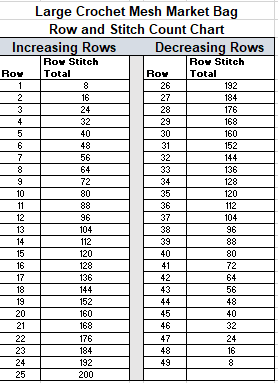
There is a chart showing the stitch counts for each row. This is helpful in marking off each row as you work this crochet pattern. the PDF printable without ads will also have this chart included in the directions for you.
Directions: Large Crochet Mesh Market Bag
Pattern Notes
Each beginning Ch 3 counts as a DC.
Each row stitch count increases by 8.
There are 8 Puff Stitches in each row.
This market bag is worked in a semi-circle.
The tote is worked from the top down, increasing in size as each row is completed through row 25. Then rows 26 through 49 the rows decrease in size as each row is completed.
A note about the decreasing rows: I have you working 2 DC2Tog in a row. This can be confusing as you are really decreasing the section by 2 stitches. To be honest, I was on about row 10 of the decreasing rows before I realized that I was not decreasing at all; just staying the same size. Then I realized that because I am continuing to add the extra stitch by the puff stitch in the same section that I needed to really decrease by 2 in the section to come out with a decrease of 1.
Special Stitches
Puff Stitch (PS)
I will provide details on how to complete the puff stitch; however, it is important to note that the puff stitch can be made in any size you want. Therefore, you might see another designer’s pattern explain a different number of yarn wraps around the hook. That is okay, just know that there are other options beyond the one I am using in this crochet pattern.
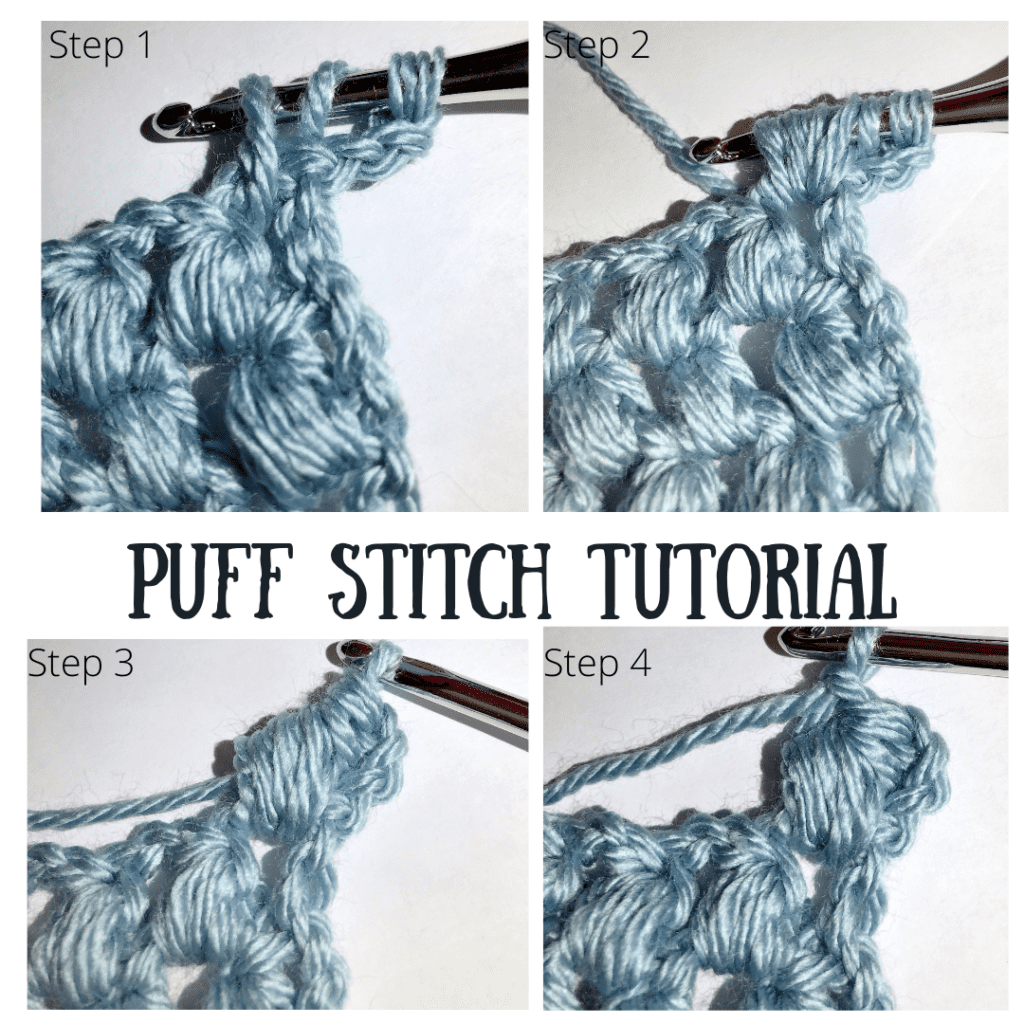
Completing the puff stitch.
Step 1: Yarn over and insert the hook in the stitch where the puff stitch will be placed. Yarn over and pull through a loop. There are now three loops on the hook.
Step 2: Yarn over again and insert the hook in the same stitch area that you previously inserted your hook. Yarn over and pull through a loop. There are now five loops on the hook.
Step 3: Repeat step two twice more. You will have nine loops on the hook. Yarn over one more time and pull the yarn through all nine loops on the hook.
Finishing: Yarn over one more time and pull through the one loop on the hook to complete the puff stitch.
Remember you can increase or decrease the loops on the hook as you need for future crochet projects. Make it puffier by adding loops, decrease the puffiness by reducing the number of loops on the hook.
Double Crochet Two Together (DC2Tog)
This decreases the stitches by one double crochet each time this is worked.
Yarn over, insert hook into next stitch and pull up a loop. There will be three loops on the crochet hook. Yarn over, pull through two loops on the hook. There should now be just two loops left on the hook.
Yarn over and insert the hook into the next stitch and pull up a loop. There will be four loops on the hook. Yarn over, pull through two loops. There should now be just three loops on the hook. Lastly yarn over and pull through the remaining three loops.
DOUBLE CROCHET TWO TOGETHER video tutorial
Difficulty
Good for an advanced beginner or intermediate
Size
24 inches wide with the handle attached. Before the handle is attached, the widest part is 30 inches wide. The market bag is a semi-circle that is 13 inches long.
Gauge
26 Stitches to 4 inches
Materials
Cotton Kings Twirls Hobbi yarn. 1 yarn cake I used approximately 500 of the 874 yards. Color number 7. If you are not able to find this yarn, you can purchase it here. Another nice option for this pattern is It’s a Wrap yarn.
Sometimes, the yarn colors are sold out. Here are some other great yarn color choices.
Size H Crochet Hook
Yarn Needle
Scissors
Abbreviations
CH = Chain
DC = Double Crochet
DC2Tog = Double Crochet 2 Together
PS = Puff Stitch
SK = Skip
SL ST = Slip Stitch
ST = Stitch
STs = Stitches
[ ] Repeat Between
Crochet Pattern Directions:
Begin with a Circle
You can use the magic ring.
However, I used this method to start this shawl.
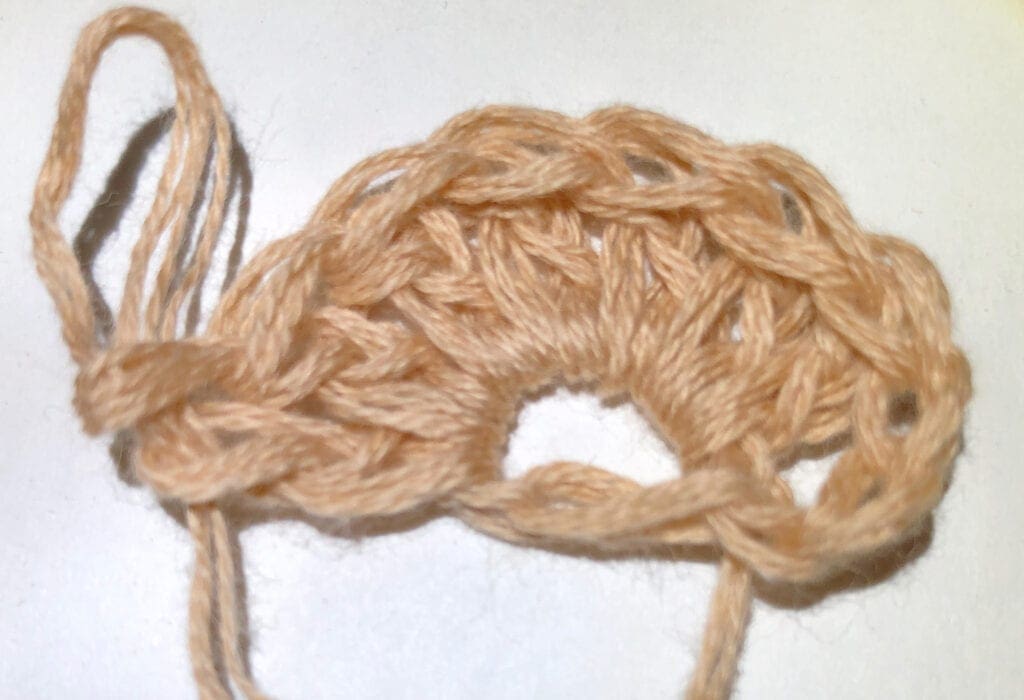
CH 4, SL ST back into the 1st CH
Row 1
Ch 3 (Counts as DC). 7 DC in the circle. Turn (8 DC)
Row 2
CH 3 (Counts as DC). DC in the same ST. 2 DC in each of the remaining STs. Turn (16 DC)
Row 3
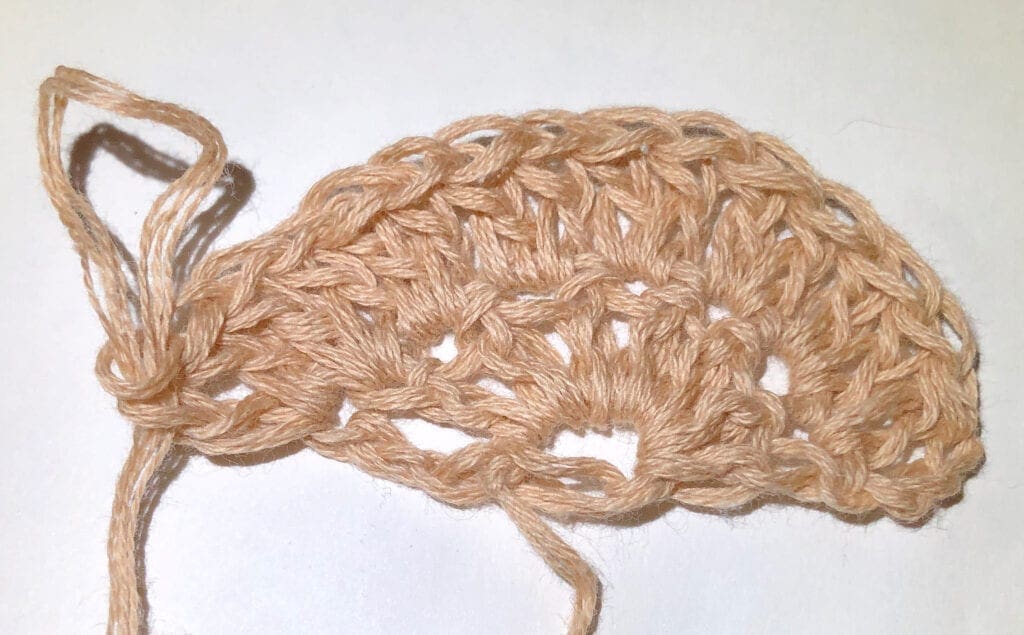
CH 3 (Counts as DC). PS in same ST. DC in next ST [1 DC and 1 PS in next ST, DC in next ST]. Repeat between [ ] across. Turn (24 STs).
Row 4
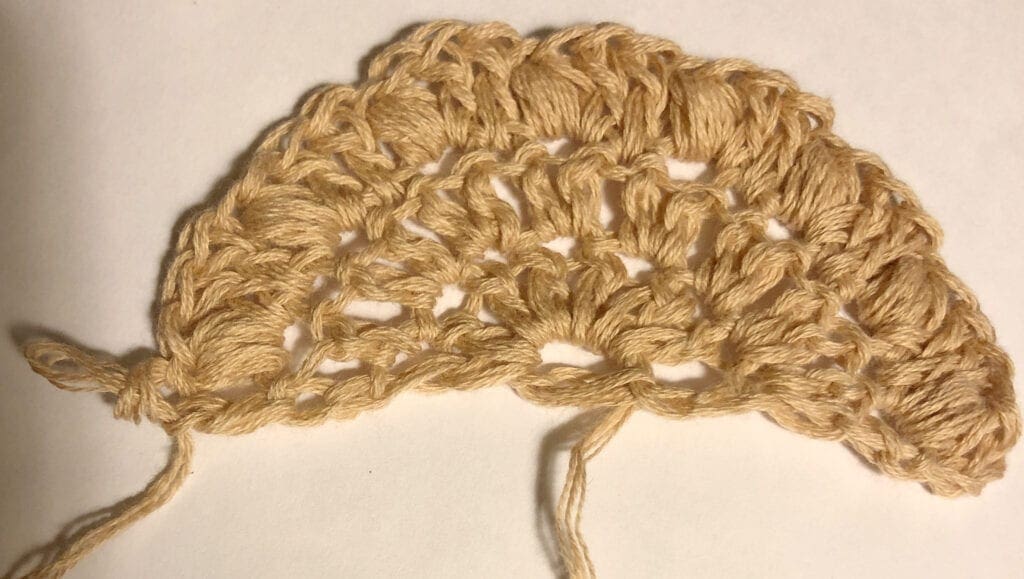
CH 3 (Counts as DC). PS in same ST. DC in next 2 STs [1 DC and 1 PS in next ST, DC in next 2 STs]. Repeat between [ ] across. Turn (32 STs).
Row 5
CH 3 (Counts as DC). PS in same ST. DC in next 3 STs [1 DC and 1 PS in next ST, DC in next 3 STs]. Repeat between [ ] across. Turn (40 STs).
Row 6
CH 3 (Counts as DC). PS in same ST. DC in next 4 STs [1 DC and 1 PS in next ST, DC in next 4 STs]. Repeat between [ ] across. Turn (48 STs).
Row 7
CH 3 (Counts as DC). PS in same ST. DC in next 5 STs [1 DC and 1 PS in next ST, DC in next 5 STs]. Repeat between [ ] across. Turn (56 STs).
Row 8
CH 3 (Counts as DC). PS in same ST. DC in next 6 STs [1 DC and 1 PS in next ST, DC in next 6 STs]. Repeat between [ ] across. Turn (64 STs).
Row 9
CH 3 (Counts as DC). PS in same ST. DC in next 7 STs [1 DC and 1 PS in next ST, DC in next 7 STs]. Repeat between [ ] across. Turn (72 STs).
Row 10
CH 3 (Counts as DC). PS in same ST. DC in next 8 STs [1 DC and 1 PS in next ST, DC in next 8 STs]. Repeat between [ ] across. Turn (80 STs).
Row 11
CH 3 (Counts as DC). PS in same ST. DC in next 9 STs [1 DC and 1 PS in next ST, DC in next 9 STs]. Repeat between [ ] across. Turn (88 STs).
Row 12
CH 3 (Counts as DC). PS in same ST. DC in next 10 STs [1 DC and 1 PS in next ST, DC in next 10 STs]. Repeat between [ ] across. Turn (96 STs).
Row 13
CH 3 (Counts as DC). PS in same ST. DC in next 11 STs [1 DC and 1 PS in next ST, DC in next 11 STs]. Repeat between [ ] across. Turn (104 STs).
Row 14
CH 3 (Counts as DC). PS in same ST. DC in next 12 STs [1 DC and 1 PS in next ST, DC in next 12 STs]. Repeat between [ ] across. Turn (112 STs).
Row 15
CH 3 (Counts as DC). PS in same ST. DC in next 13 STs [1 DC and 1 PS in next ST, DC in next 13 STs]. Repeat between [ ] across. Turn (120 STs).
Row 16
CH 3 (Counts as DC). PS in same ST. DC in next 14 STs [1 DC and 1 PS in next ST, DC in next 14 STs]. Repeat between [ ] across. Turn (128 STs).
Row 17
CH 3 (Counts as DC). PS in same ST. DC in next 15 STs [1 DC and 1 PS in next ST, DC in next 15 STs]. Repeat between [ ] across. Turn (136 STs).
Row 18
CH 3 (Counts as DC). PS in same ST. DC in next 16 STs [1 DC and 1 PS in next ST, DC in next 16 STs]. Repeat between [ ] across. Turn (144 STs).
Row 19
CH 3 (Counts as DC). PS in same ST. DC in next 17 STs [1 DC and 1 PS in next ST, DC in next 17 STs]. Repeat between [ ] across. Turn (152 STs).
Row 20
CH 3 (Counts as DC). PS in same ST. DC in next 18 STs [1 DC and 1 PS in next ST, DC in next 18 STs]. Repeat between [ ] across. Turn (160 STs).
Row 21
CH 3 (Counts as DC). PS in same ST. DC in next 19 STs [1 DC and 1 PS in next ST, DC in next 19 STs]. Repeat between [ ] across. Turn (168 STs).
Row 22
CH 3 (Counts as DC). PS in same ST. DC in next 20 STs [1 DC and 1 PS in next ST, DC in next 20 STs]. Repeat between [ ] across. Turn (176 STs).
Row 23
CH 3 (Counts as DC). PS in same ST. DC in next 21 STs [1 DC and 1 PS in next ST, DC in next 21 STs]. Repeat between [ ] across. Turn (184 STs).
Row 24
CH 3 (Counts as DC). PS in same ST. DC in next 22 STs [1 DC and 1 PS in next ST, DC in next 22 STs]. Repeat between [ ] across. Turn (192 STs).
Row 25
CH 3 (Counts as DC). PS in same ST. DC in next 23 STs [1 DC and 1 PS in next ST, DC in next 23 STs]. Repeat between [ ] across. Turn (200 STs).
Decreasing Stitches
After this row, the stitch count will begin to decrease by 8 each row.
Row 26
CH 3 (Counts as DC). PS in same ST. Then work a DC2Tog, and one more DC2Tog. DC in next 18 STs [1 DC and 1 PS in next ST, Then work a DC2Tog, and one more DC2Tog. DC in next 18 STs]. Repeat between [ ] across. Turn (192 STs).
Row 27
CH 3 (Counts as DC). PS in same ST. Then work a DC2Tog, and one more DC2Tog. DC in next 17 STs [1 DC and 1 PS in next ST. Then work a DC2Tog, and one more DC2Tog. DC in next 17 STs]. Repeat between [ ] across. Turn (184 STs).
Row 28
CH 3 (Counts as DC). PS in same ST. Then work a DC2Tog, and one more DC2Tog. DC in next 16 STs [1 DC and 1 PS in next ST. Then work a DC2Tog, and one more DC2Tog. DC in next 16 STs]. Repeat between [ ] across. Turn (176 STs).
Row 29
CH 3 (Counts as DC). PS in same ST. Then work a DC2Tog, and one more DC2Tog. DC in next 15 STs [1 DC and 1 PS in next ST. Then work a DC2Tog, and one more DC2Tog. DC in next 15 STs]. Repeat between [ ] across. Turn (168 STs).
Row 30
CH 3 (Counts as DC). PS in same ST. Then work a DC2Tog, and one more DC2Tog. DC in next 14 STs [1 DC and 1 PS in next ST. Then work a DC2Tog, and one more DC2Tog. DC in next 14 STs]. Repeat between [ ] across. Turn (160 STs).
Row 31
CH 3 (Counts as DC). PS in same ST. Then work a DC2Tog, and one more DC2Tog. DC in next 13 STs [1 DC and 1 PS in next ST. Then work a DC2Tog, and one more DC2Tog. DC in next 13 STs]. Repeat between [ ] across. Turn (152 STs).
Row 32
CH 3 (Counts as DC). PS in same ST. Then work a DC2Tog, and one more DC2Tog. DC in next 12 STs [1 DC and 1 PS in next ST. Then work a DC2Tog, and one more DC2Tog. DC in next 12 STs]. Repeat between [ ] across. Turn (144 STs).
Row 33
CH 3 (Counts as DC). PS in same ST. Then work a DC2Tog, and one more DC2Tog. DC in next 11 STs [1 DC and 1 PS in next ST. Then work a DC2Tog, and one more DC2Tog. DC in next 11 STs]. Repeat between [ ] across. Turn (136 STs).
Row 34
CH 3 (Counts as DC). PS in same ST. Then work a DC2Tog, and one more DC2Tog. DC in next 10 STs [1 DC and 1 PS in next ST. Then work a DC2Tog, and one more DC2Tog. DC in next 10 STs]. Repeat between [ ] across. Turn (128 STs).
Row 35
CH 3 (Counts as DC). PS in same ST. Then work a DC2Tog, and one more DC2Tog. DC in next 9 STs [1 DC and 1 PS in next ST. Then work a DC2Tog, and one more DC2Tog. DC in next 9 STs]. Repeat between [ ] across. Turn (120 STs).
Row 36
CH 3 (Counts as DC). PS in same ST. Then work a DC2Tog, and one more DC2Tog. DC in next 8 STs [1 DC and 1 PS in next ST. Then work a DC2Tog, and one more DC2Tog. DC in next 8 STs]. Repeat between [ ] across. Turn (112 STs).
Row 37
CH 3 (Counts as DC). PS in same ST. Then work a DC2Tog, and one more DC2Tog. DC in next 7 STs [1 DC and 1 PS in next ST. Then work a DC2Tog, and one more DC2Tog. DC in next 8 STs]. Repeat between [ ] across. Turn (104 STs).
Row 38
CH 3 (Counts as DC). PS in same ST. Then work a DC2Tog, and one more DC2Tog. DC in next 6 STs [1 DC and 1 PS in next ST. Then work a DC2Tog, and one more DC2Tog. DC in next 6 STs]. Repeat between [ ] across. Turn (96 STs).
Row 39
CH 3 (Counts as DC). PS in same ST. Then work a DC2Tog, and one more DC2Tog. DC in next 5 STs [1 DC and 1 PS in next ST. Then work a DC2Tog, and one more DC2Tog. DC in next 5 STs]. Repeat between [ ] across. Turn (88 STs).
Row 40
CH 3 (Counts as DC). PS in same ST. Then work a DC2Tog, and one more DC2Tog. DC in next 4 STs [1 DC and 1 PS in next ST. Then work a DC2Tog, and one more DC2Tog. DC in next 4 STs]. Repeat between [ ] across. Turn (80 STs).
Row 41
CH 3 (Counts as DC). PS in same ST. Then work a DC2Tog, and one more DC2Tog. DC in next 3 STs [1 DC and 1 PS in next ST. Then work a DC2Tog, and one more DC2Tog. DC in next 3 STs]. Repeat between [ ] across. Turn (72 STs).
Row 42
CH 3 (Counts as DC). PS in same ST. Then work a DC2Tog, and one more DC2Tog. DC in next 2 STs [1 DC and 1 PS in next ST. Then work a DC2Tog, and one more DC2Tog. DC in next 2 STs]. Repeat between [ ] across. Turn (64 STs).
Row 43
CH 3 (Counts as DC). PS in same ST. Then work a DC2Tog, and one more DC2Tog. DC in next 1 STs [1 DC and 1 PS in next ST. Then work a DC2Tog, and one more DC2Tog. DC in next 1 STs]. Repeat between [ ] across. Turn (56 STs).
Row 44
CH 3 (Counts as DC). PS in same ST. Then work a DC2Tog, and one more DC2Tog. [1 DC and 1 PS in next ST. Then work a DC2Tog, and one more DC2Tog]. Repeat between [ ] across. Turn (48 STs).
Row 45
CH 3 (Counts as DC). PS in same ST. Then work a DC2Tog. DC in the next ST. [1 DC and 1 PS in next ST. Then work a DC2Tog. DC in the next ST]. Repeat between [ ] across. Turn (40 STs).
Row 46
CH 3 (Counts as DC). PS in same ST. Then work a DC2Tog. [1 DC and 1 PS in next ST. Then work a DC2Tog]. Repeat between [ ] across. Turn (32 STs).
Row 47
CH 3 (Counts as DC). PS in same ST, 1 DC. [1 DC and 1 PS in next ST, 1 DC]. Repeat between [ ] across. Turn (24 STs).
Row 48
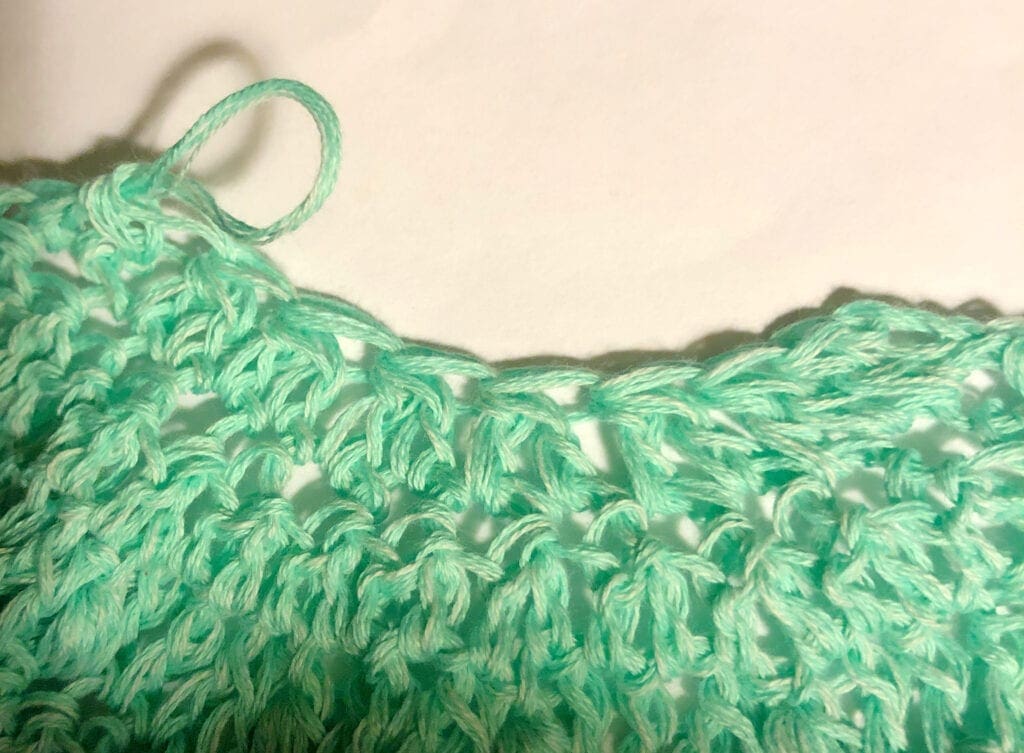
CH 3 (Counts as DC), DC2Tog 15 times. Turn (16 STs).
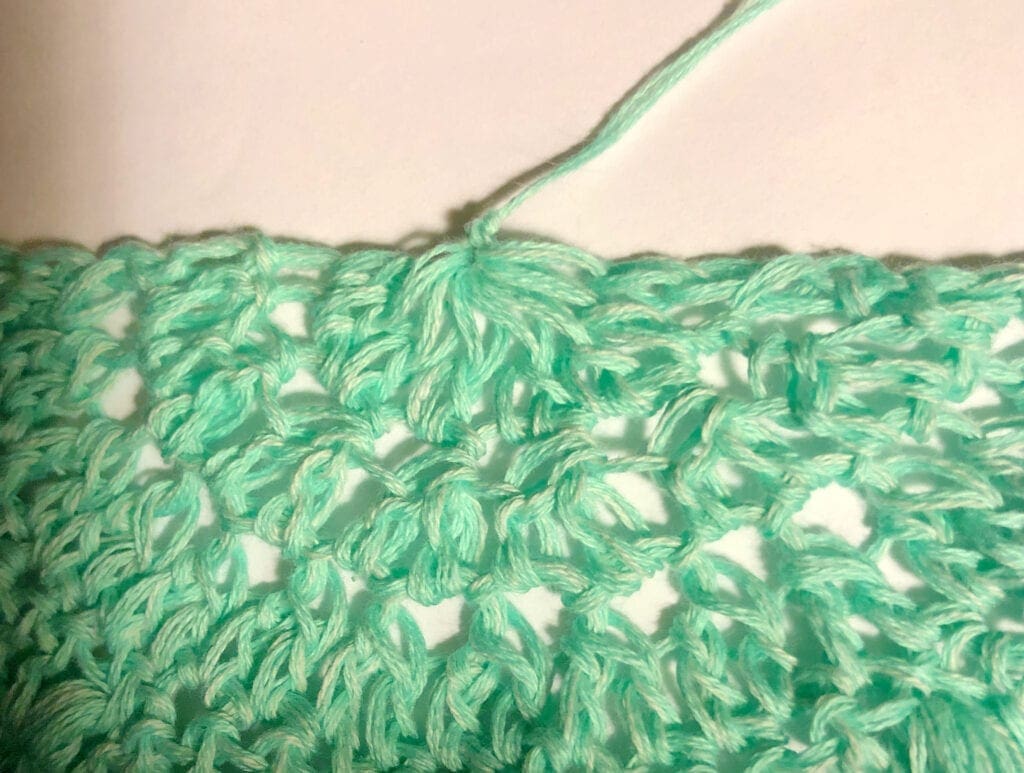
Row 49
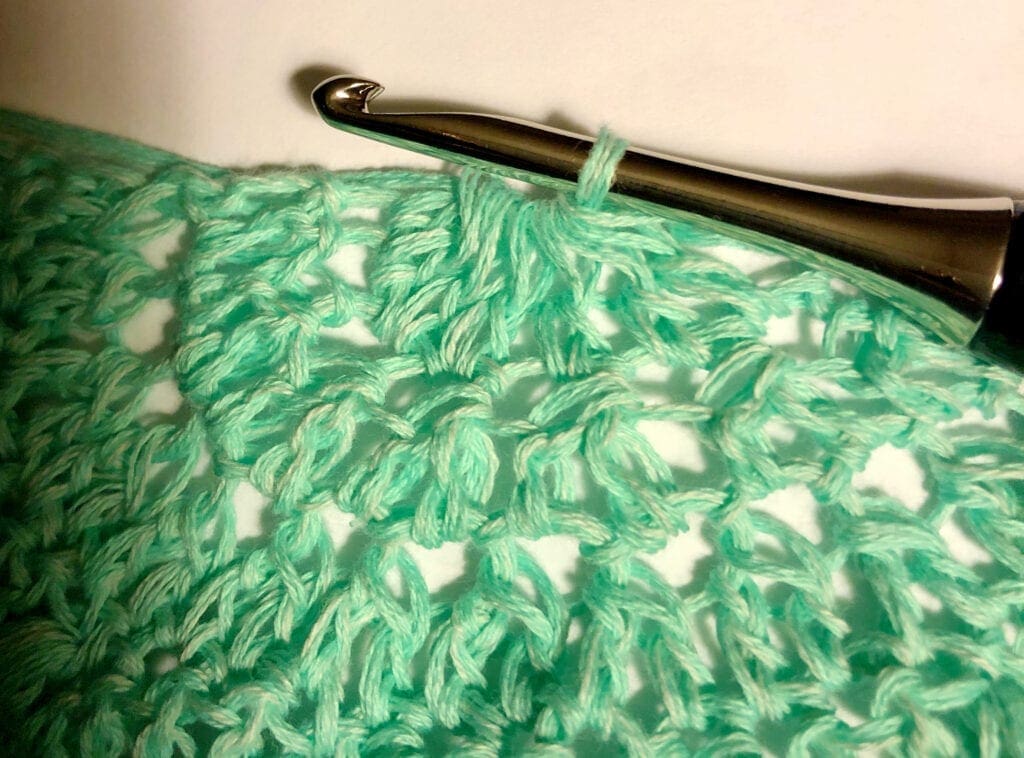
CH 3 (Counts as DC), DC2Tog 7 times keeping all the loops on the hook. Yarn over and bring the yarn through all the loops on the hook. YO one more time and bring through the loop on the hook. Cut off a long tail and pull the yarn through and make a knot. Weave the yarn end through quite a bit and add a few more knots for extra security. (8 STs).
Crocheting the Handle
Lay the bag flat and find the center points on each side. Start your stitches for the handles at those center point areas.
I did five stitches for my handle; however, you could make yours wider or narrower.
Leave a long yarn tail on so it can be knotted and weaved back and forth quite a few times. This makes the area where the handle is joined nice and sturdy.
You will be joining the yarn and crocheting SC in 5 stitches beginning a stitch or two away from the center point. This eases the stitches in a few yarn strands for distributing the weight of the items in the bag.
I crocheted my handles 15 rows long. Again, you can add more rows or reduce the number of rows to the length that you desire.
Join the yarn and work 5 SC. Ch 1 turning chain (does not count as a ST). Turn
Rows 2 – 15
SC in the first ST and in each across, CH 1. Turn (5 SC).
Finishing
Weave in the yarn ends and remove the excess.
Row and Stitch Chart for Crochet Shawl Pattern
Crochet Video Tutorials
Left hand tutorial.
Right hand tutorial.
If you’re like me, you will want one is many colors. I suggest starting soon. Enjoy!
If you loved this post, please share. It helps to show me that these types of posts are helpful – thank you!
I hope that you liked this pattern. If you are looking for more ideas for crocheted projects, here are a few others you may enjoy.
[pt_view id=”ac7b107f1u”]

You can find Victoria crocheting, quilting, and creating recipes. She has cooked in restaurants for over 20 years, including many larger parties. She learned to crochet when she was just 11 years old and has been crocheting ever since; over 50 years now. Over 40 years ago, she loved her first class in sewing and continues to hone her skills in quilting. Many have enjoyed the handmade gifts over the years. In her professional career, she has worked in management in a wide variety of businesses including higher education as a dean of a division. All the while attending college part-time to achieve her doctorate in higher education with an emphasis in e-learning.

I am trying it a second time after watching your videos. Turning out much better this time. Your comment to what out for that little tiny stitch at the end is making a big difference.
I do want to say thank you for your time and effort posting this pattern to the internet.
Thank you.
My pleasure. I’m so glad it all worked out for you. This is one of my favorite farmers market bags and it gets used a lot.
Take care.
Vicky
Pingback: 4 Beginner Crochet Earrings Patterns - Pattern Princess
Pingback: Bolsa de mercado de malla grande Patrón de ganchillo gratis – mujer de la casa
Love this pattern. I just have one query: The pictures seem to show that there are three strands of the yarn crocheted together but I can’t see this stated anywhere in the pattern. Could you clarify this please?
Thank you
I was showing how the fingering yarn that I was using is made up of 4 thread-like strands of yarn. I the materials section, it details the yarn that I used. One fingering yarn cake. vicky