Last updated on March 27th, 2026 at 10:05 am
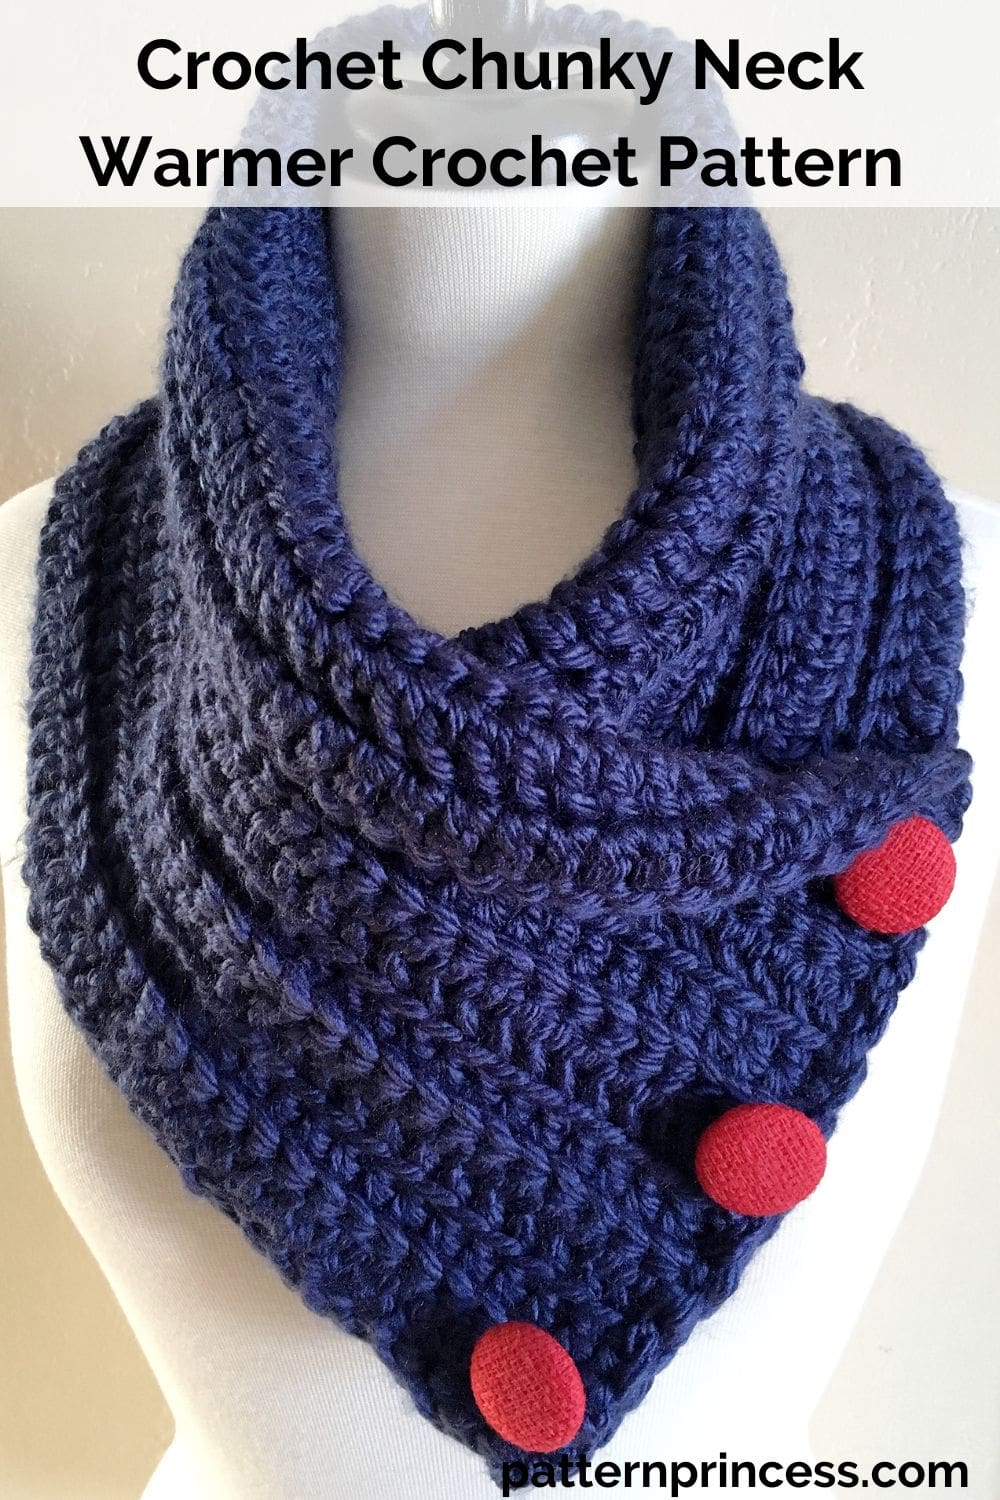
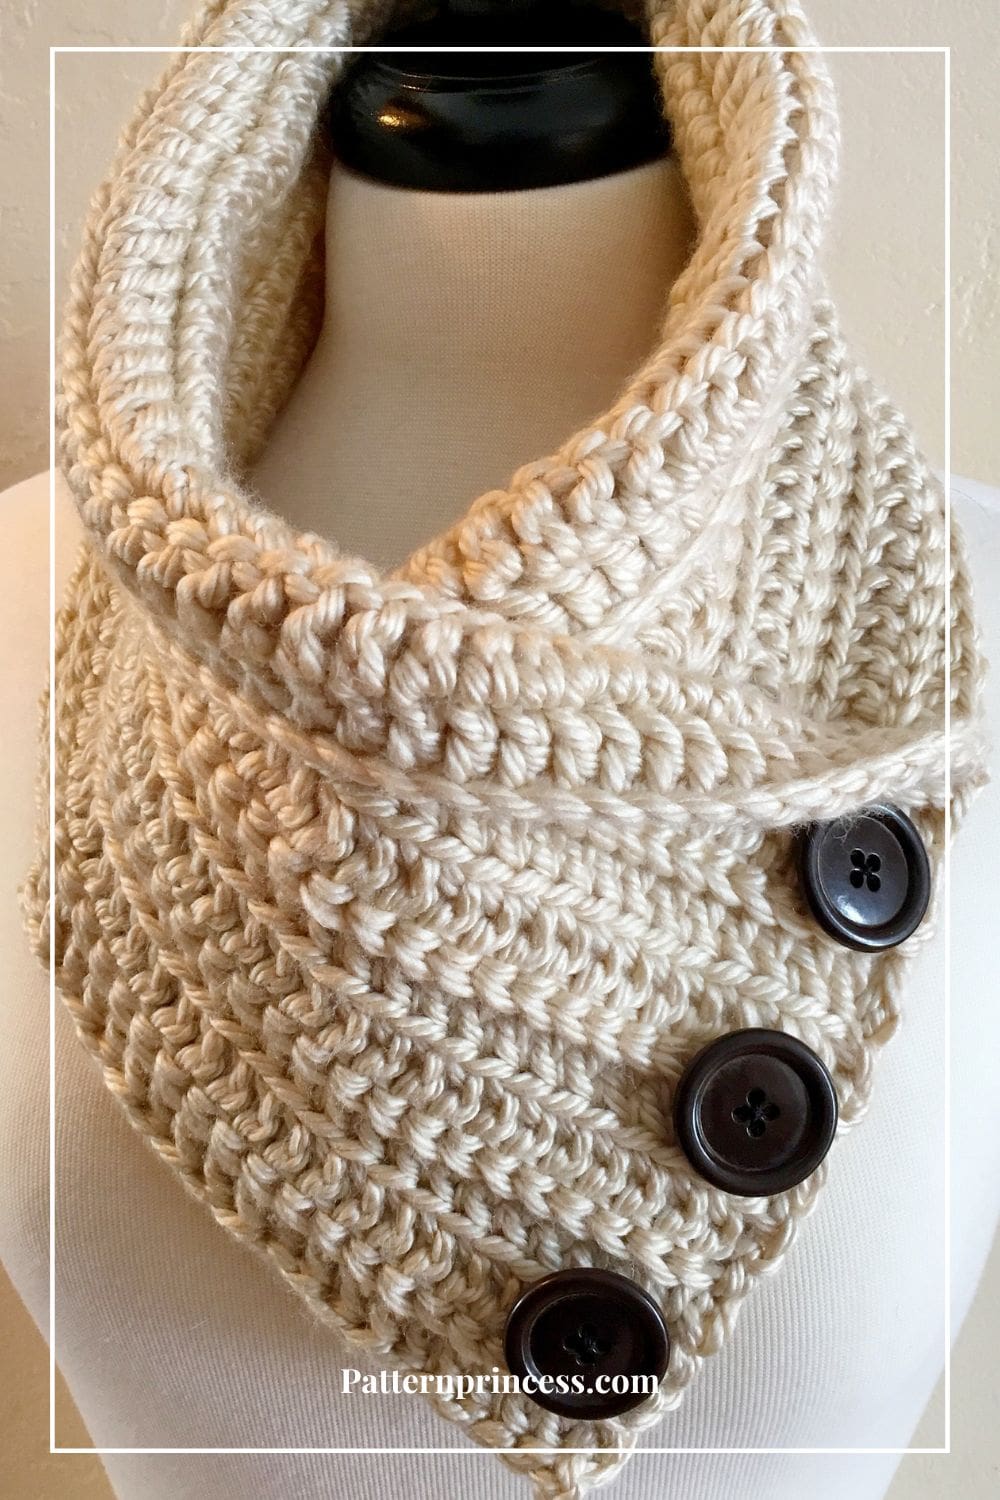
This chunky neck warmer is a quick crochet pattern that uses the double crochet stitch alternating between the back and front loops. This creates beautiful texture.
I had so much fun making three versions of this chunky neck warmer, each with its own personality. I used different yarn colors for each one, which really let the texture shine in unique ways.
The simple stitch pattern makes it easy to experiment with colors, and I loved raiding my button box to add the finishing touches.
One neck warmer features four small buttons, each about ¾ inch. That give it a delicate, classic vibe. The other two are fastened with three bold buttons, which add a bit of a modern flair.
It’s amazing how something as simple as changing the button size or style can give a whole new look to the same pattern!
This cozy accessory is wonderfully warm and has quickly become a go-to favorite. It slips easily over the head, so there’s no need to fuss with tying or adjusting.
I especially love how polished it looks, layered with a fall trench coat. It adds just the right amount of texture and handmade charm to an everyday outfit—perfect for crisp autumn walks or heading out for a coffee.
It’s perfect for last-minute gifts, chilly mornings, or just adding a handmade touch to your winter wardrobe. Keep reading to see how different yarn colors and button combos can give this easy pattern three distinct and stylish looks.
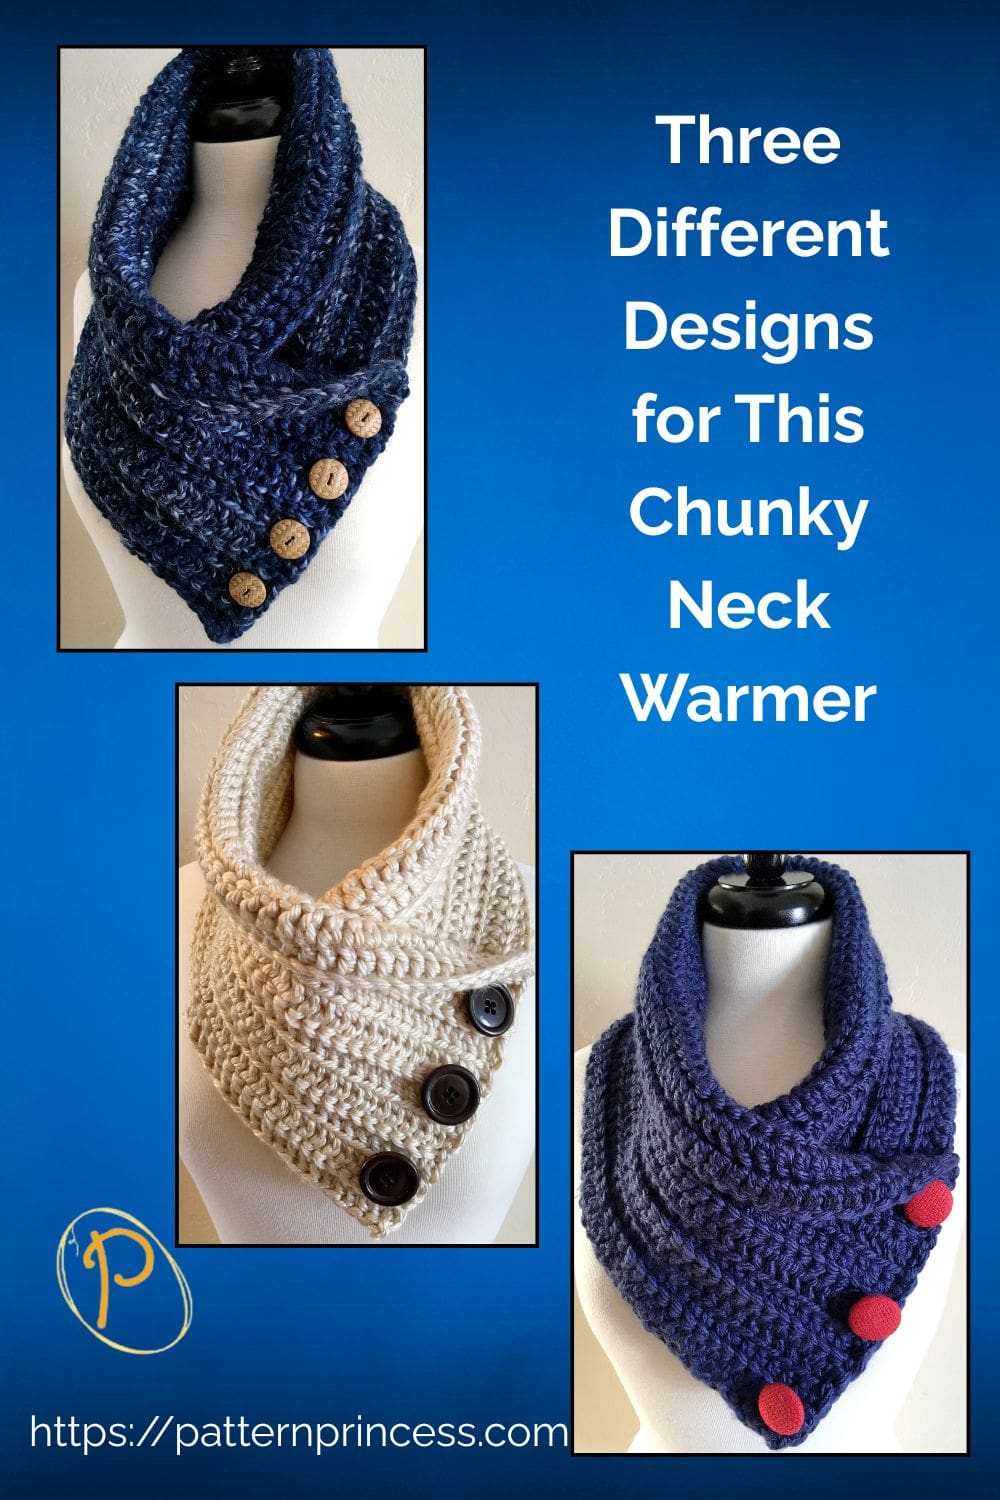
Three Different Designs for This Chunky Neck Warmer
Read on for three different looks created by various colors and button combinations. This Chunky Neck Warmer was crocheted in three different colors. Each neck warmer is made from 2 skeins of chunky yarn.
First Design. This one was made from two skeins of Lion Brand Hometown USA Super Bulky yarn in San Diego Navy. The three buttons are 1-inch cloth covered buttons.
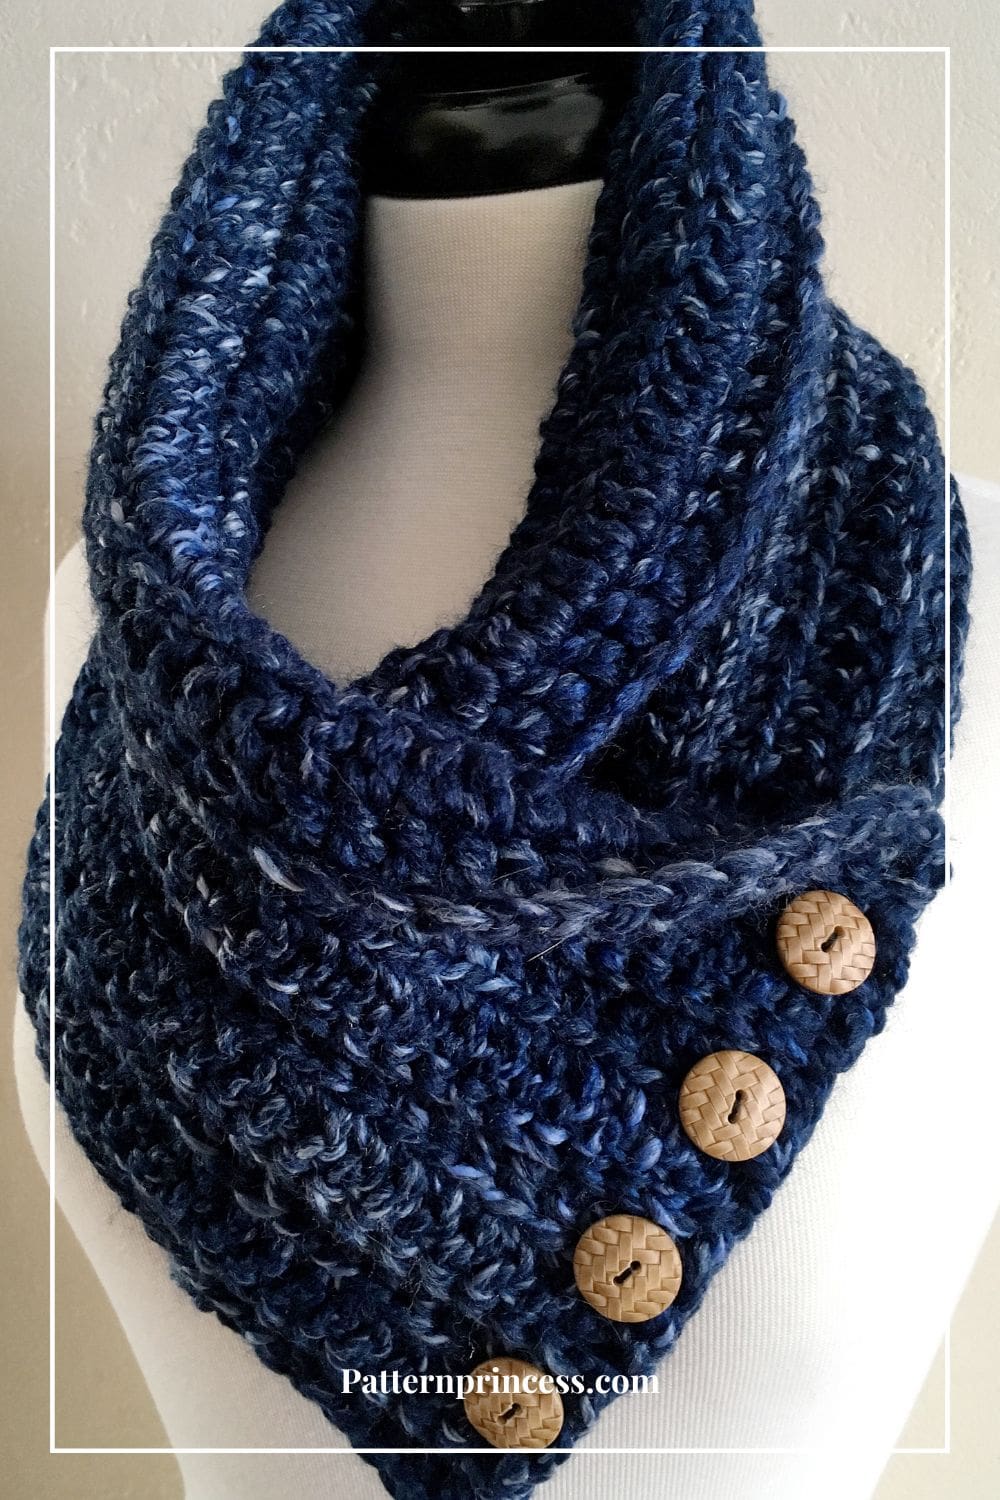
Second Design. We had to dig through several plastic totes to find a few more colors that have two skeins. This next neck warmer was made from two skeins of Lion Brand Wool- Ease Thick & Quick River Run yarn. The buttons are from the button jar. There are 4 buttons about 3/4 inch in diameter.
Third Design. Working this pattern in the Los Angeles Tan really helps show off the texture of this beautiful crochet pattern. It was the last two skeins we had of the chunky yarn too, but it turned out very nice. This cowl is finished with three large buttons from my button jar.
Easy Crochet Stitches
Whether you’re a seasoned crochet enthusiast or just getting started with this addictive craft, this pattern promises to be a rewarding and enjoyable project that you’ll cherish for years to come.
This pattern uses basic stitches like double crochet stitches. The lovely texture comes from working alternatively in the front loop and the back loop as you work the rows.
I used super bulky yarn for this pattern; however, it would look great in any medium with two strands held together to a super bulky yarn.
Digging into My Yarn Stash – Yikes!
If you are a yarn crafter like me, you probably have a yarn stash somewhere. I’ve seen plenty of others yarn stashes on social media. Well, I was doing very good in keeping it relatively under control until the last few months. There were so many sales!
Needless to say, my daughter even commented…”Mom, you have quite a lot of yarn all over the place in my old bedroom.” Hum, I think it is time to use what I have and restrain myself from buying more for a while anyway.
What’s even more exciting is the versatility of this pattern – with just a few tweaks in color and button choices, you can achieve three completely different looks
Raid your Yarn Stash
This Chunky Neck Warmer was crocheted in three different colors. Each neck warmer is made from 2 skeins of chunky yarn. In keeping with the theme of using what I have, these were the only colors that I had two skeins of the color. I still think they turned out beautiful.
The buttons were also raided from my button jars. My daughter and I had all of the buttons from 3 quart jars out on the table. This helped us sift through them and find matching buttons that would work. I think that the buttons we chose paired beautifully with the yarn for a very stylish look.
Quick Crochet Pattern
This crochet pattern works up very quickly. It is -25 degrees Fahrenheit here. Yup, negative 25…very dangerously cold. There are many businesses and schools closed. So, I am home and love the chance to stay warm and crochet. I made all three neck warmers in two days. Yes, a quick project and simple stitches.
Update, my friends and my daughter’s co-workers love this so much, I have now made more than three. I don’t mind. I love this one too. It makes a perfect gift. It’s such a beautiful cowl.
If you are new to crochet, you may find these tutorials on how to crochet the double crochet and chain stitch helpful.
Directions: Easy Crochet Chunky Neck Warmer Pattern
Skill Level
Beginner-Friendly Easy
Gauge
Approximately 12 stitches per 4 inches and 4 rows every 4 inches.
Finished Size
35 inches long X 7.5 inches wide
Materials
Yarn
Super Bulky (6) yarn. Each skein has 81 yards. Approximately 140 yards 2 Skeins of yarn per neck warmer.
I made this neck warmer in 3 different yarn colors.
- Lion Brand Hometown USA Super Bulky yarn in San Diego Navy color.
- Lion Brand Wool- Ease Thick & Quick River Run yarn
- Lion Brand Hometown USA Yarns Super Bulky yarn in Los Angeles Tan color.
If you cannot find this yarn locally, you can purchase it online at Lion Brand. Use the link in our Savings Center.
Crochet Hook Size I, 5.5 MM
Scissors
Yarn Needle
Buttons 3 or 4 of your choice. From ¾ inch to 1 ½ inches in diameter
Thread
Sewing Needle
Abbreviations
- CH = Chain
- DC = Double Crochet
- BLDC = Back Loop Double Crochet
- FLDC = Front Loop Double Crochet
- ST = Stitch
Crochet Stitches
Back Loop Double Crochet (DC)
Yarn over, insert the hook into the back loop and pull up a loop. Yarn over and pull through two loops on the hook. Last step, Yarn over again and pull through the last two loops on the hook.
Double Crochet (DC)
Yarn over, insert the hook into the next stitch and pull up a loop. Yarn over and pull through two loops on the hook. Last step, Yarn over again and pull through the last two loops on the hook.
Front Loop Double Crochet (DC)
Yarn over, insert the hook into the front loop and pull up a loop. Yarn over and pull through two loops on the hook. Last step, Yarn over again and pull through the last two loops on the hook.
Single Crochet
Insert the hook, pull up a loop. Yarn over and pull through the two loops on the hook.
Pattern Notes
Written in US Terms.
The pattern is a two row repeat.
Turn at the end of each row.
Chain 3 at the beginning of rows counts as a double crochet.
Crochet Pattern Directions
Begin
Start with a Slip Knot. Place a slip knot on your crochet hook.
Chain 90
Row 1
In the fourth CH from the hook, DC and in each ST across. Turn
Row 2
CH 3 (Counts as DC), BLDC in the first ST from the hook and in each ST across. Turn
Row 3
CH 3 (Counts as DC), FLDC in the first ST from the hook and in each ST across. Turn
Rows 4-10
Repeat the stitch pattern for rows 2 and 3.
Finishing
After the last stitch, leave a long yarn tail; approximately 15-20 inches. This will give you enough yarn to sew the ends together to form the neck warmer.
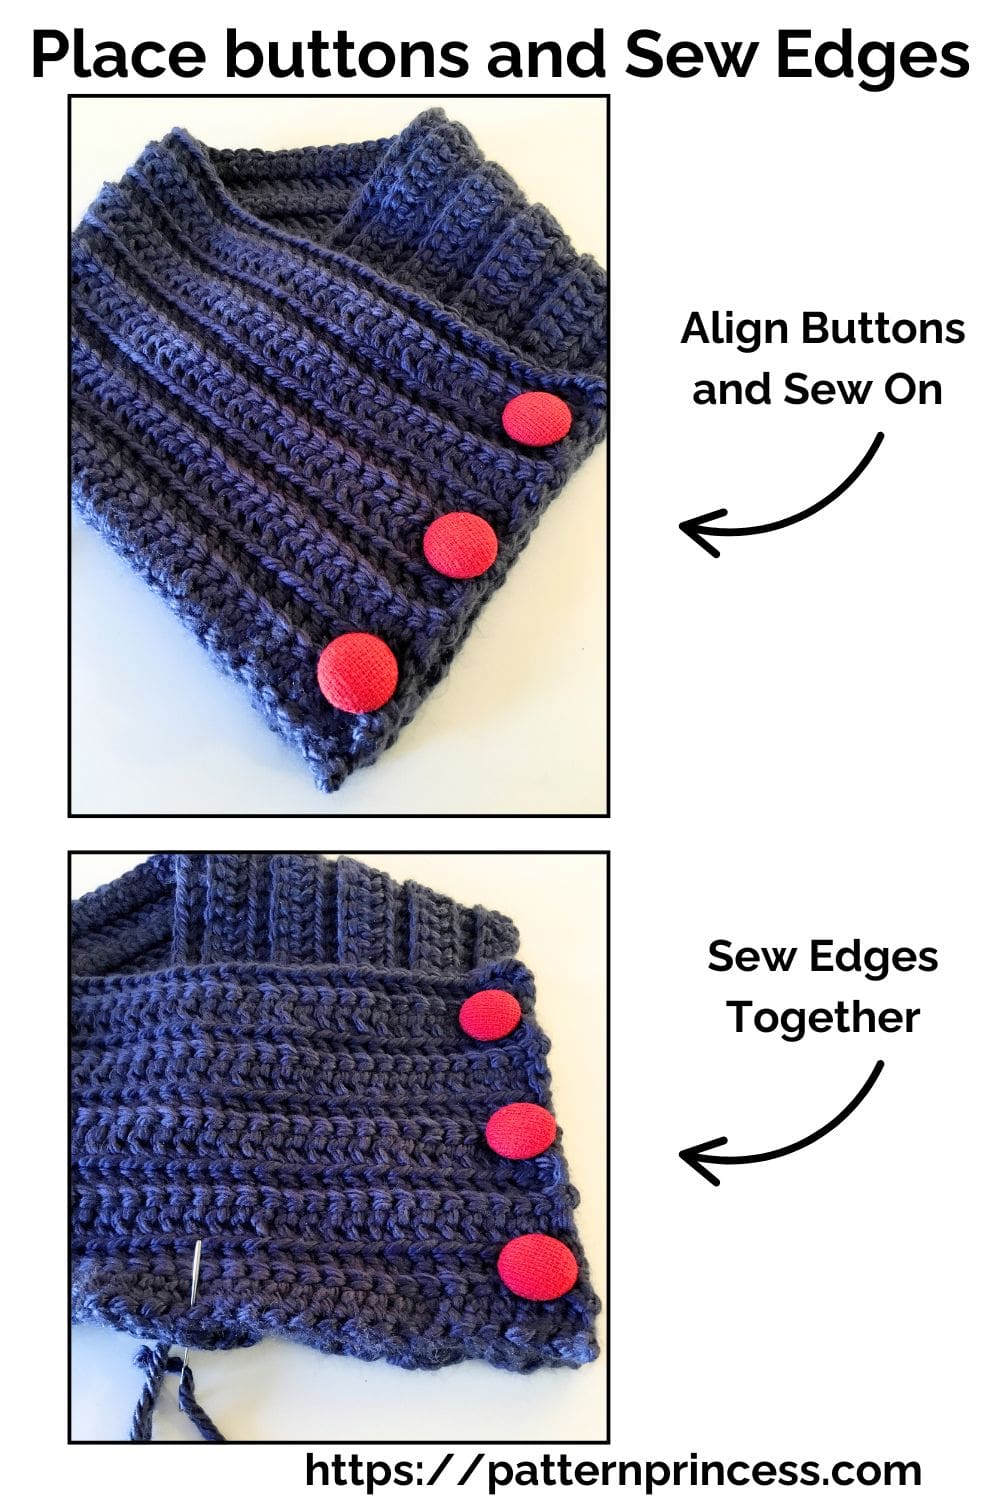
However, before the neck warmer is sewn together, sew the buttons on.
Sewing on the Buttons
Decide where you want the buttons. For a balanced look, evenly space the 4 buttons along the edge of the rectangle. A good guideline is to space the buttons 2-inches apart. The last button near the bottom edge, will be just 1 ½-inches from the edge.
Use clips or stitch markers to mark the button positions.
Use matching or contrasting thread, depending on whether you want the stitches to blend or stand out.
The sewing needle should fit through the buttonholes and thread that complements your project.
Threading the Needle
I use the double-thread method. Cut a length of thread or yarn, about 18–24 inches long, and thread it through the sewing needle. Bring the thread ends together and tie a knot at the end to secure it.
Attach the Buttons. Position the first button over its marked spot.
From the back of the rectangle, insert the needle through the crochet fabric and one hole of the button, pulling it until the knot is close to the crochet fabric.
Insert the needle through the opposite hole (if it’s a two-hole button) or an adjacent hole (if it’s a four-hole button), then back through the collar.
Tip. Then pull the needle and thread through the thread from the first pass before the knot. Then pull everything snug. This is a great way to keep the thread from pulling out of the crochet fabric.
Continue working from back to the front and front to the back with the needle and thread to secure the button. (About 3 or 4 times).
Secure the Button. When the button feels securely attached, tie a small knot on the underside of the collar to secure the thread.
How to Tie Off the Thread When Sewing Buttons
Finish Your Last Stitch. After sewing the button securely in place, bring the needle and thread to the back side of the collar.
Create the Knot. Hold the thread taut near the base where it exits the fabric. Wrap the thread around the needle three times.
While holding the wraps in place with your fingers, carefully pull the needle and thread all the way through the wraps and through the fabric near the underside of the button.
As you pull, the wraps will slide down to the base of the needle and tighten into a secure knot against the fabric.
Trim the Excess Thread. Use scissors to cut the thread close to the knot, leaving a small tail.
Repeat for Extra Security (Optional). If you want the knot to be extra secure, repeat the process one more time.
This method ensures the knot is secure and tidy, preventing the button from coming loose.
Repeat for the Other Buttons
Sew on the other buttons in the same manner, ensuring they’re evenly spaced and aligned.
Sewing the ends together
Align the points of the rectangle together as shown in the photo.
I placed the right side over the left side. The key is to make sure that the ends come to a point. Once you have the ends positioned where you like, sew through both layers with the long tail of yarn.
Use a whipstitch or mattress stitch to sew the front and back rectangle panels together.
- Whipstitch. Insert the needle from back to front, wrapping the yarn around the edges in a spiral motion.
- Mattress Stitch. Work through the middle of the stitches on the edges of both pieces, creating an almost invisible seam.
Keep the Tension Even. As you sew, ensure the yarn is snug but not so tight that it puckers or distorts the fabric.
Weave in the ends and cut off the excess.
Video Tutorials to Help with the Crochet Stitches
Front Loop Double Crochet Tutorial
Back Loop Double Crochet Tutorial
If you loved this post, please share. It helps to show me that these types of posts are helpful – thank you!
I hope that you liked this pattern. If you are looking for more ideas for crocheted projects or other crochet neck warmer patterns, here are a few others you may enjoy.

You can find Victoria crocheting, quilting, and creating recipes. She has cooked in restaurants for over 20 years, including many larger parties. She learned to crochet when she was just 11 years old and has been crocheting ever since; over 50 years now. Over 40 years ago, she loved her first class in sewing and continues to hone her skills in quilting. Many have enjoyed the handmade gifts over the years. In her professional career, she has worked in management in a wide variety of businesses including higher education as a dean of a division. All the while attending college part-time to achieve her doctorate in higher education with an emphasis in e-learning.
I made the cowl using Lion Brand Wool Ease Thick and Quick. It looked very nice but was quite stiff, but the measurements matched. I’m confused.
Hi,
Glad it worked out well for you. It is a chunky cowl, so it will be a bit stiff and hold its shape well.
Vicky
Hi, Thank you so much for this lovely pattern.
I have a stash of Anna’s Choice Aran (medium 4) which I’d like to use for it. I’m a crochet novice so I hope someone will be able to advise me if I could use 2 strands of the Anna’s Choice together to produce a similar effect as the bulky yarn single stranded?
And, if so, should I use the same hook size, please? That being the ‘I’?
Hope someone can help. Thank you.
Hello,
Using two strands together would be nice and thick. Try a small swatch using the Size I crochet hook and see if you like the look of it. That is what I do when I am developing patterns.
Vicky
Hi, I need the number of stitches and the hook size for the regular 4ply yarn. Thanks.
Hi, I would use a size H crochet hook with 4 ply yarn. I would chain as many stitches until your length was the 35 inches to begin for the pattern. It is hard to say exactly how many stitches you should start with as it depends on how loose or tight you crochet. In general, I would guess this might take 130-160 initial chain stitches using the 4 ply yarn to equal the 35 inches.
Hi, the neck warmer is good for the homeless. But I have only regular 4 ply yarn. Can you give me some instructions on how many stitches I need to make and how many rows? Thanks.
Great idea. Since this is worked flat and joined at the end, I would crochet to the size with the worsted yarn. 35 inches long X 7.5 inches wide.
Pingback: 30 Free Crochet Patterns For Neck Warmers - 11 Crafts
I made the cowl as a gift and she loved it. Now one of my coworkers wants one for her 6 yr old, cut I’m not sure how to invert it. Any thoughts?
Hi Julie, Great question. Well, I think it would need to be a bit narrower, as well as, shorter. I might even use a bit less chunky yarn too. This current cowl works up to be 35 inches long X 7.5 inches wide. I used my tape measure and used my dress form as a guide for a smaller neck size. Maybe 25-27 inches long by 5 inches wide would look nice on a child. I hope this helps. So glad you like the pattern though. I would love to hear how it turns out. Take care.
Vicky
I have made four more cowls as gifts, since I made that first one. People love them and they are so easy and quick to make. I am going to tackle the child’s cowl next. I will let you know how it comes out. Thank you for the measurement suggestion. I am going to use them.
Thank you for letting me know. Please tag me or let me know how the child’s cowl turns out. Take care.
Vicky
Thankyou very much for the neck warmers pattern. I made 4 of them they look very nice with the buttons. Be safe and thanks
Thank you so much for taking the time to let me know. So glad you like the pattern. I do too.
Take care and stay safe and healthy.
Vicky
Love your pattern! Thank you so much for sharing your creativity. Could you explain where you are sewing the neck warmer together?
Also, I have a size 5 buttercream luxe craft yarn in my stash. Do you think I need to change the amount of stitches? I was going to use the crochet hook k which is suggested for the yarn. Thank you ?
Thank you Donna. I would crochet to size then if using a different yarn. Start the beginning chain with the 90 stitches, then measure without stretching to see if it is 7.5 inches. If so, carry on and crochet until your desired length or 35 inches long. I was hoping the photos of where I sewed the edges together would help…after laying one edge on top of the other, I sewed just the outer edges of the v-shape end that is made from putting one end over the other. Hope this helps. Vicky
Thank you, Vicky. Yes, that does help. Can’t wait to get started. Happy Thanksgiving ?
Wonderful. So glad to hear. If you post a photo on social media, tag me so I can see your results.
Take care and stay safe.
Vicky
The videos show exactly where to insert the hook. Did that help? Once you do the chain 3, which counts as your first double crochet, then insert the hook in the front loop of the next stitch from the previous row. There should be a double crochet in each stitch.
Do you mean that you used 2 skeins simultaneously?
No, the pattern uses 2 skeins to make. The yarn is chunky all by itself. If you don’t have chunky yarn, you could use two skeins at the same time to probably get the same chunky effect though. However, I love the particular yarn I used for the smooth chunky look it has.
Hi, I’ve only recently taught myself to crochet and have just finished this but mine doesn’t look quite the same. I wonder if I should have crocheted it a little looser as the texture doesn’t seem as clear…
Maybe, did you use a different chunky yarn or a different hook size? Sometimes, that will make a difference.Vicky
Not to worry, I unravelled it and started from scratch using the next size hook and a looser tension. It is much closer to yours now, and looks gorgeous. Thank you for sharing this pattern.
I am so glad to hear that it all worked out. Thanks for the follow up. You are welcome. When people let me know it all worked for them and they enjoy the patterns, it just makes my day. Take care. Vicky
I used an “I” hook and Lion Brand “Scarfie” , and added 2 more rows…perfect! Thanks for sharing the pattern.
I bet that turned out just beautiful. Might have to try that one myself. I have some Scarfie yarn. Thank you for sharing and so glad you liked this pattern too.
Please tell me the hook size (I) is an error. How can two strands of super bulky use and I?
This yarn is a bit thicker and therefore I used a bit larger hook size. I is correct. I think you can use the two strands of yarn, but it will give the neck warmer a bit different look. One of the things I love about this particular neck warmer is the smooth and thick look and feel of the yarn. Give it a try…might look wonderful.
In the charts I have seen, an I crochet hook is 5.5 mm. The manufacturer recommends 9mm hook for the Wool-ease thick and quick. Is there a mistake in the hook size?
Hi, depending on the tightness or the looseness I am looking for in my stitches, I sometimes do not use the exact hook size recommended. You certainly could though. I would just crochet the neck warmer to size rather than just relying more on the stitch count. Do a swatch first.
Vicky
Pingback: Chunky Neck Crochet Warmer FREE | Pattern Center