Last updated on July 4th, 2024 at 11:30 pm
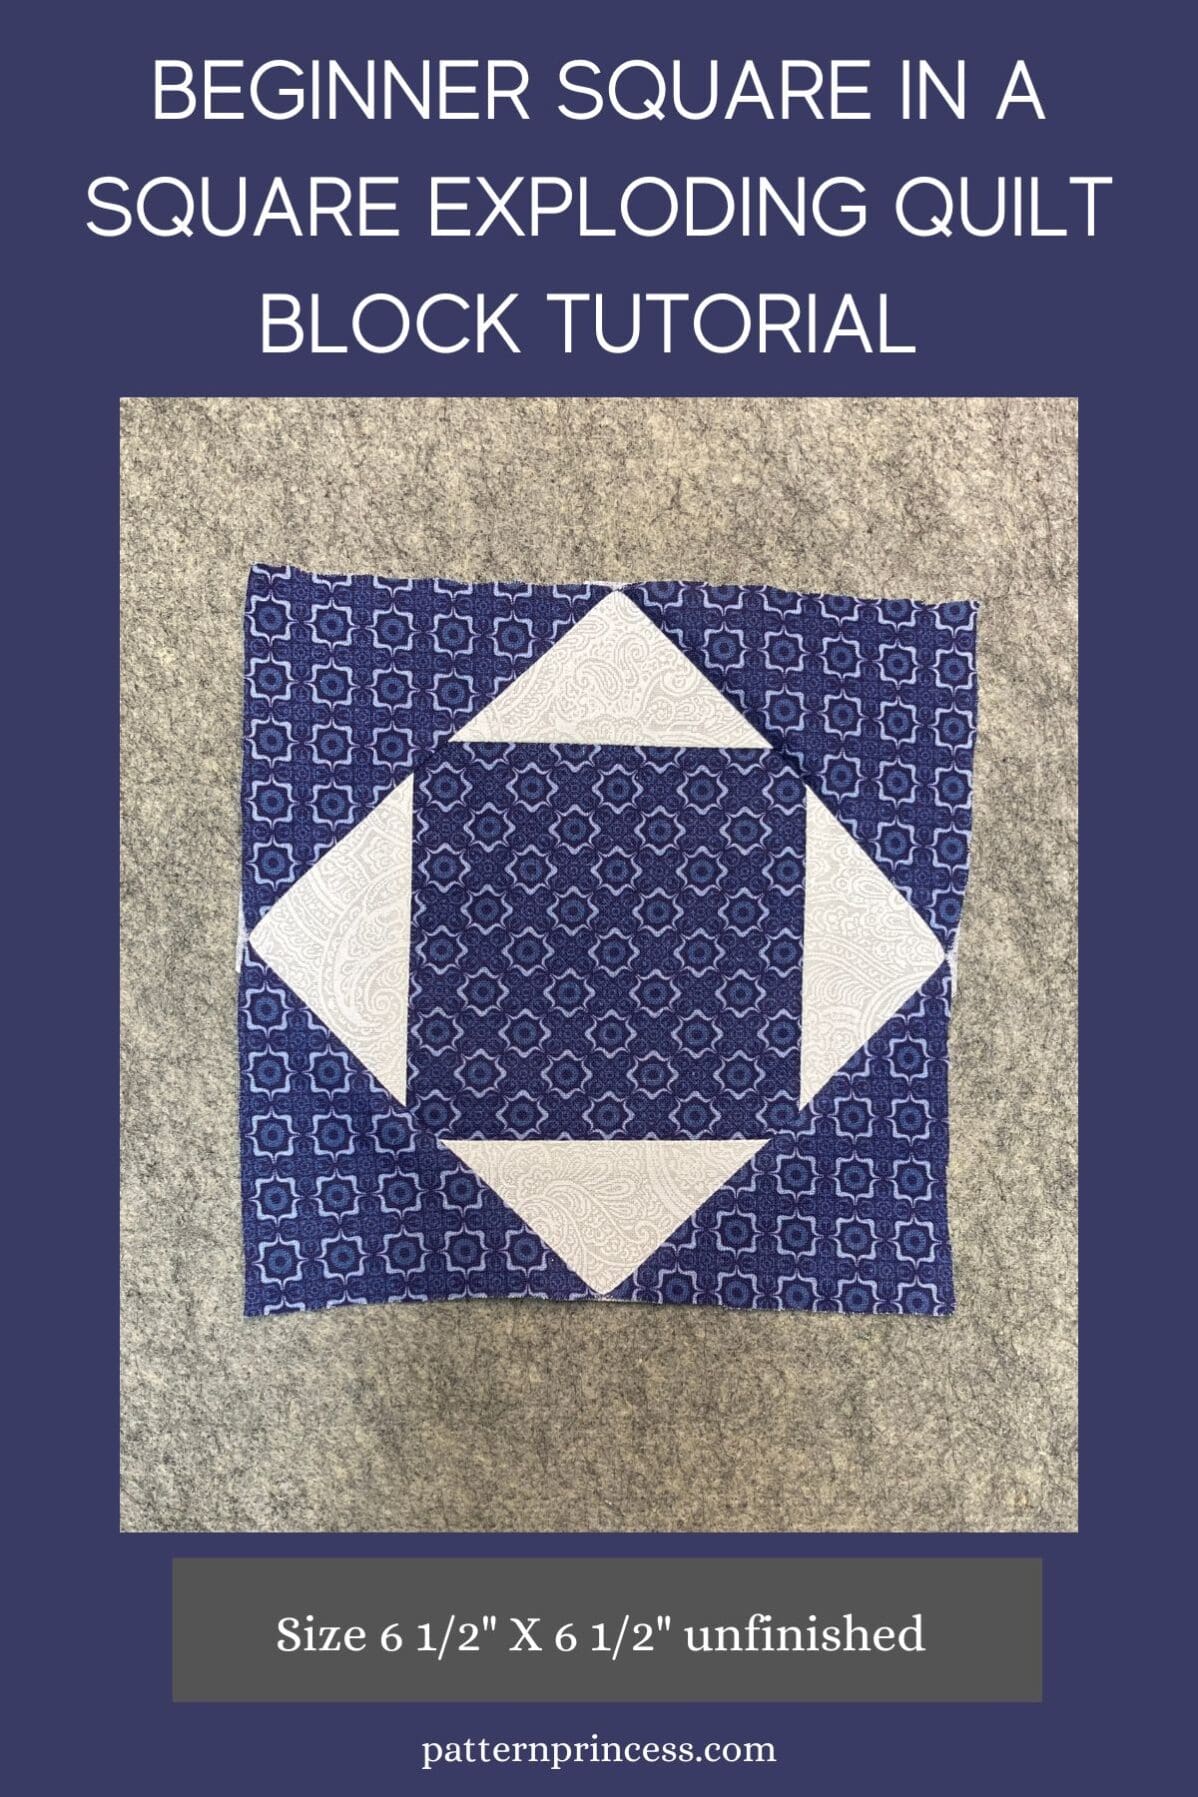
Here is a delightful and beginner-friendly quilting block pattern that will ignite your creativity the Exploding Quilt Block. It’s an easy way to make a square in a square block.
Quilting is a timeless craft that allows you to blend the worlds of art and functionality. For those just starting on their quilting journey, the idea of creating intricate designs might seem daunting. However, fear not, for there’s a delightful quilt block that can be sewn by anyone.
Whether you’re a seasoned crafter or a total novice, the Exploding Quilt Block is a fun and visually stunning pattern that can be accomplished with ease. In this tutorial, we will take you through the step-by-step process of creating this mesmerizing design, ensuring you not only grasp the basics of quilting but also unveil the magic of turning simple fabric squares into a dazzling work of art.
Post contains affiliate links, and we earn commissions if you shop through the links on this page. For more information, please read the disclosure section under the About Us page.
Traditional Method of Making a Square in a Square Quilt Block
The traditional method of making a Square in a Square quilt block requires four smaller squares and one larger center square. Draw and diagonal line on the back of each of the smaller squares. Sew each one onto the corners of the initial center square along the line. Trim the outside corners ¼” from the seam. Press the fabric open to reveal a square around the first square on point.
Video of the Modern Quilt Square
Then I saw a new method from Jenny Doan of Missouri Star Quilt Company with a quite different creation process. She made a video of each block with her version of the pattern.
While visual demonstration videos are wonderful for learning, I struggle with retaining all the information. So, I wrote down my cheat notes and thought I would share the written pattern with a visual photo tutorial with you too.
I tried a few sizes of this square and for me, it’s the best way to get the job done and find out which square combinations work for you.
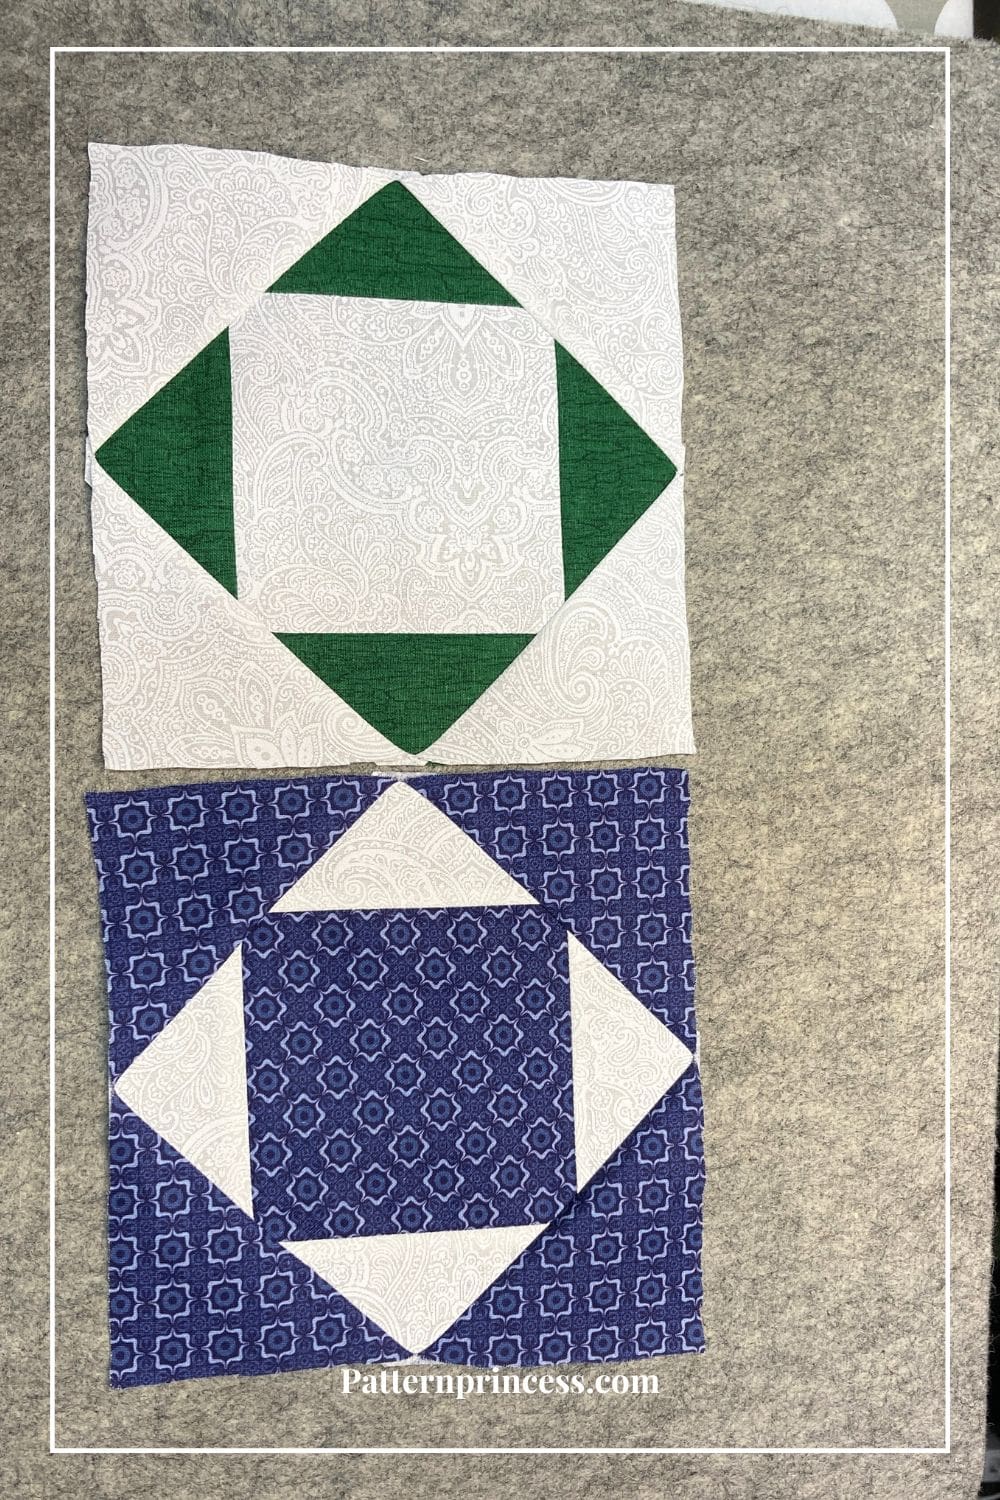
Exploding Square Quilt Block
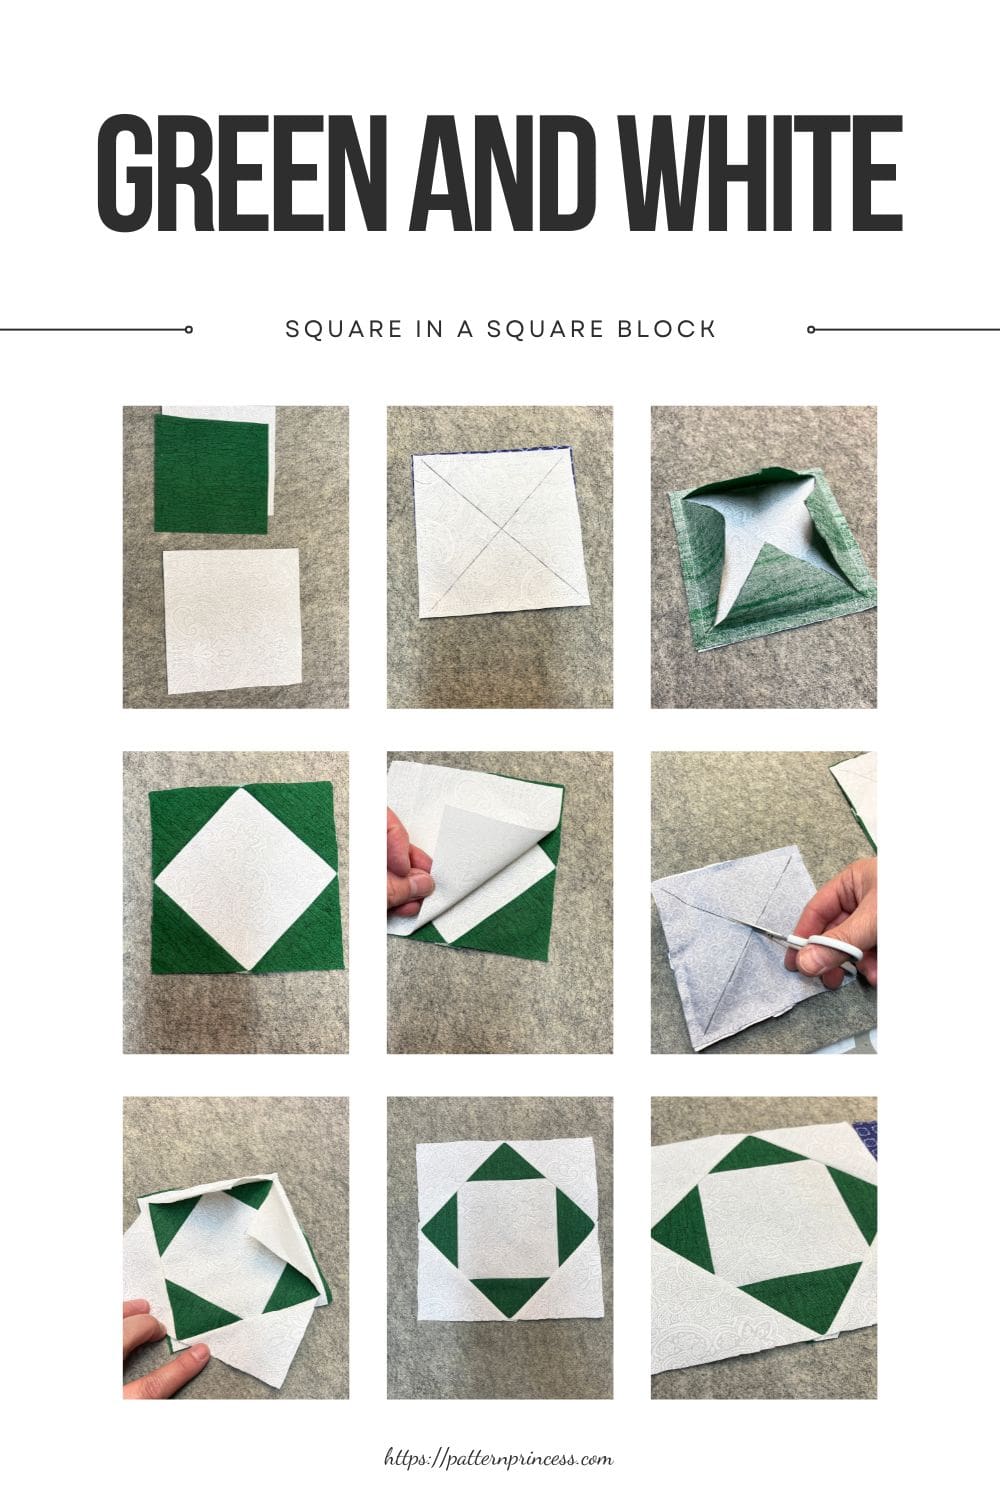
This method uses squares sewn with the right sides together around the edges. Draw an “X” on the side of the fabric that you want to show as the square around the center square.
Carefully cut just the one fabric along the X lines to the sewing. Press open to reveal the square in a square on point.
Fabric Scraps Quilting Block
This quilt block works best with contrasting fabric colors. You can have a coordinated look or a scrappy look.
For the sample 6 ½” square today, you will just need three squares of fabric. Two 4-inch and one 5-inch. However, this can easily be made in any size, and you can add as many rounds as you wish.
Contrasting Complementary Colors
Experiment with complementary colors for the background squares to create a visually striking and balanced quilt.
The choice of color combinations depends on your personal preferences, the intended mood of the quilt, and the overall aesthetic you want to achieve. You can also mix and match different color schemes to create a unique and eclectic quilt that reflects your creative style.
The exploding block quilt is perfect for a fat eight, fat quarters, or full yards of fabric. Depending on the project you plan on making.
Using just this quilt block, you can make a gorgeous throw quilt, baby blanket, bag, or table runner.
There are photo step-by-step tutorials to help with your success in making this beautiful and simple block.
Directions: Beginner Square in a Square Exploding Quilt Block Tutorial
Skill Level
Advanced Beginner pattern. This one is great for someone that can complete multiple steps in sewing. While there are no points to line up, you do need to be able to sew a slightly smaller, wonky square in another square.
Quilt Block Name
Exploding Quilt Block
Finished Block Size
6 inches square, 6 ½ inches square unfinished.
The size can be adjusted by adding more rounds of squares or reducing the number of squares. Additionally, the beginning block size will determine the subsequent square sizes.
Equipment and Tools
Rotary Cutter
Quilting Ruler
Cutting Mat
Rotating Cutting Mat
Iron
Ironing Board or Pressing Mat
Pins
Clips
Sewing Machine
Fabric Scissors
Disappearing fabric marker
** Download the Free Quilt Block Pattern PDF file with the Step-by-Step Diagram. After the written pattern. Just sign up for the newsletter and you will have access to this file and more. Once signed up, you can also find other free PDF downloads available to you. **
Pattern Notes
All seams are 1/4 inch unless otherwise noted.
Sew with right sides together unless otherwise noted.
General Fabric Requirements for Each Quilt Block
In addition to your usual quilting supplies here are the fabric requirements.
For each 6 ½” block you will need
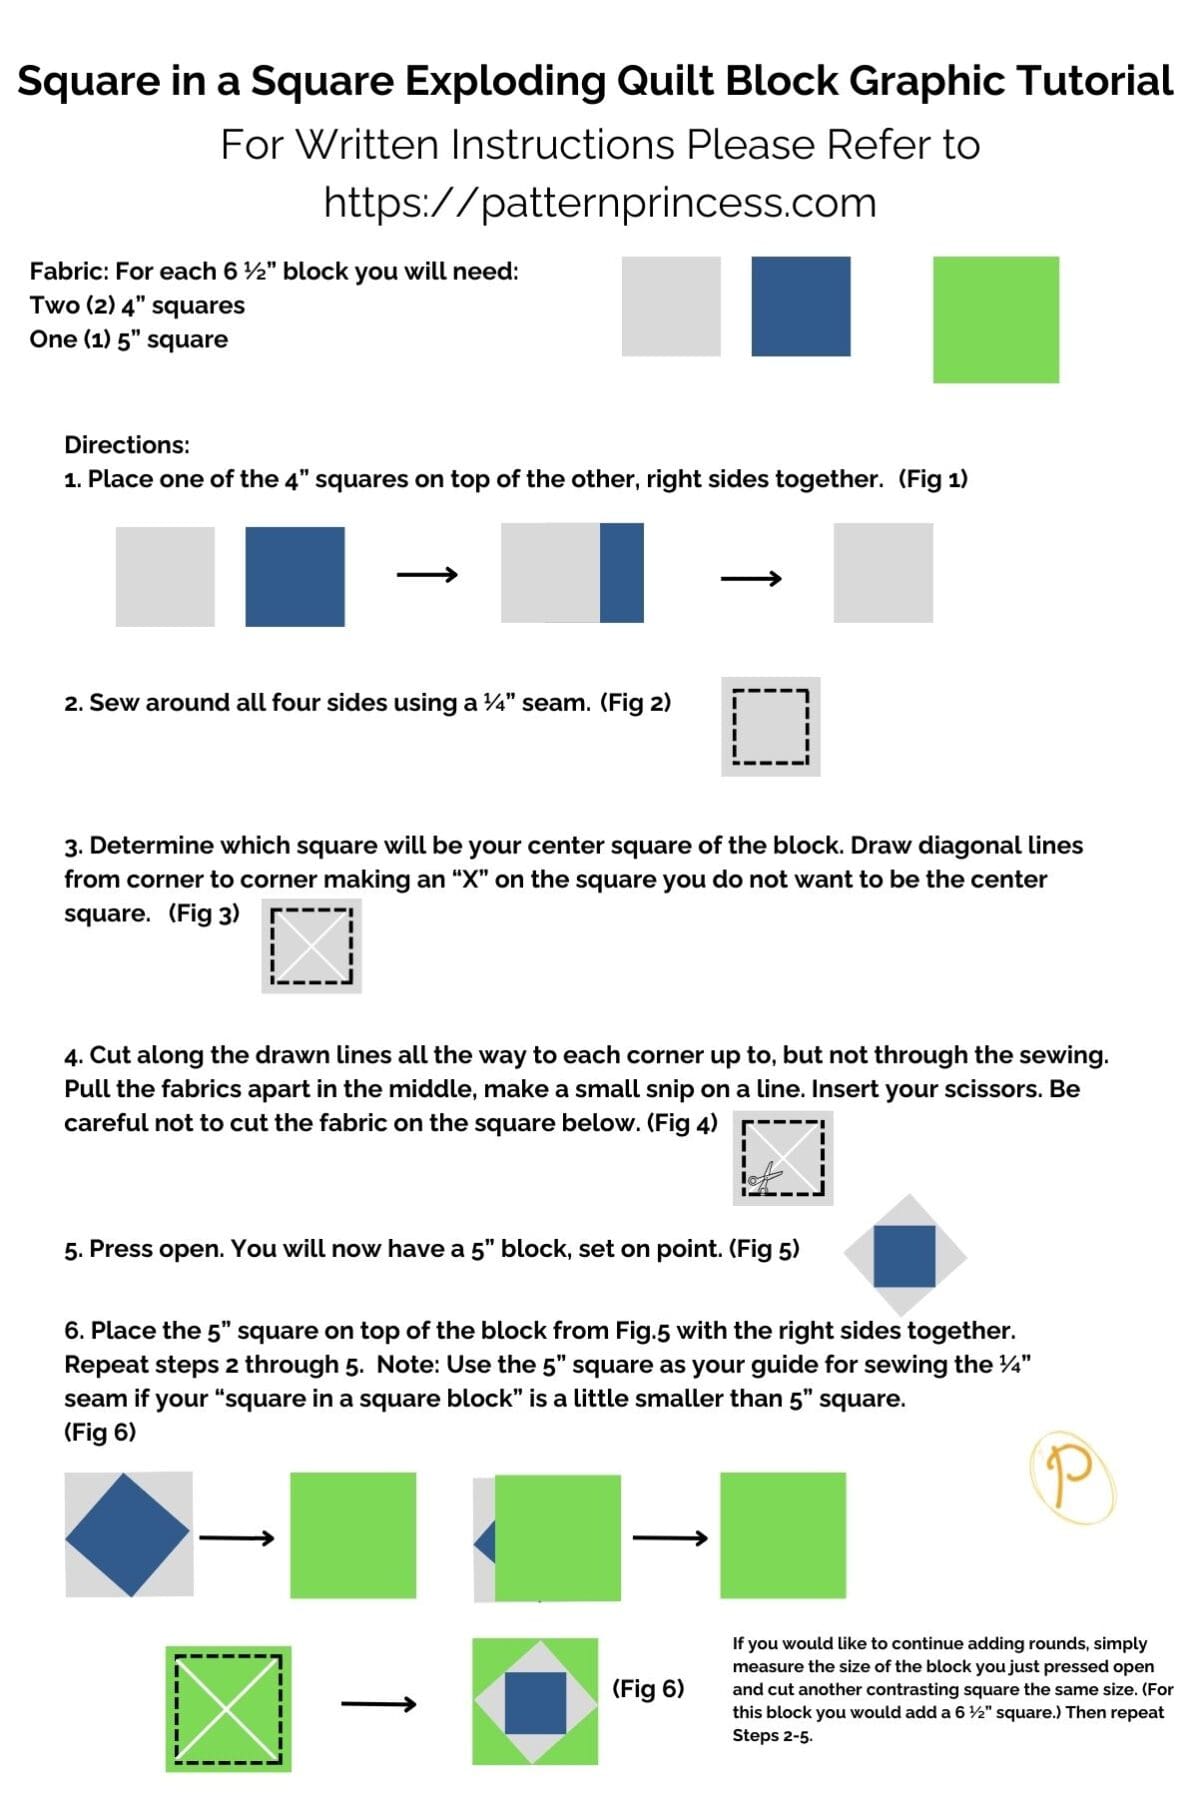
Two (2) 4” squares of fabric in contrasting colors.
One (1) 5” square of fabric the same as one of the 4” colors or a completely different color.
Making Exploding Quilt Blocks: Easy Square in a Square Quilt Block
Step 1
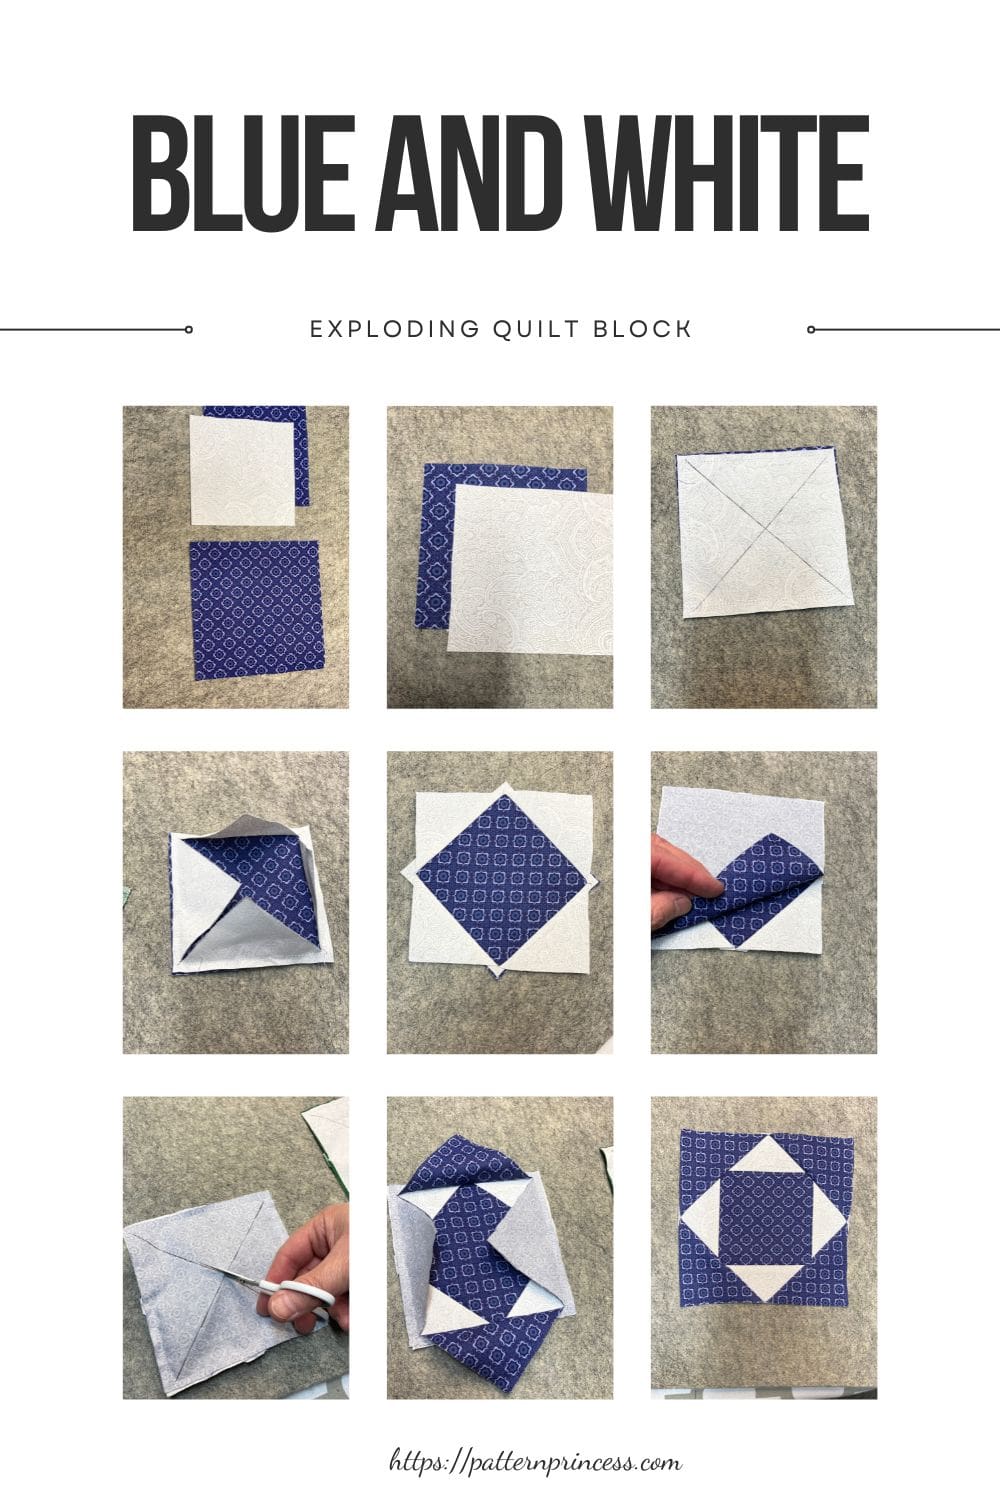
Start by using your ruler and fabric cutter and cut two 4” X 4” squares in colors of fabric.
Cut 1 5” X 5” square of fabric, set this one aside. You can use the same color as one of the smaller squares or a completely different background fabric color.
Step 2
Place one of the 4” X 4” squares on top of the next with right sides facing each other. Pin in place.
Step 3
Sew all the way around the outer edges, all 4 edges, using ¼” seam allowance.
Step 4
Using a ruler and fabric marker, draw diagonal lines from corner to corner on the square of fabric that you want to show as the square around the center square. You will end up with an “X” shape line on the fabric.
Step 5
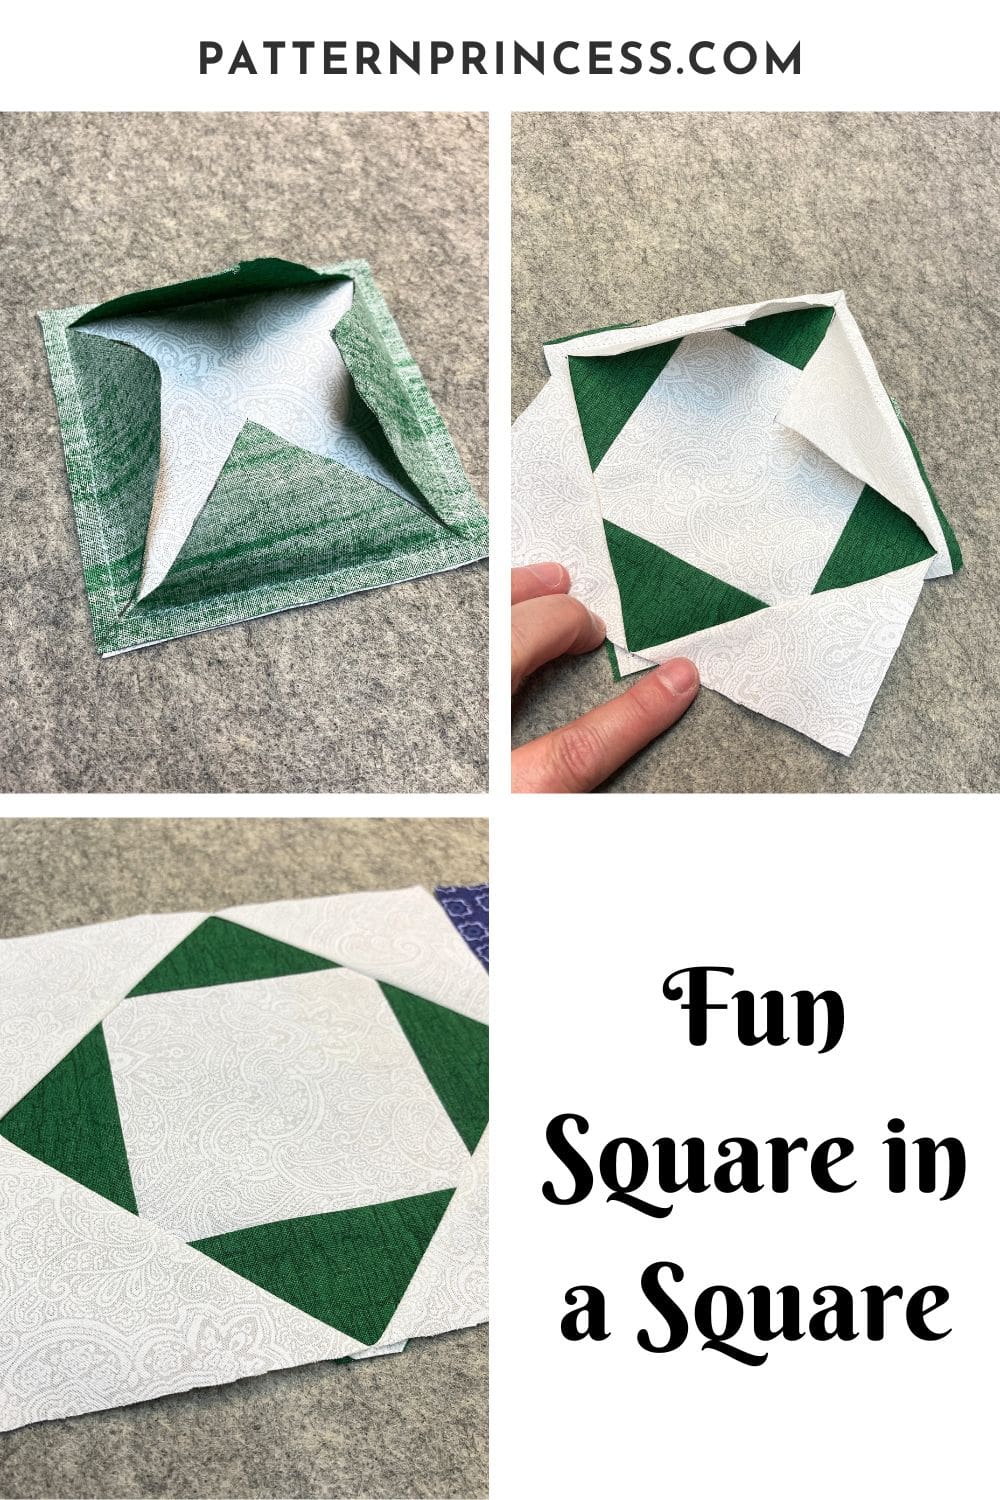
After drawing the diagonal lines on one of the squares, pinch it up in the middle and make a small snip along a line. I like using a fabric scissors with a nice point at the end so I can trim very close to the stitching line. Making sure not to cut the square below. The small snip makes it easy to get your scissors in there to cut along the diagonal lines right up to the sewing line but not through it.
Step 6
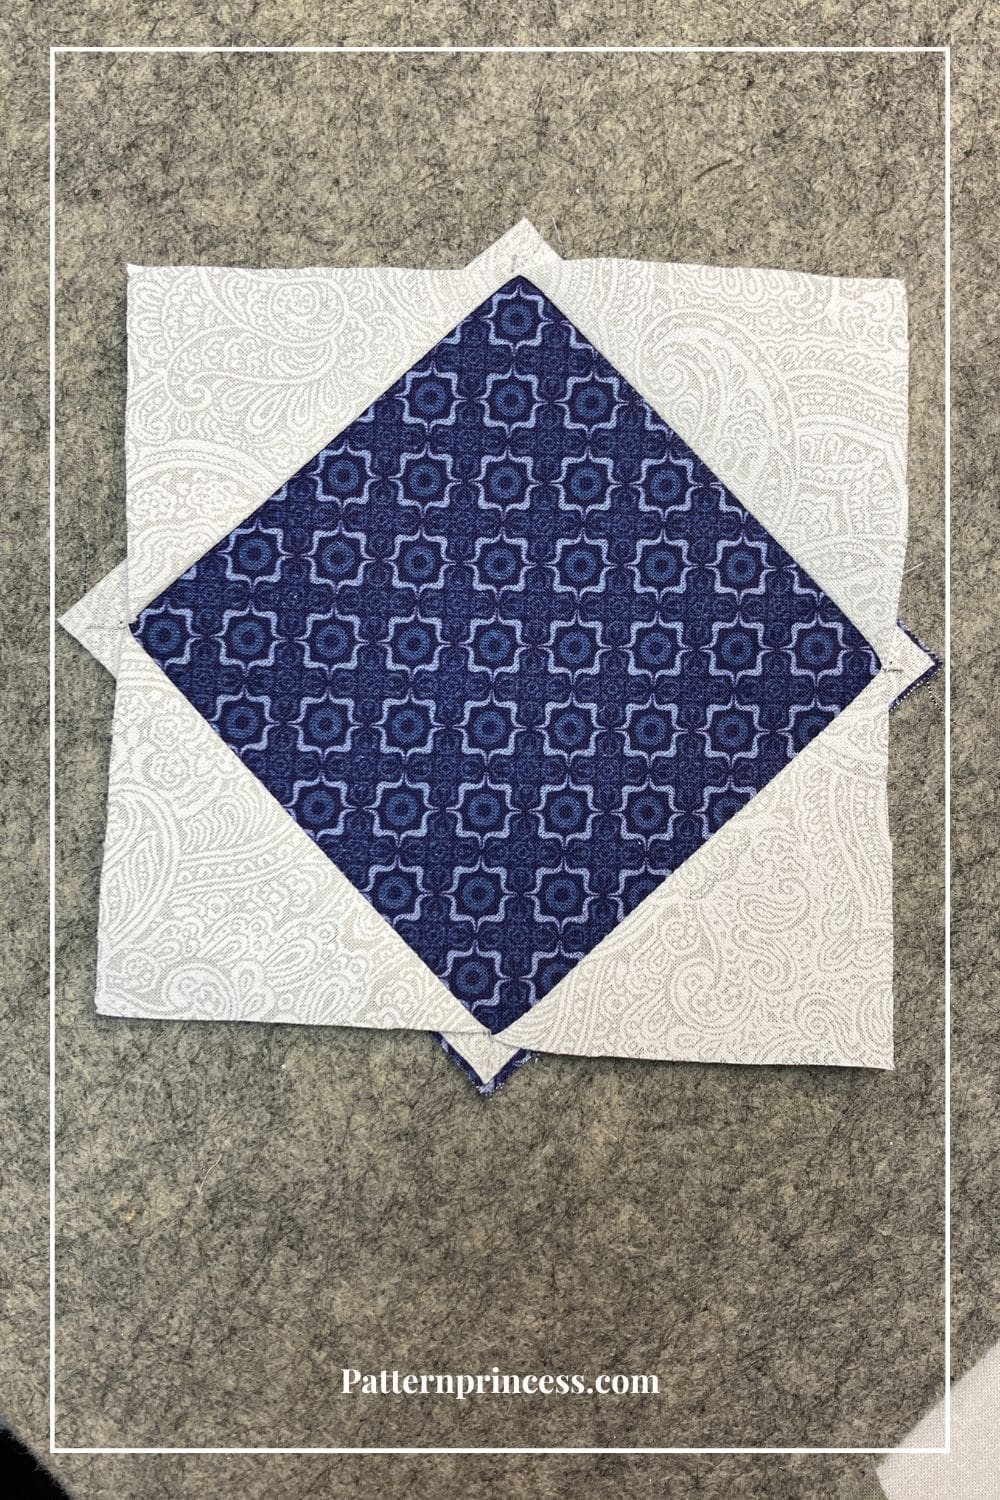
Iron the square open. Roll out all four sides and press. The center block is now set on point. If you want less bulk at the seams, you can trim off the points on the sides.
It now fits the size of the 5” block.
Adding on the Next Square: Step 7
Put the 5” block on top of the square you just made, with the right sides together. Note. you will notice that the square in a square you just made is slightly smaller than the 5” block. That is because by just cutting the center seam rather than sewing a ¼” seam and trimming, you lose a bit of the seam allowance.
Sew all the way around the outer edges, all 4 edges, using ¼” seam allowance. Pro Tip. Since you know that the 5” block is square, follow that for the ¼” seam allowance. Just center the block you just made inside the 5” block and it will come out.
Step 8
Using a ruler and fabric marker, draw diagonal lines from corner to corner on the square of fabric that you want to show as the square around the center square. You will end up with an “X” shape line on the fabric.
Step 9
After drawing the diagonal lines on one of the squares, pinch it up in the middle and make a small snip along a line. Making sure not to cut the square below. The small snip makes it easy to get your scissors in there to cut along the diagonal lines right up to the sewing line but not through it.
Completion of this Block: Step 10
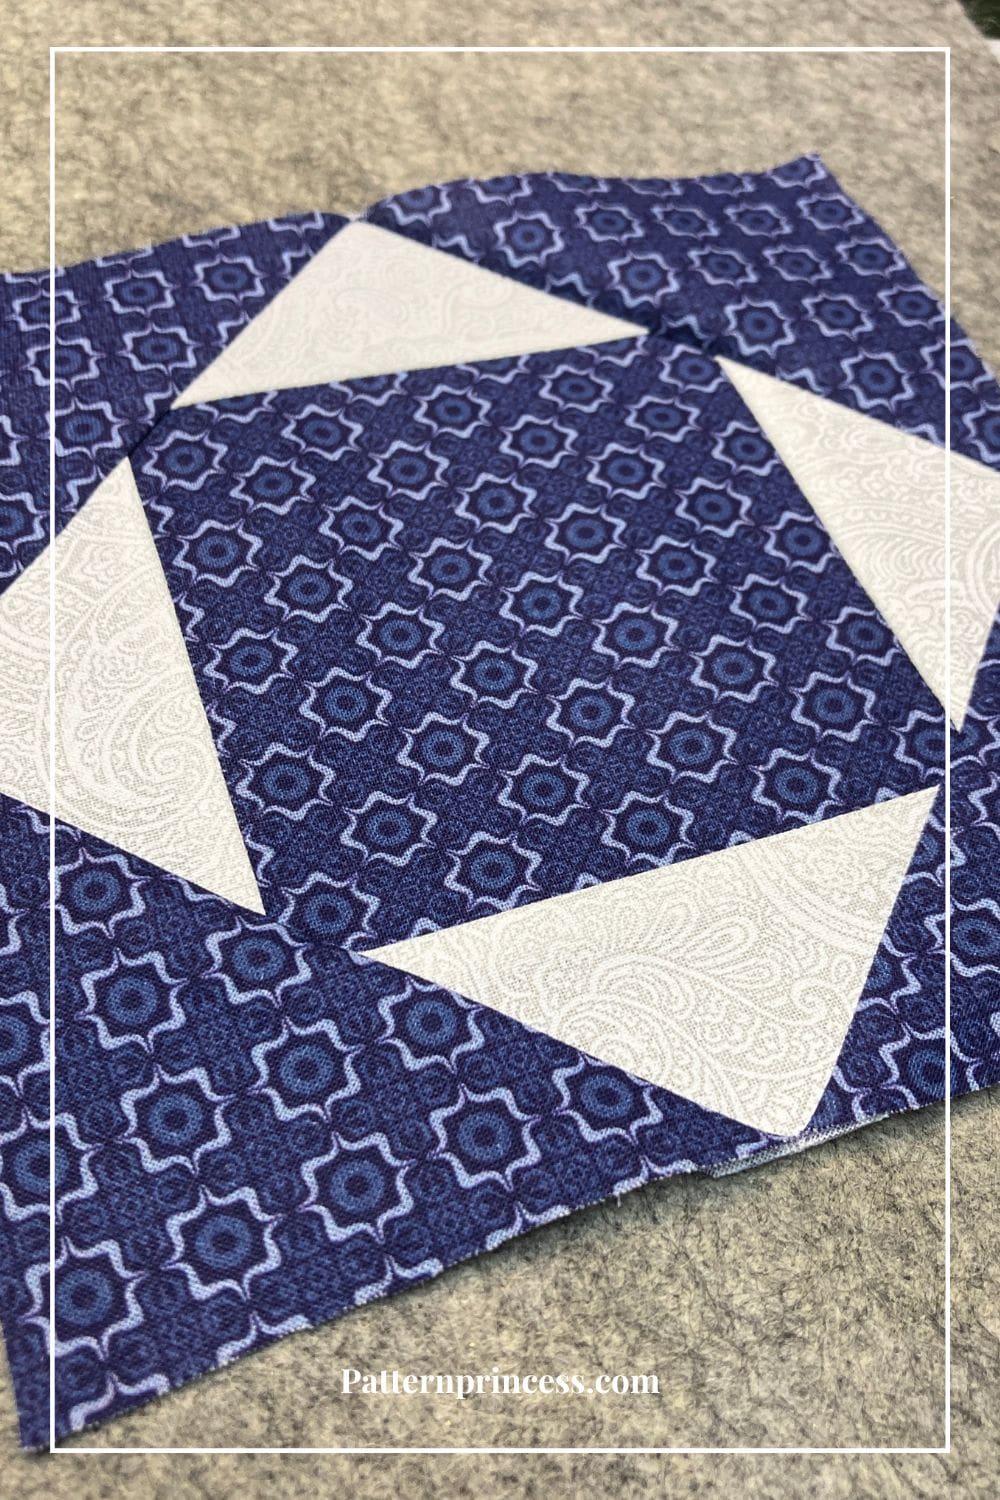
Iron the square open. Roll out all four sides and press. The center block is now set on point.
The block is now 6 ½” X 6 ½”. You could add another block this size and continue making this larger or you can stop and use this square in a sewing project.
Vary the Size Options of the Block
You can do this with any size of block. Whatever size you start with, cut 2 squares of the same size fabric. Repeat steps 1 through 6. Upon the completion of each block, measure and this is the next size square of fabric needed. Repeat steps 1 through 6 again and measure, etc. You can repeat this as many times as you wish making your exploding block bigger and bigger.
Other Free Patterns and Quilting Tutorials
You can find other quilting tutorials and quilt patterns to inspire your next sewing project.
You can find a pattern using this Square in a Square Exploding Quilt block. Rustic Charm Mini Quilt Table Topper Pattern
Quilting Basics and Quilt Squares

You can find Victoria crocheting, quilting, and creating recipes. She has cooked in restaurants for over 20 years, including many larger parties. She learned to crochet when she was just 11 years old and has been crocheting ever since; over 50 years now. Over 40 years ago, she loved her first class in sewing and continues to hone her skills in quilting. Many have enjoyed the handmade gifts over the years. In her professional career, she has worked in management in a wide variety of businesses including higher education as a dean of a division. All the while attending college part-time to achieve her doctorate in higher education with an emphasis in e-learning.
