Last updated on January 19th, 2026 at 10:28 pm
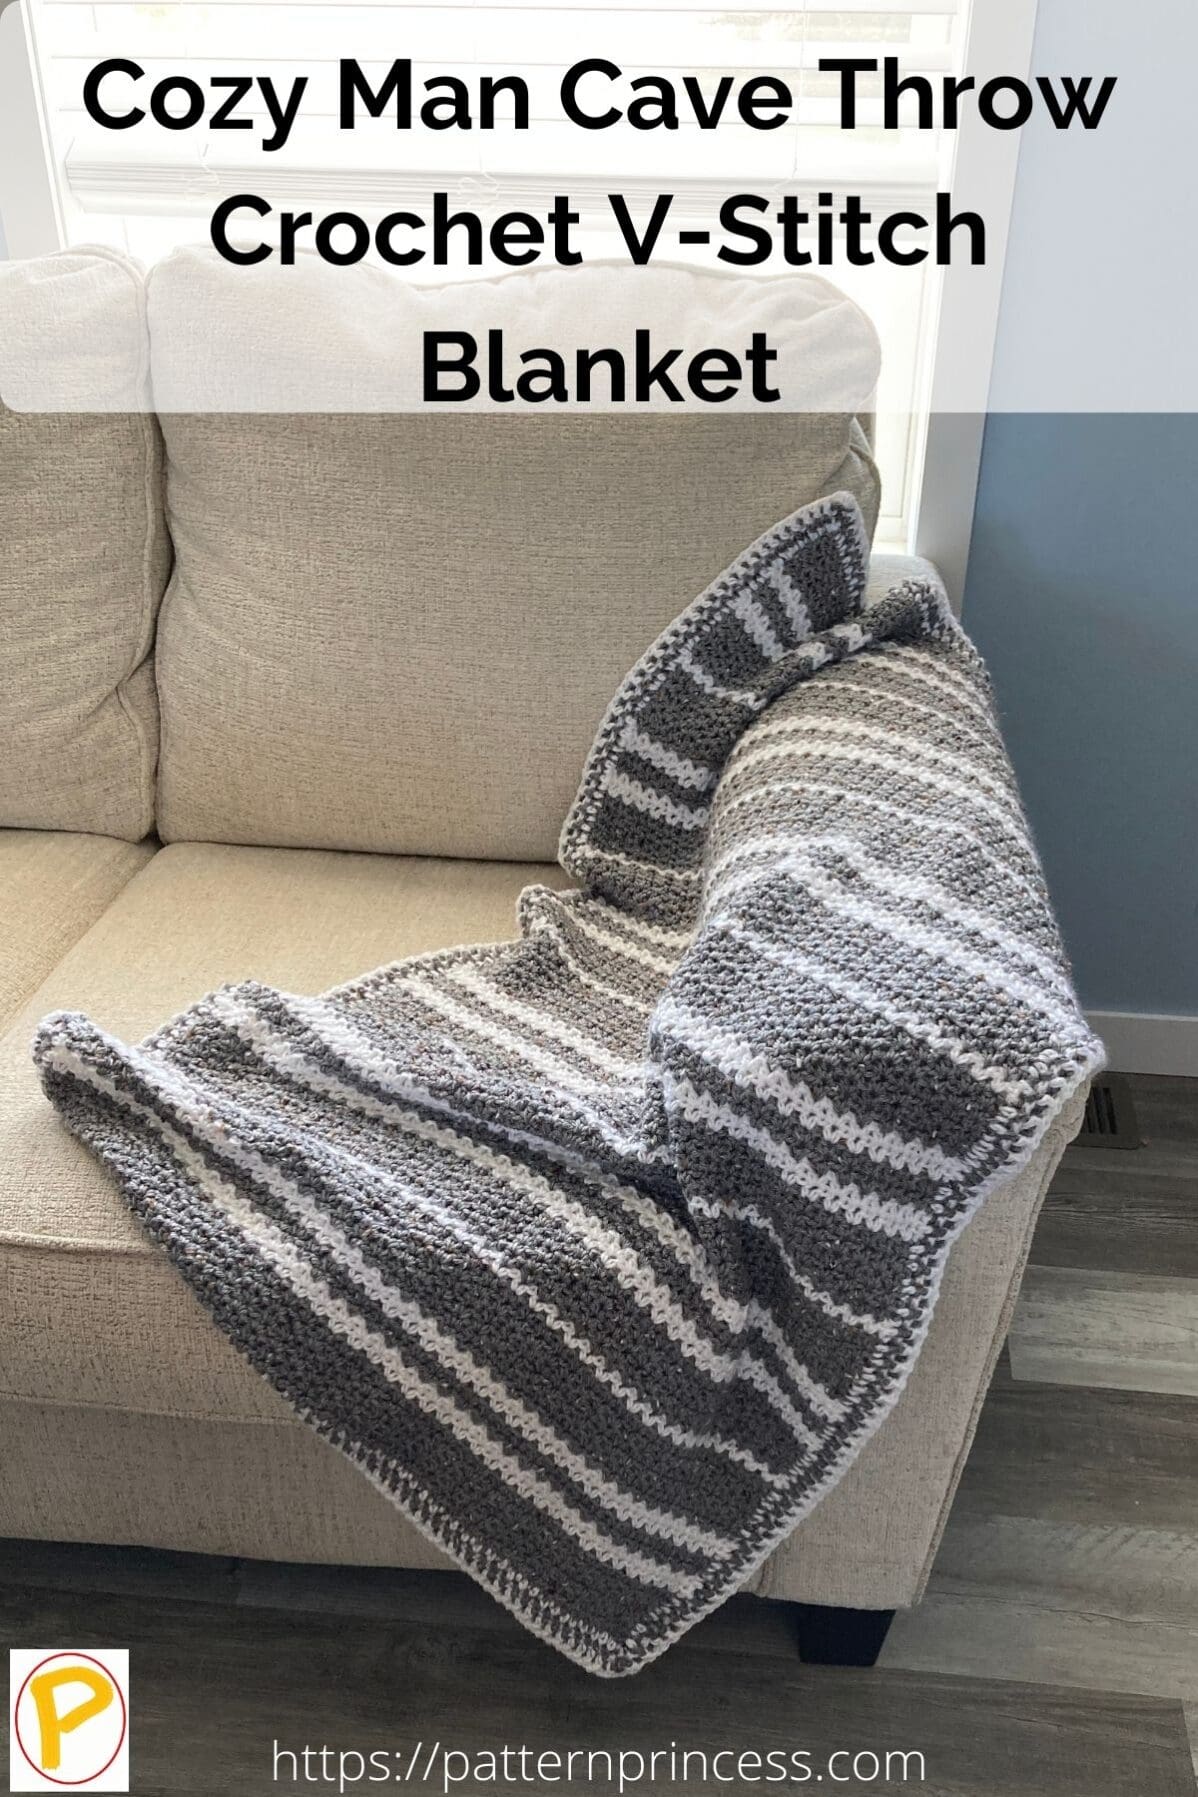
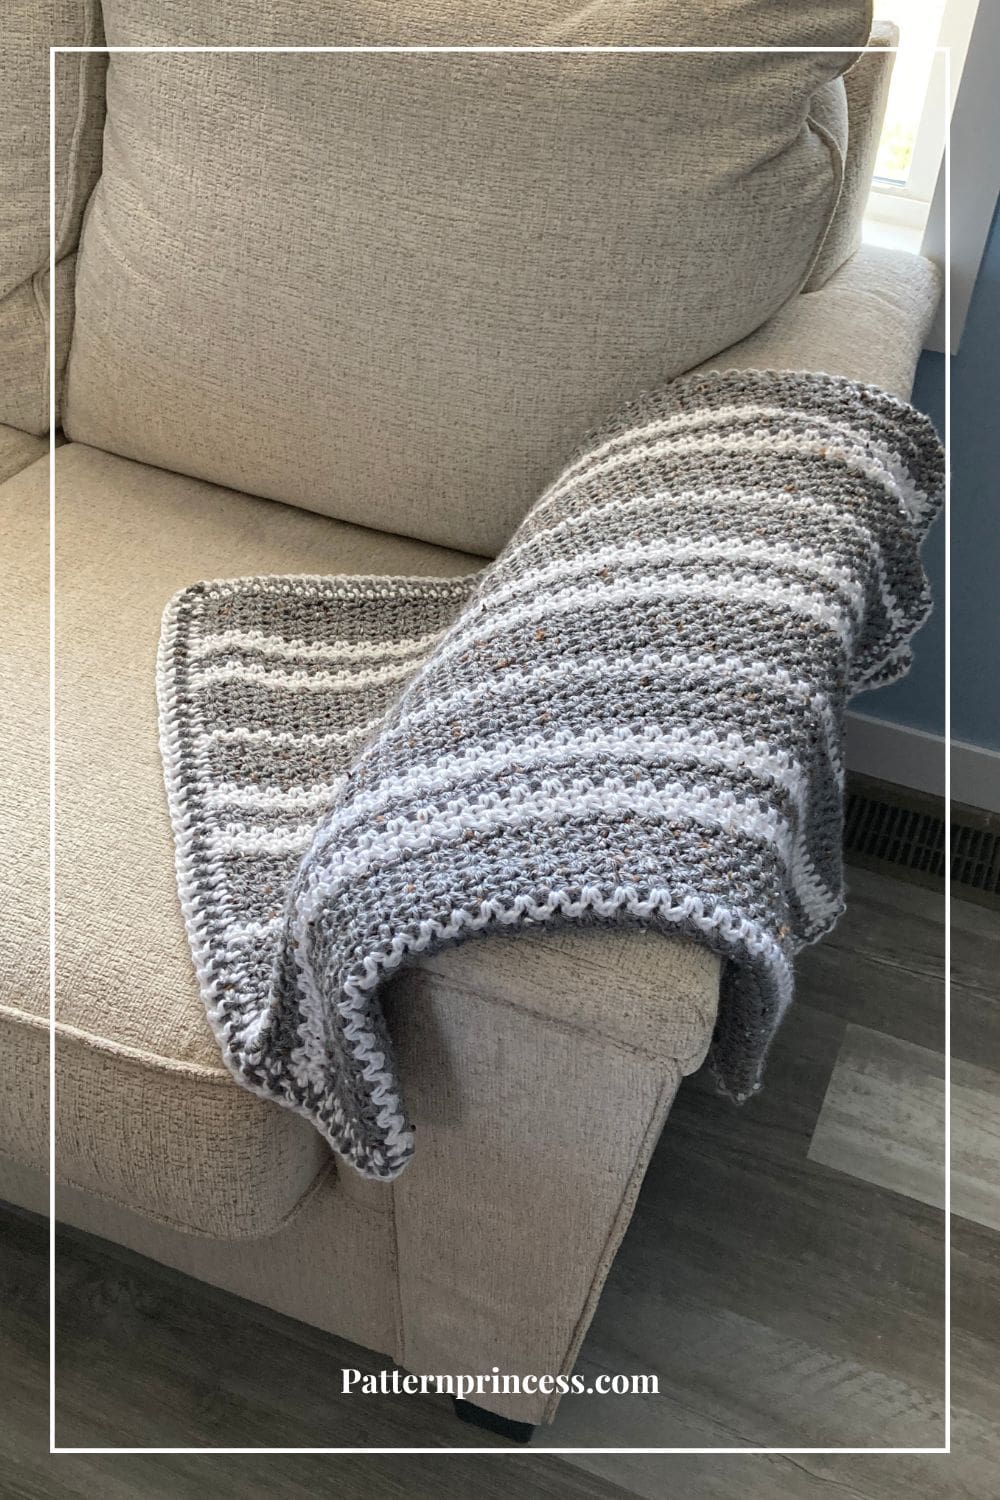
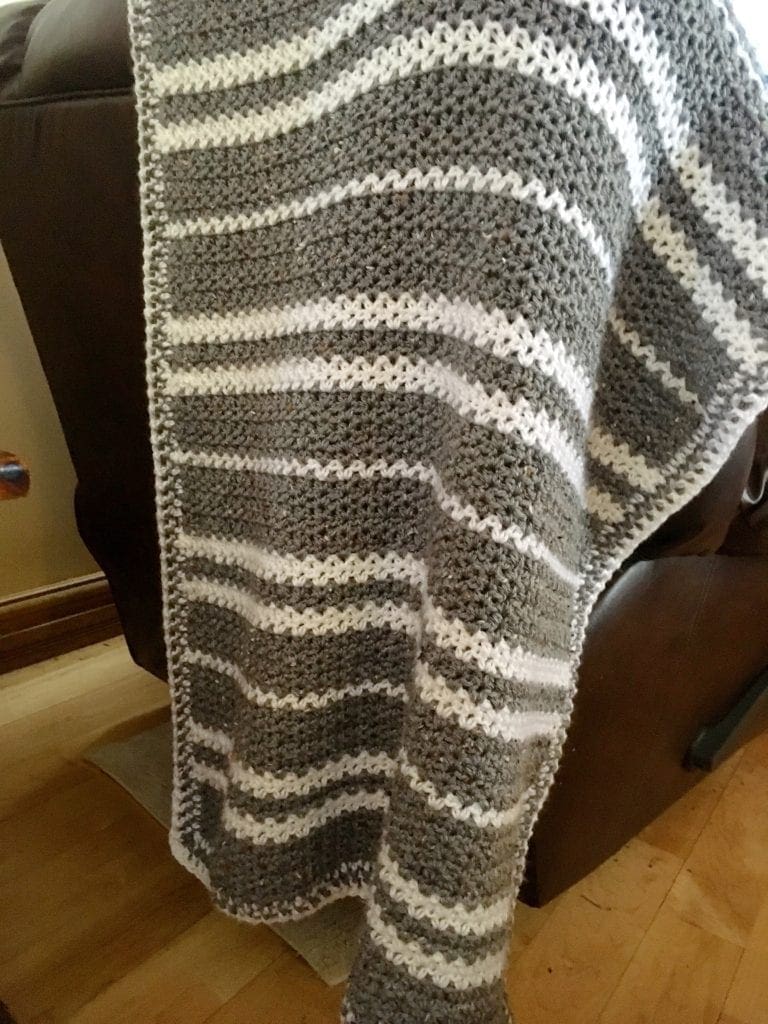
This cozy man cave throw crochet v-stitch blanket can be made in a few weekends. Basic crochet stitches paired with a luxurious soft yarn and a squishy crochet border and you have a winning blanket pattern.
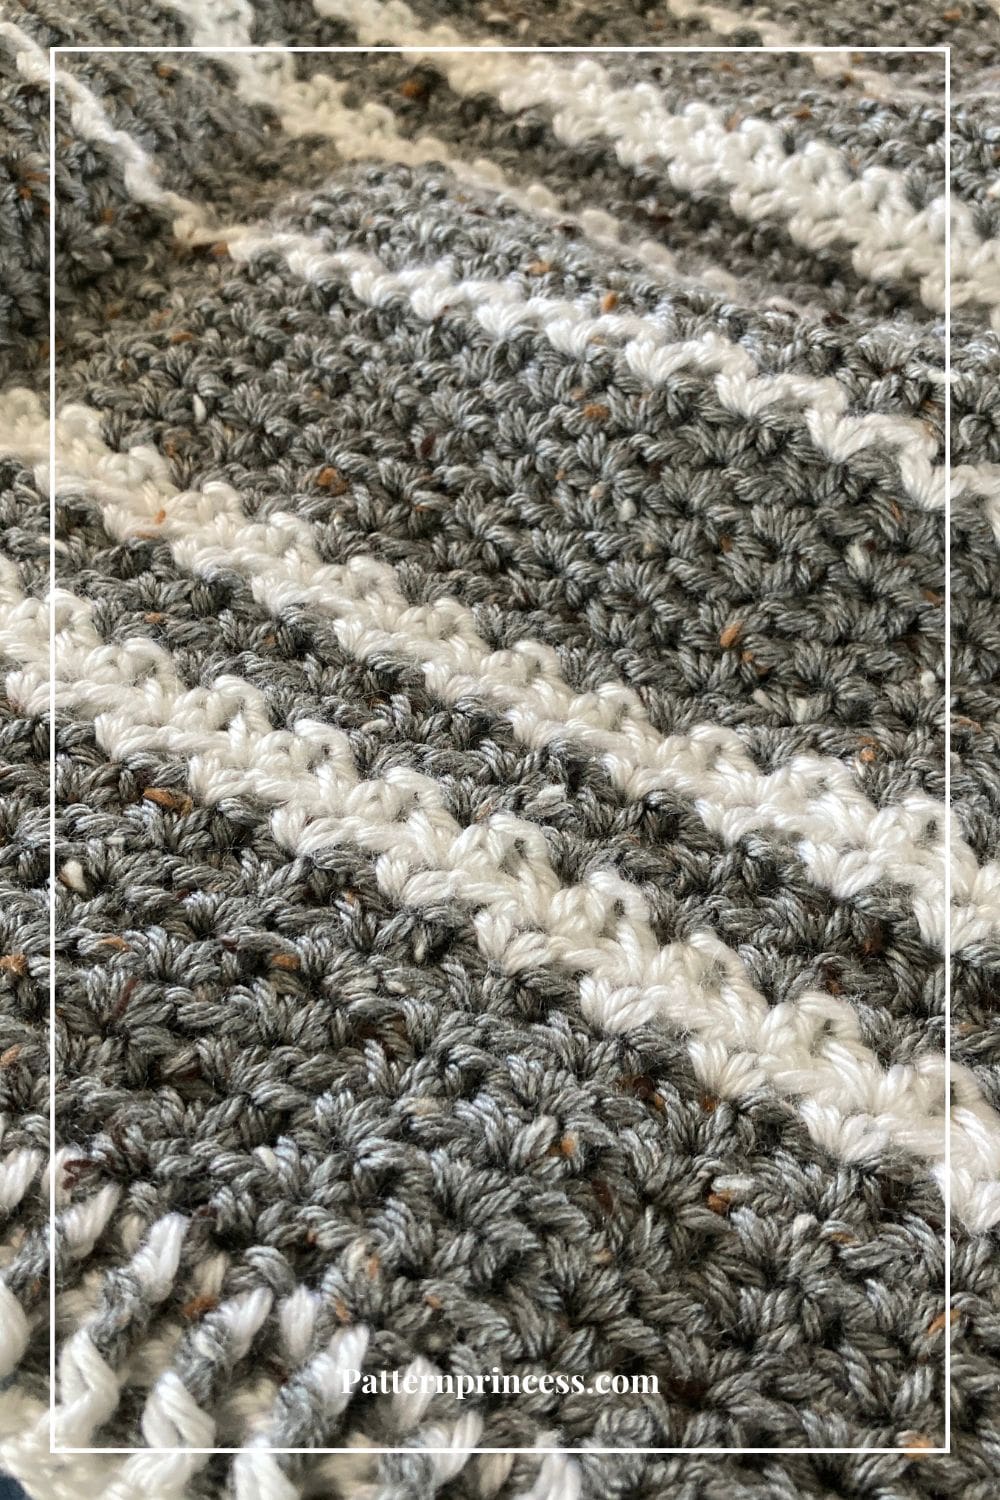
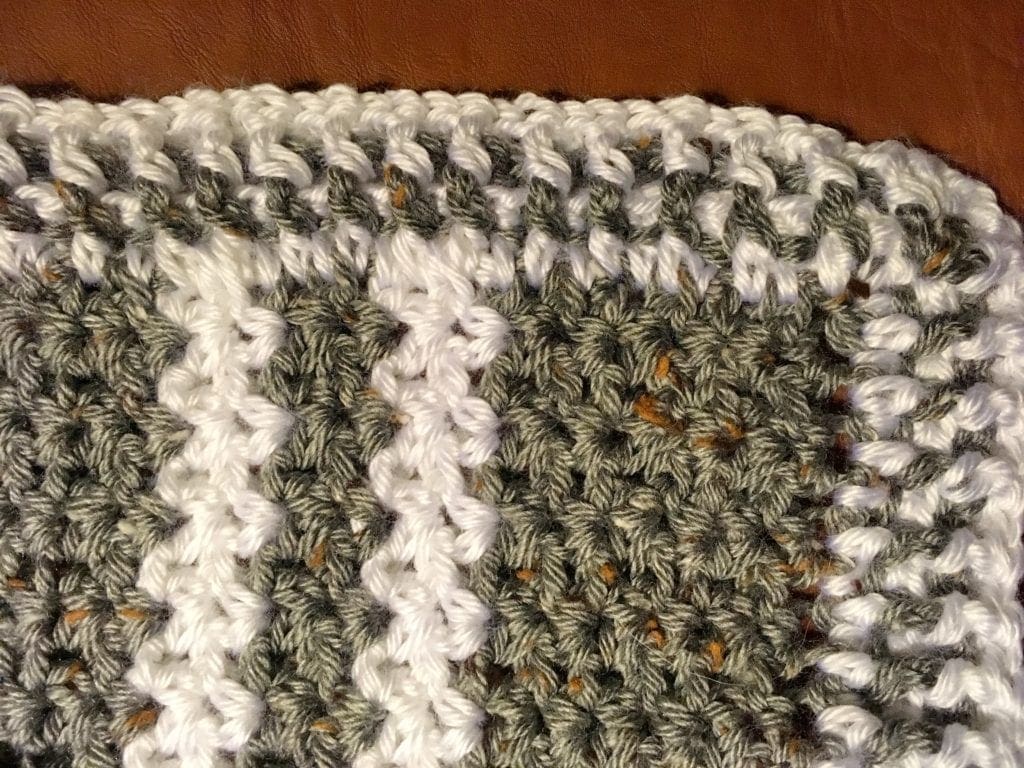
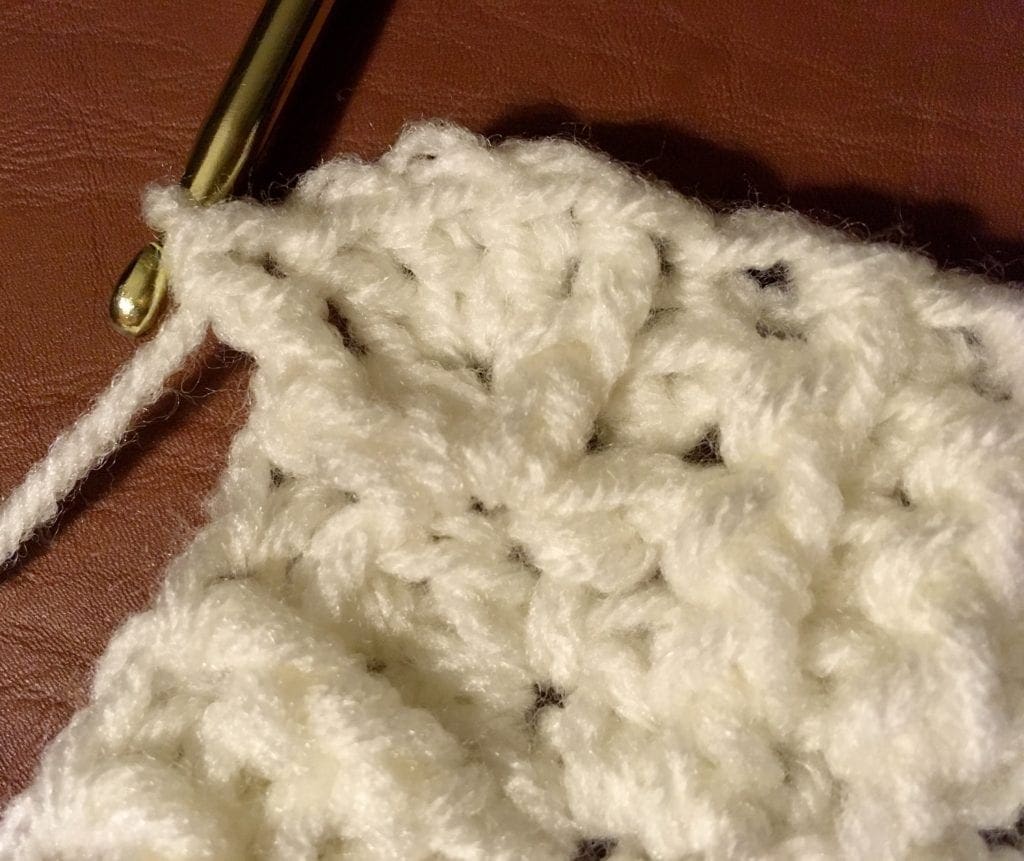
This crochet blanket pattern uses the half double crochet v-stitch to create a lovely texture. Basic crochet stitches paired with a luxurious soft yarn and a squishy crochet border and you have a winning blanket pattern. The stripe pattern helps create a modern looking and quite striking blanket for anyone.
With this free crochet pattern, you will find the written instructions, the list of materials, colors for each row, and crochet video tutorials.
The throw is not limited to just men; it can be a versatile addition to any room or living area. Whether draped over a couch, placed at the foot of a bed, or used as a cozy wrap on chilly evenings, this blanket serves both functional and decorative purposes. Change up the colors to match your color scheme.
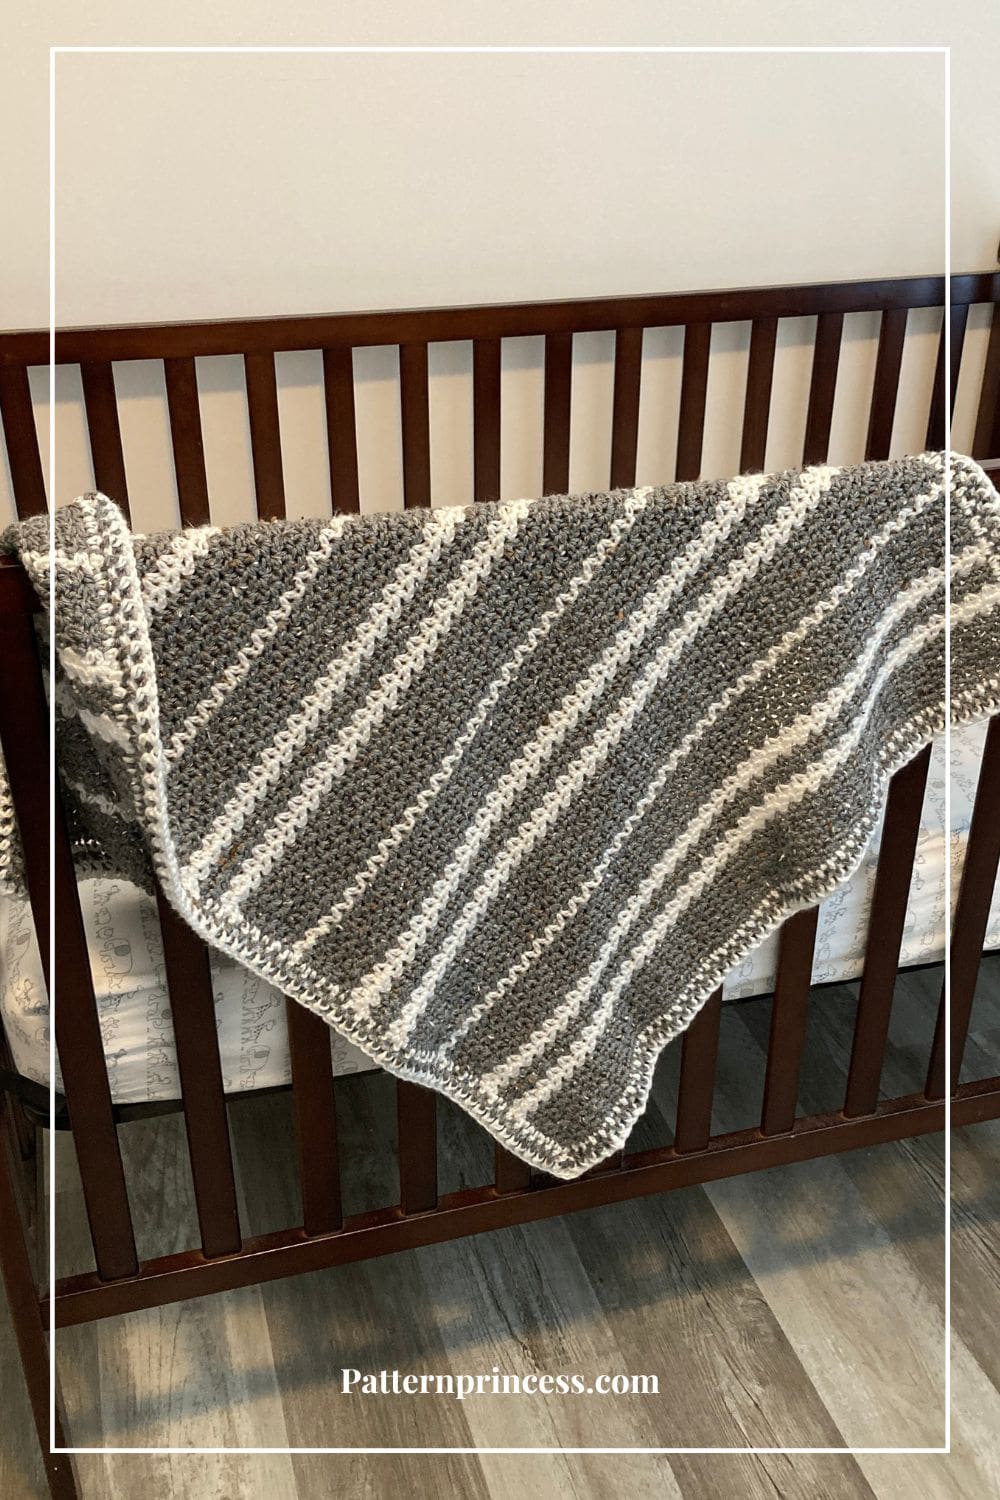
It is easy to change the size. Just use multiples of 3 plus 1 to change the width and crochet the number of rows desired for the length. The size shown is perfect for a baby blanket. s generous size ensures ample coverage and comfort.
*Post contains affiliate links* for more information please read the disclaimer on the About Us page.
This Crochet Throw is Perfect for Men and Boys
It seems like finding a feminine and lacy crochet pattern can be found in a moment. However, if you are like me, you may have noticed it is hard to find stylish patterns and crochet blankets for the male in your life.
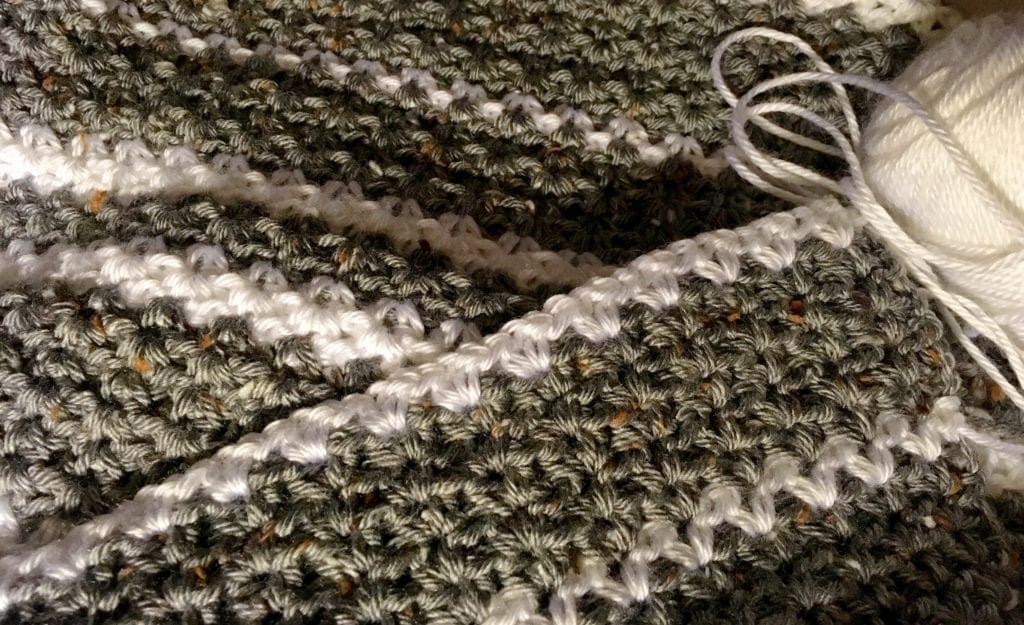
The white provides a clean and classic backdrop, while the tweed grey introduces subtle texture and depth. The overall effect is a blanket that not only keeps you warm but also enhances the aesthetic appeal of your space.
Make this crochet throw to show him you care with a homemade afghan. Whether he is lucky enough to have a man cave or just that favorite chair, he can use the throw to relax.
Easy V-Stitch Crochet Blanket Pattern
If you love quick and easy patterns, then you will love this v stitch blanket pattern.
If you can work the half double crochet and the chain stitch, you can crochet this blanket quickly. It is a great stitch to add lots of soft texture to your afghans.
Make this simple v-stitch blanket today using the free crochet blanket pattern below.
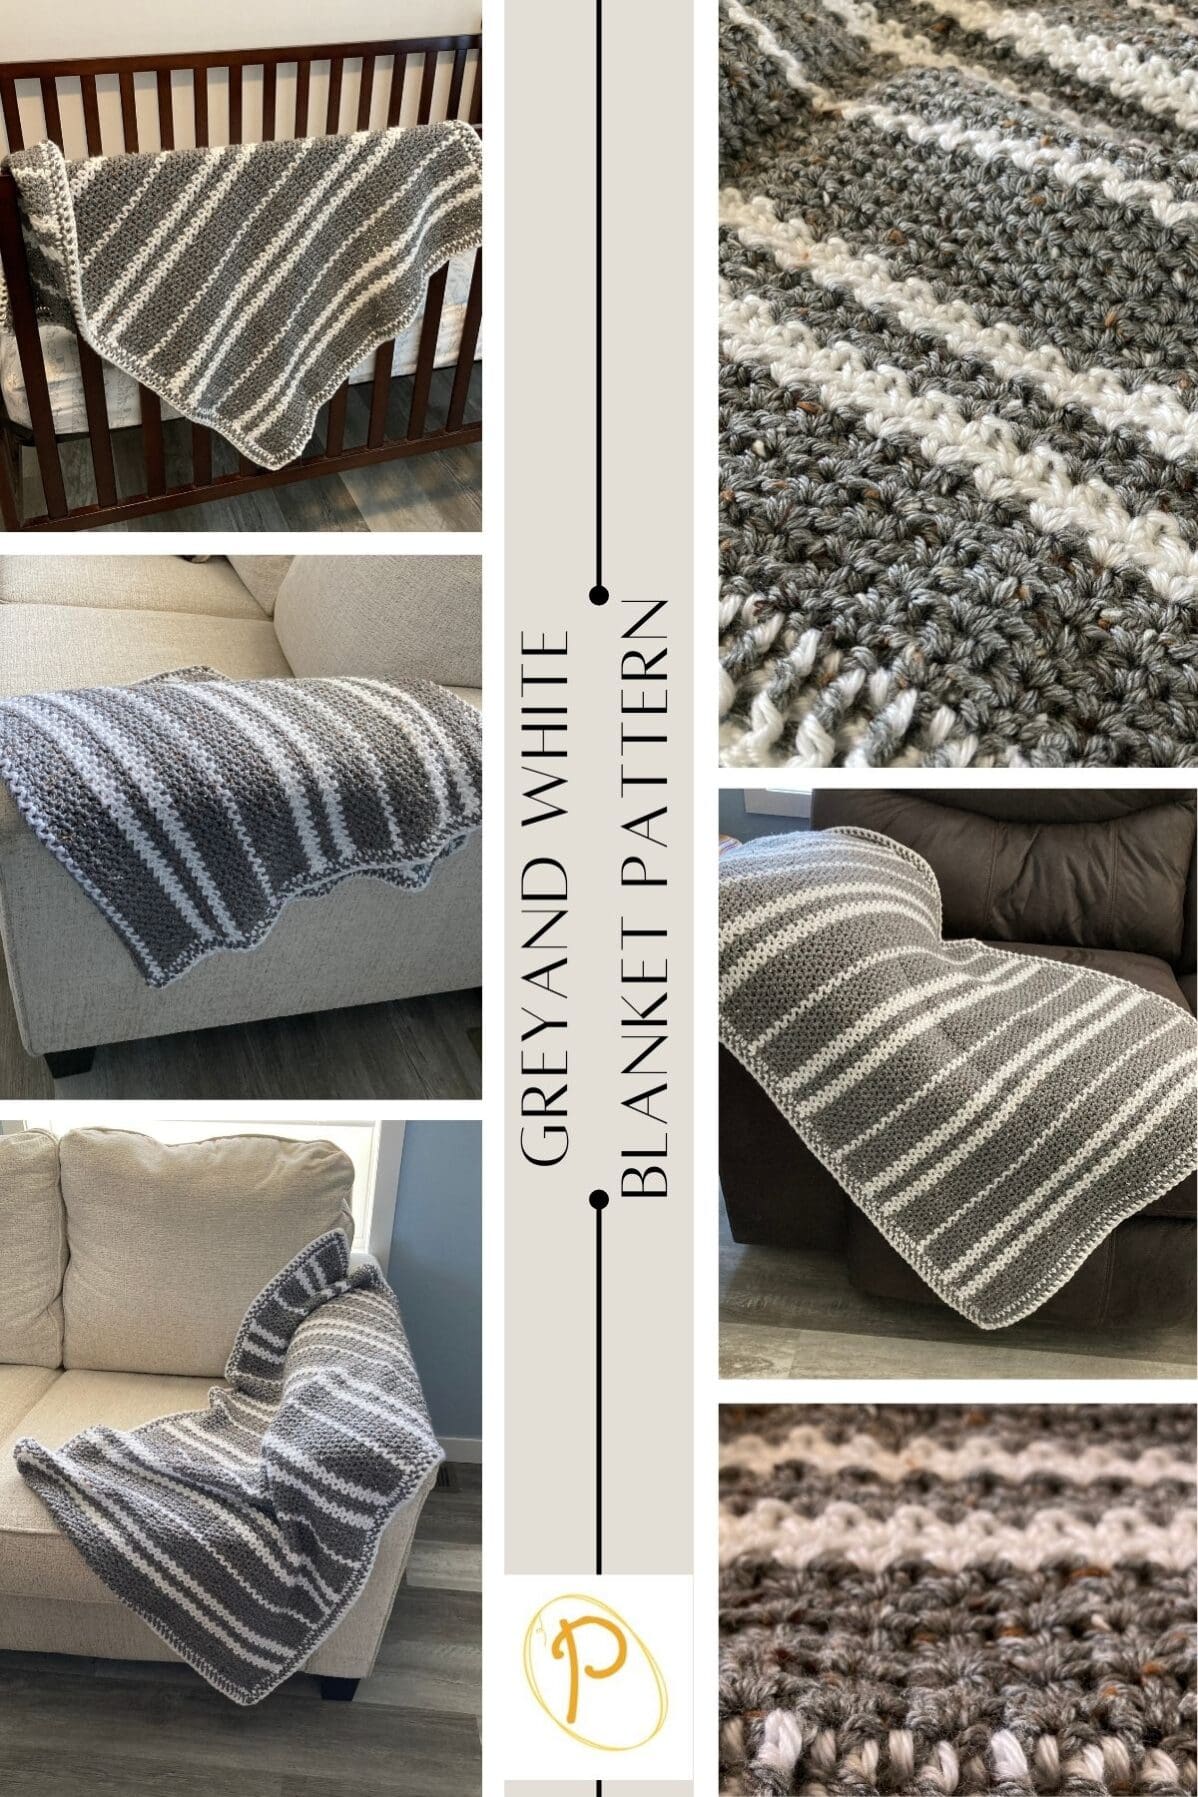
While I made this using a tweed grey and white yarn, you can pick your favorite yarn and color combination to make this afghan pattern. This crochet stitch works with worsted weight yarn and bulky yarn. If you use a different size yarn and crochet hook from the pattern, make sure to adjust your foundation chain stitches to get the size you desire.
Remember, below the written pattern you will find helpful videos.
Crochet Video Tutorials
There are video tutorials near the bottom of the written directions for this crochet pattern for both the v-stitch and the front post and back post double crochet.
Perfect Homemade Gift
Make one for every guy you know. The blanket can be used for years to come. It would make the perfect wedding gift to give at a bridal shower.
One of the most rewarding aspects of crochet is creating something handmade with love. The Cozy Man Cave Throw allows you to pour your creativity and passion into every stitch, resulting in a unique and personalized item. Consider gifting this blanket to a loved one, as it carries not just warmth but also the sentiment of your craftsmanship.
This would make a beautiful baby blanket too.
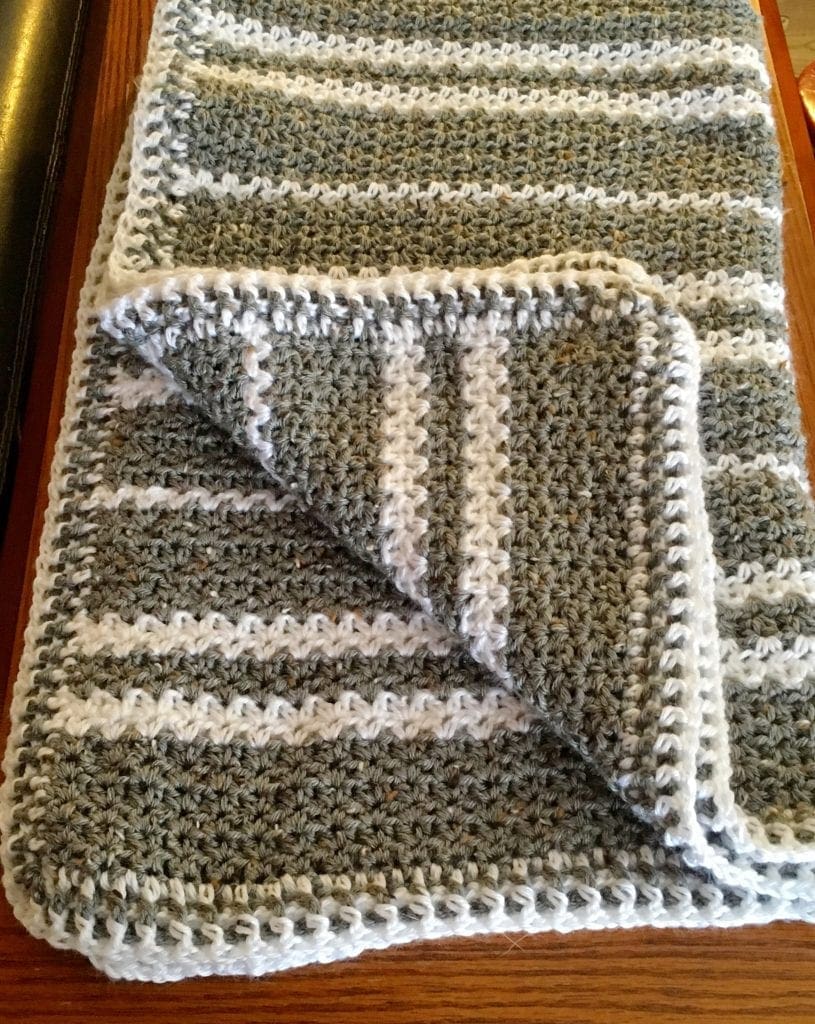
Front Post and Back Post Double Crochet Border
The feel of the edge is just luxurious and squishy. It really helped pull the entire design together. I actually planned on adding one more row of the gray heather tweed color; however, as the blanket was progressing. However, I realized that I liked the white row of front post and back post double crochet as the last row.
When you are making this pattern, you may end up adding one more row on and ending with the tweed color. If you like that as your last row better, please do so. That is what is wonderful about handmade. You put your finishing touches and personal design preferences into what you are creating.
Directions: Cozy Man Cave Throw
Skill Level
Advanced Beginner
While the half double crochet stitches and the chain stitch used for the main part of the blanket are easy. The crochet border is a bit harder to crochet. It uses front post double crochet and back post double crochet stitches.
Gauge
14 Stitches per four inches
Finished Size
28 inches wide by 42 inches long with the border. The border itself is approximately 1 inch wide.
To make this throw larger or smaller, work the beginning row in multiples of 3 plus 1.
Materials
- 4 Skeins Caron Simply Soft Tweeds Gray Heather about 850 yards
- 1 Skein Caron Simply Soft White about 250 yards
- Size H Crochet Hook
- Yarn Needle
- Scissors
Abbreviations
- BPDC = Back Post Double Crochet
- CH = Chain
- DC = Double Crochet
- FPDC = Front Post Double Crochet
- HDC = Half Double Crochet
- SK = Skip a Stitch
- SL ST = Slip Stitch
- SP = Space
- ST = Stitch
- [ ] = Repeat
Pattern Notes
Turn at the end of each row.
Pattern is written in US Terms.
Directions
Starting with the Gray Heather Tweed yarn, Chain 127
Row 1:
In the 4th CH from the hook, complete a HDC. SK 2 ST in the next ST [HDC, CH 1, HDC, SK 2 ST] repeat between the [ ] to the end. Ending with a HDC in the last ST. Turn
Row 2:
CH 2, [HDC, CH 1, HDC in the previous row CH 1 SP]. Repeat the Stitches between the [ ] in each previous row CH 1 SP to the end. Ending with a HDC in the last ST. Turn
Rows 3-108:
Repeat Row 2 for all subsequent rows.
Yarn Color for Each Row
For my throw. Here is the color pattern that I used.
- Rows 1-6 Gray Heather Tweed (6 rows)
- Rows 7-8 White (2 rows)
- Rows 9-10 Gray Heather Tweed (2 rows)
- Rows 11-12 White (2 rows)
- Rows 13-18 Gray Heather Tweed (6 rows)
- Row 19 White (1 row)
- Rows 20-24 Gray Heather Tweed (5 rows)
- Rows 25-26 White (2 rows)
- Rows 27-28 Gray Heather Tweed (2 rows)
- Rows 29-30 White (2 rows)
- Rows 31-36 Gray Heather Tweed (6 rows)
- Row 37 White (1 row)
- Rows 38-42 Gray Heather Tweed (5 rows)
- Rows 43-44 White (2 rows)
- Rows 45-46 Gray Heather Tweed (2 rows)
- Rows 47-48 White (2 rows)
- Rows 49-54 Gray Heather Tweed (6 rows)
- Row 55 White (1 row)
- Rows 56-60 Gray Heather Tweed (5 rows)
- Rows 61-62 White (2 rows)
- Rows 63-64 Gray Heather Tweed (2 rows)
- Rows 65-66 White (2 rows)
- Rows 67-72 Gray Heather Tweed (6 rows)
- Row 73 White (1 row)
- Rows 74-78 Gray Heather Tweed (5 rows)
- Rows 79-80 White (2 rows)
- Rows 81-82 Gray Heather Tweed (2 rows)
- Rows 83-84 White (2 rows)
- Rows 85-90 Gray Heather Tweed (6 rows)
- Row 91 White (1 row)
- Rows 92-96 Gray Heather Tweed (5 rows)
- Rows 97-98 White (2 rows)
- Rows 99-100 Gray Heather Tweed (2 rows)
- Rows 101-102 White (2 rows)
- Rows 103-108 Gray Heather Tweed (6 rows)
Adding the Border
Weave in ends prior to starting the border. Trim off any excess yarn. Once this is done, you are ready to add the border. It also makes it so much nicer later when you complete the border…there are only a few pieces of yarn that need to be weaved in later and snip off.
Front Post and Back Post Border
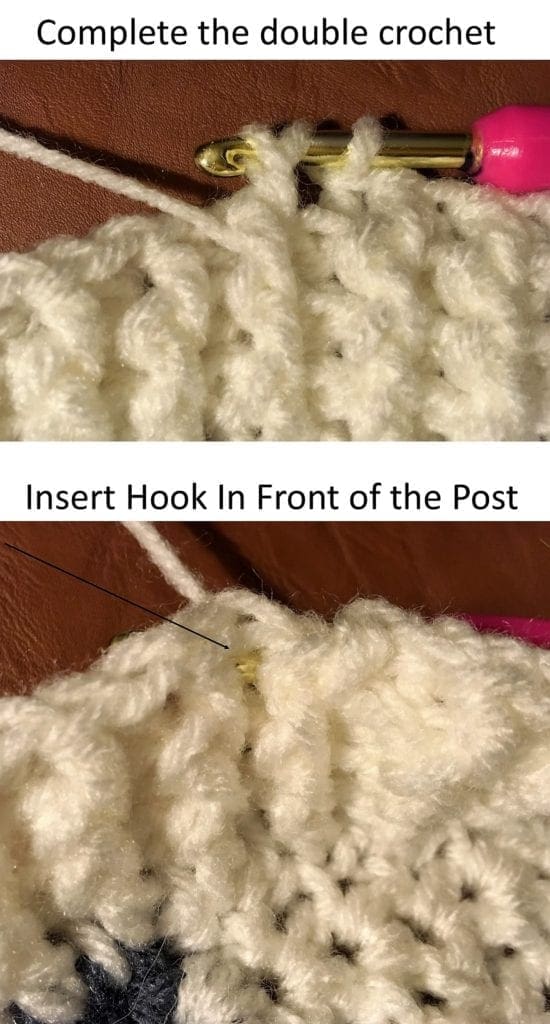
FPDC: means that you insert your hook in the front of the post from the previous row DC.
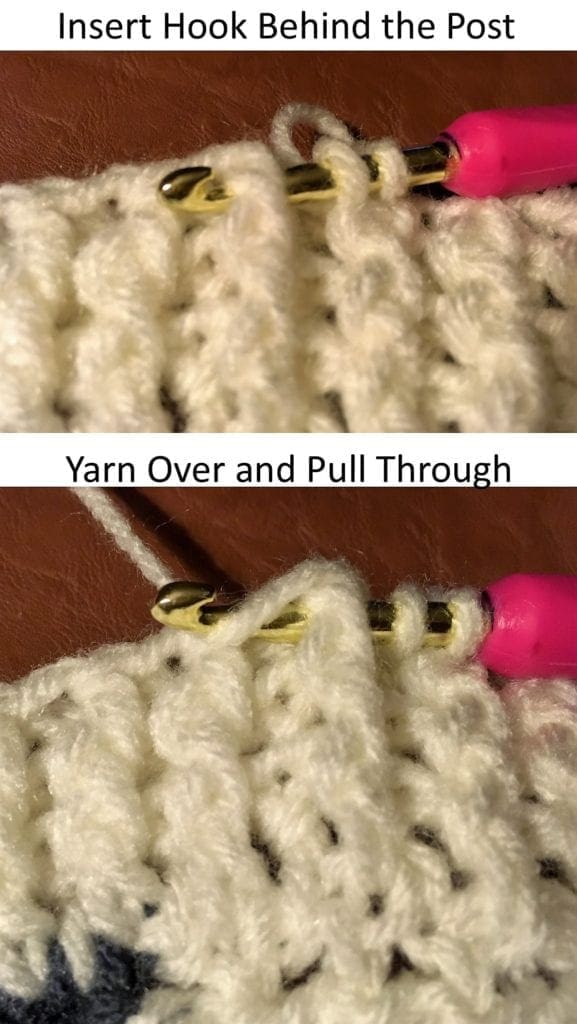
BPDC: means that you insert your hook behind the post from the previous row DC.
This stitch combination creates a nice ribbed stitch look. This border is worked around the blanket 3 times. I will explain the pattern here and there is also a video tutorial on the front and back post double crochet. For those folks that would rather complete this with a photo tutorial, I have that below too.
Ribbed Border Directions:
Begin with the Gray Heather Tweed yarn
Round 1:
Starting in one of the corners and chain 3. DC around the entire blanket, working 3 DC into each corner ending with a SL ST into the top CH of the first chain 3.
Change to the White yarn
Round 2:
Start with a CH 3. Then go around the blanket again; however, this time, you will work the DC alternating between the front and back post. See more detail below for the corners…
Change back to the Gray Heather Tweed yarn
Round 3:
Start with a CH 3. Then go around the blanket again; however, this time, you will work the DC alternating between the front and back post. See more detail below for the corners…
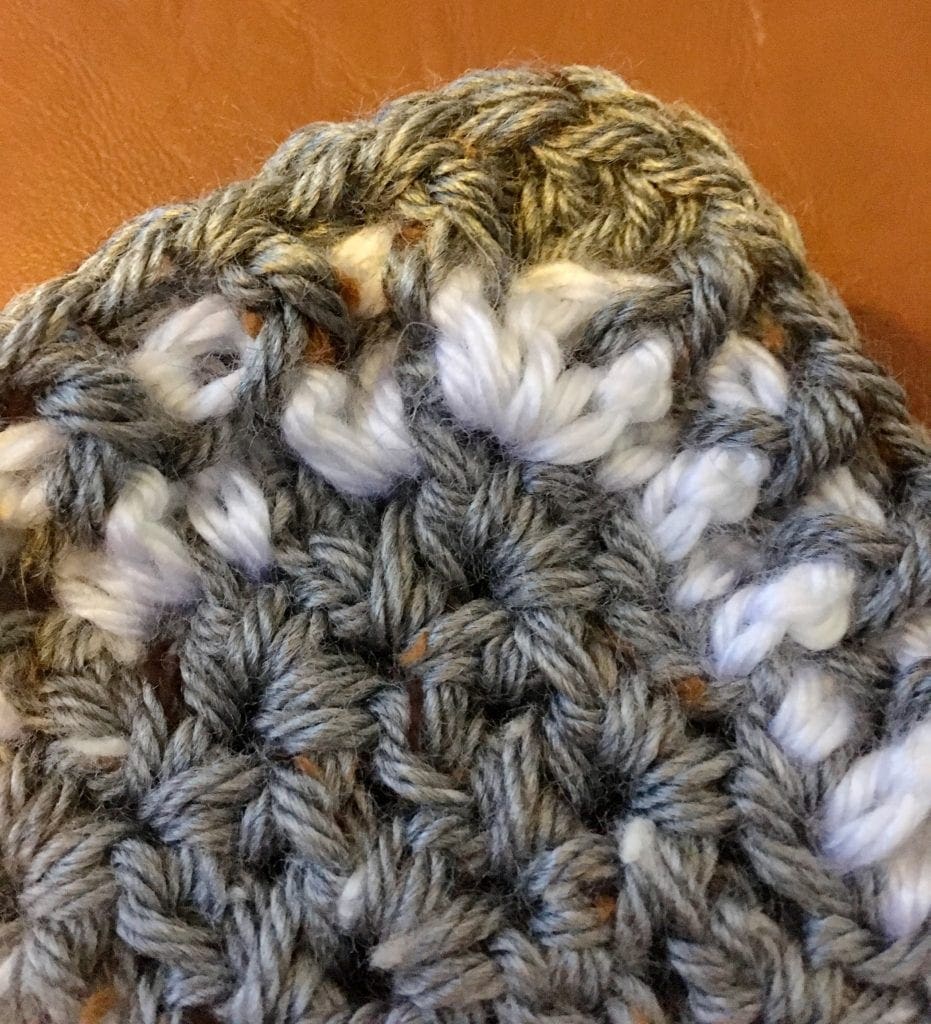
Corners:
When you get to the corners, continue to work 3 DC into the middle DC ST from the previous row. However, on the other two stitches from the previous row DCs in the corner – blend those into the FPDC and BPDC. See the photos of the corners to help show the detail.
Youtube Crochet Tutorial Video Links
Here is the video tutorial on this COZY MAN CAVE THROW
Here is the link for the front post and back post video tutorial. FRONT POST AND BACK POST DOUBLE CROCHET
Here is the link for the half double crochet v stitch. HALF DOUBLE CROCHET V STITCH
Front Post and Back Post Double Crochet Photo Tutorial
I know some people prefer and video, some like just the written directions, and other folks like to have a photo tutorial. It is my hope that I have included enough variety to help everyone learn how to make this beautiful crochet pattern.

If you loved this post, please share. It helps to show me that these types of posts are helpful – thank you!
I hope that you liked this pattern. If you are looking for more ideas for free patterns, here are a few others you may enjoy.

You can find Victoria crocheting, quilting, and creating recipes. She has cooked in restaurants for over 20 years, including many larger parties. She learned to crochet when she was just 11 years old and has been crocheting ever since; over 50 years now. Over 40 years ago, she loved her first class in sewing and continues to hone her skills in quilting. Many have enjoyed the handmade gifts over the years. In her professional career, she has worked in management in a wide variety of businesses including higher education as a dean of a division. All the while attending college part-time to achieve her doctorate in higher education with an emphasis in e-learning.
Pingback: Crochet For Men: The Dude Blanket Is Simple And Sturdy, Just Like Most Men Like It! [Free Pattern] - Knit And Crochet Daily
Pingback: Free Masculine Crochet Patterns - Knit And Crochet Daily