Last updated on July 4th, 2024 at 11:44 pm
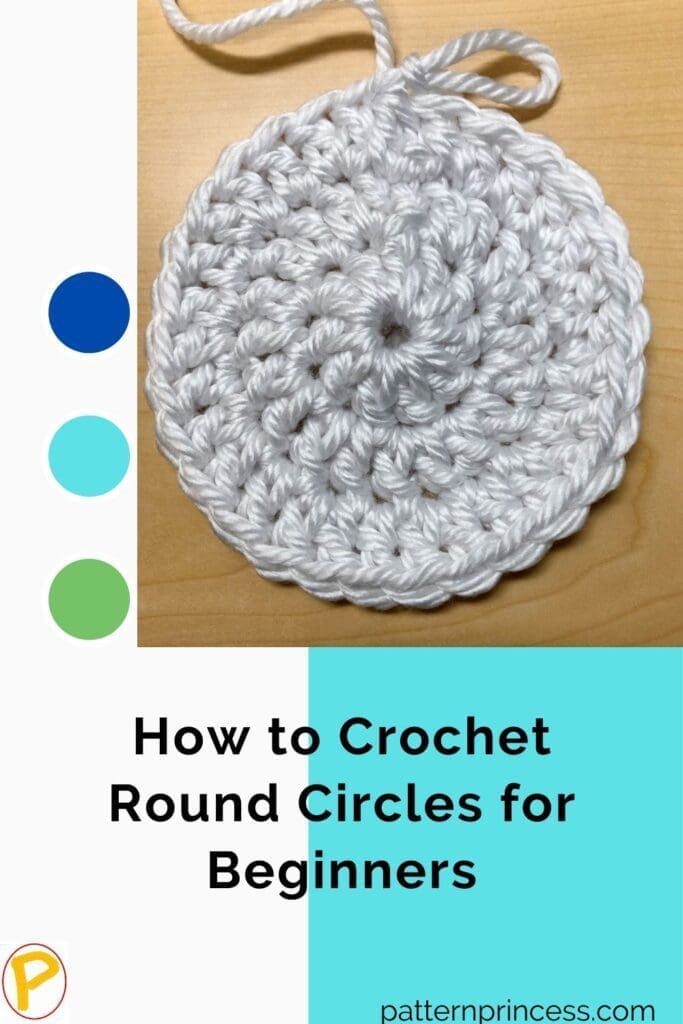
Learn how to crochet round circles for beginners breaks down the basics so you can be successful in crocheting in the round. Crocheting flat circles can be easy for some and challenging for others. This tutorial makes it easy to get round and flat circles. I will teach you the basics so you can be successful crocheting in the round too.
Many people find crocheting in rounds daunting because they have trouble getting started or figuring out where their stitches should go next; but this guide will give beginners an understanding of what’s involved.
Crocheting in the round is an essential skill to learn as it is used to make baskets, hats, tablecloths, blankets, coasters, and amigurumi projects.
Post contains affiliate links, and we earn commissions if you shop through the links on this page. For more information, please read the disclosure section under the About Us page.
Round Crochet Patterns
Let’s dig into how to make a perfect circle using basic stitches. Today, we will be discussing the method to crochet circles by joining with a slip stitch at the end of each round. There is an alternative method where you create continuous rounds like a spiral rather than creating a complete circle with each round.
Beginning a round crochet pattern.
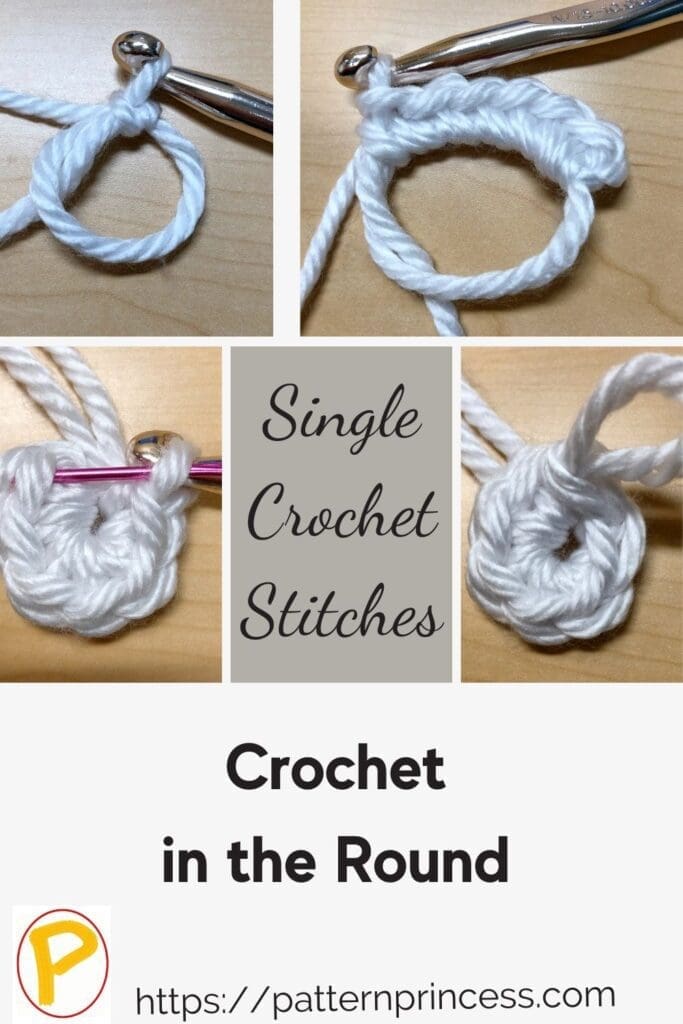
Generally, when making round crochet patterns, the directions will have you either start with a magic circle or a chain 4 or 5 and join with a slip stitch. They are just different ways to make the initial circle; nonetheless, both methods make a circle. However, the magic circle makes a slip knot that can be snugged up after the total number of stitches have been added for the first round.
Working the first round in the center circle.
This circle is used to crochet around for the first round of crochet stitches. For example, if you will be working single crochet stitches in the circle, generally, you could work a chain 1 stitch which will not count as a stitch and continue working the number of single crochet stitches indicated in the pattern. When you complete the last single crochet, join with a slit stitch to the first single crochet stitch. This will create the circle.
If you used the magic circle, which is sometimes called the magic loop or the magic ring, you can pull the yarn tail snug which will close the center hole. If you used the chain stitches joined with a slip stitch to make the initial circle, then the center hole is already the smallest it will be.
How Many Crochet Stitches are in a Round?
Have you heard of the 6-8-10 rule when crocheting in the round?
It is one of those simple rules to remember for assured success when paired with basic crochet stitches. The number of stitches that work best when starting a circle should follow the 6-8-10 rule. This will provide for the optimal number of stitches worked in the first round. Six for single crochets, eight for half double crochets or ten for double crochets.
However, the 6-8-10 rule is really a general guideline.
The number of stitches crocheted in the center circle can vary a bit depending on your crochet hook size and yarn weight.
Therefore, use this as a general guideline for the first round of stitches.
- 6-10 stitches for single crochet
- 8-12 stitches for half double crochet
- 10-14 stitches for double crochet
When I want to make the circle larger with fewer rounds, I will add more stitches to the first round. This helps when making a basket or coasters, which are started in the round. You can also make a larger circle by using the half double crochet or double crochet versus the single crochet stitch.
Depending on how large I want the product and in how many rows I want to reach the desired size will sometimes determine the number of stitches I use in round 1. However, the 6-8-10 rule is often the sweet spot for the number of stitches worked in round 1.
How to Increase in the Round When Crocheting
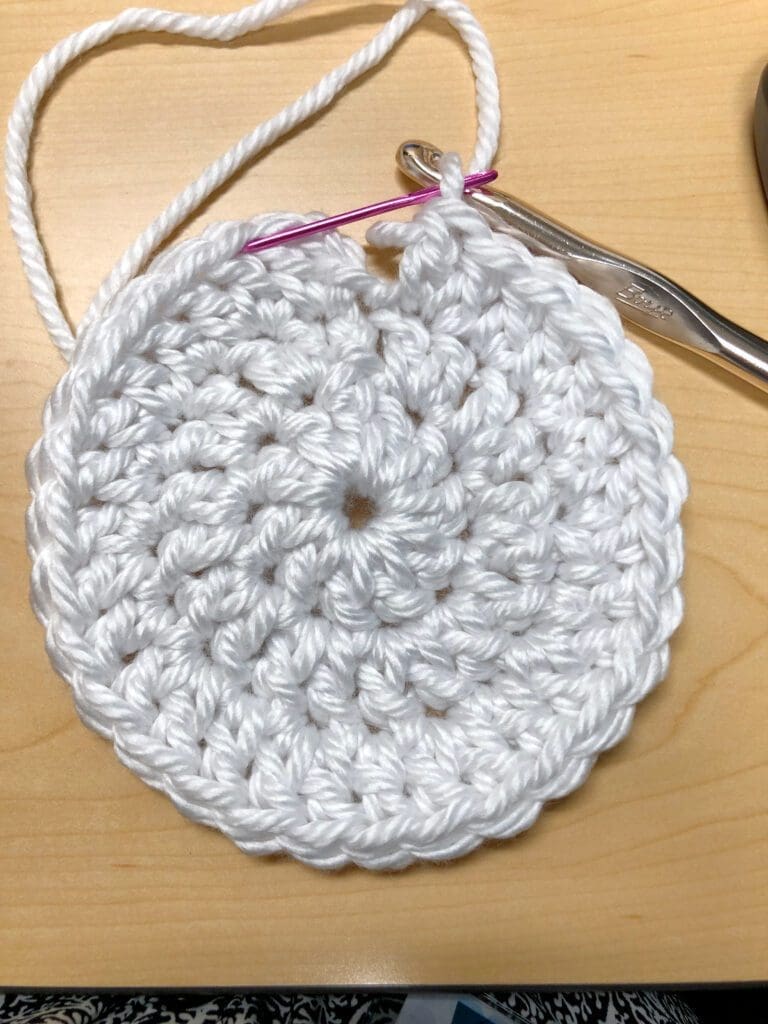
After the first round is completed in a circular crochet pattern, you will begin increasing the number of stitches used in each subsequent round, so the piece lays flat.
What does it Mean to Increase in Crochet?
The term “increase” means to make two or more stitches into the same stitch. This will increase the stitch count. For example, if you work two single crochet stitches into a stitch, you will increase the stitch count by one.
Keep Crochet Circles Flat by Evenly Spacing Increases throughout Each Round.
Here is a bit of a detailed explanation on how to evenly space stitches in each round.
The first increase of stitches begins in round 2.
Each round of crochet should increase by the number of stitches worked inside of the circle for round 1. A single crochet circle begins with 6 single crochet stitches in the first round. At the end of the second round, that circle will have 12 single crochet stitches.
Let me try and explain a bit more…
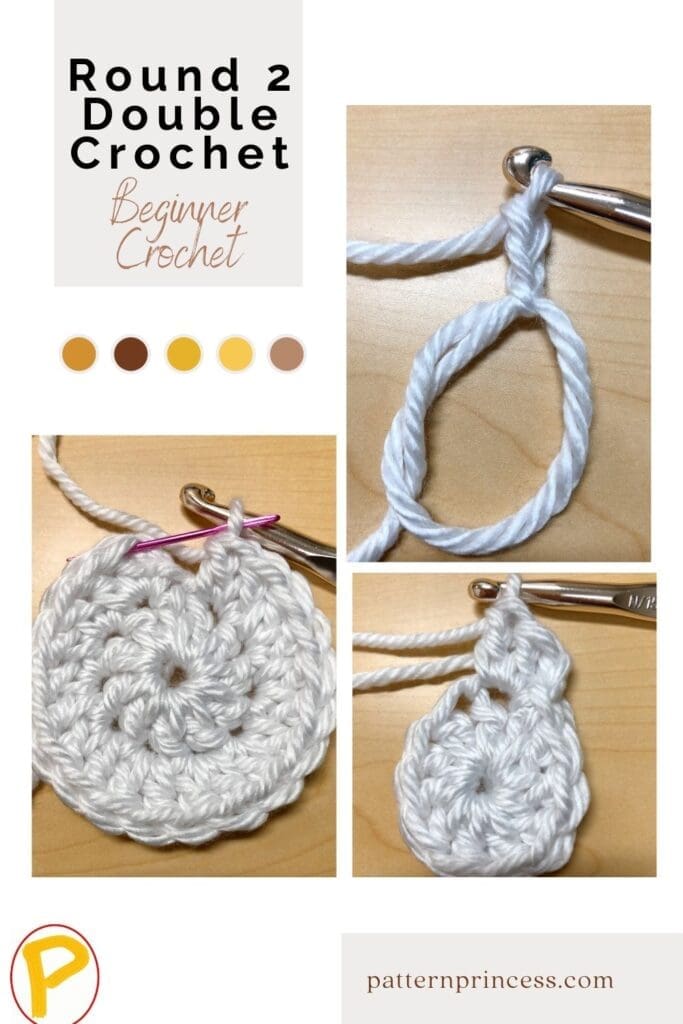
For each round, the number of stitches worked between each increase increases by one. Therefore, in round 2 of any crochet circle, there are no stitches in between increases; consequently, you increase every stitch. In other words, if you had 6 single crochet stitches in round 1, you would have 12 single crochet stitches in round 2.
For rows three and beyond, there is an additional crochet stitch added between every stitch where there are 2 single crochets worked.
To explain further, in one stitch you would complete a single crochet, the next stitch you would complete 2 single crochet stitches. When you count the single crochet stitches, you should have 18 for round 3. (Since you started with 6 single crochets, the number of stitches in each row should increase by 6).
Increase Stitch Chart for Crocheting Round Circles
Here is a Crocheting in the Round Chart Showing the Number of Stitches Between the Increases in Each Round. This will help you determine the right number of stitches between the increase stitches. If you want to continue growing the circle, continue growing the pattern. For each round, add one more single crochet stitch before doing two single crochet stitches.
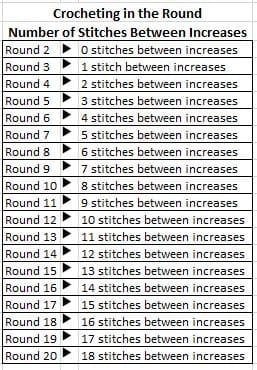
An easy way to make sure you’re on track in each round is to count your stitches. Remember, you’re increasing each round by the same number of stitches you started with in Round 1.
When increasing more than 20 rounds, continue to add one more stitch between each increase stitch area for every additional round.
Keeping the Circle Flat and Round
By increasing the number of stitches between the increases with each round, the circle will lay flat. Because the increasing stitches are distributed evenly around the circle, the circle will remain round.
Reminder: Each row will increase by the initial stitch count. If you started with 6, each round should increase by 6. If you started with 10, each round should increase by 10 stitches.
As you increase rows, it is important to keep an even increase with each round. How to Crochet a Circle with an Almost Invisible Seam
For me, the turning chain is key is helping the seam stay in place and be less visible. When I first started crocheting in the round, little tricks like putting a stitch marker in the turning chain made all the difference.
While you can do the alternate method and just continue crocheting stitches in a spiral format, I find that the spiral method is harder to align stitches when doing any special stitches in each round. Therefore, my go-to is the addition of chain stitches at the beginning of each round and ending with a slip stitch.
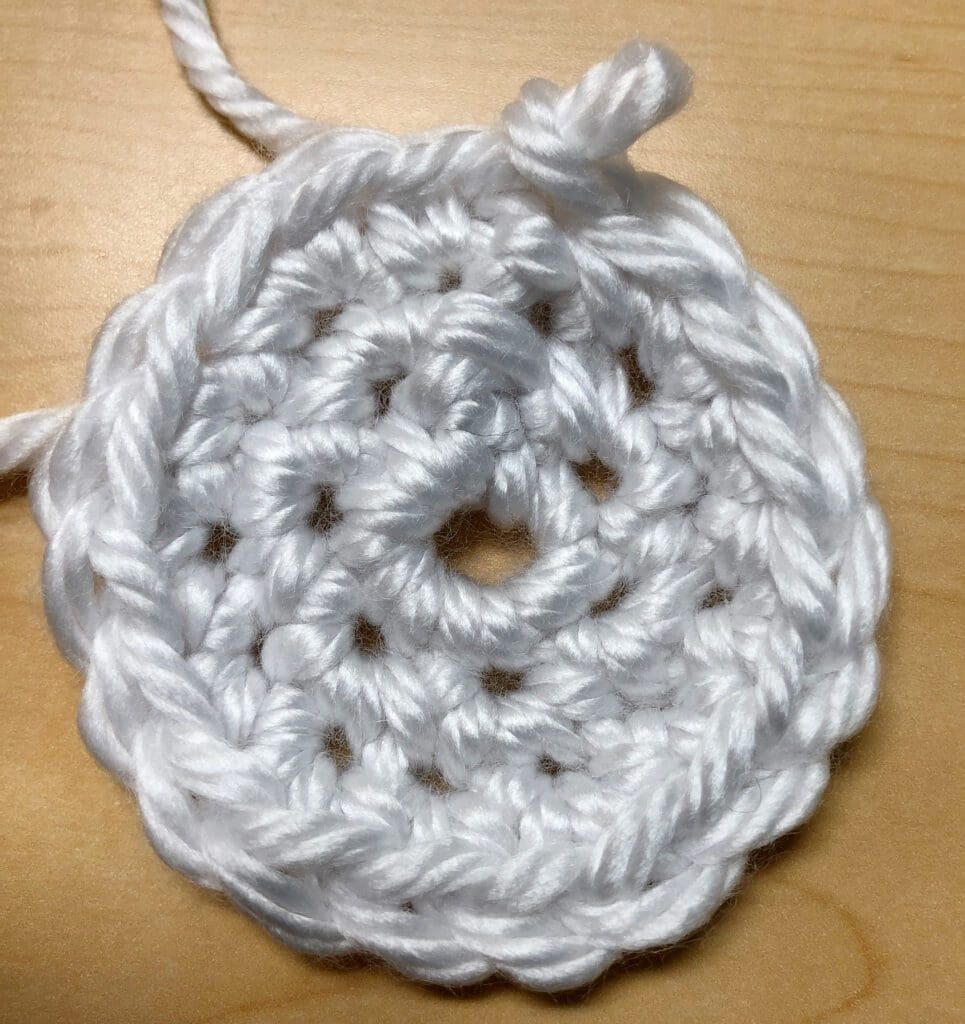
What are Turning Chains in the Round
The turning chain is like the invisible counterpart to your work. It’s responsible for making sure you have matching stitches around and sets all those magic looks into motion.
While generally, you do not turn your work when crocheting in the round, the element of a turning chain is critical to getting a uniform look to the crochet stitches.
In a circle, the turning chain should match the height of the stitch used. In some cases, it will count as a stitch while in others, it will not count as a stitch.
Often, when I am writing a crochet pattern, I will not count the stitch as I think it is a nice filler stitch and fills the gap that working the slip stitch can create.
Here are a few general guidelines to help you determine the number of turning chains to use for three of the most common stitches used when crocheting in the round.
- Single crochet ~ 1 turning chain
- Half Double crochet ~ 2 turning chains
- Double crochet ~ 3 turning chains
- Treble crochet ~ 4 turning chains
- Double Treble crochet ~ 5 turning chains
Does the Turning Chain Count as a Stitch in Crochet in the Round
When reading a round crochet pattern, there are clues to help you determine if the turning chain counts as a stitch.
Here are two ways this could be written in a round crochet pattern.
- If you patterns reads “join with a slip stitch to the (first, second, or third) chain”, then the turning chain counts as the first stitch of the round.
- If your pattern reads “join with a slip stitch to the first stitch”, then the turning chain does NOT count as a stitch at all. Your first stich of the round will be the first stitch you crochet after the turning chain.
Pro-Tip: To make sure that you have worked the right amount of crochet stitches with each round, it is a good idea to count. The last stitch of the round is determined by counting the stitches in that round as you go and ending on the number you know to be last.
What Happens When You Stop Increasing Each Round in Crochet?
When you stop increasing with each round, the circle will transform from a flat circle to more of a tube.
The row where you stop increasing will become the first round of the sides of the crochet projects.
This technique is used when making baskets and hats.
Keep in mind that shorter stitches require more rounds before seeing any differences. Therefore, it might take a few rows to start to see the results.
Here are a few general guidelines to help you determine the number of rows that are worked before you will see the shape start to change when crocheting in the round.
Stop increasing for before the shape will change:
- Single Crochet ~ 6 Rounds
- Half Double Crochet ~ 3 Rounds
- Double Crochet ~ 1 Round
What Can You Make with Flat Circles?
Once you’ve mastered how to crochet a flat circle, then your skills will come in useful for all sorts of projects.
Here’s a sample pattern on Crocheting a Round Circle using Single Crochet Stitches
Supplies
Any yarn. I recommend practicing with a medium-weight yarn. You’ll only need a small amount to make a few rounds.
5.5 mm Crochet Hook
Pattern Notes
This crochet pattern is written in US terms.
For this sample pattern, since 6 Single Crochet stitches are worked in the beginning ring, you will increase by six stitches each round. The circle will lay flat with this method.
Abbreviations
SC = Single Crochet
SL ST = Slip Stitch
ST = Stitch
STs = Stitches
[ ] = Repeat Between
Begin
You can start with a magic circle or chain stitches joined with a slip stitch to make your beginning circle.
If using chain stitches, Ch 4 and join with a SL ST into the 4th CH from the hook.
Round 1
Working into the circle, CH 1 (Counts as a SC). Work 5 SC into the circle. Close with a SL ST into the first CH. (6 STs).
Round 2
CH 1 (Counts as a SC). Work 2 SC into each ST. Close with a SL ST into the first CH. (12 STs).
Round 3
CH 1 (Counts as a SC). [Work 2 SC into the next ST and 1 SC into the next ST] Repeat around between [ ]. Ending with 2 SC and a SL ST into the first CH. (18 STs).
Round 4
CH 1 (Counts as a SC). [Work 1 SC into the next ST and 2 SC into the next ST] Repeat around between [ ]. Ending with 2 SC and a SL ST into the first CH. (24 STs).
Round 5:
CH 1 (Counts as a SC). [Work 1 SC into the next two STs and 2 SC into the next ST] Repeat around between [ ]. Ending with 2 SC and a SL ST into the first CH. (30 STs).
Round 6:
CH 1 (Counts as a SC). [Work 1 SC into the next three STs and 2 SC into the next ST] Repeat around between [ ]. Ending with 2 SC and a SL ST into the first CH. (36 STs).
Round 7 and Beyond
To make larger circles, continue increasing 6 stitches per round.
Here are a few of my own crochet patterns using flat circles.
Crochet Christmas Coaster Pattern
These other crochet patterns are worked in the round too. Once you get the technique of working in the round, a whole new world of possibilities opens up for crochet projects.
Crochet Shell Stitch Round Doily
Youtube Video Crochet Circle Tutorials
Right hand crochet tutorial
Left hand crochet tutorial
Here are a few other free crochet patterns you may enjoy.

You can find Victoria crocheting, quilting, and creating recipes. She has cooked in restaurants for over 20 years, including many larger parties. She learned to crochet when she was just 11 years old and has been crocheting ever since; over 50 years now. Over 40 years ago, she loved her first class in sewing and continues to hone her skills in quilting. Many have enjoyed the handmade gifts over the years. In her professional career, she has worked in management in a wide variety of businesses including higher education as a dean of a division. All the while attending college part-time to achieve her doctorate in higher education with an emphasis in e-learning.
