The Double Monkey Wrench quilt block is simple yet striking in design. Its bold geometric design stands out, whether you’re making a single block or incorporating it into a larger quilt.
It’s a classic choice that has been passed down through generations, making it a beloved part of many quilting traditions. Perfect for both beginners and experienced quilters, this pattern combines precision and artistry, resulting in a striking piece that can be customized with a variety of fabric choices.
Whether you prefer traditional or modern quilting styles, it’s a great block that is a versatile option that can be adapted to fit any quilt project.
In this tutorial, I’ll guide you through the simple steps to create your own stunning Double Monkey Wrench block.
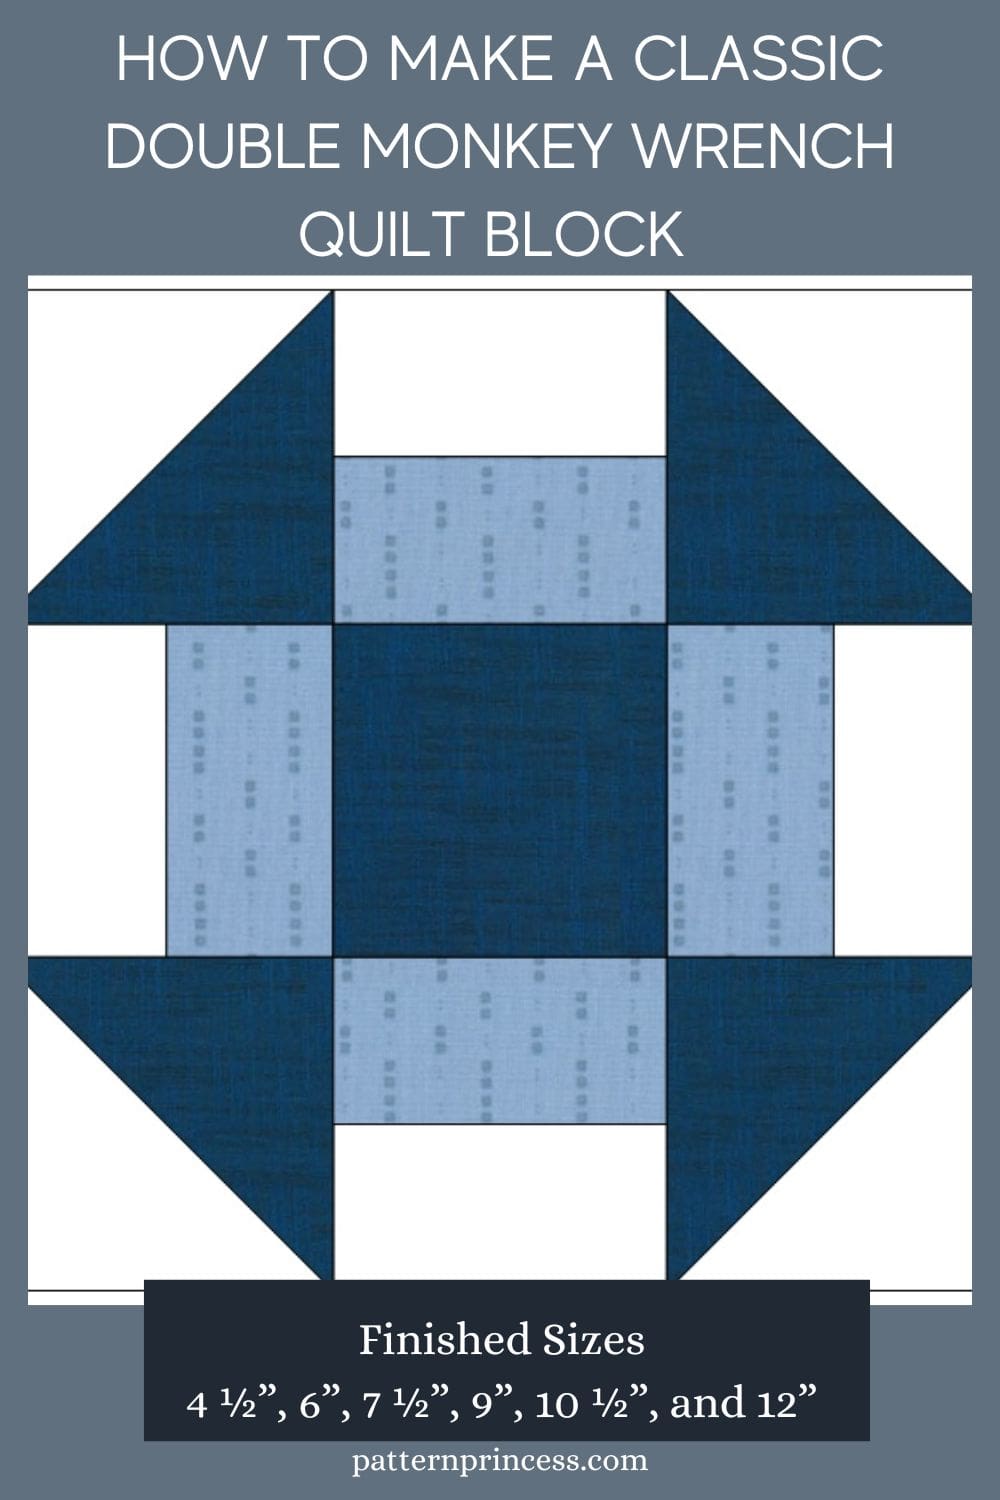
Other names
You may have heard one of the many other names this block is also known as. Here are a few, Broken Plate, Double T, Fisherman’s Reel, Hens and Chickens, Hole-in-the-barn-door, Indian Hammer, Joan’s Doll Quilt, Lincoln’s Platform, Love Knot, Ludlow’s Favorite, Old Mill Design, Picture Frames, Puss-in-the-corner, Quail’s Nest, Sherman’s March, Churn Dash, Colonial Design and probably more. But the list is already long. It’s a timeless pattern that has been cherished by quilters for generations.
Tips for Success
- Fabric choice matters: Choose fabrics with strong contrast to make the design pop. This pattern is great for using fat quarters, jelly roll strips, or pre-cut fabrics.
- Seam allowance: Maintain a consistent 1/4″ seam allowance throughout to ensure accurate piecing.
- Pressing: Press seams toward the darker fabric or open them up if that works better for reducing bulk.
- Chain piecing: If making multiple blocks, try chain piecing (sewing continuously without cutting thread) to save time.
Variations
- Scrappy Version: Use different fabrics for each piece to create a fun, scrappy look.
- Color Placement: Experiment with color placement to change the look of the block. Try using a lighter fabric in the center square for a more open, airy design.
- Block Size: Resize the block to make smaller or larger quilt projects. Adjust the size of your fabric pieces accordingly.
Creating a Double Monkey Wrench quilt block is a rewarding experience, blending simplicity with eye-catching design.
Directions: Double Monkey Wrench Quilt Block
Skill Level
Beginner Friendly
Materials Needed
Before we begin, gather the following materials:
- Fabric: Two contrasting colors (light and dark) work best for this block. You can also use it like I did (light, medium, and dark). You can use solid or patterned fabrics depending on your style.
- Cutting tools: Rotary cutter and self-healing mat, or fabric scissors if you prefer.
- Ruler: A quilting ruler for precise cutting.
- Thread: Match your thread to your fabric or opt for a neutral color like white or grey.
- Sewing machine: Set with a quarter-inch seam allowance.
- Iron and ironing board: For pressing seams.
Block Measurements
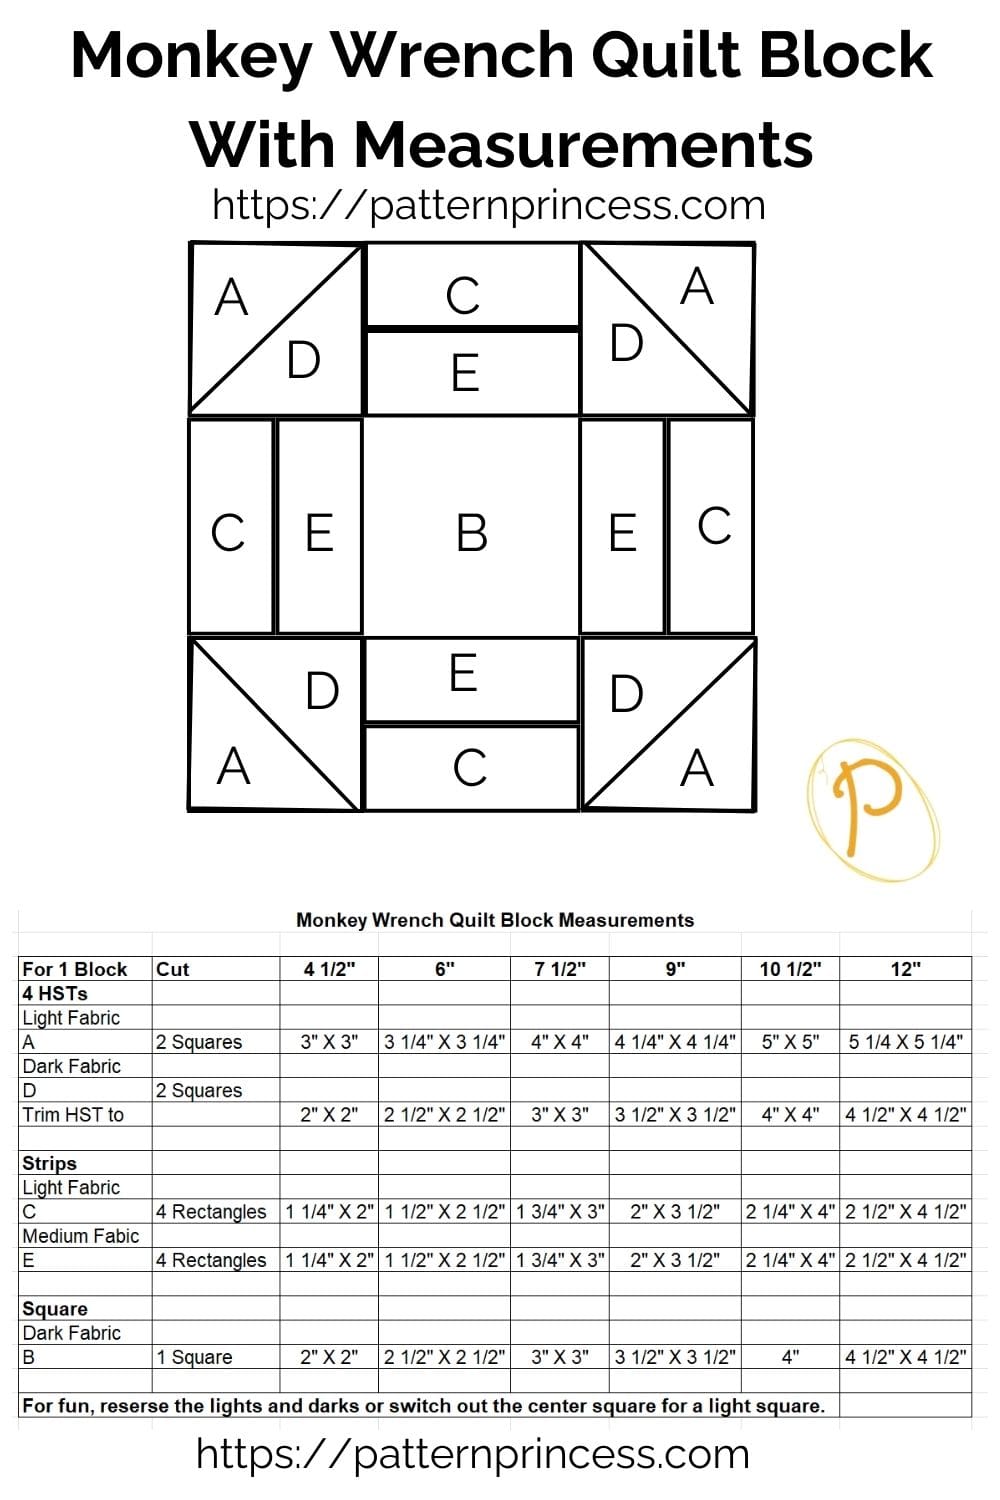
Here are the unit fabric cutting measurements for a 4 ½”, 6”, 7 ½”, 9”, 10 ½”, and 12” monkey wrench quilt block pattern.
Block Layout
This block is laid out on a 3 x 3 grid, also known as a 9 patch block. Three rows and three columns. The easiest sizes to make are evenly divisible by three: 6, 9, 12 inch squares. However, I do have the measurements for the other sizes to help you.
Pattern Notes
The instructions below will produce a 12” quilt block.
Sew fabrics together using ¼” seam allowances.
Sew fabric with the right sides together.
Step-by-Step Instructions
Cutting the Fabric:
Start by cutting the following pieces.
- B = (1) 4 1/2″ x 4 1/2″ square from your dark fabric (for the center)
- A and D = (2) 5 1/4″ x 5 1/4″ squares from both the light and dark fabrics (for Half Square Triangles, HSTs)C = (4) 2 1/2″ x 4 1/2″ rectangles from your light fabric (for the outer bars)
- E = (4) 2 1/2″ x 2 1/2″ squares from your dark fabric or medium fabric (for the corners)
Make sure your cuts are as precise as possible to ensure your block comes together cleanly.
Making the Half-Square Triangles (HSTs) for the Corner Units:
Take the 5″ squares from both the light and dark fabrics. Place them right sides together and draw a diagonal line from one corner to the other on the back of the lighter fabric.
Sew a quarter-inch seam on both sides of the drawn line.Cut along the drawn line to create two HST units.
Press the seams toward the darker fabric and trim the HSTs to 4 1/2″ x 4 1/2″.
Repeat this process with the other two squares. You should have a total of (4) half square triangles.
Sewing the Two-Tone Blocks: Sometimes Called Bar Units:
Take one 2 ½” X 4 ½” light rectangle and one 2 ½” X 4 ½” medium fabric rectangle and sew together lengthwise using ¼” seam allowance. Press seams to the darker fabric.
Repeat this process three more times.
You should have a total of (4) two-tone units.
Alternative method of making the two-tone units using strip sets.
Cutting the Fabric using the Strip method for the two-tone blocks.
- Cut (1) 2 ½” X 18” strip of light fabric.
- Cut (1) 2 ½” X 18” strip of dark or medium fabric.
With the right sides together, sew the strips lengthwise using ¼” seam allowance. Press the seam to the darker fabric.
Sub cut the strip into (4) 4 ½” segments.
Assembling the Block
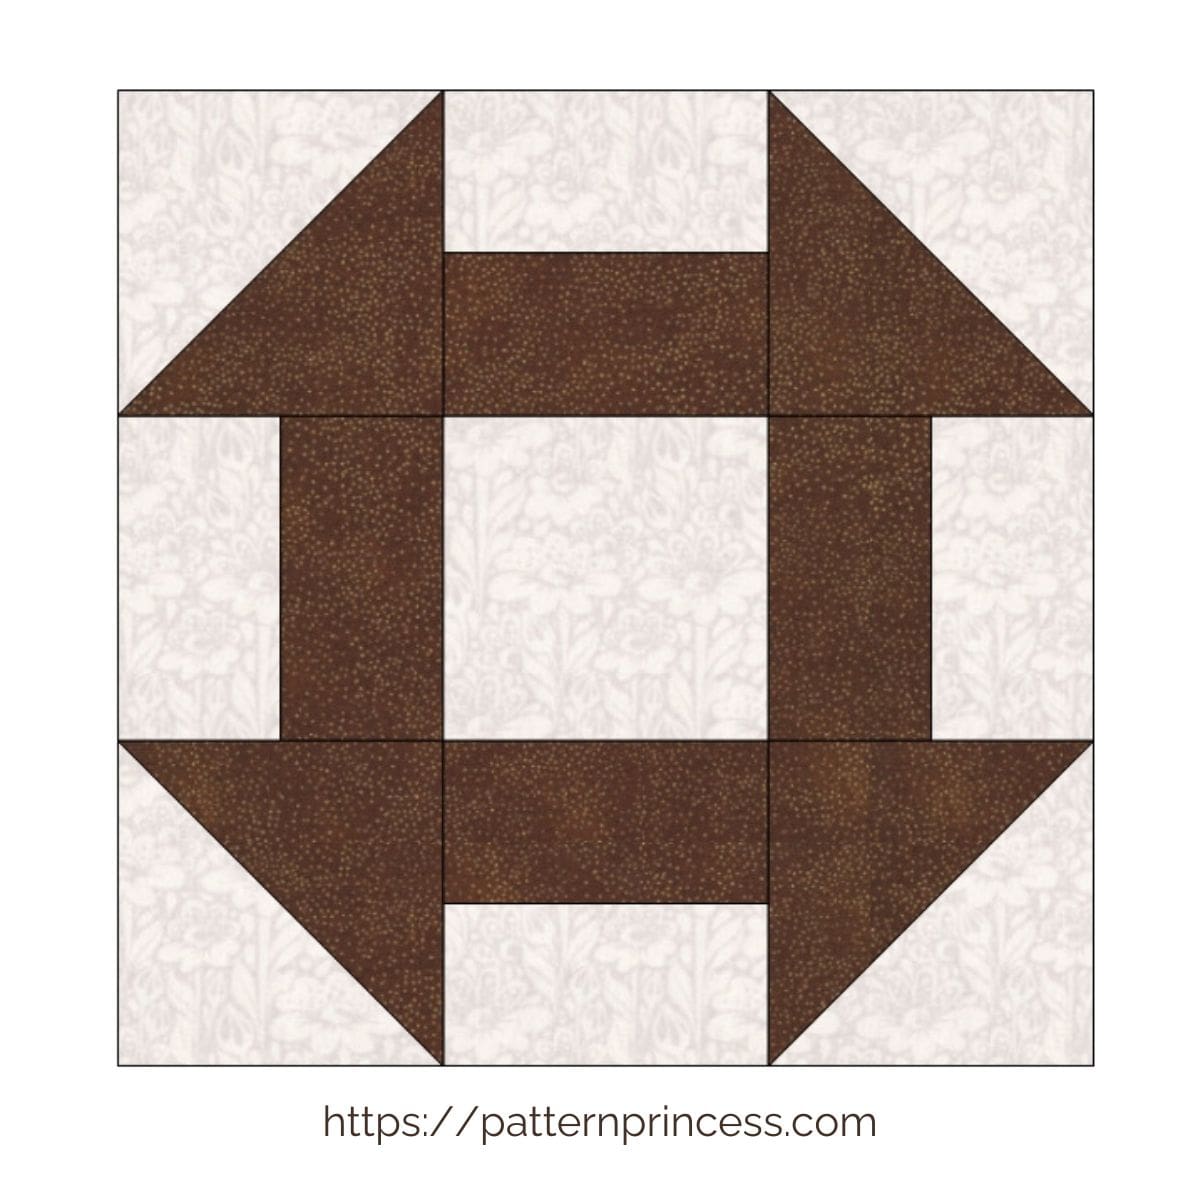
Refer to diagram for visual assistance.
- Lay out your pieces as follows:P
- lace the dark 4 1/2″ square in the center.Position a HST on each corner with the darker fabric on the inside.
- Place the 2 1/2″ x 4 1/2″ two-tone squares on each side of the center square with the darker fabric on the inside.
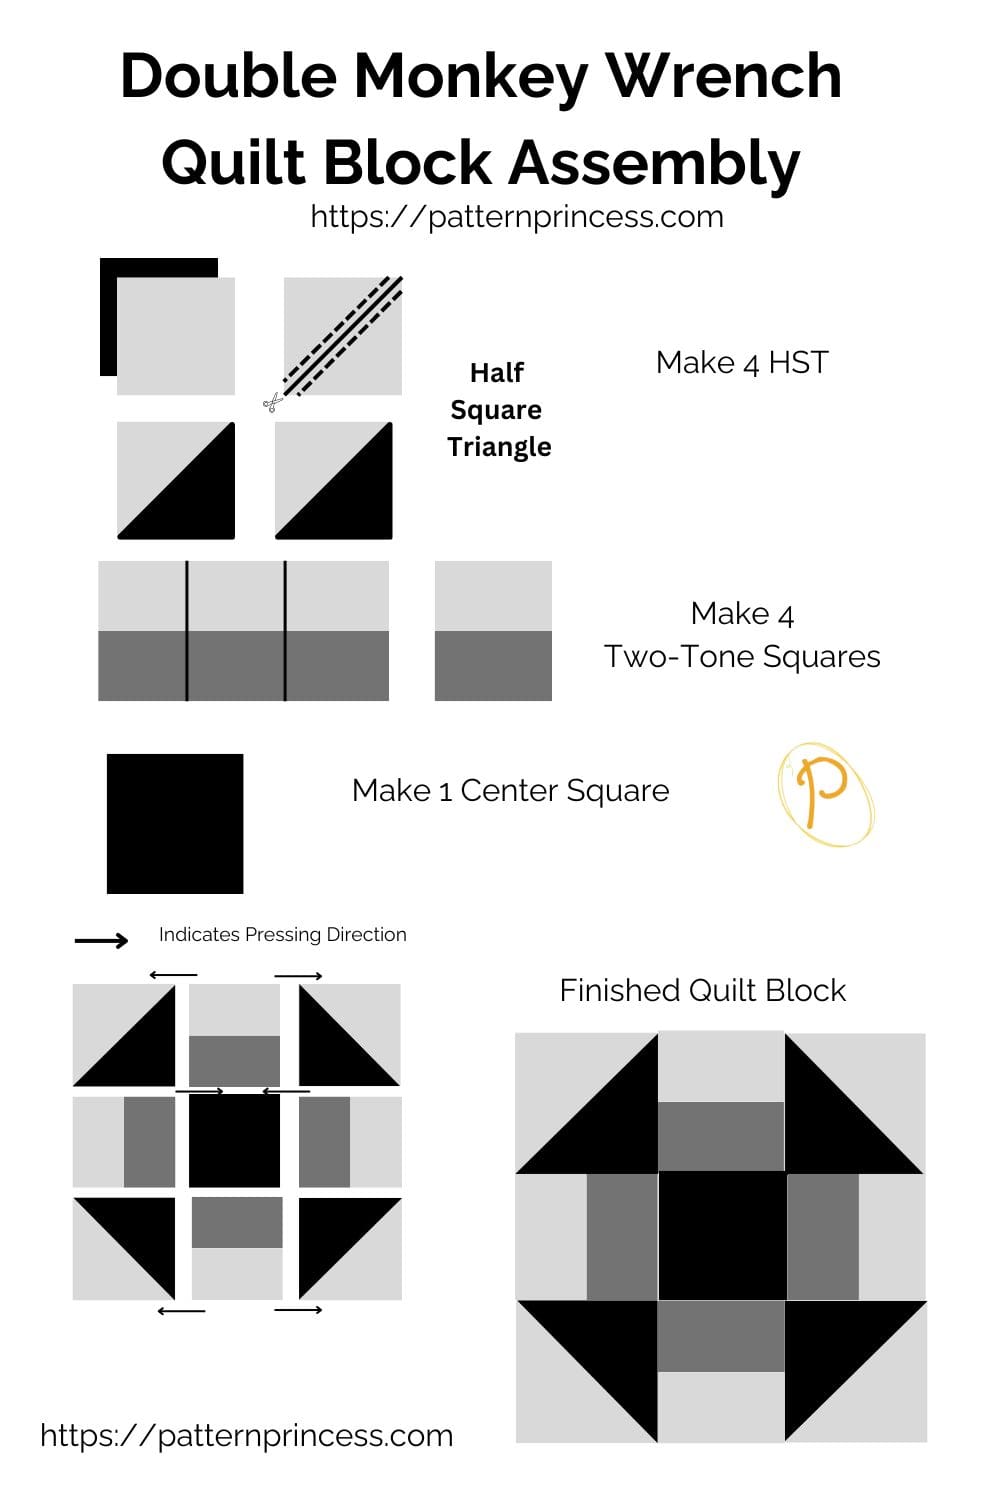
With the right sides together, sew the blocks together in rows.
Press each row as you go to ensure neat seams. The top and bottom row press seams out. Center row, press seams in.
Building the Final Double Monkey Wrench Quilt Block:
Once you’ve sewn each row, join the rows together to form the final block. With the right sides together, pin and nest the seams to ensure everything lines up neatly.
Sew the rows using a quarter-inch seam allowance. Press the seams flat for a crisp, professional finish.
Here is a photo of the finished quilt block.
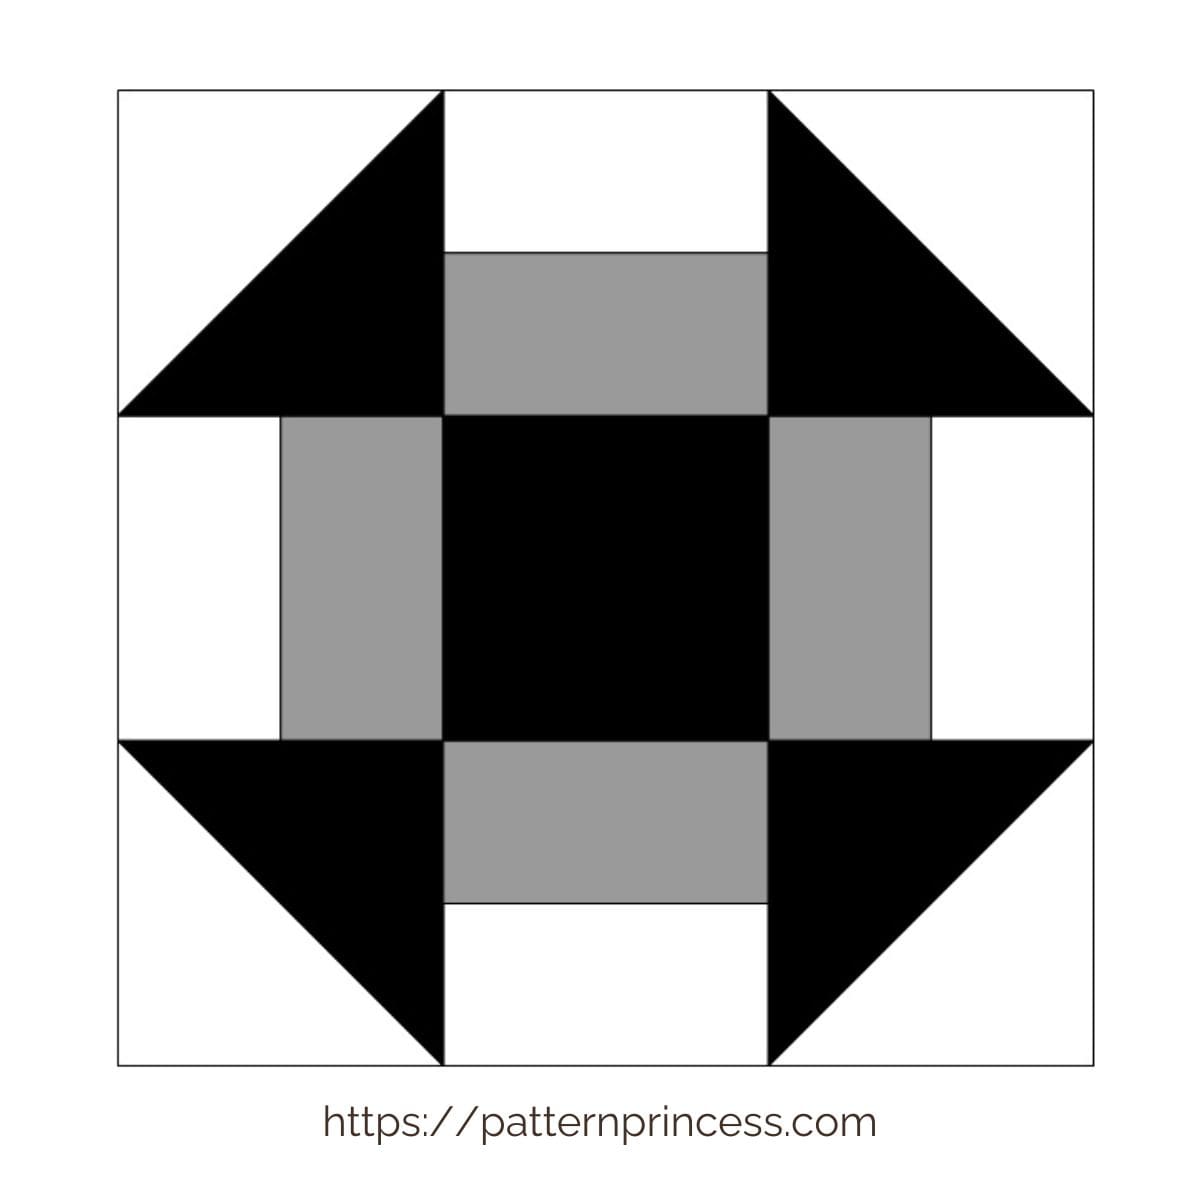
Here is another version with a light center.
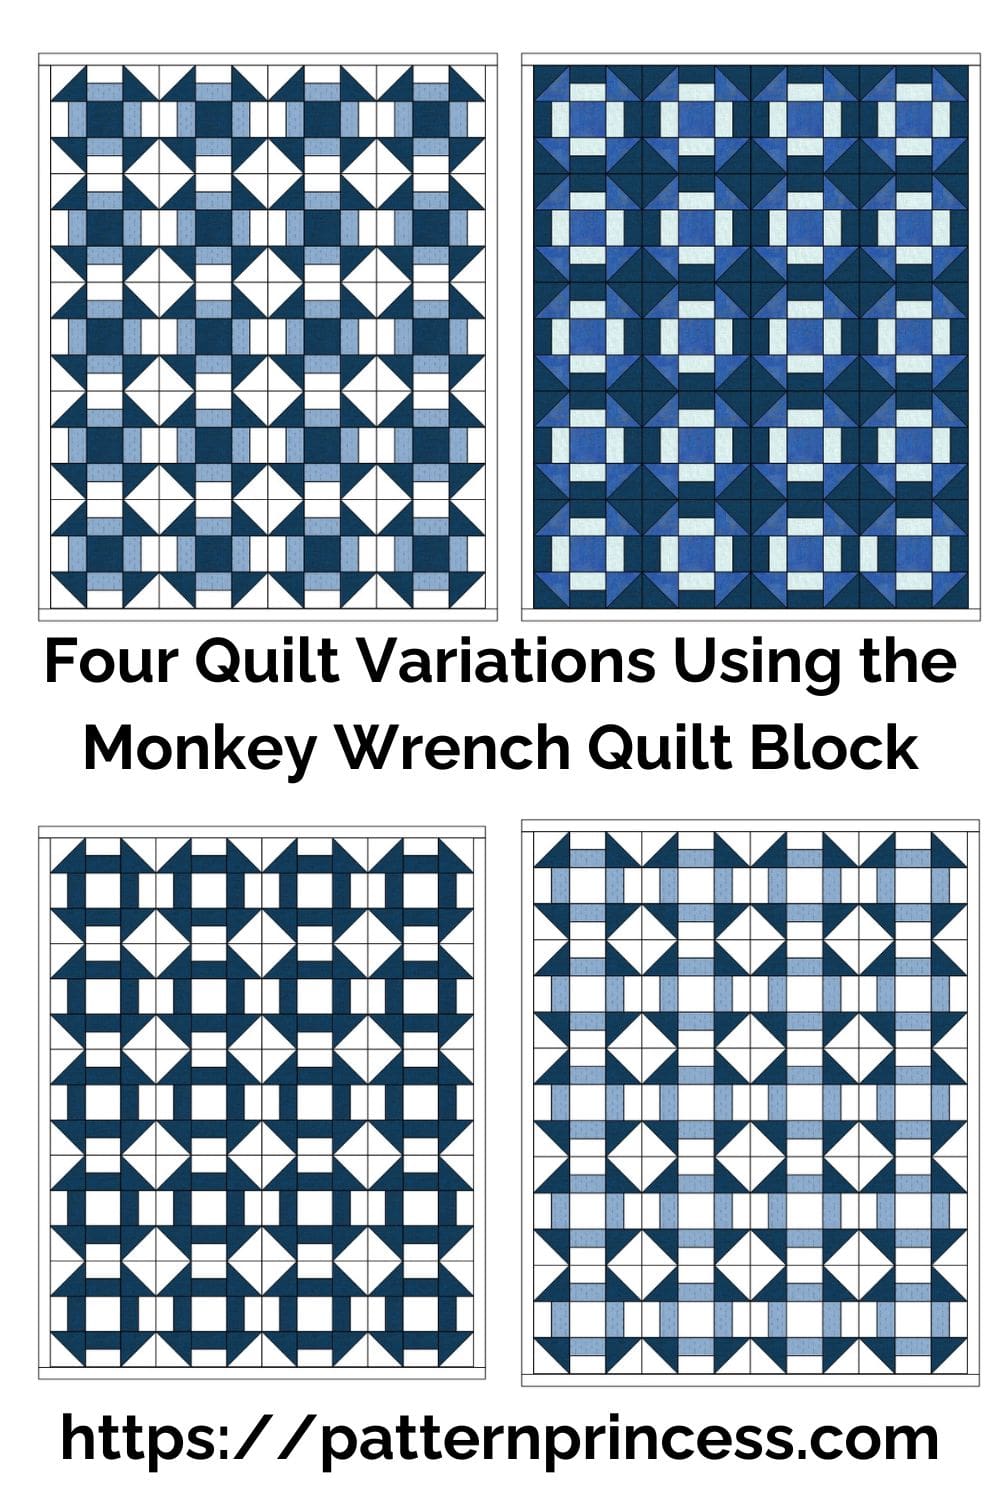
I thought it would be nice to show you a few variations of a quilt by changing the fabric colors.
How to Make a Classic Double Monkey Wrench Quilt Block
Equipment
- Sewing Machine
- Cutting tools
- Ruler.
Materials
- Fabric
- Thread
Instructions
Cutting the Fabric:
- Start by cutting the following pieces:
- B = (1) 4 1/2″ x 4 1/2″ square from your dark fabric (for the center)
- A and D = (2) 5 1/4″ x 5 1/4″ squares from both the light and dark fabrics (for Half Square Triangles, HSTs)
- C = (4) 2 1/2″ x 4 1/2″ rectangles from your light fabric (for the outer bars)
- E = (4) 2 1/2″ x 2 1/2″ squares from your dark fabric or medium fabric (for the corners)
- Make sure your cuts are as precise as possible to ensure your block comes together cleanly.
- Making the Half-Square Triangles (HSTs) for the Corner Units:
- Take the 5″ squares from both the light and dark fabrics. Place them right sides together and draw a diagonal line from one corner to the other on the back of the lighter fabric.
- Sew a quarter-inch seam on both sides of the drawn line.
- Cut along the drawn line to create two HST units.
- Press the seams toward the darker fabric and trim the HSTs to 4 1/2″ x 4 1/2″.
- Repeat this process with the other two squares. You should have a total of (4) half square triangles.
Sewing the Two-Tone Blocks: Sometimes Called Bar Units:
- Take one 2 ½” X 4 ½” light rectangle and one 2 ½” X 4 ½” medium fabric rectangle and sew together lengthwise using ¼” seam allowance. Press seams to the darker fabric.
- Repeat this process three more times.
- You should have a total of (4) two-tone units.
Alternative method of making the two-tone units using strip sets.
- Cutting the Fabric using the Strip method for the two-tone blocks.
- Cut (1) 2 ½” X 18” strip of light fabric.
- Cut (1) 2 ½” X 18” strip of dark or medium fabric.
- With the right sides together, sew the strips lengthwise using ¼” seam allowance. Press the seam to the darker fabric.
- Sub cut the strip into (4) 4 ½” segments.
Assembling the Block:
- Refer to diagram for visual assistance.
- Place the dark 4 1/2″ square in the center.
- Position a HST on each corner with the darker fabric on the inside.
- Place the 2 1/2″ x 4 1/2″ two-tone squares on each side of the center square with the darker fabric on the inside.
- With the right sides together, sew the blocks together in rows.
- Press each row as you go to ensure neat seams. The top and bottom row press seams out. Center row, press seams in.
Building the Final Block:
- Once you’ve sewn each row, join the rows together to form the final block. With the right sides together, pin and nest the seams to ensure everything lines up neatly.
- Sew the rows using a quarter-inch seam allowance. Press the seams flat for a crisp, professional finish.
Notes


Once you’ve mastered this block, you can incorporate it into countless quilt projects. It’s perfect for traditional quilts, modern interpretations, or even mixed in with other block patterns for a unique quilt top. Give it a try, and I bet you’ll love how versatile and beautiful this classic block is.
If you enjoyed this tutorial, don’t forget to check out my other quilt block tutorials and quilting patterns.

You can find Victoria crocheting, quilting, and creating recipes. She has cooked in restaurants for over 20 years, including many larger parties. She learned to crochet when she was just 11 years old and has been crocheting ever since; over 50 years now. Over 40 years ago, she loved her first class in sewing and continues to hone her skills in quilting. Many have enjoyed the handmade gifts over the years. In her professional career, she has worked in management in a wide variety of businesses including higher education as a dean of a division. All the while attending college part-time to achieve her doctorate in higher education with an emphasis in e-learning.

This worked exactly as written, thanks!