Last updated on January 19th, 2026 at 10:18 pm
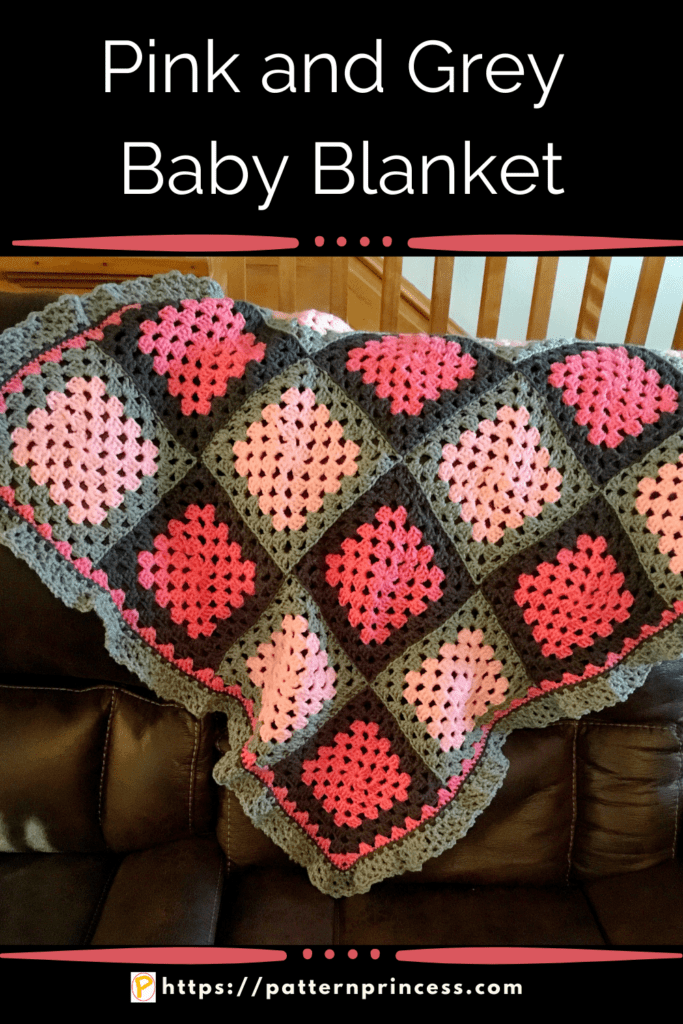
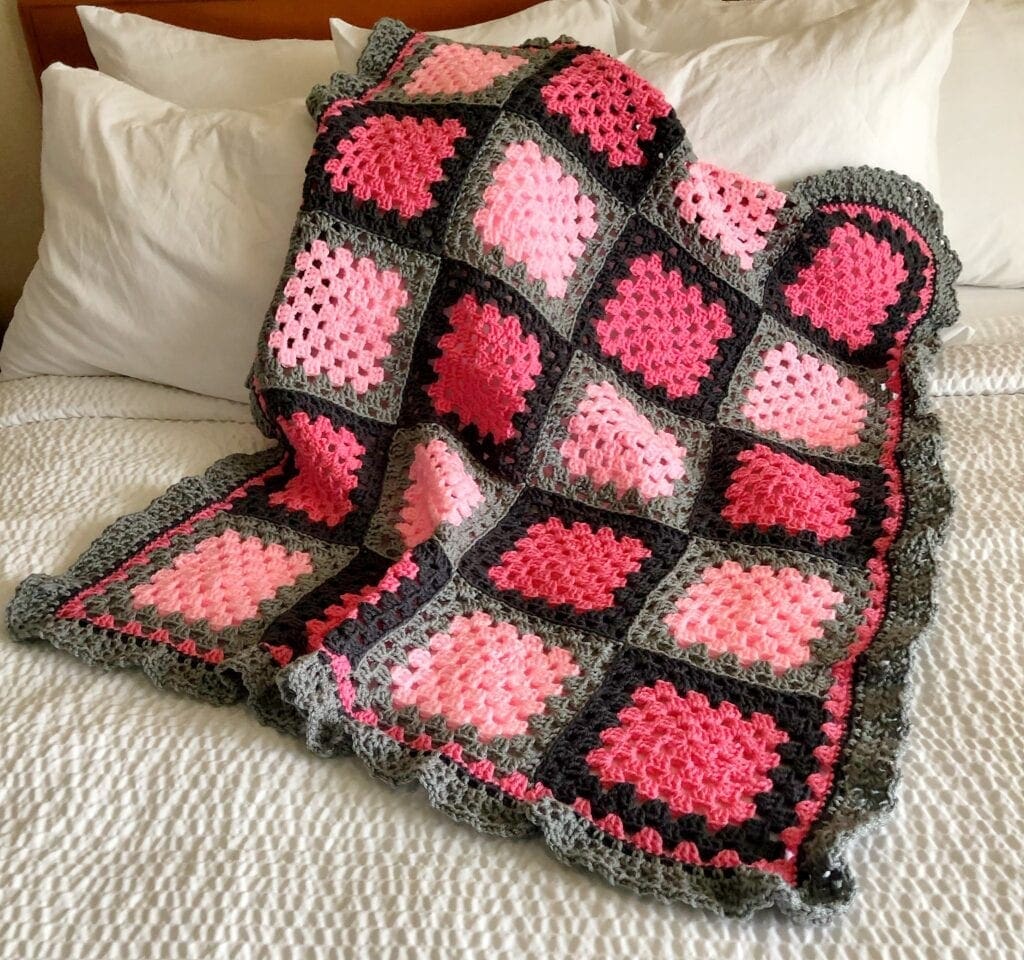
This pink and grey baby blanket uses the granny square crochet stitch pattern. A quick crochet project for anyone with beautiful results.
Post contains affiliate links and we earn commissions if you shop through the links on this page. For more information please read the disclaimer on the About Us page.
Granny Squares Beginner Crochet Pattern
The granny square is a lovely pattern for someone that is relatively new to crochet. While you can just start the granny square and keep going until your blanket is the large size you desire, you can also make smaller squares and join them together. That is what we will be doing in this crochet pattern.
Easy and Versatile Crochet Pattern
The granny square is one of the most easy and versatile crochet patterns around. Not to mention a granny square pattern can be worked on when you are on the go maybe taking a break and sitting in on a park bench.
They are a great small project that can be worked up quickly and stashed away and then seamed together into whatever crochet project you are working on.
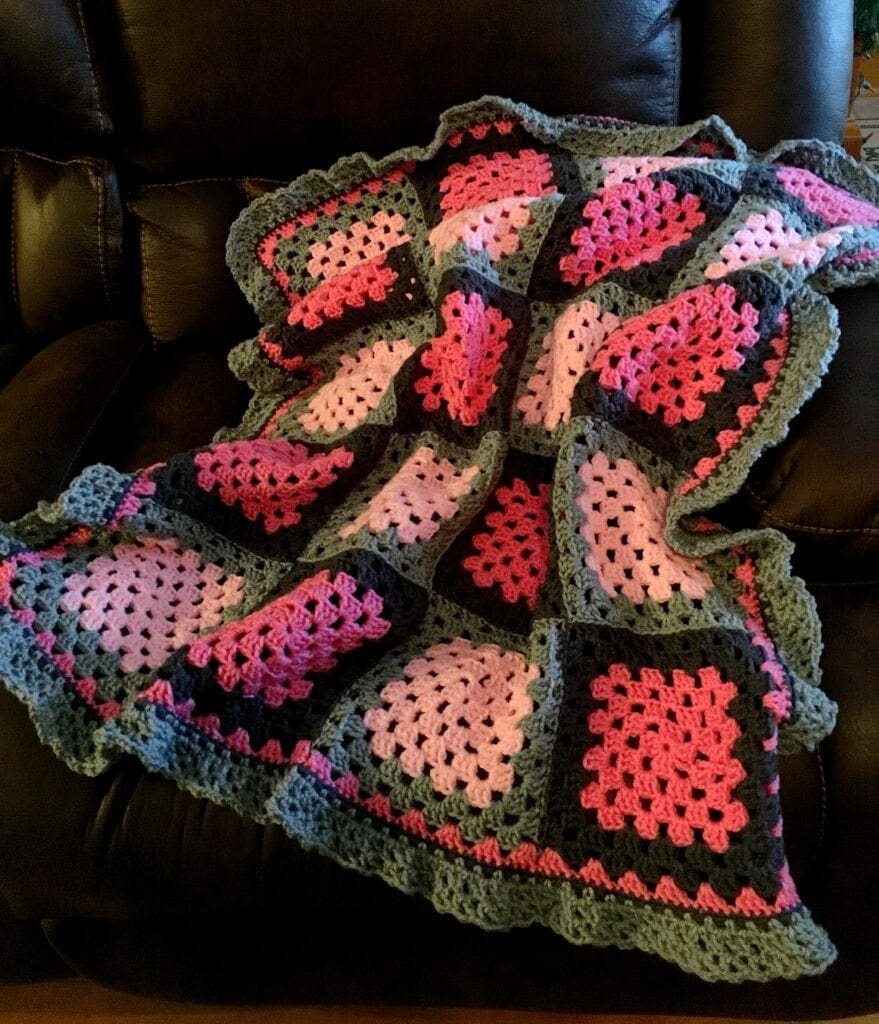
Crochet twenty squares, join them together, add a border and you will end up with a lovely handmade baby blanket. There crochet patterns for six blankets that use just twenty crochet granny squares. Once you start, it is hard to stop.
Six-Part Granny Square Crochet Blanket Series
This granny square blanket is the fourth one is a series of six blankets. They all use a granny square with six rounds. However, the crochet borders on each one is different.
Additionally, the colors used in the squares are different too. Between the border and the colors used in the squares, each one has a completely different look. I am not sure which one I love more.
Here you can find the other granny square crochet patterns and a few others too.
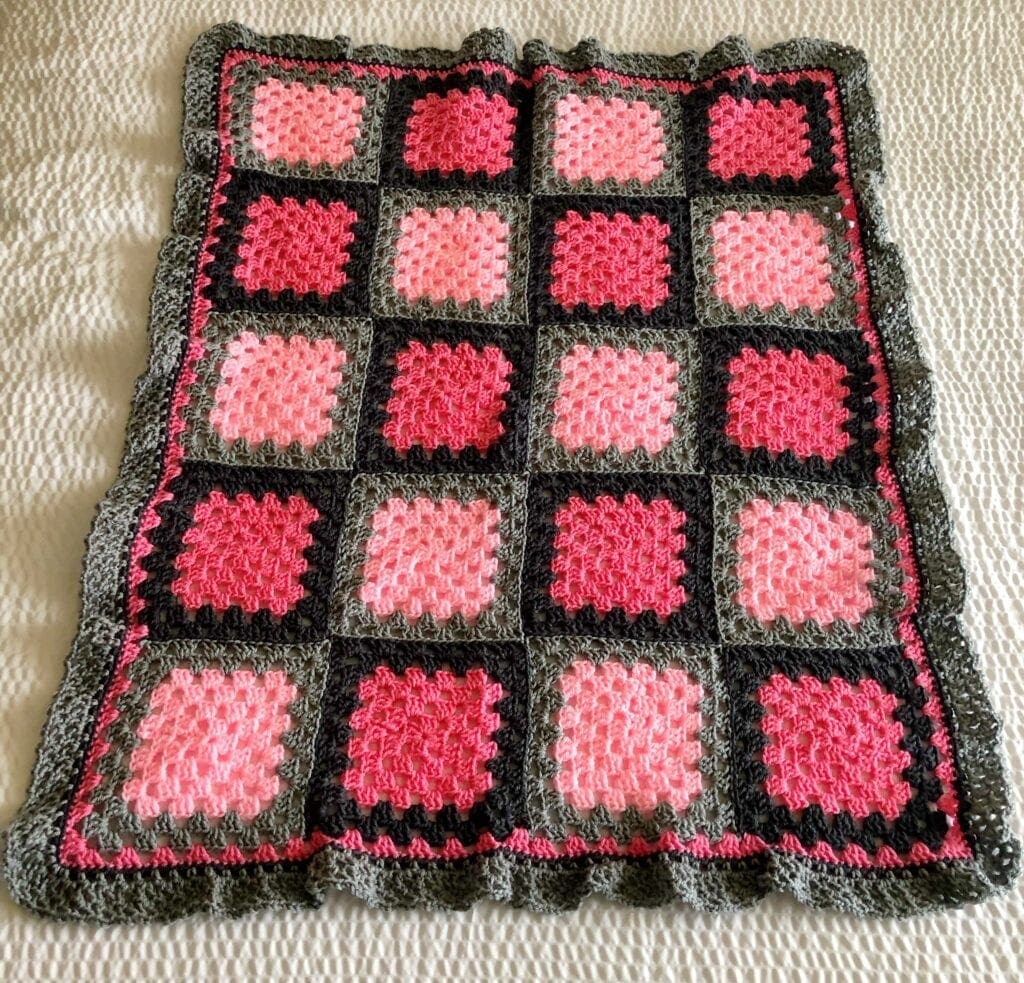
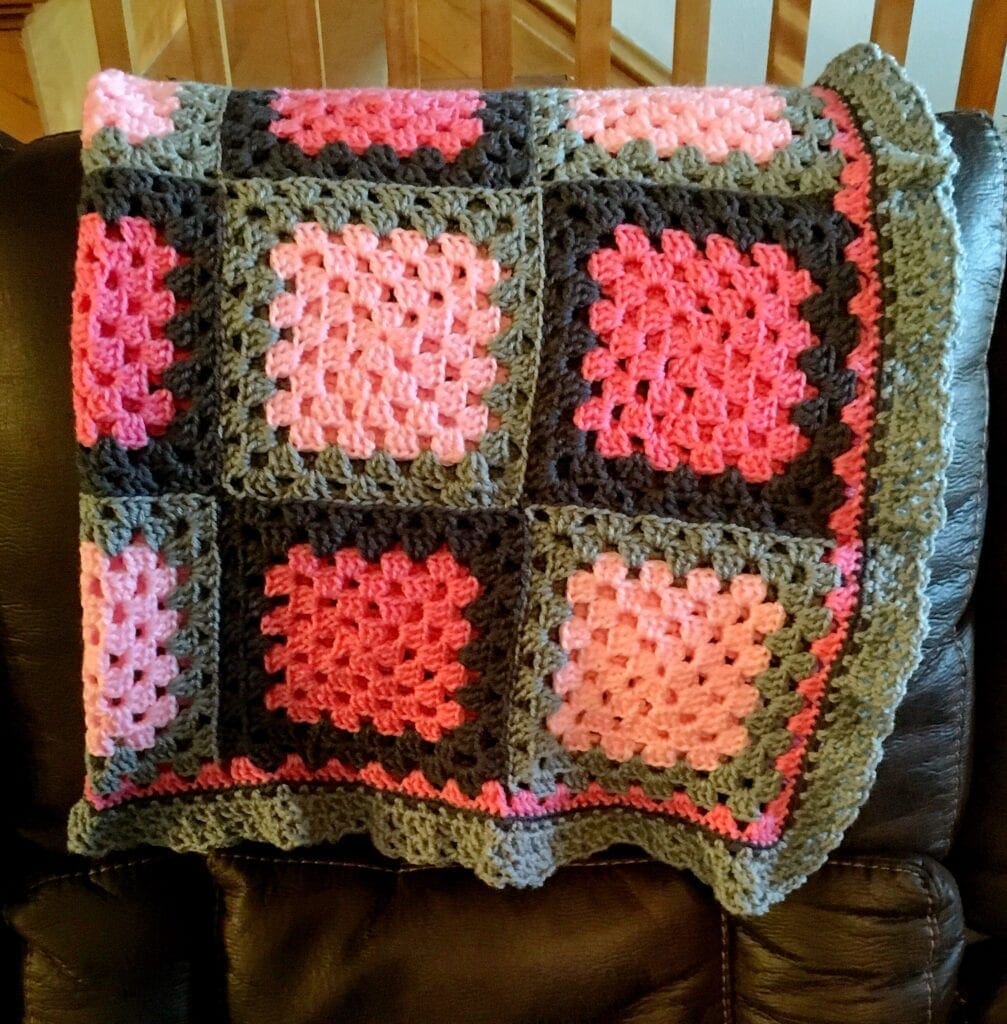
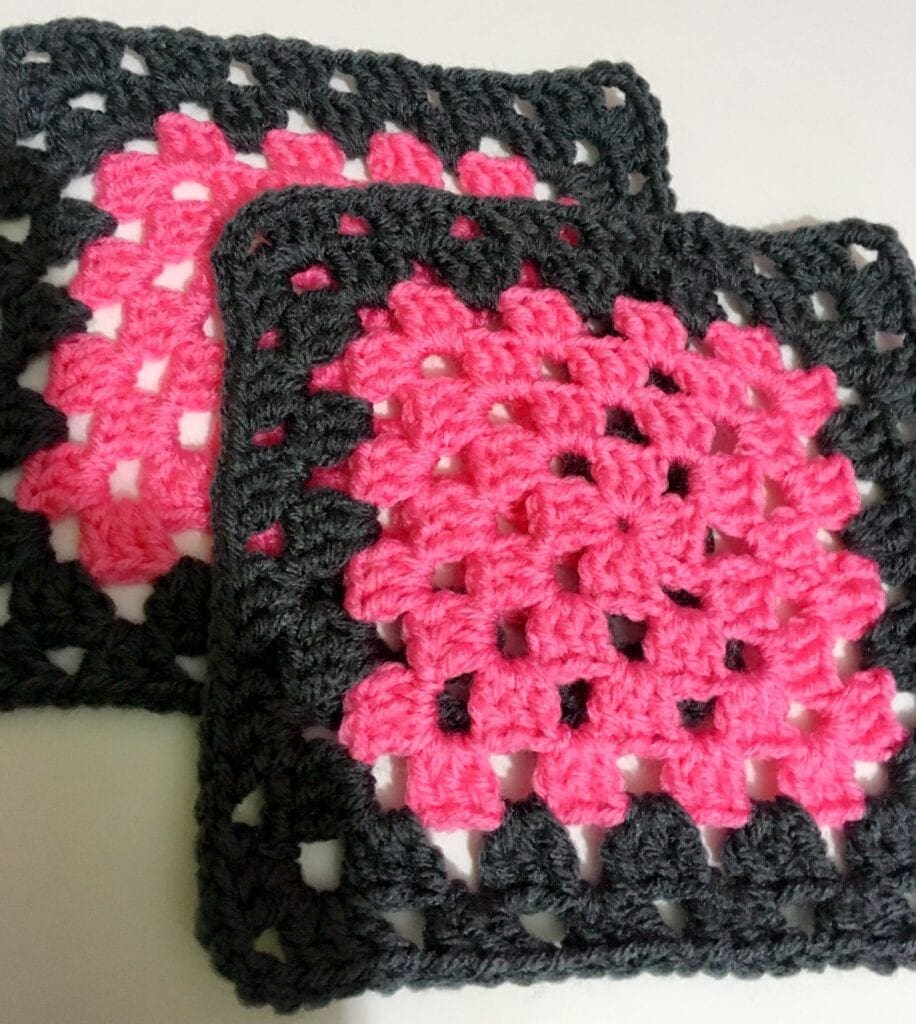
Pink and Grey Baby Blanket Squares
There are ten of each granny square for a total of 20 squares.
Square one consists of four rounds of petal pink and two rounds of dusty grey.
Petal Pink and Dusty Grey Granny Square
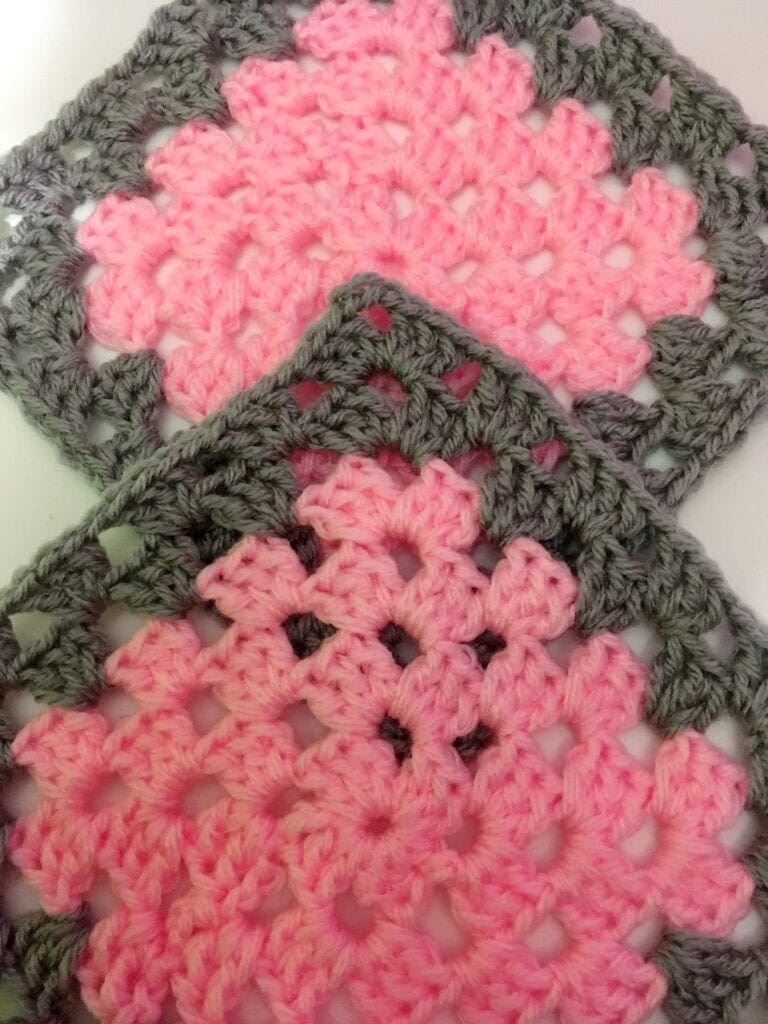
Square two consists of four founds of Perfect Pink and two rounds of Charcoal Grey
Perfect Pink and Charcoal Grey Granny Square
Directions: Pink and Grey Baby Blanket
Blanket Size
Size is approximately 31 inches wide by 39 inches long.
Each square is approximately 6 3/4 inches around.
A total of 20 squares.
- 10 squares with four rounds of petal pink and two rounds of dusty grey.
- 10 squares with four rounds of perfect pink and two rounds of charcoal grey.
The blanket is four squares wide and five squares long.
Gauge
12 Double Crochet per 4 inches. However, gauge is not critical in this crochet pattern.
Materials
Charcoal Grey Red Heart. 1 Skein or 364 yards. If you are not able to find the yarn locally, you can find it here.
Dusty Grey Red Heart. 2 Skeins or 525 yards. If you are not able to find the yarn locally, you can find it here.
Petal Pink Red Heart. 1 Skeins or 364 yards. If you are not able to find the yarn locally, you can find it here.
Perfect Pink Red Heart. 2 Skeins or 525 yards. If you are not able to find the yarn locally, you can find it here.
Size H crochet hook
Scissors
Yarn needle

Abbreviations
CH = Chain
DC = Double Crochet
SC = Single Crochet
SL ST = Slip Stitch
SP = Space
ST = Stitch
STs = Stitches
YO = Yarn Over
[ ] repeat between

Directions:
Begin by making a Magic Circle. Directions for the magic circle can be found here. This is a detailed step-by-step tutorial on making the magic circle.
An alternative way to begin this pattern is to CH 4 and SL ST into the first CH to form a circle.
Round 1:
For this round, you will be working inside the magic circle. Chain 3 (Counts as DC of this round and throughout the entire pattern). Continuing working in the ring, work 2 DC. Then chain 3. 3 DC, CH 3, 3DC, CH3, 3DC, CH3 and join into the top CH of the beginning CH 3. This join completes the first round. (note, you should have 4 clusters of 3 DC with 4 areas of CH 3 between)
Round 2:
CH 4 (This will count as your first DC plus a 1 CH). Then in the first CH 3 SP, [3 DC, 3 CH, 3 DC and CH 1]. Continue the stitch pattern between the [ ] until the last CH 3 SP. In the last CH 3 SP, work the 3 DC, 3 CH, then work only 2 DC and join with a SL into the 3rd chain of the beginning CH STs. This join will complete the round. (You should have 8 shells, 4 chain 3 spaces, and 4 CH 1 spaces).
Round 3:
CH 3 (Counts as a DC), Insert the hook into the CH 1 SP from the previous row, (Should be right where the previous row ended). YO and work a DC, Insert hook again, YO and DC. (This completes your first 3 DC in the round). CH 1. [In the corner CH 3 SP work (3 DC, 3 CH, 3 DC. and CH 1)]. In the next CH 1 SP work 3 DC and 1 CH]. Repeat between [ ] 3 more times until all 4 sides are complete. After the last DC in the CH 3 space CH 1 and SL ST into the top ST of the first DC of this round. (You should have 12 shells and 12 spaces after the completion of this round).
Round 4-6:
Repeat rounds 2 and 3.
Finishing Each Square:
Pull the yarn through the last ST. Using the yarn needle, weave the yarn back and forth through the crochet stitches until a bit snug. Cut off excess.
Join the Squares
Joining the Granny Squares Using the Invisible Join Method
Here is a quick video showing how I did the invisible join. Step-by-step instructions on how to join granny squares using the invisible joining method. Learn how to easily achieve that look of evenly joined granny squares in your next project.
How to complete the Invisible Join for Granny Squares
Watch this video on YouTube.
Subscribe to the channel
However, if you would rather read the written directions, I will do my best to write out clear directions below if you learn better that way.
Invisible Join Written Directions
I used one of the colors that I was currently joining. Use a piece of yarn that is about 10 inches longer than two sides of the square. In order words approximately 20 inches long. Thread a yarn needle.
Begin by holding the wrong sides together. Start in a corner of one of the squares.
Look for the first horizontal thread inside the chain in the corner stitch. Insert the yarn needle and pull the yarn through leaving approximately a 5-inch tail. (you will need to weave this in later. Make sure to weave it into the color you used so it will not be noticeable).
Step-by-Step Joining Directions
- Starting in the horizontal thread inside the chain in the corner stitch, insert the yarn needle and pull the yarn through. (don’t snug up the yarn just yet).
- In the opposite square and insert the yarn needle into the next horizontal yarn piece in the next stitch.
- Come back to the first square and insert the yarn needle into the next horizontal yarn piece in the next stitch.
- Continue for 2 or 3 more horizontal yarn stitches.
- Then holding the starting yarn stitch in the corner, pull the yarn snug.
- Your granny squares will be snug and invisibly joined for the stitches that you have worked.
- Continue moving back and forth between the two squares and weaving the yarn through the horizontal stitches.
- Every 3 or 4 stitches, pull the yarn snug.
Align the Corners
Insert the yarn needle in all the corner stitches of the squares being joined together, and pull through the yarn. Then continue weaving back and forth through the horizontal stitches. Every 3 or 4 stitches, pulling the yarn snug.
Weave in the Yarn Ends
Before working on the border, I took the time to weave in all the yarn pieces using the yarn needle.
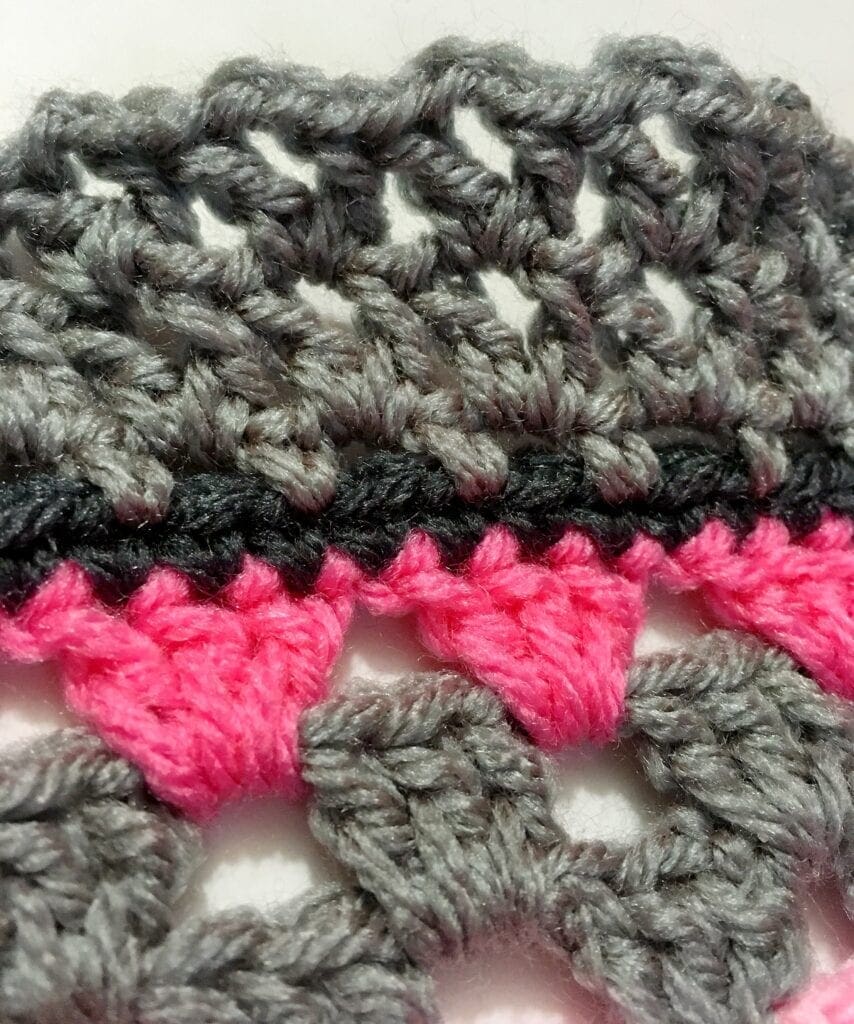
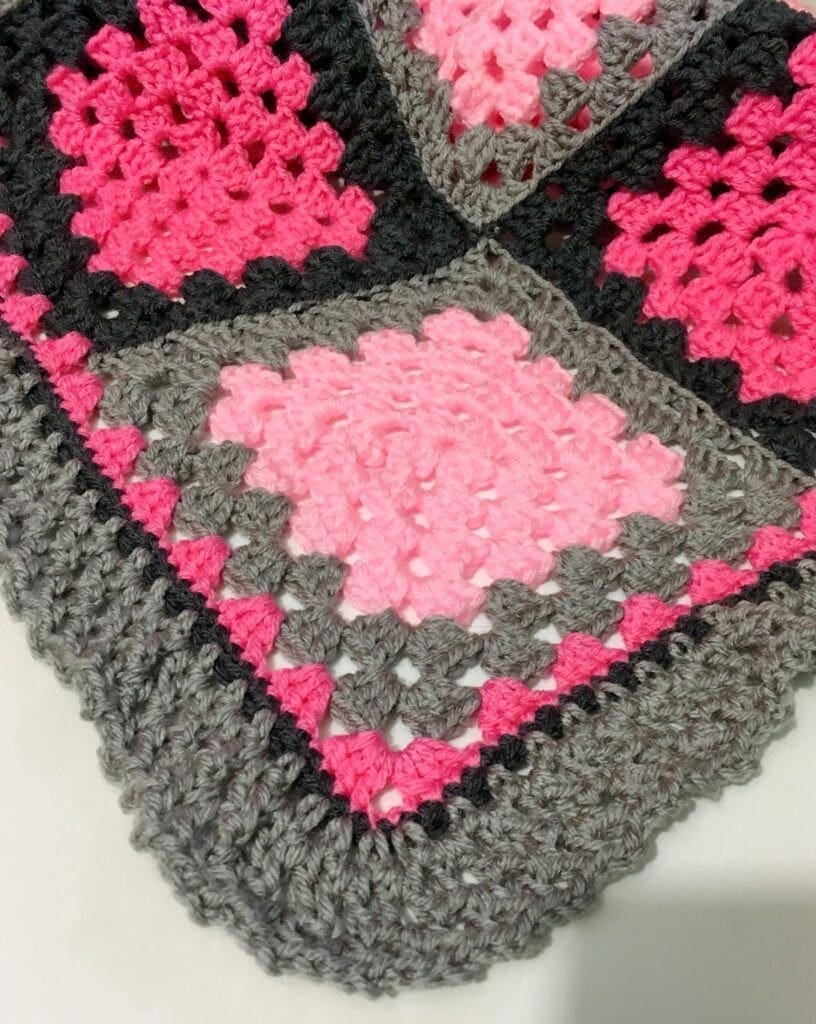
Crochet Border Directions
Round 1
Join the perfect pink yarn in a CH SP.
CH 3 (Counts as DC). 2 DC in the same CH SP, CH 1, SK 3 DC, in the next CH SP work 3 DC. [CH 1, SK 3 DC, work 3 DC in the next CH SP]. Repeat around. In the corners work (3 DC, CH 3, 3 DC). End with a CH 1 and SL ST into the top CH of the first CH 3 STs.
Round 2
Change to the charcoal yarn.
CH 1 (Counts as SC) and SC in each ST around. End with a SL ST to the first CH ST. (In each chain stitch, work in the back loop only so some of the perfect pink yarn shows through from the previous row).
Round 3
Join the dusty grey yarn.
CH 3 (Counts as SC, CH 2). [SK 1 ST, SC, CH 2]. Repeat between [ ] around. In each corner work (SC, CH 2, in each ST. Don’t skip a stitch between in the corner stitches). End with a SL ST into the first CH.
Round 4
Still using the dusty grey yarn.
SL ST into a CH 2 SP. CH 5 (Counts as DC, CH 2). In the next CH 2 SP work (DC, CH 2, DC). [Skip to the next CH 2 SP work (DC, CH 2, DC)]. Repeat around. Ending with a DC and SL ST into the 3rd CH of the beginning CH 5.
Round 5
Continue using the dusty grey yarn.
Repeat round 4.
Finishing:
Weave in all the ends and cut off excess yarn.
Granny Square Crochet Tutorials
If you prefer a video on how to crochet a granny square, that is here for you too.
Right Hand Tutorial of Crochet Border:
Left Hand Tutorial of Crochet Border:
How to Crochet a Granny Square:
If you loved this post, please share. It helps to show me that these types of posts are helpful – thank you!
I hope that you liked this pattern. If you are looking for more ideas for crocheted projects, here are a few others you may enjoy.

You can find Victoria crocheting, quilting, and creating recipes. She has cooked in restaurants for over 20 years, including many larger parties. She learned to crochet when she was just 11 years old and has been crocheting ever since; over 50 years now. Over 40 years ago, she loved her first class in sewing and continues to hone her skills in quilting. Many have enjoyed the handmade gifts over the years. In her professional career, she has worked in management in a wide variety of businesses including higher education as a dean of a division. All the while attending college part-time to achieve her doctorate in higher education with an emphasis in e-learning.