Last updated on July 4th, 2024 at 11:28 pm
If you are looking for an easy table runner pattern, there is nothing easier than this 10 minute table runner pattern. With 2 fabrics and less than a yard of fabric for each, you can no doubt have a new table runner in just a few minutes.
So, without further ado, grab your supplies, and let’s make a table runner. Just a note before we get started, if you are going to place hot dishes on the table runner, you want to ensure you are using cotton thread.
You can also choose between using batting and interfacing for your table runner. In this project, we are using a medium-weight interfacing.
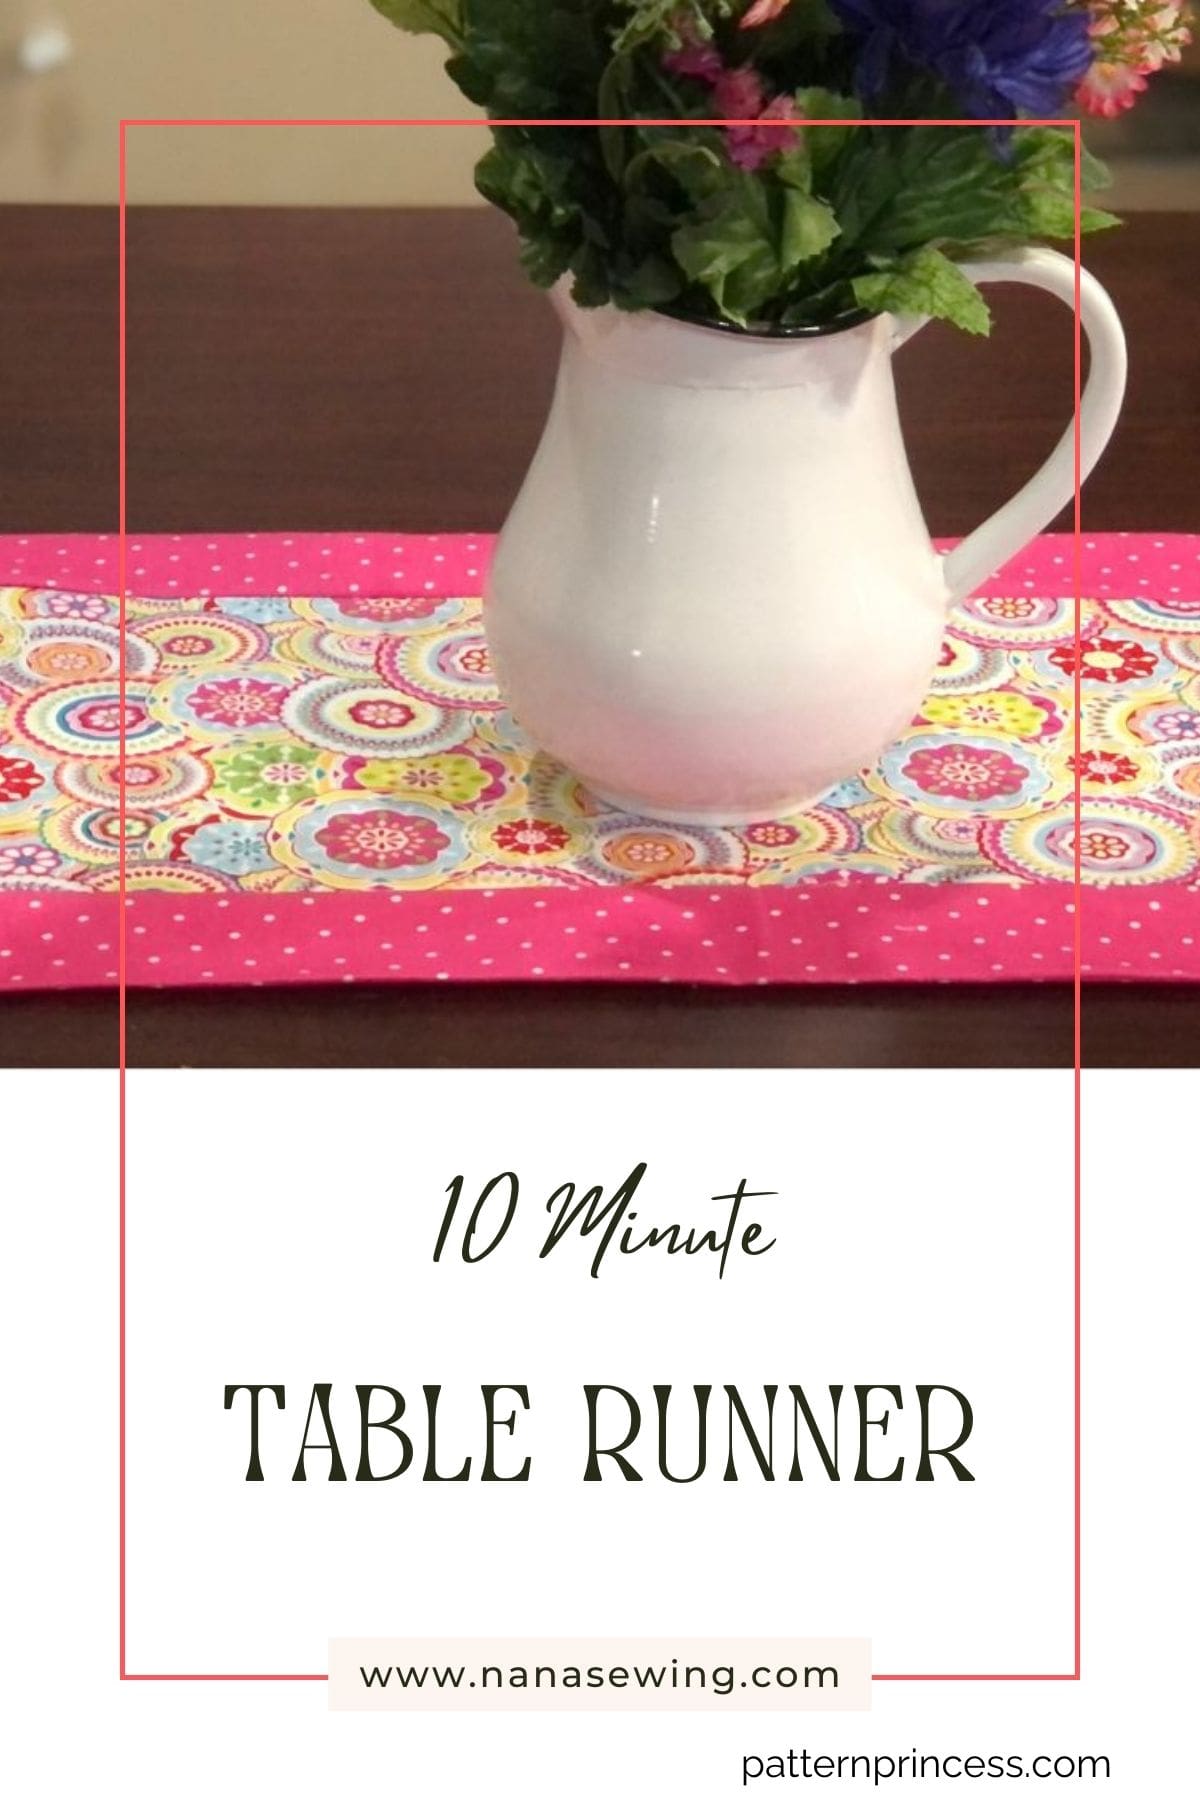
This 10 minute table runner is courtesy of Peggy and Connie Terry, which make up Nana Sews. This mother/daughter duo has over 100 years of sewing experience between the two of them. They love creating or showing easy sewing and quilt projects.
Sometimes, we have different free patterns offered as a download. Head on over to our free PDF printables page. You will be prompted to sign up for the newsletter. It’s a good idea, so you are notified when the free downloads are available.
Supplies:
- 2 contrasting fabrics
- Medium Weight interfacing or batting
- Thread
- Rotary cutter
- Magnetic Seam Guide (keeps your seams straight)
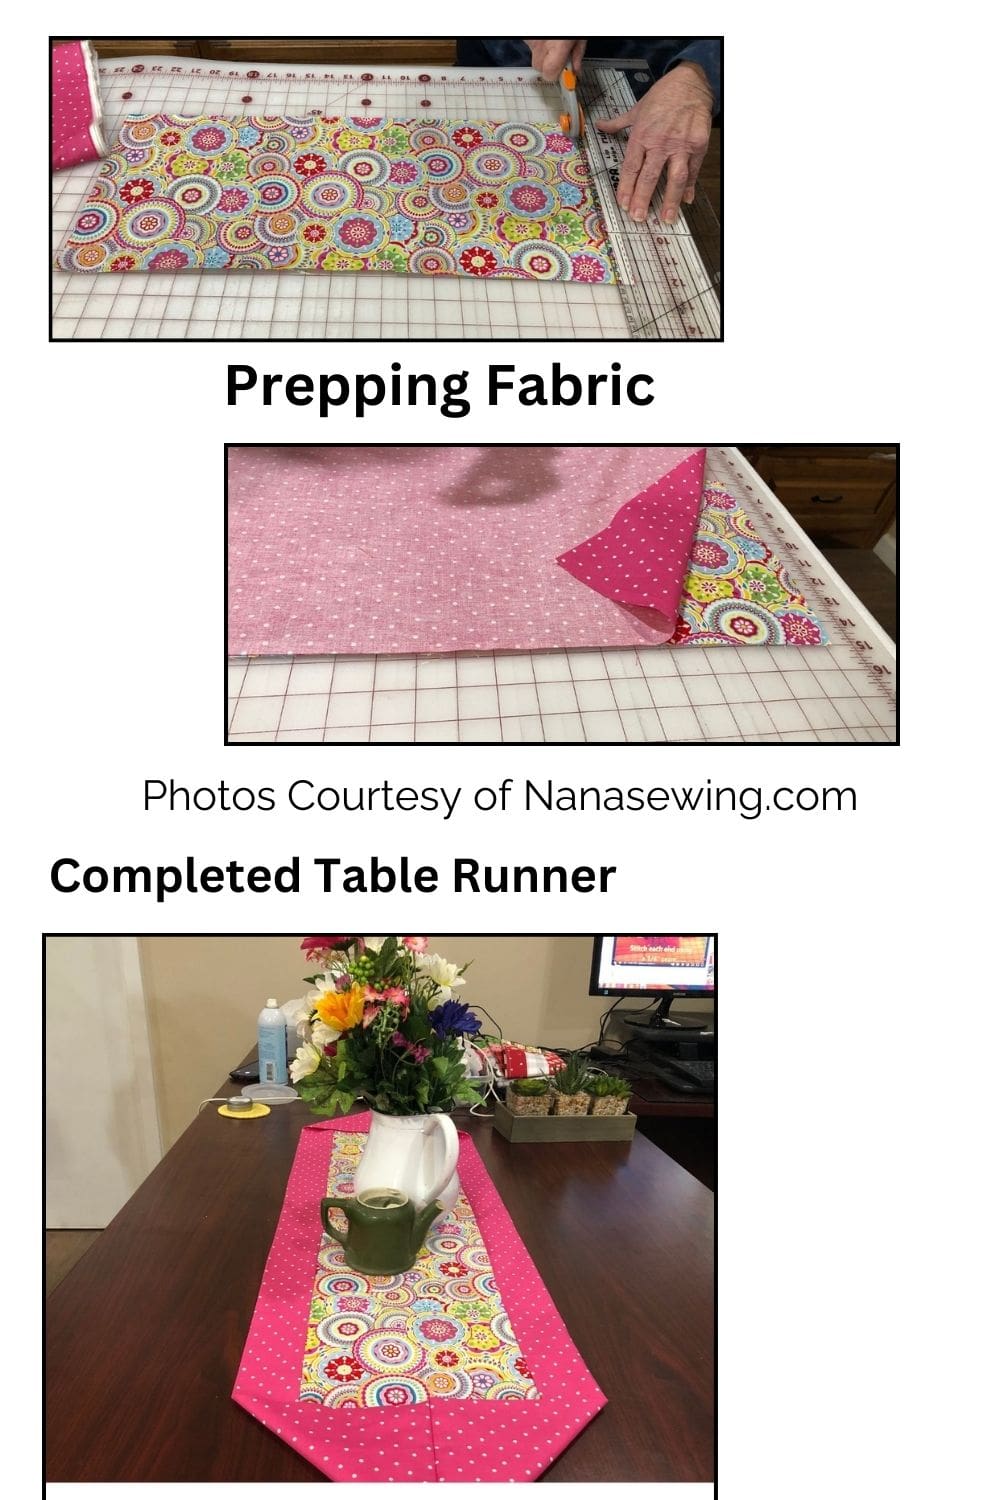
Cut Your Fabric Pieces
Cut your center piece 9″ x 44″ or longer if you have a large dining table. For your border you need a piece of fabric cut 18″ x 44″ or of course you can make it longer.
Next, cut a piece of interfacing or batting the same size as your center fabric piece and, following the instructions that came with your interfacing, attach it to your centerpiece. If using batting, we love using Quilt basting glue to hold it in place.
Sew Right Sides Together
With right sides together, you want to sew one side of your center piece of fabric to one edge of your border using a 1/4″ seam. You want to sew the long side of your 2 fabrics together.
After sewing that piece, press your seams toward the border (large piece of fabric).
Sew Your 2nd Piece
Now you want to fold your long piece of fabric on top of the center (right sides together) and in or use sewing clips to hold in place. Along the long side, you will want to sew 1/4″ seam allowance, making sure you back stitch as you start and finish.
When finished, you will want to take your pieces over to your iron. Press your seams flat.
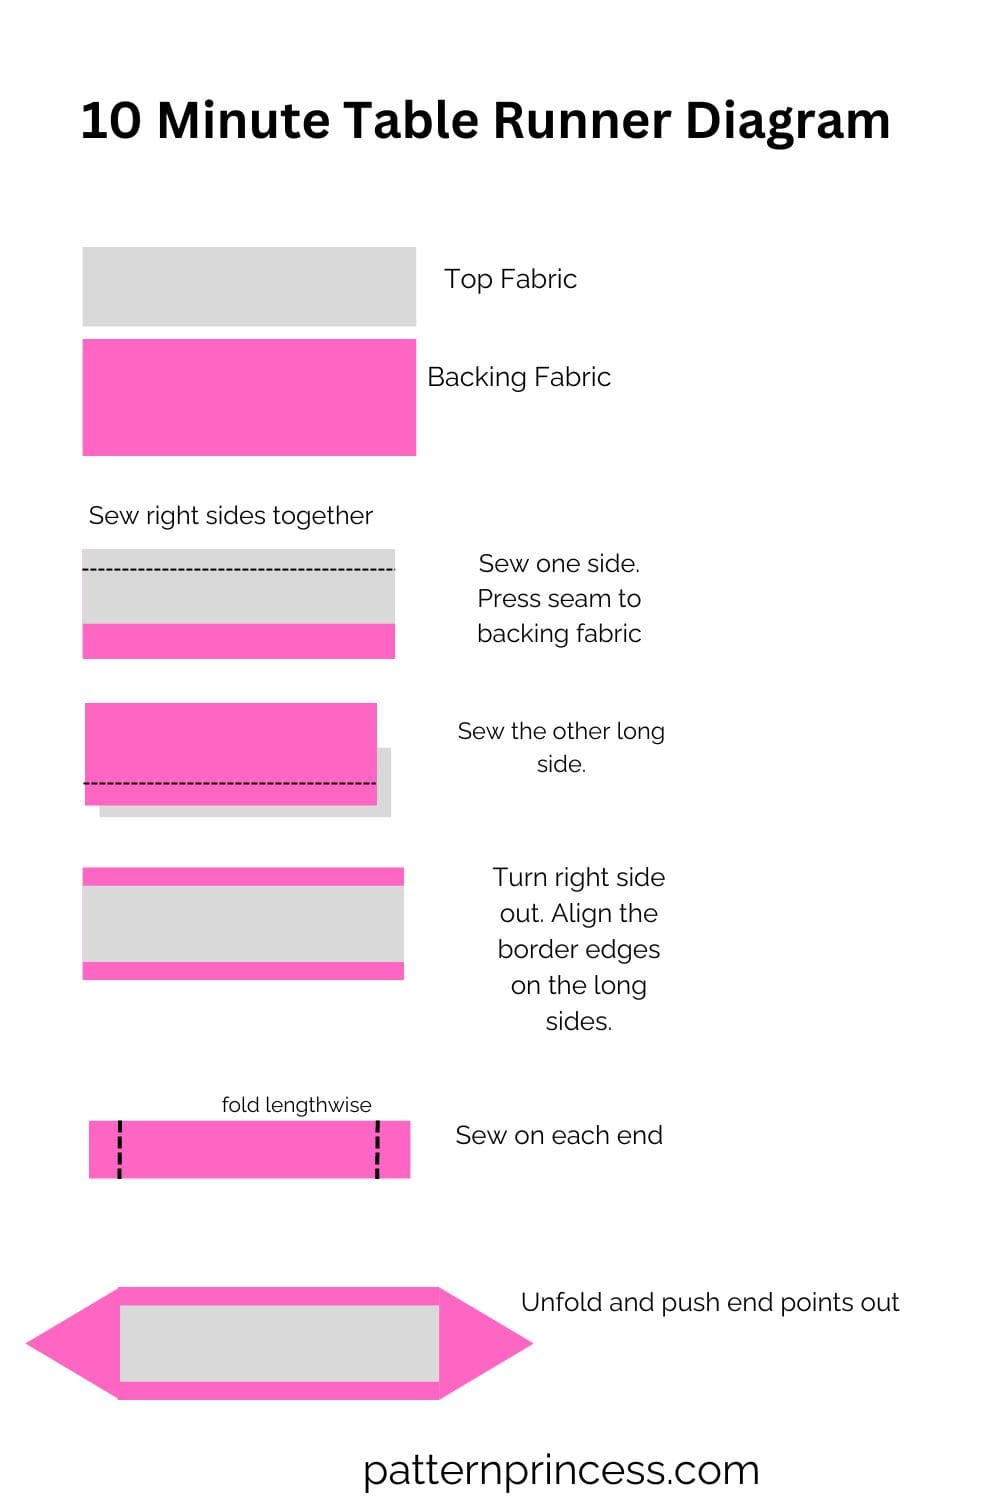
Turn Inside Out
Next, you want to turn your pieces inside out and iron your pieces, making sure your border is the same size on both sides of your centerpiece of fabric.
If you have a sliding ruler that works well in checking your measurements. I find that ironing as I measure makes the process easy.
Make sure and cut off the selvage fabric and even out your edges on both sides. I love using my rotary cutter for precise cuts.
Create Your Points
Now, you want to turn your fabric over so that the back side is facing up. Fold your fabric in half. Use sewing clips or sewing pins to hold your pieces in place.
Sew 1/4″ seam allowance on both edges. Trim just a little off your folded corner at the top where it is the thickest. Make sure and don’t cut through your thread.
Now you want to open your point by turning your fabric edges inwards. You should see the center piece of fabric facing you and it should look like a triangle point with the seam up. Press your seam open. Flip your fabric at the point the other direction making sure to use something to press the point out like a chopstick.
You will now only see your background fabric as your point. You can iron this down if it needs a little help lying flat. Don’t forget to do both ends.
Finishing Your 10 Minute Table Runner Pattern
Now it’s time to finish your table runner. You want to top stitch across the pointed end on both sides and down the middle of your seam on your pointed end.
Finally, you want to stitch in the ditch down the seam between your center piece of fabric and the border. If your machines do decorative stitches, or you have a quilting machine, you can also add that to the center or edges.
How you finish it is totally up to your personal tastes. It’s all up to your imagination.
We hope you enjoyed this free tutorial. These are such a quick project, and you can easily create a table runner for any occasion and adjust the length depending on your table size.
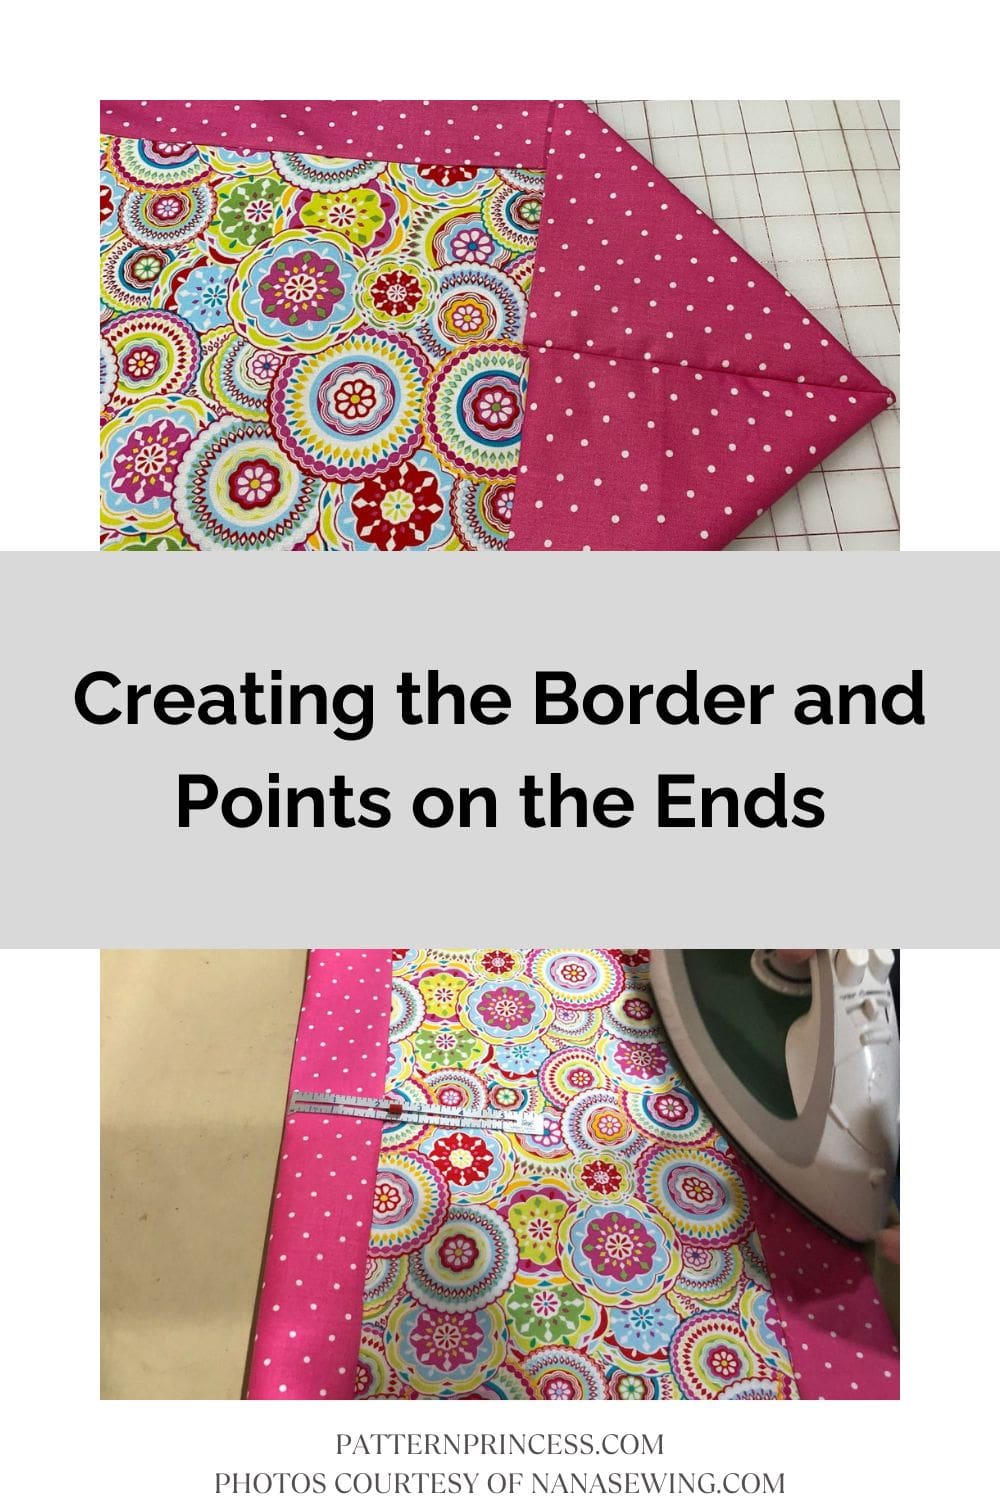
Table Runner Patterns
Here are more table runner patterns you can easily complete in a weekend. Huge thank you to Connie from Nana Sews for this fun pattern.
She has a great hobo bag pattern from recycled jeans and a drawstring makeup bag that is super cute and a great organizer.

You can find Victoria crocheting, quilting, and creating recipes. She has cooked in restaurants for over 20 years, including many larger parties. She learned to crochet when she was just 11 years old and has been crocheting ever since; over 50 years now. Over 40 years ago, she loved her first class in sewing and continues to hone her skills in quilting. Many have enjoyed the handmade gifts over the years. In her professional career, she has worked in management in a wide variety of businesses including higher education as a dean of a division. All the while attending college part-time to achieve her doctorate in higher education with an emphasis in e-learning.