Last updated on July 5th, 2024 at 12:38 am
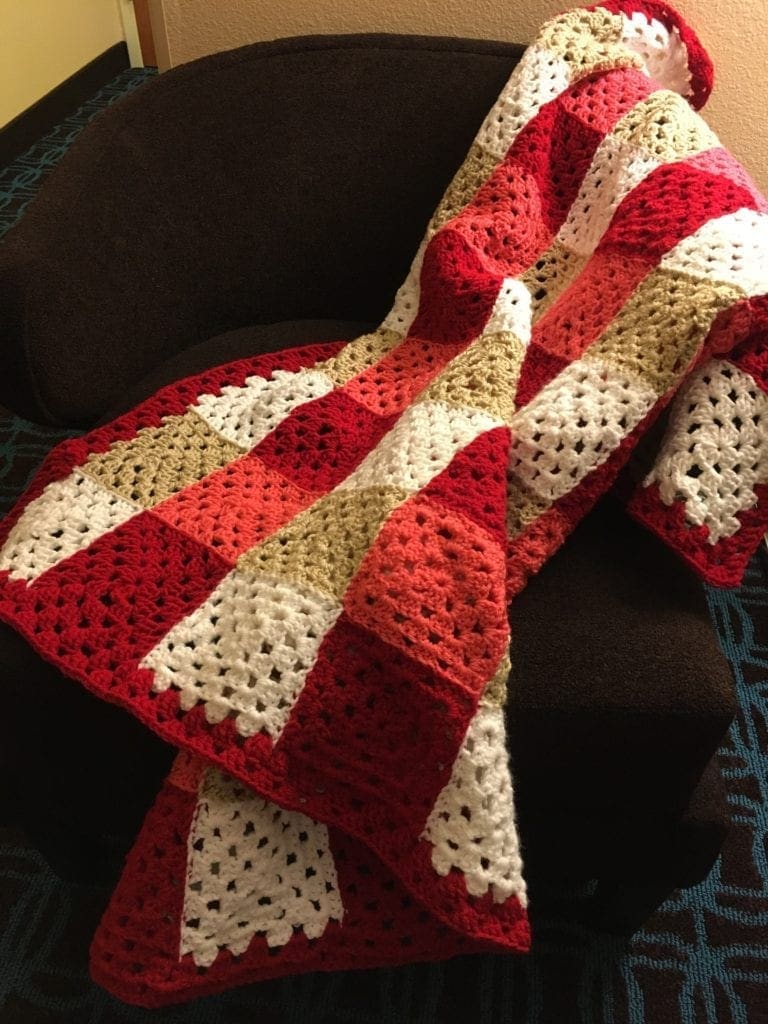
This chic colorful granny square throw has a modern look and it was so much fun to make. Full directions for the pattern, plus a video tutorial on how to complete the invisible join for a granny square. This throw would be nice for a baby too.
In the world of crochet, few patterns possess the timeless appeal and versatile charm quite like Granny Square patterns. This free pattern combines the nostalgia of yesteryears with a contemporary twist, this project promises not only warmth and comfort but also a burst of color and style to any living space.
Traditional granny squares are often made with a repeating sequence of 3 double crochet stitches. Also known as clusters. These are separated by 1 chain stitch. There are more elaborate square designs can feature a variety of stitches, shapes and motifs which are then finished with a border to square off the design.
Post contains affiliate links, and we earn commissions if you shop through the links on this page. For more information, please read the disclosure section under the About Us page.
Modern Blanket Colors
I love the modern look so much, that it is on display as part of my home décor. Eventually, I need to figure out some other new colors for another one.
Thank you to all of you that gave me advice on what color choices would go together. I made a few granny squares out of colors that I thought would look nice together. Then I asked all of you on Instagram and Twitter. These were the colors that rose to the top.
Thank you for your insight into what color palette looks good together. Here is the end result of that project. I think it turned out to be a very attractive granny square throw.
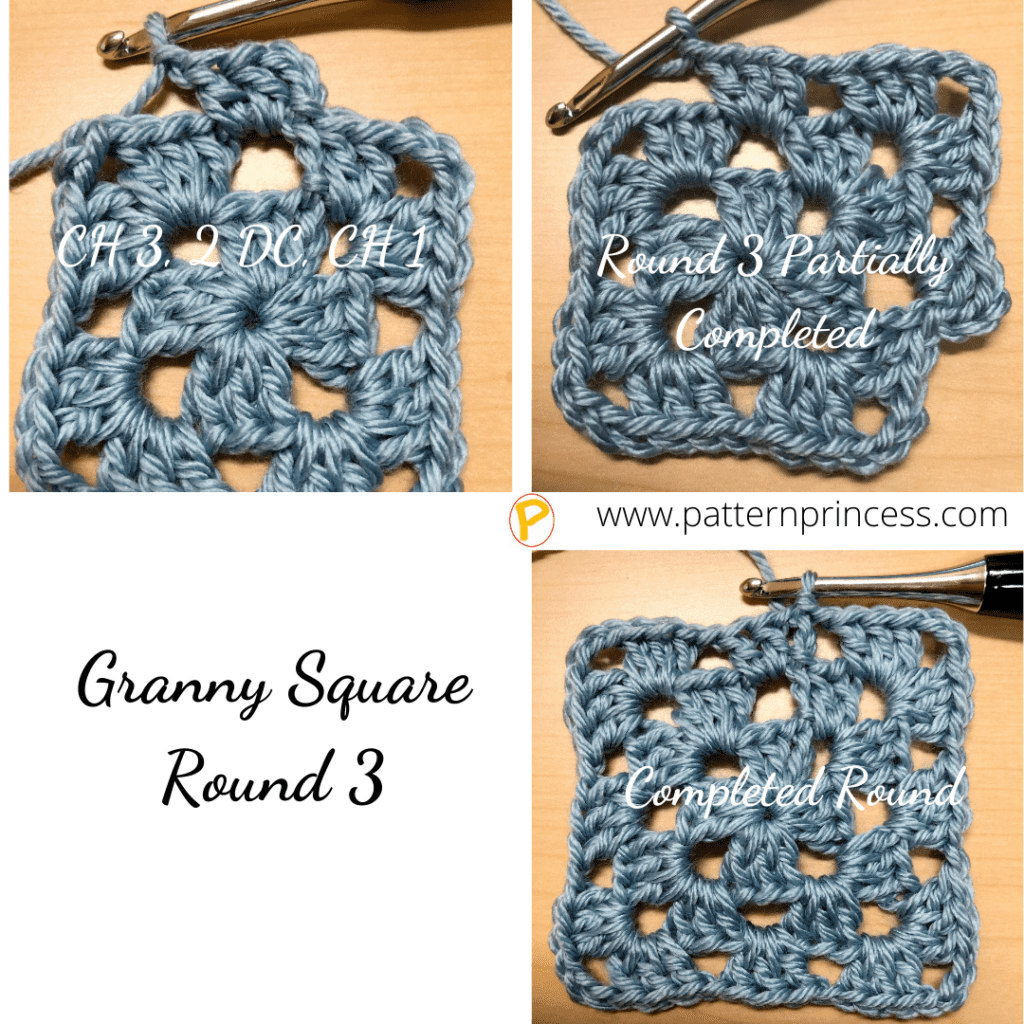
If this is the first time you are crocheting a granny square design, we have a whole blog post on how to crochet the granny square that can help you with a step-by-step tutorial.
Video Tutorials Near the Bottom of the Crochet Directions
Video tutorials on the invisible join, how to crochet a granny square, and how to change colors in a granny square.
Easy Invisible Join for a Granny Square
This is an easy way to let the crochet pattern highlight the granny squares rather than the method used for joining. It takes a bit of time, but the end result looks very nice.
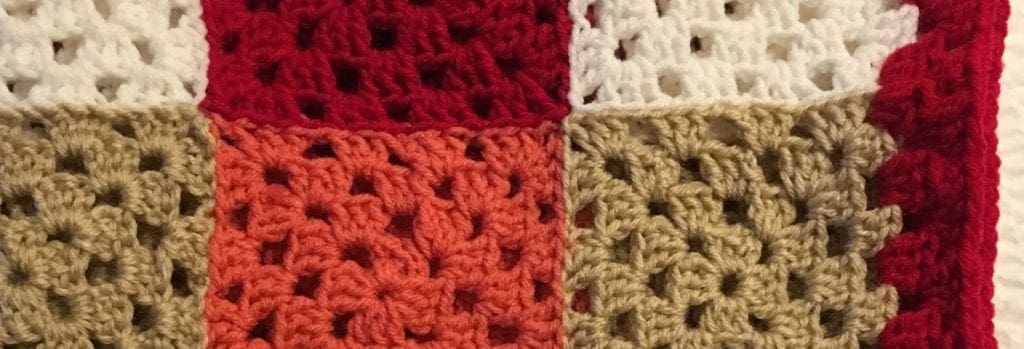
Color chart at the bottom of this post
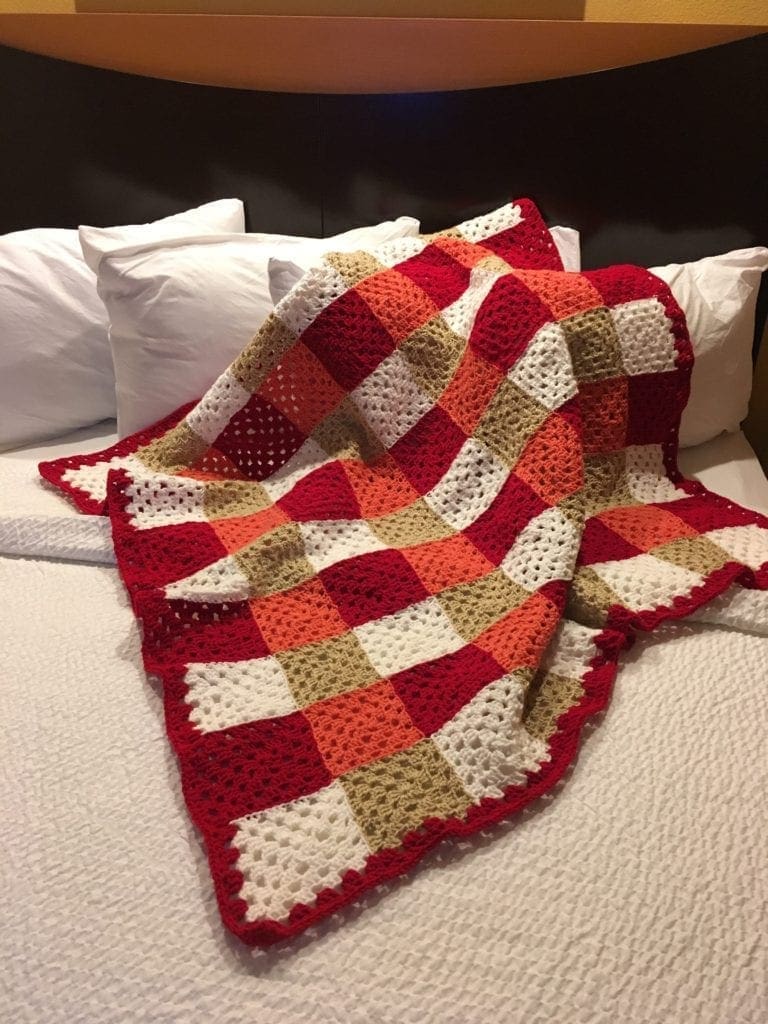
If you would like to make the same color layout as I did, feel free to use the chart to help with that process. Sometimes, seeing the entire color scheme graphed out can be helpful.
Directions: Chic Colorful Granny Square Throw
Skill Level
Advanced Beginner
While the granny square itself is a great pattern for a beginner to start out with, this is worked in multiple colors in a specific layout.
Gauge
12 single crochet every 4 inches.
Sizes of granny square blocks and blanket:
Each square is approximately a 5 X 5 inch square. Yours might be slightly different depending on your yarn, needle size, or the yarn and stitch tension you use.
The throw is 9 blocks wide X 9 blocks long…approximately 46 X 46 inches once the red border is added.
Hints to Completing the Crochet Blanket
To help me with keeping things straight with this pattern, I made the squares first. I left about a 8-10 inch tail on all of the squares. This makes it much easier to use the yarn needle to weave in the ends. The ends are weaved in before joining the squares. The squares were all crocheted before joining. Lastly, the squared were all joined before the border was added.
- 25 White
- 20 Buff
- 20 Cherry Red
- 16 Flamingo
Supplies:
White Yarn – Red Heart Super Saver Yarn White color 2 skeins
Buff Yarn – Red Heart Super Saver Yarn Buff color 1 skein
Flamingo Yarn – Red Heart Super Saver Yarn Flamingo color 1 skein
Cherry Red Yarn – Red Heart Super Saver Yarn Cherry Red color 2 skeins
Total yards approximately 2,058.
If you are not able to get the yarn locally, you can purchase it on Amazon.
J Boy Hook 6.0 MM
Scissors
Yarn Needle
Abbreviations:
- CH = Chain
- DC = Double Crochet
- SL ST = Slip Stitch
- SP = Space
- YO = Yarn Over
Crochet Directions:
Begin by making 5 chains (CH), join with a slip stitch to the 5th chain from hook to form a ring.
Round 1:
For this round, you will be working inside the ring. Chain 3 and count this chain 3 as your first DC of this round and throughout the entire pattern. Continuing working in the ring, work 2 DC. Then chain 3. 3 DC, CH 3. 3DC, CH3. 3DC, CH3. Join into the top of the beginning CH 3. This join completes the first shell of the first round. (note, you should have 4 clusters of 3 DC with 4 areas of CH 3 between)
Round 2:
CH 4 (This will count as your first DC plus a 1 CH). Then in the first CH 3 SP, [3 DC, 3 CH, 3 DC and CH 1]. Continue the stitch pattern between the [ ] until the last CH 3 SP. In the last CH 3 SP, work the 3 DC, 3 CH, then work only 2 DC and join with a SL into the 3rd chain of the beginning CH STs. This join will complete the round. (You should have 8 shells, 4 chain 3 spaces, and 4 CH 1 spaces).

Round 3:
CH 3 (Counts as a DC), Insert the hook into the CH 1 SP from the previous row, (Should be right where the previous row ended). YO and work a DC, Insert hook again, YO and DC. (This completes your first 3 DC in the round). CH 1. [In the corner CH 3 SP work (3 DC, 3 CH, 3 DC. and CH 1)]. In the next CH 1 SP work 3 DC and 1 CH]. Repeat between [ ] 3 more times until all 4 sides are complete. After the last DC in the CH 3 space CH 1 and SL ST into the top ST of the first DC of this round. (You should have 12 shells and 12 spaces after the completion of this round).
Round 4:
Make 4 CH, this will count as your first DC plus a 1 CH. Then in the first CH 3 space, work *3 DC, 3 CH, 3 DC and CH 1*. Continue the stitch pattern between the * until the last 3-ch space. In the last CH 3 SP, work the 3 DC, 3 CH, then work only 2 DC and join with a SL ST into the 3rd chain of the beginning CH. This join will complete the last shell of the round.
Size of the Granny Square Thoughts
I made mine 4 rounds; however, you can certainly make your squares larger if you wish. However, this will change the size of each square and the overall size of the throw. Using a different crochet hook or yarn may also change sizes.
Weave in Ends
Next, I weaved in the ends on all of the squares and cut off the excess once weaved in. Then I started to join the squares using the invisible join. Again, I left the 8-10 inch tail for easy weaving in of the ends. Once all of he squares were joined, I added the two rows of the red border. Weaved in the ends and now I can enjoy the beautiful throw.
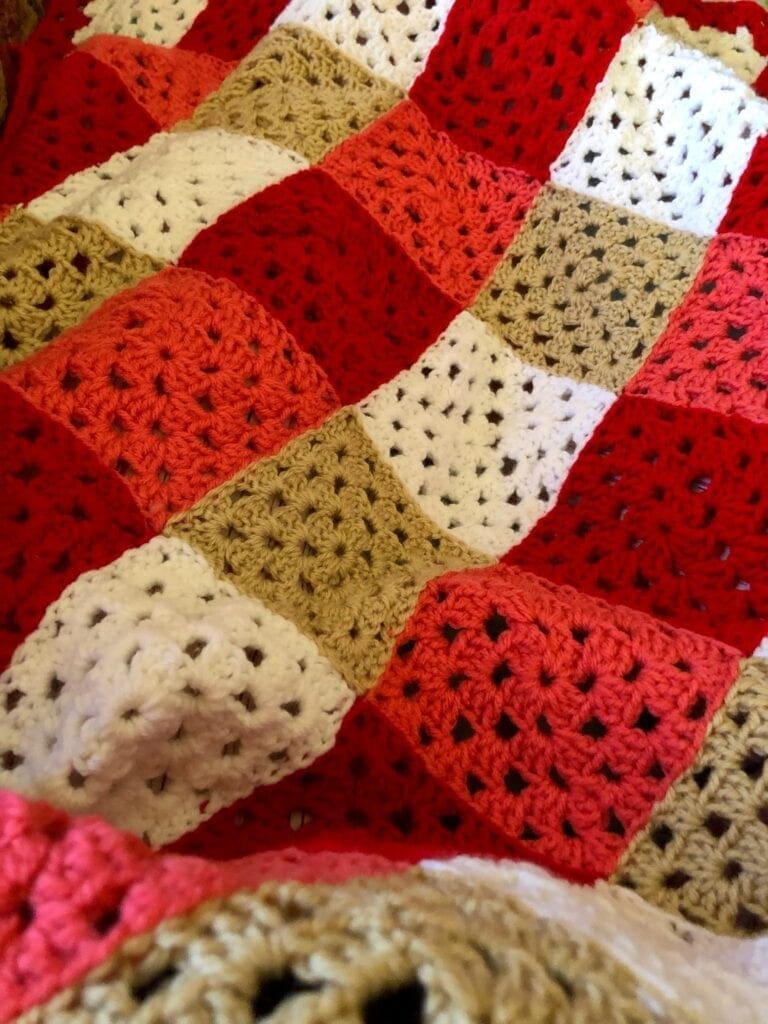
I used the invisible join for this Chic & Colorful Granny Square Throw.
Crochet Squares Invisible Join Video
Here is a quick video showing how I did the invisible join. Step-by-step instructions on how to join granny squares using the invisible joining method. Learn how to easily achieve that look of evenly joined granny squares in your next project.
However, if you would rather read the written directions, I will do my best to write out clear directions below if you learn better that way.
Invisible Join Written Directions
I used one of the colors that I was currently joining. Use a piece of yarn that is about 10 inches longer than two sides of the square. In order words approximately 20 inches long. Thread a yarn needle.
Begin by holding the wrong sides together. Start in a corner of one of the squares.
Look for the first horizontal thread inside the chain in the corner stitch. Insert the yarn needle and pull the yarn through leaving approximately a 5 inch tail. (you will need to weave this in later…make sure to weave it into the color you used so it will not be noticeable).
Step-by-Step Joining Directions
- Starting in the horizontal thread inside the chain in the corner stitch, insert the yarn needle and pull the yarn through. (don’t snug up the yarn just yet).
- In the opposite square and insert the yarn needle into the next horizontal yarn piece in the next stitch.
- Come back to the first square and insert the yarn needle into the next horizontal yarn piece in the next stitch.
- Continue for 2 or 3 more horizontal yarn stitches.
- Then holding the starting yarn stitch in the corner, pull the yarn snug.
- Your granny squares will be snug and invisibly joined for the stitches that you have worked.
- Continue moving back and forth between the two squares and weaving the yarn through the horizontal stitches.
- Every 3 or 4 stitches, pull the yarn snug.
Align the Corners
Insert the yarn needle in all the corner stitches of the squares being joined together, and pull through the yarn. Then continue weaving back and forth through the horizontal stitches. Every 3 or 4 stitches, pulling the yarn snug.
Weave in the Yarn Ends
Before working on the border, I took the time to weave in all the yarn pieces using the yarn needle.
Crochet Border Directions
For the border I did two rows of Cherry Red.
Border Round 1:
First corner:
Starting in a corner, 3 CH, plus 2 DC, CH 1. *3 DC, CH 1, 3 DC*. Continue this until the next corner.
Second corner:
In the corner CH 3 space, work 3 DC, 3 CH, 3 DC and CH 1. Continue *3 DC, CH 1, 3 DC*. Continue this until the next corner.
Third corner:
In the corner CH 3 space, work 3 DC, 3 CH, 3 DC and CH 1. Continue *3 DC, CH 1, 3 DC*. Continue this until the next corner.
Fourth corner…which is the corner you started in:
Work 3 DC, CH 3 and join with a SL ST to the top stitch of the beginning CH 3 Space.
Border Round 2:
First corner:
Starting in a corner, 3 CH, plus 2 DC, CH 1. *3 DC, CH 1, 3 DC*. Continue this until the next corner.
Second corner:
In the corner CH 3 space, work 3 DC, 3 CH, 3 DC and CH 1. Continue *3 DC, CH 1, 3 DC*. Continue this until the next corner.
Third corner:
In the corner CH 3 space, work 3 DC, 3 CH, 3 DC and CH 1. Continue *3 DC, CH 1, 3 DC*. Continue this until the next corner.
Fourth corner…which is the corner you started in:
Work 3 DC, CH 3 and join with a SL ST to the top stitch of the beginning CH 3 Space.
Cur off yarn leaving about a 6 inch tail and weave in the ends using a yarn needle, cut off the excess.
I hope this inspires you to make your own Chic Colorful Granny Square Throw.

Throw Color Chart

How to Crochet a Granny Square Video
If you are interested in changing colors for your granny squares, here is a quick video on that too.
How to Change Yarn Color in a Granny Square
I had made this throw and made a video of the invisible join; however, it because evident that I needed to complete a tutorial on crocheting the granny square itself. The video shown further down in the post is for a different crochet pattern and it starts with a magic circle rather than a CH 5 and SL ST.
Aside from the various ways you can start a granny square, that are a variety of methods in crocheting the granny square too. It is helpful in understanding the traditional granny square pattern.
If you loved this post, share on your fave social media links. It helps to show me that these types of posts are helpful – thank you!
Here are some other free crochet patterns you might enjoy.

You can find Victoria crocheting, quilting, and creating recipes. She has cooked in restaurants for over 20 years, including many larger parties. She learned to crochet when she was just 11 years old and has been crocheting ever since; over 50 years now. Over 40 years ago, she loved her first class in sewing and continues to hone her skills in quilting. Many have enjoyed the handmade gifts over the years. In her professional career, she has worked in management in a wide variety of businesses including higher education as a dean of a division. All the while attending college part-time to achieve her doctorate in higher education with an emphasis in e-learning.

You do such beautiful work! I follow you on Instagram. I have gotten many good ideas from you. Thank you!
OMG! You just made my day. Thank you so much for taking the time to comment. I am so glad that you are enjoying my sharing and it is helpful to you. Even better that you think it is beautiful. I am actually kind of a beginner at crochet…I am sharing as I learn and I think it is helping me learn quicker. So glad to meet a follower. 🙂
Very pretty. I wish I could knit or crochet. I would love to do either. It looks so relaxing and such beautiful results.
I have a hard time sitting still and crochet not only helps me forget about the day, I can sit and watch a movie with my family while crocheting. Of course, the results are nice to use for years too.
Love It! I have a few very similar ones made by great grandmother, that are still cherished to this day. Unfortunately I learned to knit first and now my muscle memory fight me every time I try to crochet.
So glad that you have cherished afghans made by your great grandmother. I have one from my grandmother. No matter if you knit or crochet, handmade gifts can become family heirlooms. So glad that you have the ability to create.