Last updated on October 4th, 2025 at 03:04 pm
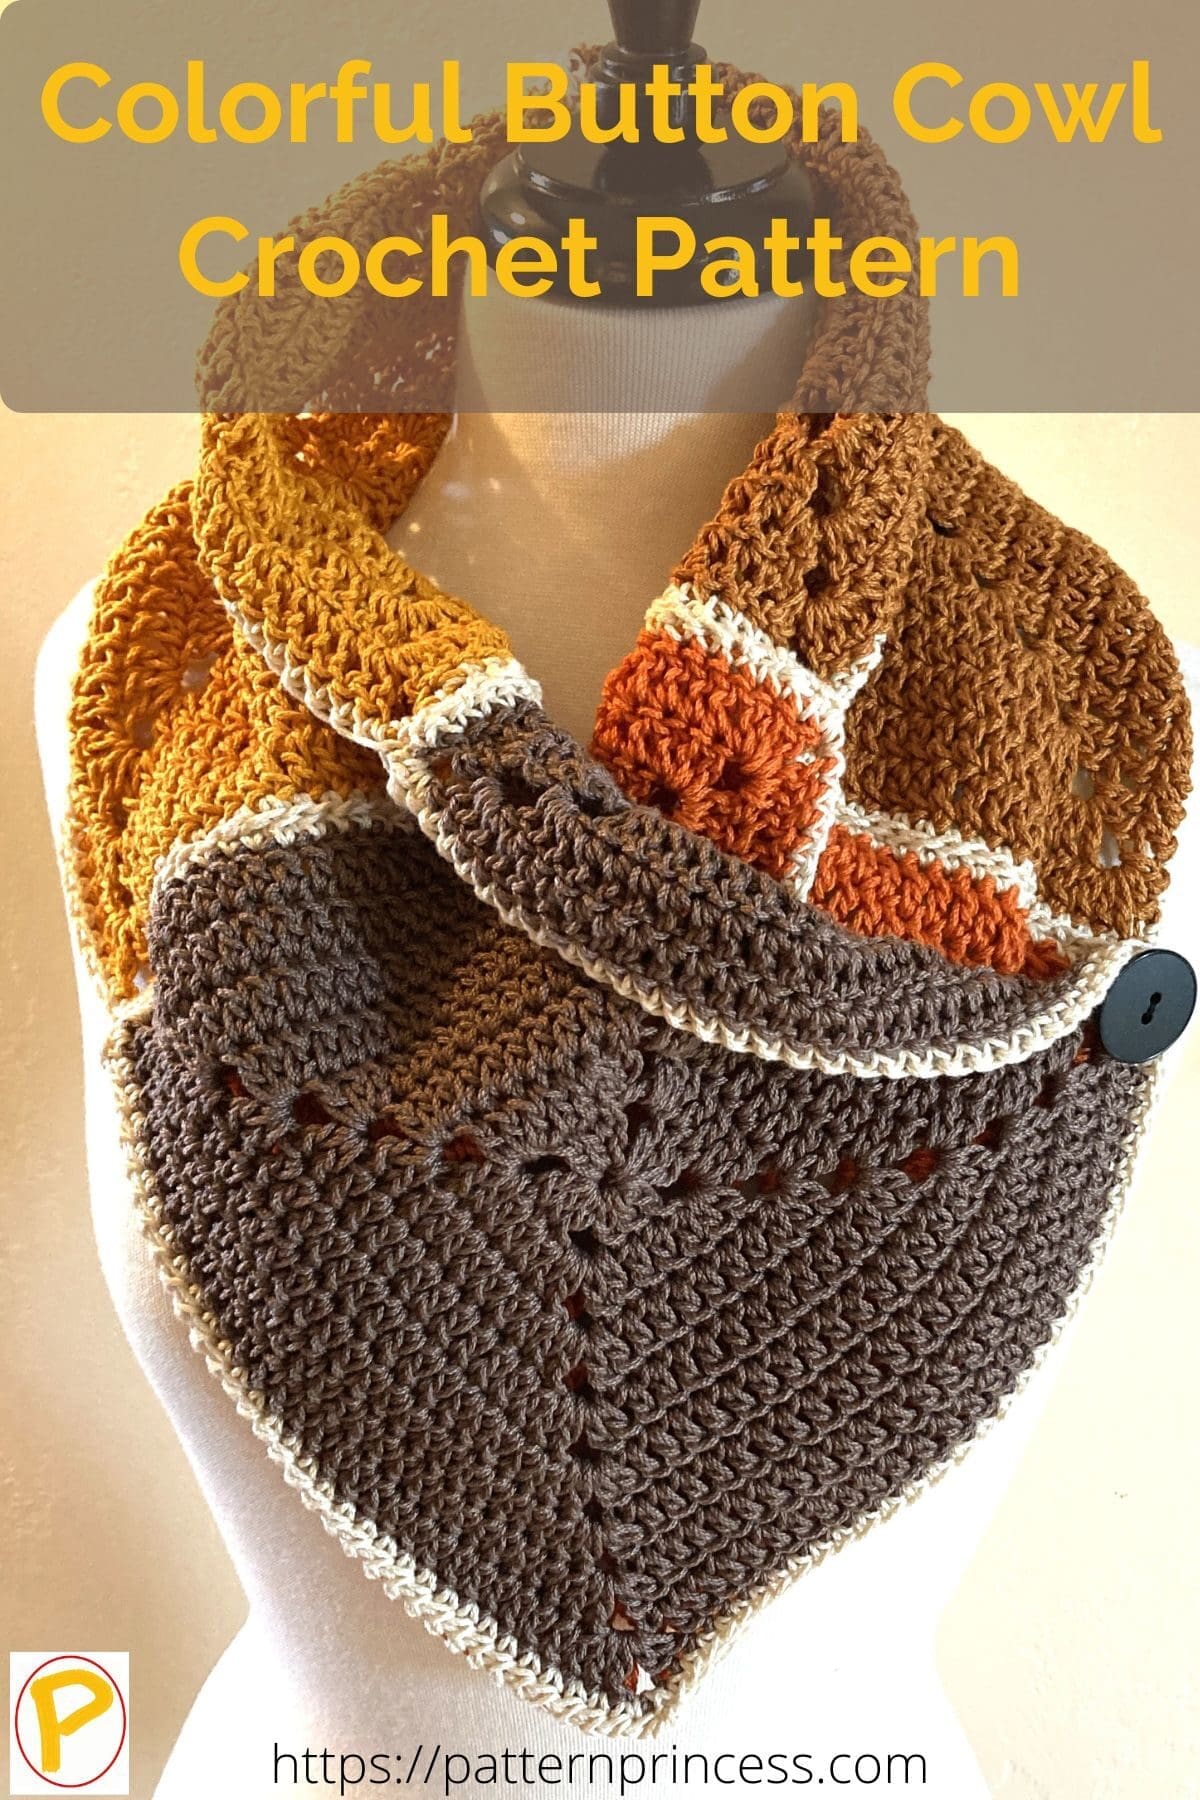
If you’re looking for a quick crochet project, look no further than this colorful button cowl. It’s beginner-friendly and perfect for using up leftover yarns in your stash.
The design is simple and easy to follow, and the finished product is sure to keep you warm. Plus, the fun button adds a touch of personality. Try it with a variety of big wooden, gold, metal, or fun bright buttons.
Sleek Fall and Winter Fashion
If you are looking for a sleek and fashionable way to keep warm once the temperature starts to drop, this is for you.
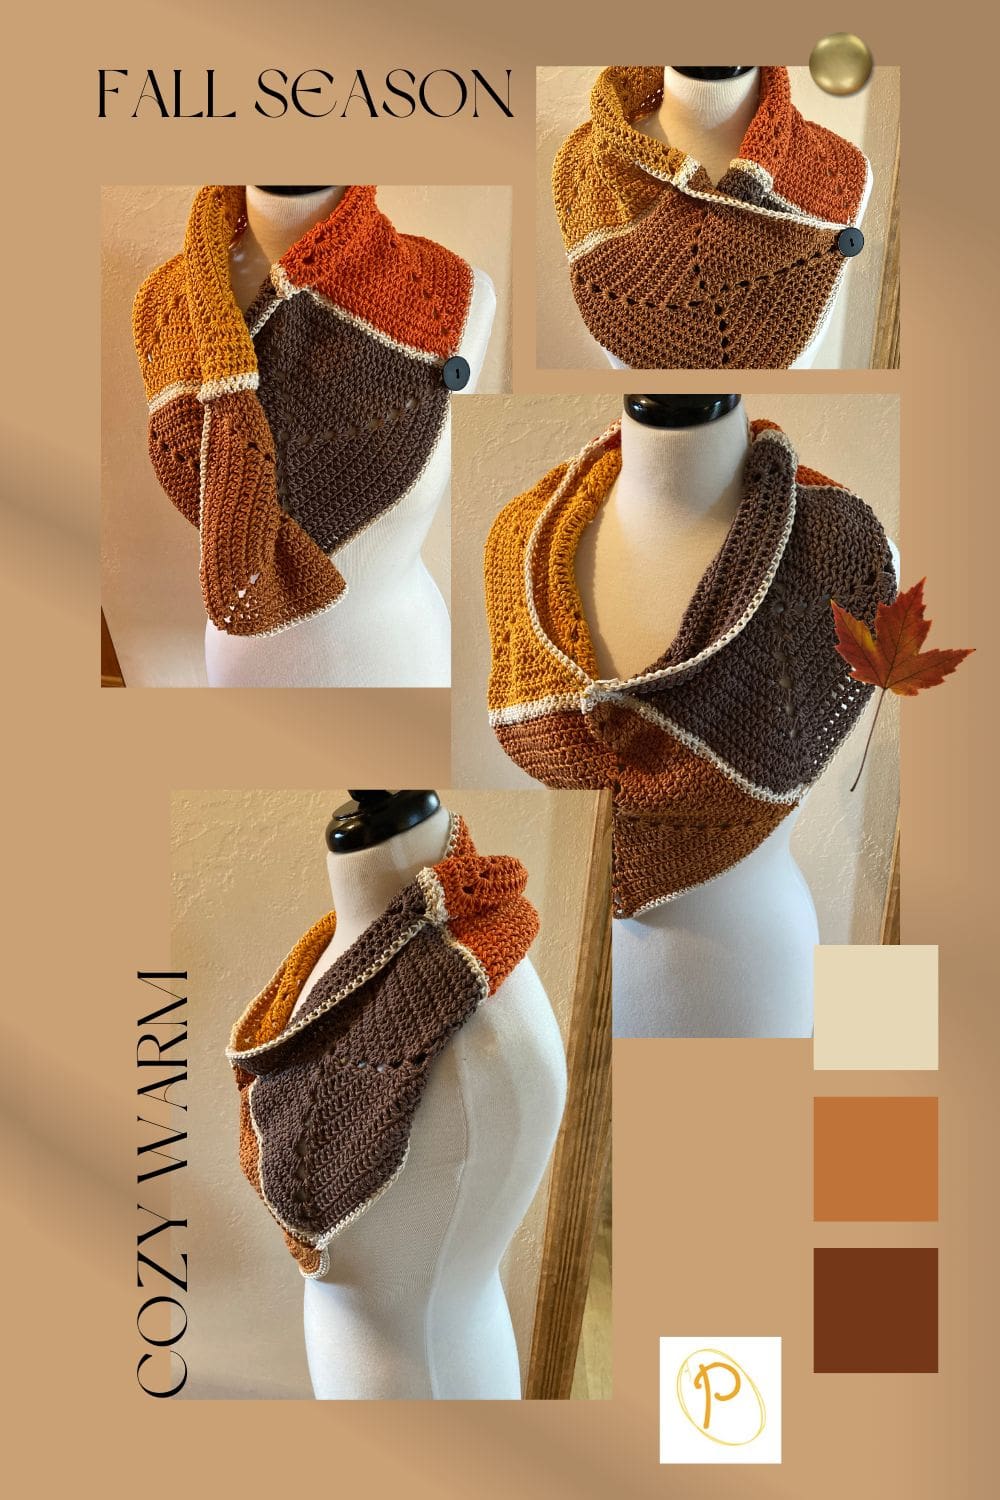
This cozy and warm Button Cowl is a perfect accessory for any outdoor adventures or activities that you attend this Fall and Winter. The easy pattern creates a textured and stylish neck warmer, and the button adds the perfect amount of flair to any outfit.
This cowl is designed with a button opening which allows it to slip easily over your head.
Solid Granny Square Cowl
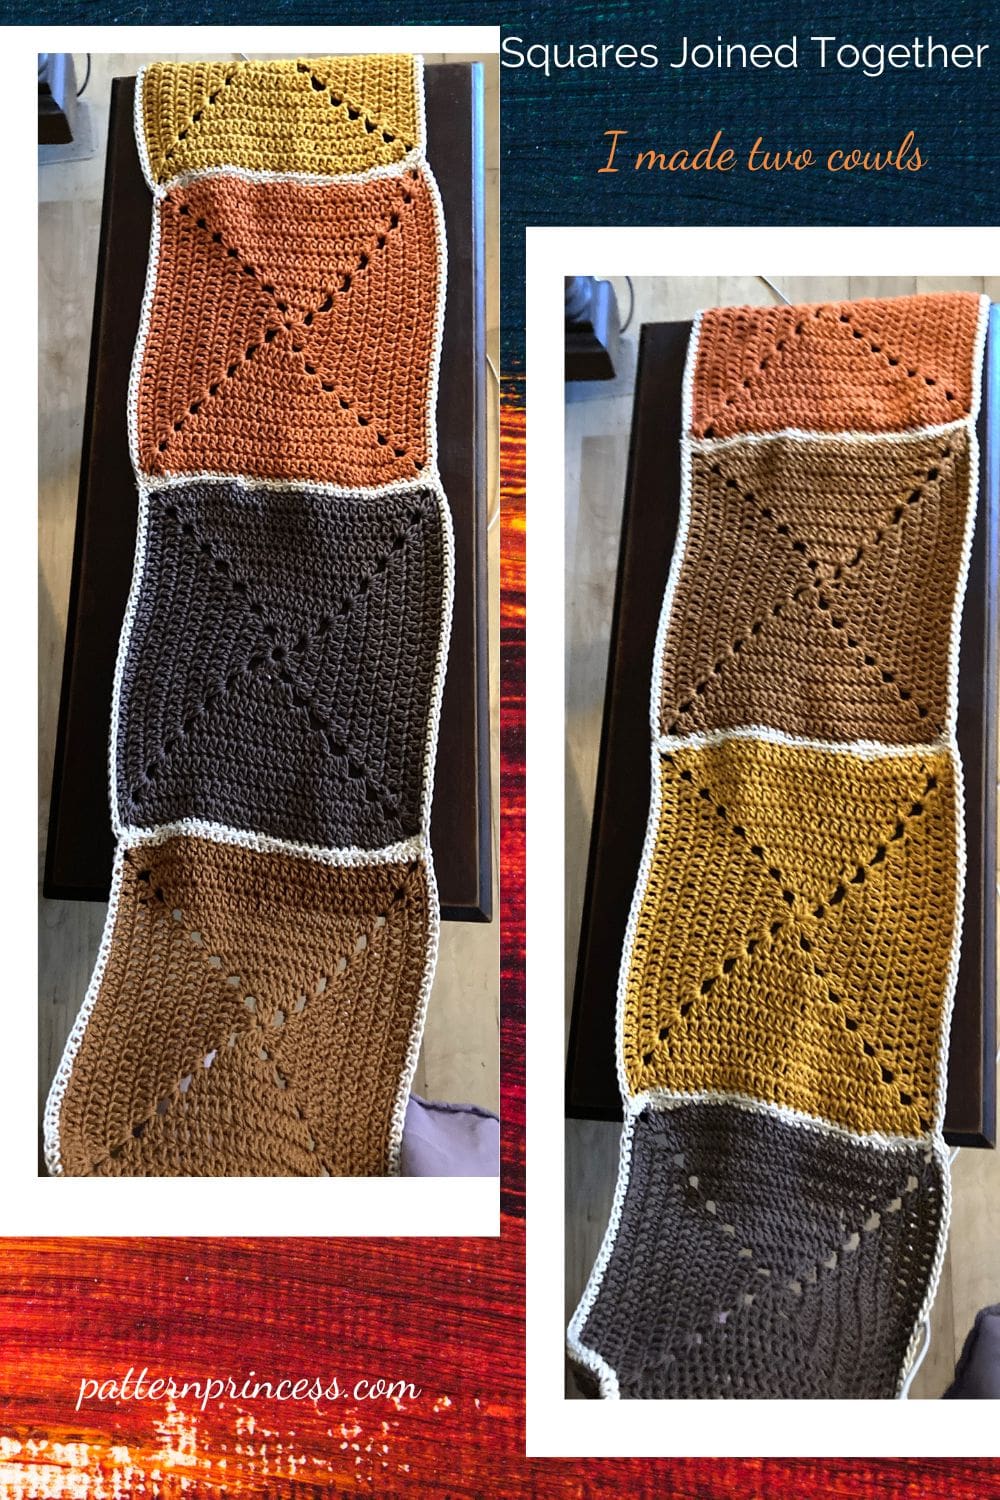
This cowl is worked flat, and the pattern uses four solid granny squares. The method I use does not have any seams showing on the sides. I have a free written pattern with crochet tutorials for the solid granny square.
Join the squares using the invisible join or another method that you prefer. You can find my video tutorial for the invisible join if this is new to you.
Each square has a round of single crochet in a lighter color yarn as this really helps separate the colors and highlight their beauty. Also, if you use the same color of yarn to join the squares it is not noticeable at all.
Leftover Yarn Scraps Crochet Pattern
For the past few months, I have been crocheting granny squares and half square triangles in preparation for a pretty Fall Afghan. You can find that free pattern for the Pumpkin Spice Blanket Pattern too.
Each solid square in the blanket I started with a new skein of yarn. Each skein made one square that was 10 rounds. I was not able to get 2 squares out of each skein and I did not want to join a new skein of yarn in a random place in the square.
I wanted to use up the yarn skein, so I didn’t waste. Therefore, I crocheted one additional solid granny square using the leftover yarn from each skein. The smaller squares, which are used in this button cowl are 8 rounds.
The pattern uses four yarn colors Amber, Café Au Lait, Golden Rod, and Tangerine. I made 2 squares of each color. However, you only need a total of 4 squares for each colorful button cowl.
If you wanted to just make this cowl, you can certainly make two cowls using the four main colors plus the Ercu for the single crochet round and joining.
Changing the Order of Colored Squares
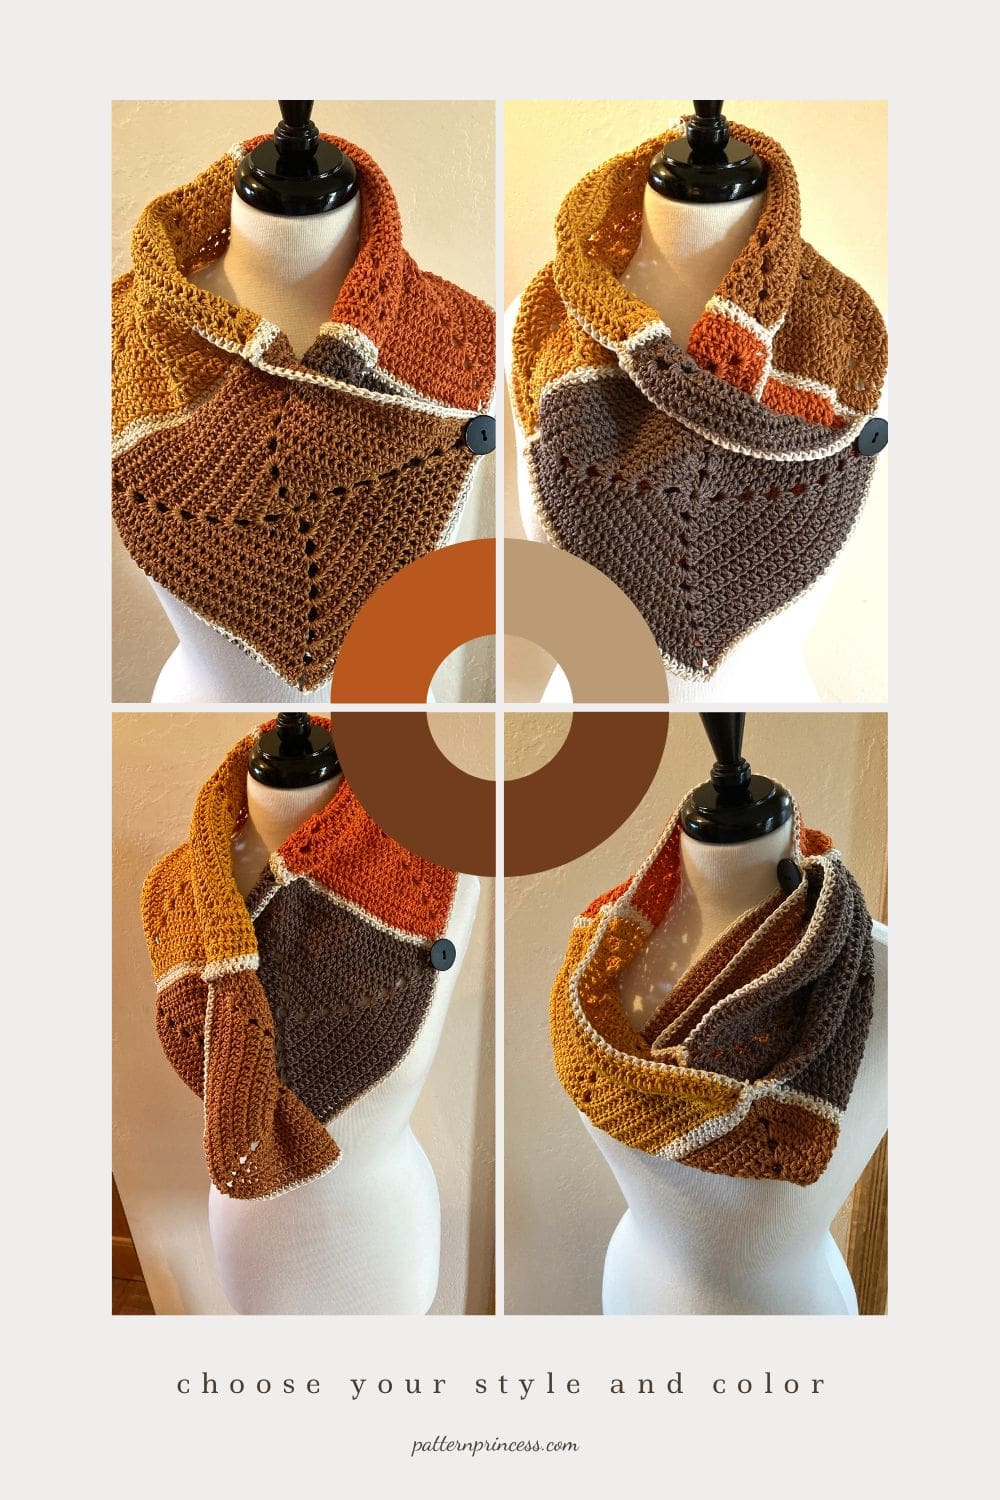
Really, any combination of yarn scraps would work. As you look at the photos of the completed cowl, notice that I varied the order of squares that are joined together.
Directions: Colorful Button Cowl Crochet Pattern
Skill Level
Confident beginner
Gauge
16 double crochet stitches for every 4 inches
Size
9 wide X 37-inches long
Materials
Amber. 24/7 Cotton yarn from Lion Brand 1 skein. 230 yards.
Café Au Lait. 24/7 Cotton yarn from Lion Brand 1 skein. 230 yards.
Golden Rod. 24/7 Cotton yarn from Lion Brand 1 skein. 230 yards.
Tangerine. 24/7 Cotton yarn from Lion Brand 1 skein. 230 yards.
Ercu. 24/7 Cotton yarn from Lion Brand 1 skein. 230 yards.
If you are not able to find this yarn locally, you can purchase it online. Check out our links on our Savings Center.
**The yarn listed will make two Colorful Button Cowls.**
Size H Crochet Hook
Tapestry Needle
Scissors
Button 1 1/4 – inch
Thread
Sewing Needle
Abbreviations
- CH = Chain
- DC = Double Crochet
- SC = Single Crochet
- SL ST = Slip Stitch
- SP = Space
- ST = Stitch
- STs = Stitches
- [ ] = Repeat between
Pattern Notes
The cowl is made using solid granny squares joined together using the invisible joining method.
Each square is 8 rounds of double crochet plus 1 round of single crochet. Time Saving Tip. Leave the ending yarn end longer on the single crochet round so it can be used to sew the crochet blocks together if you are using the invisible join method.
Each crochet square is worked in the round as a square.
The Chain 2 stitches are the corners. Each corner consists of a (2 DC, CH 2, 2 DC).
Double crochet stitches are the stitches on the sides. You will double crochet in each stitch across the sides. The number of double crochet stitches on each side will grow by 4 each side for the round or 16 total each round.
Crocheting the Solid Granny Square
Make 4 of these squares in the following colors.
1 amber, 1 golden rod, 1 tangerine, and 1 Café Au Lait.
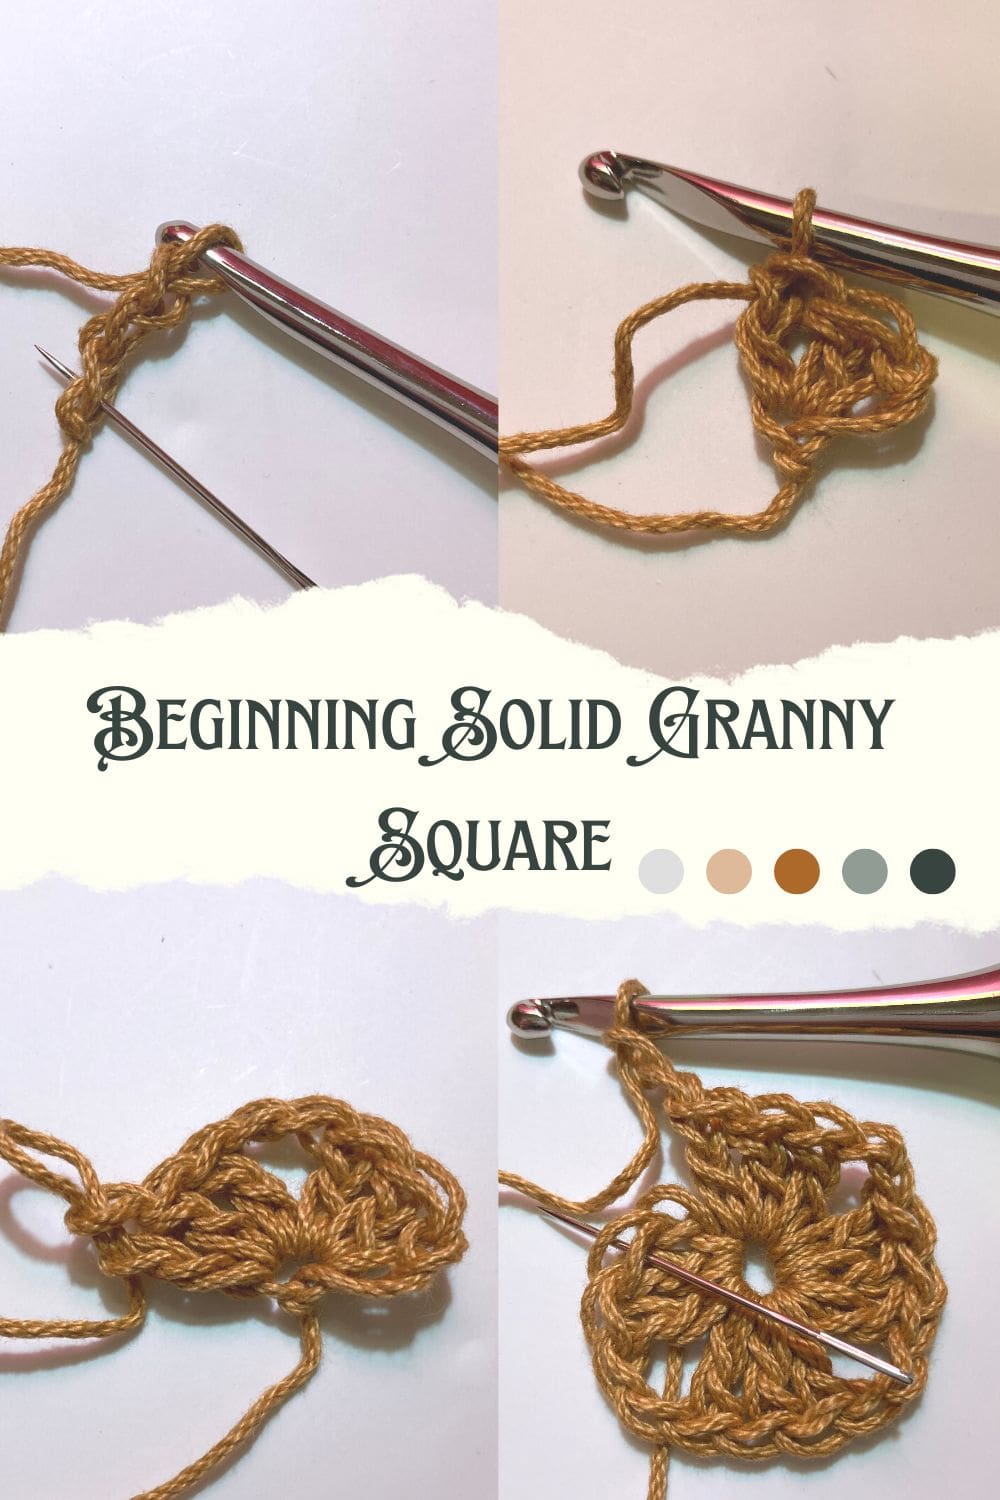
Round 1
CH 3 (Counts as DC). In the 3rd ST from the hook work (2 DC, CH 2, 3 DC, CH 2, 3 DC, CH 2, 3 DC, CH 2). Join to the top DC ST with a SL ST.
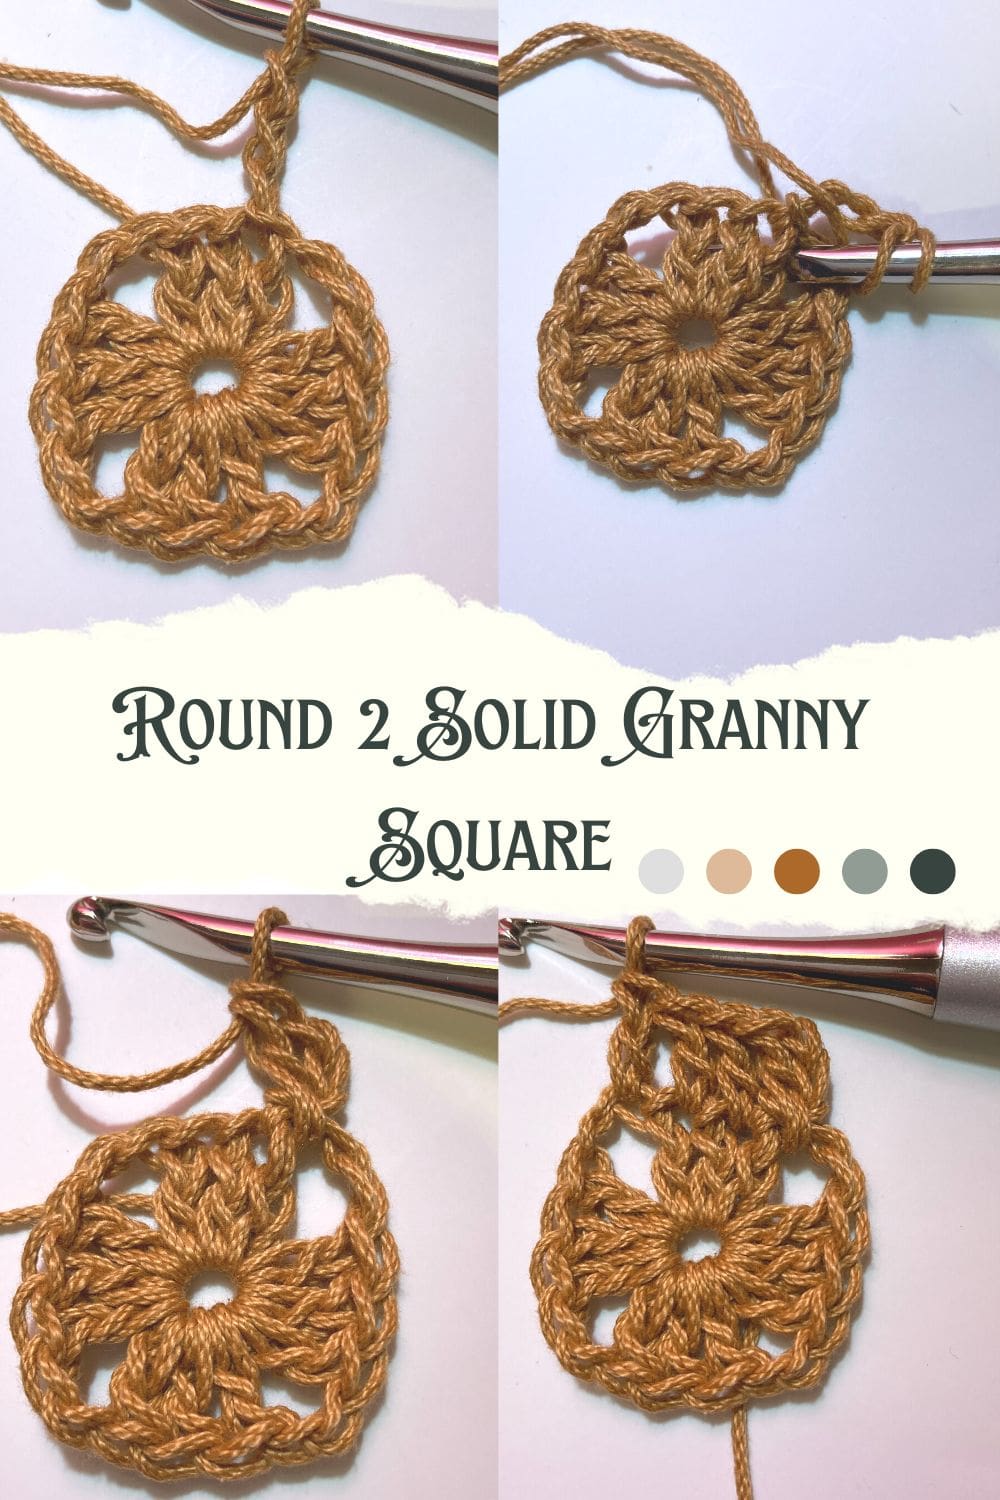
Round 2
CH 3 (Counts as DC). DC in the same corner CH 2 SP. DC in each ST across (3 DC). Work in the corner CH 2 SP (2 DC, CH 2, 2 DC). Continue working a DC in each ST across and in each corner CH 2 SP work (2 DC, CH 2, 2 DC) 2 more times. Continue working the DC in each ST across the last side (3DC). When you get to the final corner work (2 DC, CH 2) then a SL ST into the top of the first CH 3 to close the round.
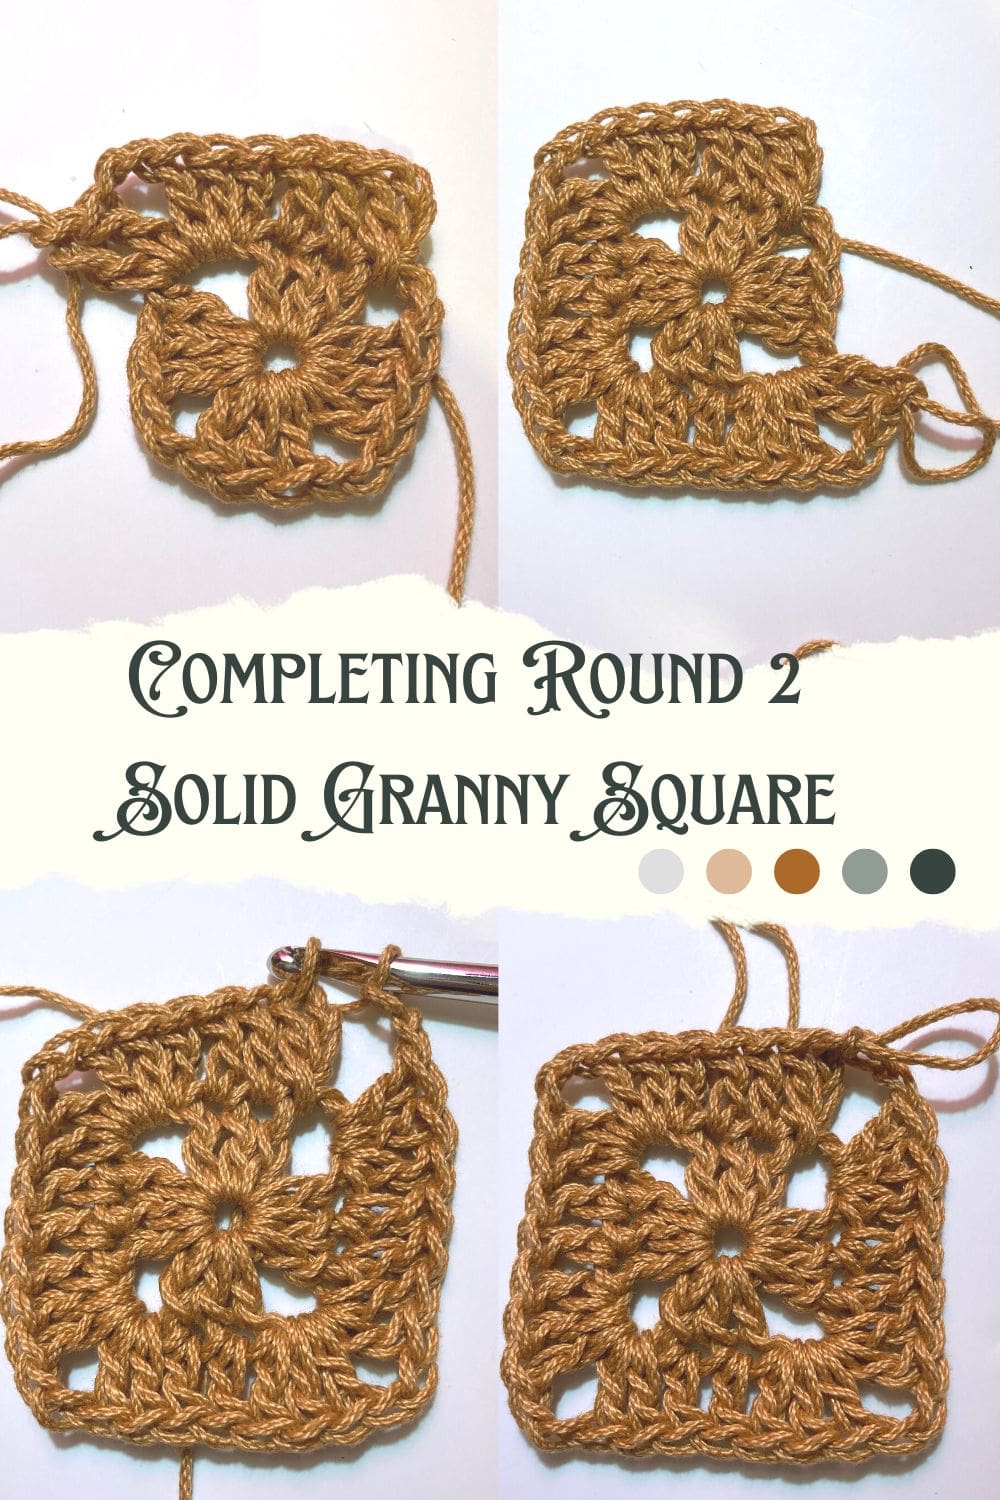
Round 3 through 8
Continue repeating round 2. The only difference is that each round will have more double crochet stitches on each side.
Here is round 3.
CH 3, DC in the same corner CH SP. DC in each ST across (7 DC). Work into the next corner CH SP (2 DC, CH 2, 2 DC). Continue working a DC in each DC ST around and in the corner CH 2 SP work the (2 DC, CH 2, 2 DC). When you get to the final corner work 2 DC, CH 2, and SL ST into the top of the first CH 2 to close the round.
For round 4 there will be 11 DC STs to work on each side.
Round 5 there will be 15 DC STs to work on each side, and so on.
Finish by weaving in yarn ends and removing the excess yarn.
Then add the last round.
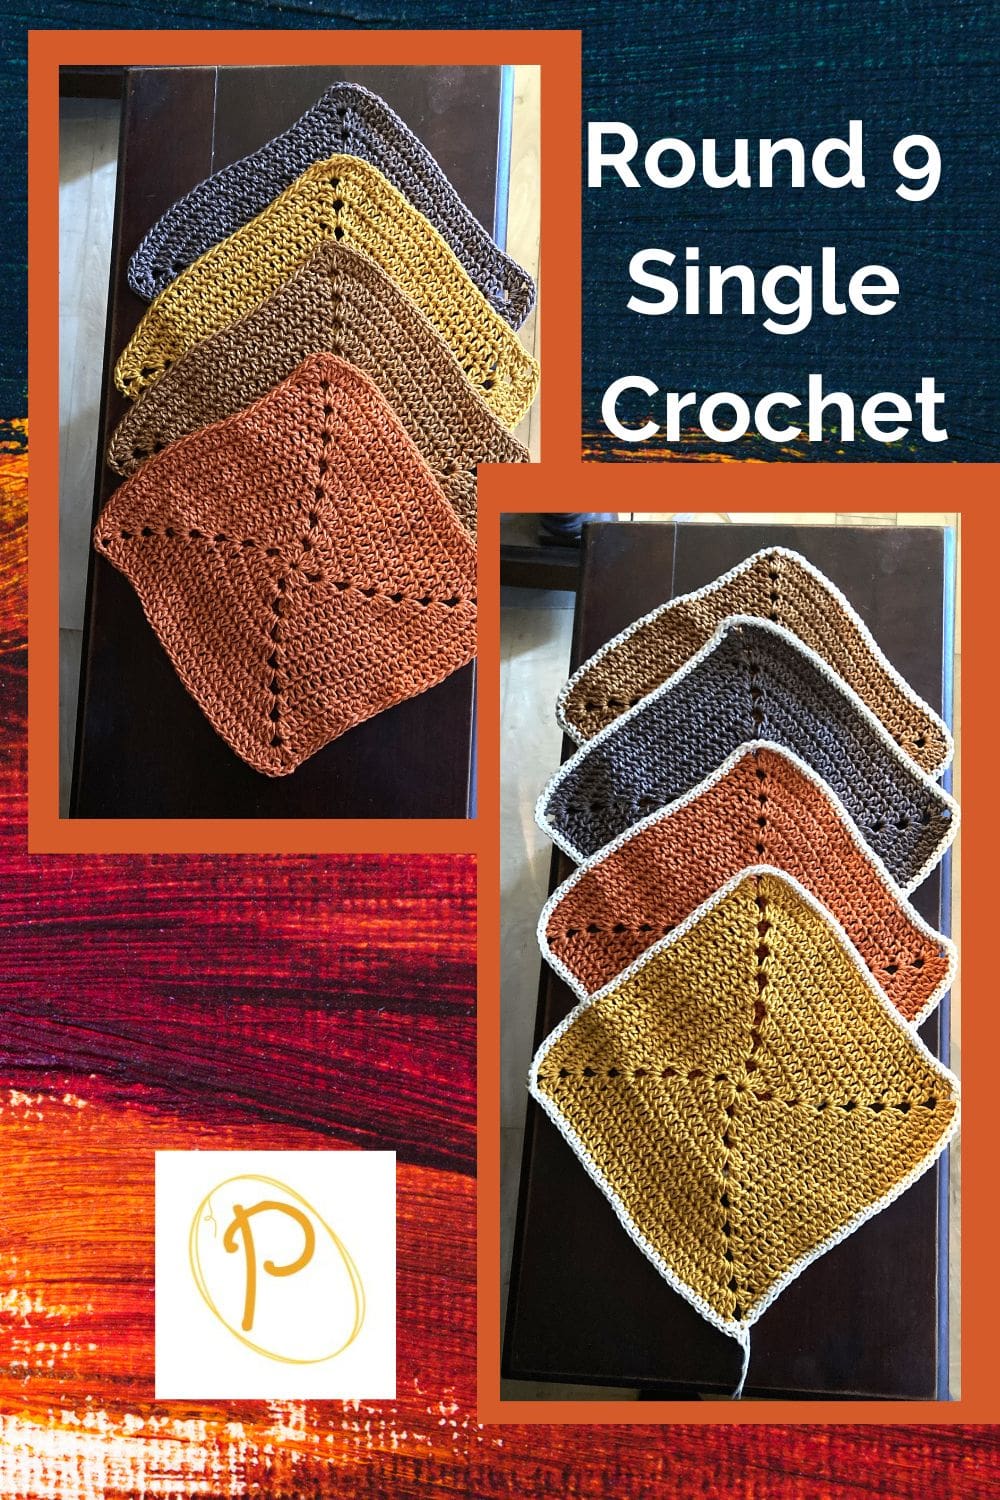
Round 9
Using the Ecru Yarn
Join the yarn in a corner. CH 1 SC in each ST around. Work 3 SC in each corner ST. Join with a SL ST into the first CH 1 SP.
Finish by weaving in yarn ends and removing the excess yarn. Remember to leave one of the yarn ends extra long so it can be used to sew the block to the next block.
Here are photos of the assembly
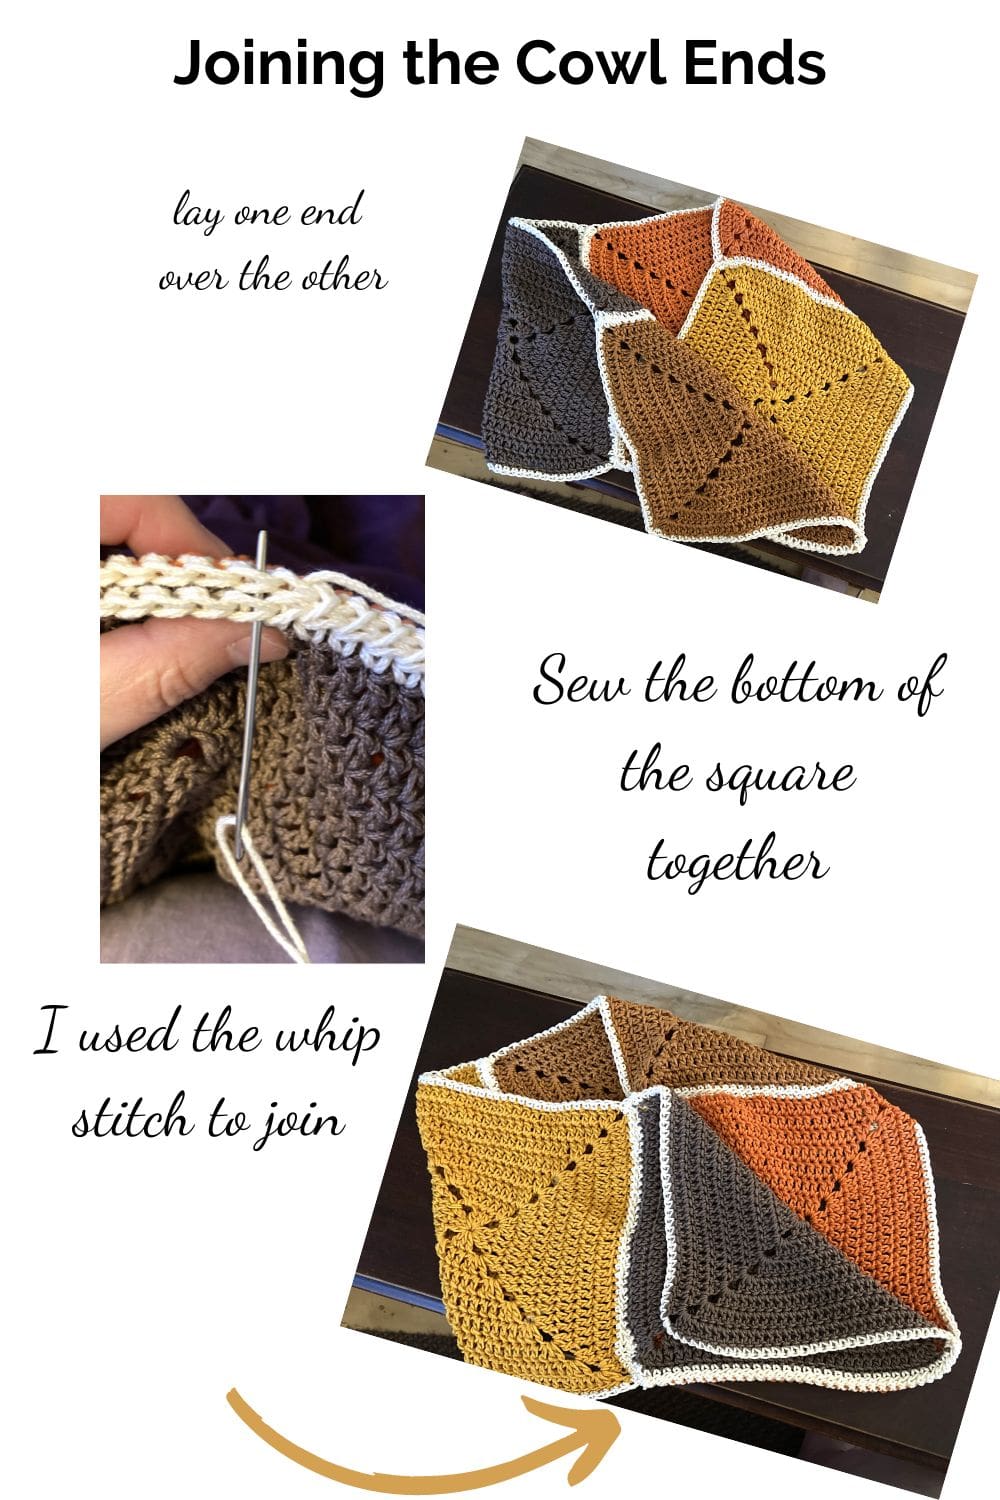
Sewing the end together. I folded the left over right; you could switch that if you wish.
Sew the bottom edge of the front square.
Add a bottom to the corner of the first square that is underneath, see the photo for placement.
If this is the first time you are sewing on a button, this pillow I made has a nice visual on how to sew a button.
This scarf can be styled with it buttoned or without. The button area can be worn in front or spin this to the back and have it hug your neck as a cozy scarf.
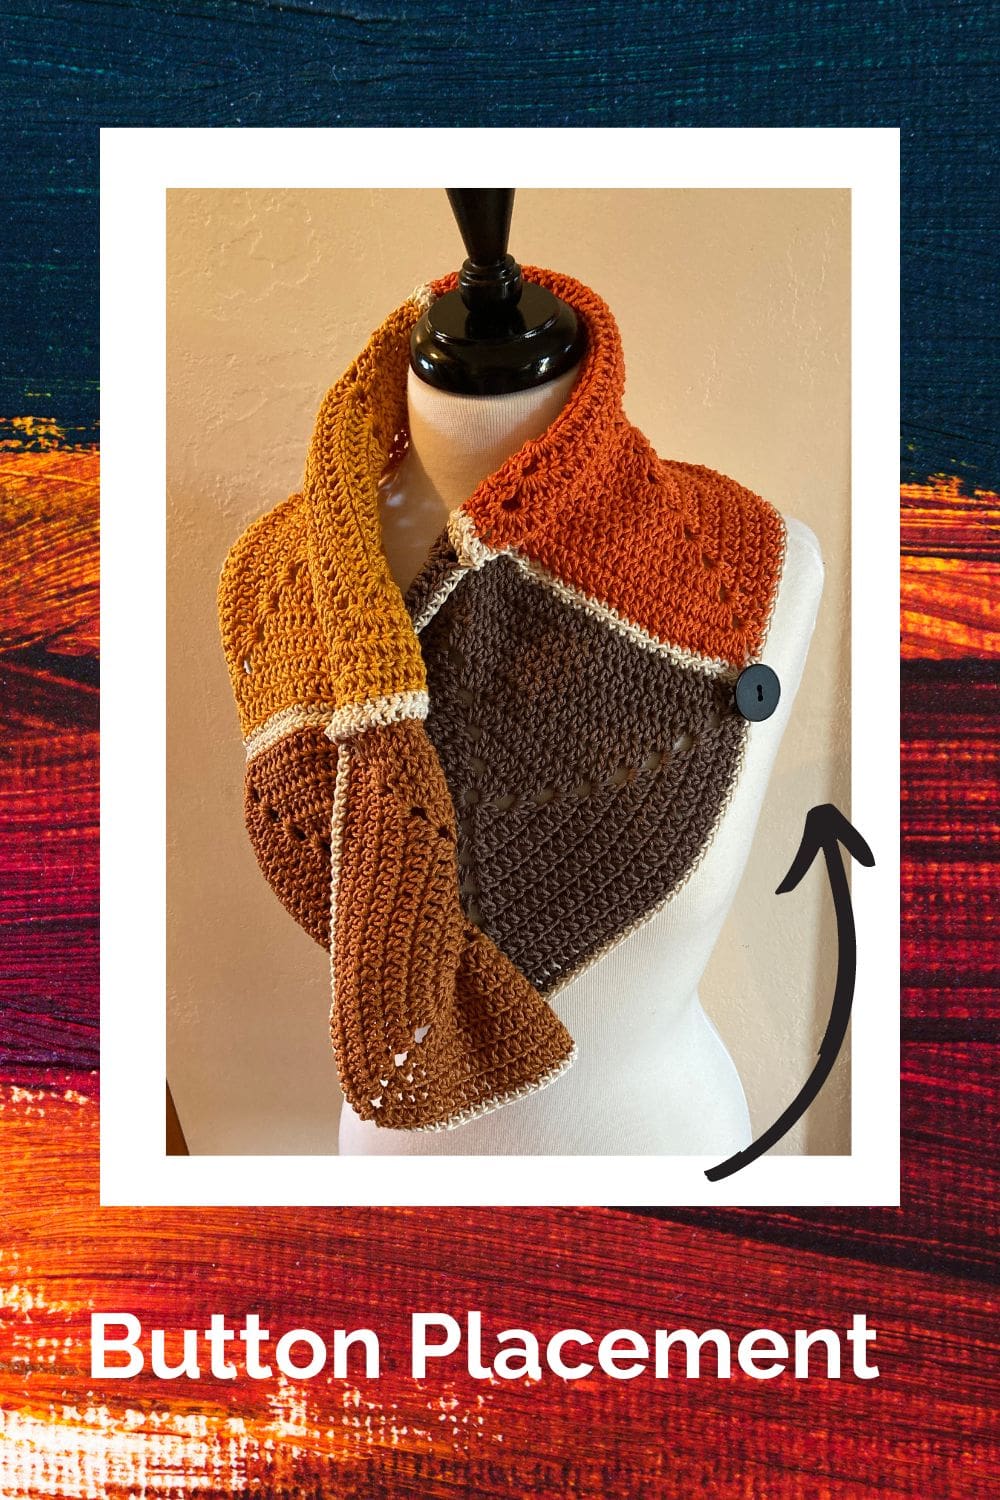
This Colorful Button Cowl has Easy Style
I like the ease of slipping it over my head and wearing it under my coat.

You can find Victoria crocheting, quilting, and creating recipes. She has cooked in restaurants for over 20 years, including many larger parties. She learned to crochet when she was just 11 years old and has been crocheting ever since; over 50 years now. Over 40 years ago, she loved her first class in sewing and continues to hone her skills in quilting. Many have enjoyed the handmade gifts over the years. In her professional career, she has worked in management in a wide variety of businesses including higher education as a dean of a division. All the while attending college part-time to achieve her doctorate in higher education with an emphasis in e-learning.
