Last updated on April 24th, 2026 at 05:23 pm
Crochet tension is often the hidden reason behind uneven edges, too many or too few stitches, or a project that simply doesn’t match the size it should. Your crochet project may start out beautifully, but suddenly the fabric looks wavy, puckered, or just plain off.
You followed the pattern exactly. You counted your stitches twice. But something still doesn’t look right.
In most cases, the culprit is tension—the invisible force that controls how tightly or loosely your stitches form around the hook.
Many crocheters assume tension is a natural talent, but that’s not true. Tension is a simple, learnable skill based on how you hold your yarn, position your hook, and control yarn flow.
The good news? With practice and small adjustments, you can develop consistent tension, create even stitches, and achieve that polished, professional look in your crochet projects.
What Is Crochet Tension?
Tension isn’t about how hard you grip your hook or how much you pull each stitch.
It’s the consistent amount of yarn that flows through your fingers as you form each stitch.
Think of tension like water pressure in a hose. You want steady, consistent flow, not random bursts and drips. Your fingers are the valve controlling that flow.
How tightly or loosely you hold and guide your yarn as you work each stitch directly affects:
- The size of your stitches
- The drape of your fabric
- The overall look of your finished project
In simple terms:
- Tight tension → small, dense stitches
- Loose tension → large, airy stitches
- Balanced tension → consistent stitches that match your pattern gauge
This is why two crocheters using the same yarn weight and hook size can end up with completely different results.
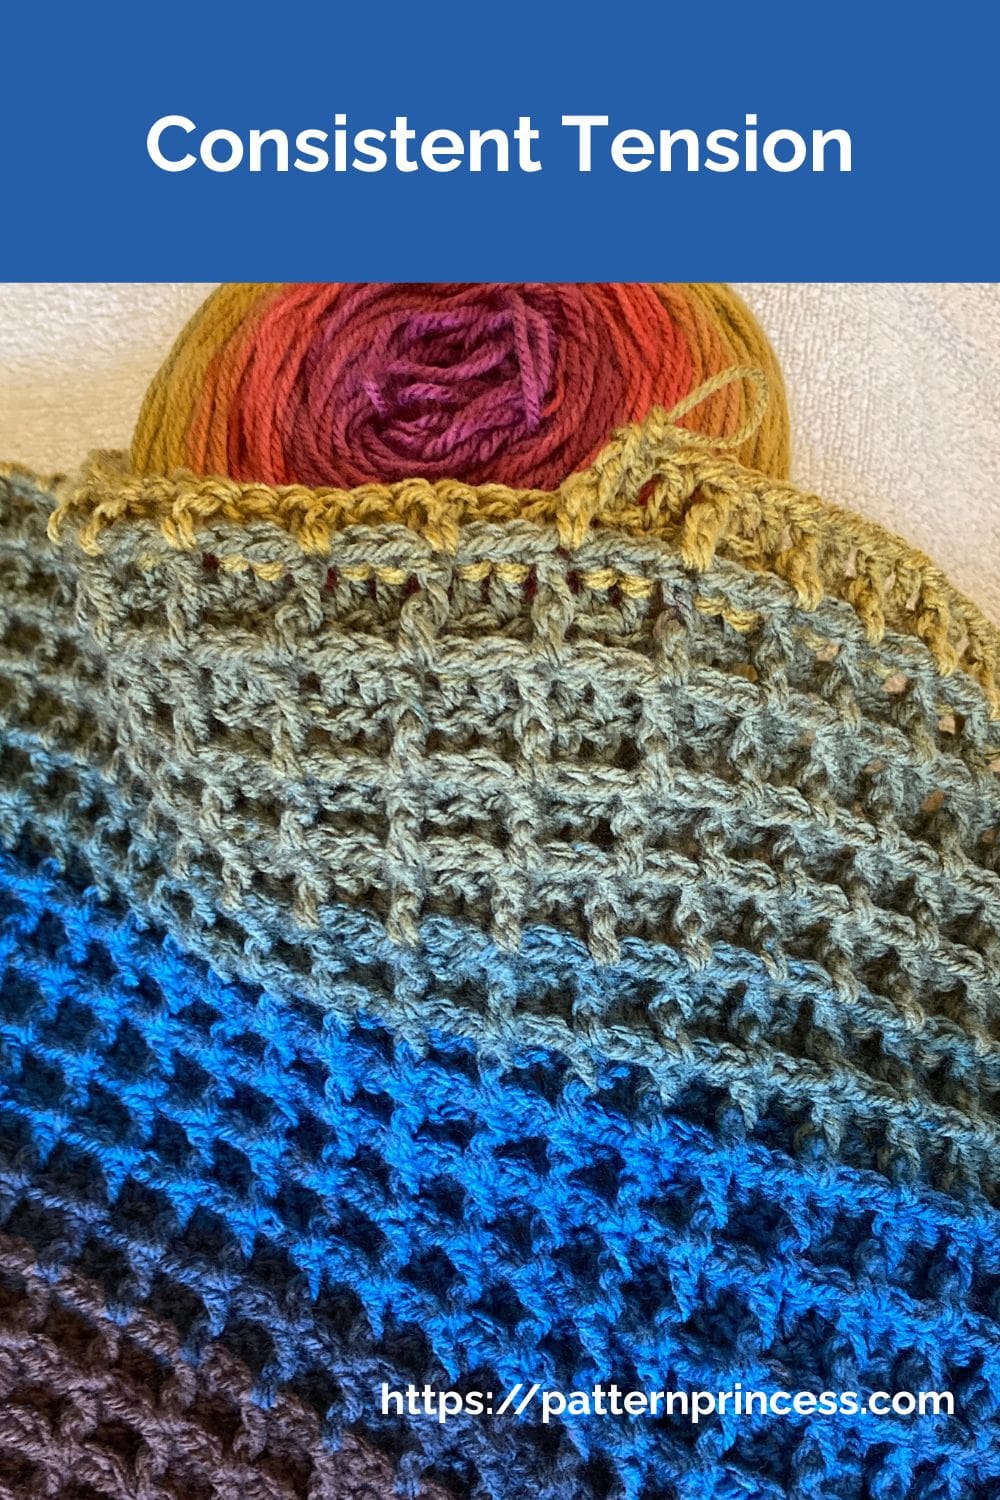
When you maintain the same yarn tension from stitch to stitch, your crochet fabric comes out even, flat, and professional-looking. When your tension bounces around, you get loose stitches next to tight ones, creating that lumpy, amateur look that drives you crazy.
Why Tension Matters in Crochet
Getting the right tension isn’t just about appearance—it determines whether your project turns out the correct size.
Proper tension ensures:
- Your gauge swatch matches the pattern
- Your finished project is the correct size
- Your stitch count stays accurate
- Your fabric looks even and professional
Even small tension changes can significantly alter the outcome of a crochet project.
Grab Your Free Crochet Tension Quick Reference Guide
Want a quick reference you can keep with your crochet supplies? Get the printable at the bottom of this blog post.
Table of contents
Tight Tension vs Loose Tension
Understanding your natural tension style is one of the fastest ways to improve your crochet results.
Once you can recognize the difference, it becomes much easier to adjust your hook size, yarn tension, and technique to get closer to that perfect tension.
Signs of tight tension:
- Hook is difficult to insert into stitches
- Yarn feels hard to pull through
- Fabric is stiff or dense
- Stitches are smaller than expected
- Starting chains are tight and hard to work into
Tight tension often comes from gripping the yarn too firmly or using a hook that is too small.
How to fix it:
- Use a larger crochet hook
- Relax your grip on the yarn and hook
- Let yarn flow more freely through your index finger
- Pause and loosen your hands every few rows
Signs of loose tension:
- Gaps or holes between stitches
- Fabric feels floppy or unstable
- Stitches are difficult to identify
- Inconsistent stitch size across rows
Loose tension often happens when yarn flows too freely or the hook is too large.
How to fix it:
- Switch to a smaller crochet hook
- Add slight resistance when wrapping yarn around fingers
- Slow down your stitching rhythm
- Keep yarn slightly more controlled over your index finger
Why Tension Is Hard for Beginners
Crochet tension is tied directly to muscle memory, which takes time to develop.
When you’re learning, your hands are figuring out:
- How to hold the hook (knife grip or pencil grip)
- How to control yarn with your fingers (index, middle, ring, and little finger)
- How much yarn each stitch needs
- How to maintain consistency across rows
That’s a lot happening at once—and uneven stitches are completely normal.
With time, your hands naturally begin to regulate yarn flow without conscious effort.
When I was learning, my tension went from super tight to way too loose depending on the day (and honestly, sometimes even within the same row!). It’s something I still see all the time, especially with beginners trying out new yarn types or different yarns.
Here’s the truth:
- Struggling with tension is not a sign you’re doing anything wrong.
- It’s a natural part of building your crochet skills.
With practice, your hands will find a rhythm, your yarn tension will even out, and those uneven stitches will turn into consistent tension without you even thinking about it.
Don’t Chase Perfect Tension Too Early
One of the most common beginner mistakes is trying to achieve perfect tension immediately.
In reality, uneven stitches are part of learning.
Early on, your goal should be:
- Comfort in your hands
- Awareness of yarn flow
- A steady stitching rhythm
Perfection comes later—consistency comes first.
How Tension Improves Naturally
The good news? Crochet tension improves on its own with repetition.
You don’t have to force perfect tension right from the start. In fact, trying too hard often leads to tight tension or stiff hands—making things harder instead of easier.
As you continue practicing your crochet skills, your hands begin to learn what to do without you overthinking it.
As You Practice, You’ll Notice:
- Your hands learn how much yarn to feed into each stitch
- Your yarn tension becomes more natural and controlled
- Your movements become smoother and more relaxed
- Your stitches become more even and consistent
- You’ll maintain consistent tension across your entire crochet project
This is all part of building muscle memory—and it happens little by little every time you pick up your hook.
Whether you’re working on foundation chains, a simple swatch, or a full crochet project, each row helps train your hands to create consistent stitches.
The Two Main Grip Styles and How They Affect Tension
Your hook grip is the foundation of tension control, and there are two dominant styles.
Knife Grip vs Pencil Grip
How you hold your crochet hook also plays a role in yarn tension.
Knife Grip
You hold the hook like you’re gripping a knife to cut vegetables, with your whole hand wrapped around the handle. This grip offers more power for working through thick yarns or tough stitches and typically creates looser tension because your hand has more range of motion. Loose crocheters often use knife grip without realizing it’s making their tension even looser.
- Offers more control for tighter stitches
- Common for beginners
Pencil Grip
You hold the hook like you’re writing with a pencil, with the hook resting between your thumb and pointer finger. This grip gives you precise control and works beautifully for detailed work and smaller hooks. Most people who use pencil grip naturally have tighter tension because the grip position limits how much their hand moves. If you’re a tight crocheter struggling with stiff fabric, pencil grip might be contributing to your tension issues.
- Allows more fluid motion
- Often preferred for speed
Which one is Better?
Neither is better—it depends on your crochet skills and what feels natural.
The best way forward is understanding which one you naturally use, then adjusting your yarn hand to compensate. If you’re a knife grip user with loose stitches, you’ll need to add more yarn resistance through your fingers. Pencil grip users with tight tension need to reduce finger resistance and let yarn flow more freely.
You can switch grips deliberately to change your tension, but most crocheters find it easier to keep their natural grip and adjust everything else around it.
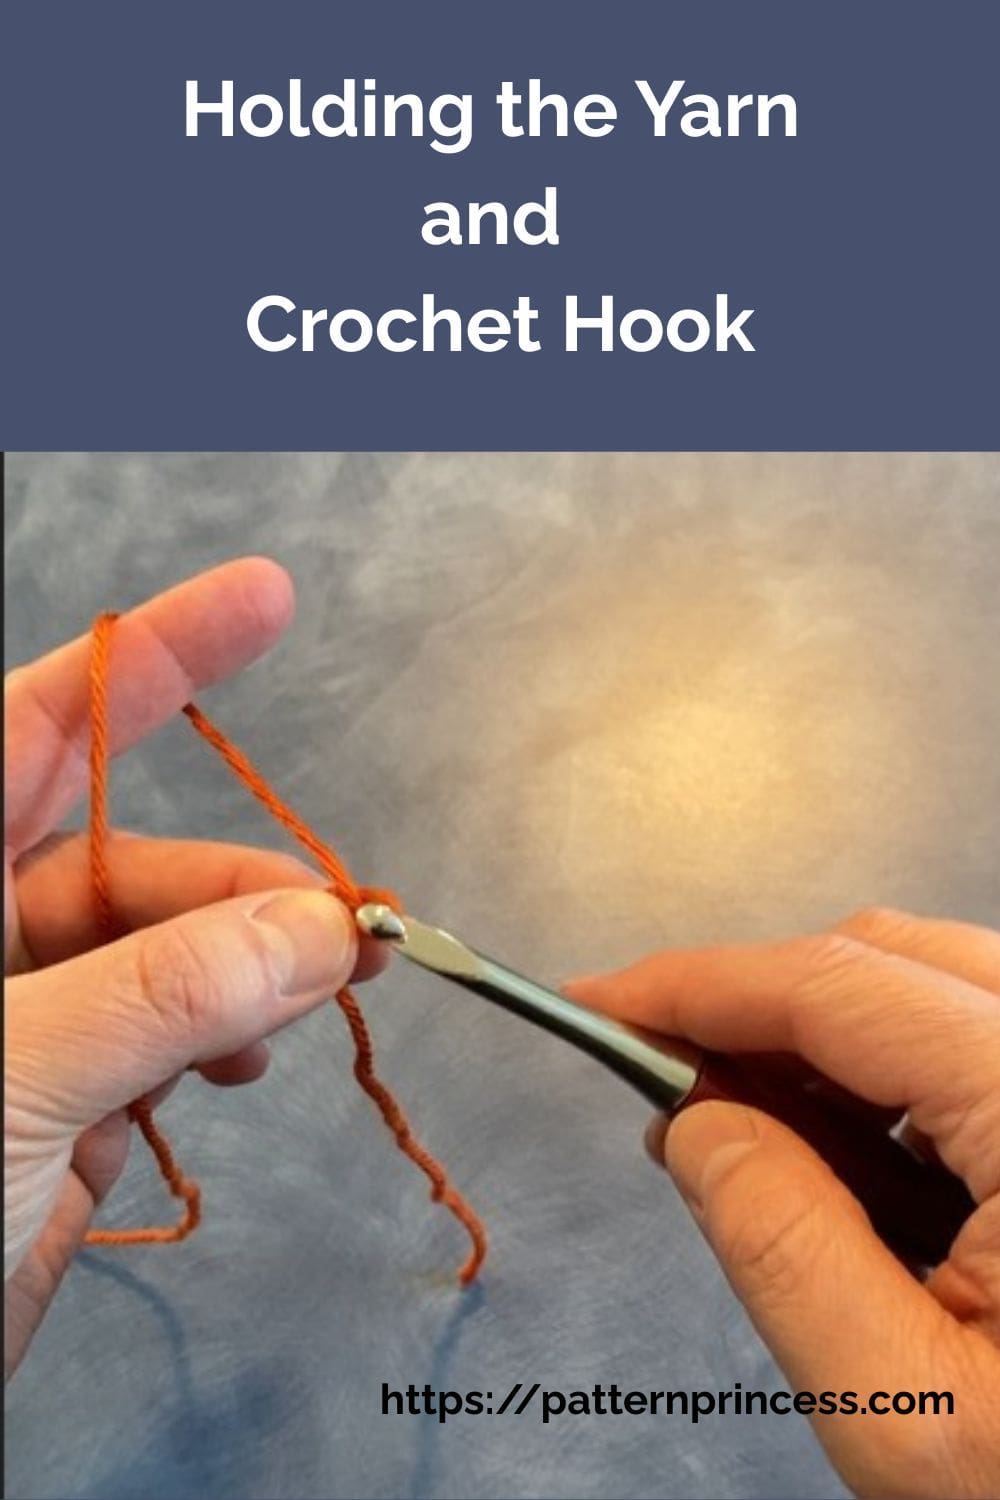
How to Hold Your Yarn (Finding What Works Best)
There isn’t just one best way to hold your yarn. The key is finding a method that gives you consistent tension.
Common Yarn Holds
Most crocheters guide the yarn using a combination of fingers:
- Index finger (pointer finger) – controls yarn flow
- Middle finger & ring finger – help guide tension
- Little finger – adds stability
Some wrap the yarn once or twice around their fingers, while others simply drape it over the index finger.
The goal isn’t perfection—it’s control and comfort.
How to Hold Yarn for Consistent Tension
Your yarn hand does all the real work of tension control.
The standard method wraps yarn around your pinky finger (or ring finger), across your palm, then over your pointer finger or middle finger. This creates natural resistance points that meter out consistent yarn amounts as you work. But the exact path matters, and small adjustments create big differences in tension.
- Start with yarn coming from your project or ball and bring it to your pinky finger on your non-hook hand
- Wrap yarn around your pinky once (for tighter tension) or let it rest against your pinky without wrapping (for looser tension)
- Bring yarn across your palm and thread it over your pointer finger or middle finger
- Use that top finger to lift and control yarn as you work each stitch
If you’re a loose crocheter, add more resistance by wrapping yarn around your pinky twice or threading it between more fingers before it reaches your pointer finger. Each additional contact point slows down yarn flow and tightens your stitches.
Tight crocheters should do the opposite. Skip the pinky wrap entirely and let yarn simply rest against the outside of your little finger. Some tight crocheters even hold yarn with just their pointer finger and thumb, eliminating most resistance points. The goal is finding the sweet spot where yarn flows smoothly but consistently.
Your yarn hand should feel relaxed, not cramped. If your pinky or ring finger starts hurting after ten minutes, you’re gripping too hard or creating too much resistance. Loosen up and let the yarn path do the work instead of muscle tension.
How Hook Size and Yarn Weight Change Everything
You can have perfect hand tension and still get wonky results if your hook doesn’t match your yarn.
Hook size and yarn choice work directly with tension.
- Larger hook → looser stitches
- Smaller hook → tighter stitches
- Thicker yarn → requires larger hook
- Thinner yarn → requires smaller hook
If your tension feels off, adjusting hook size is often the quickest fix.
Yarn Label Recommendations
Every yarn weight has a recommended hook size range printed on the label. Worsted weight yarn typically works with a 5mm to 5.5mm hook. Fingering weight needs a smaller 3mm to 4mm hook. These recommendations exist because the yarn thickness and hook size relationship directly controls how your stitches form.
Using a hook that’s too small for your yarn weight forces you to work harder, creates stiff fabric, and often makes you pull yarn tighter just to get stitches onto the hook. Even naturally loose crocheters end up with tight, dense fabric.
Using a hook that’s too large for your yarn creates loose stitches with visible gaps, even if you have naturally tight tension. Your fabric becomes droopy and unstable because there’s too much space inside each stitch.
For most crochet patterns, the listed hook size is just a starting point. Your personal tension determines your actual correct hook size. If your gauge swatch shows more stitches per inch than the pattern calls for, you’re working too tight and need a larger hook. Fewer stitches per inch means you need a smaller hook to tighten things up.
Ergonomic crochet hooks with cushioned grips can also affect your tension by changing how your hand sits and moves. Some crocheters find ergonomic hooks relax their grip and loosen their tension. Others find the larger handle gives them more control for tighter stitches. Try different hook styles to see what works with your natural tension.
How to Check Your Tension (Gauge Swatch)
A gauge swatch helps you match the pattern designer’s tension. Before starting a big crochet project, it’s a good idea to make a gauge swatch.
- Follow the pattern’s stitch instructions (like double crochet)
- Crochet a small square
- Count the number of stitches and rows
- Compare it to the pattern
If you have:
- Fewer stitches → your tension is too loose
- Too many stitches → your tension is too tight
Adjust your hook size until you match the pattern.
If you would like more detailed information on making a gauge swatch, you can find more with our Beginners Guide to Crochet Gauge.
Signs Your Tension Needs Adjustment
Here are a few common clues:
- Your starting chain is too tight to work into
- Your foundation chains are uneven
- Your edges are curling
- Your stitches vary in size
- Your project doesn’t match the pattern size
If you notice these, it’s time to adjust your yarn tension.
When Tension Really Matters
While tension tends to even out as your crochet skills grow, there are times when correct tension becomes especially important.
You’ll want to pay closer attention when:
- Making garments (like sweaters or tops)
- Creating fitted items like hats
- Following crochet patterns that rely on a gauge swatch
- Working with specific yarn weight and hook size combinations
In these cases, even a small difference in tension can affect the final size of your crochet project—sometimes resulting in too many or too few stitches.
Hook size, yarn type, and yarn tension all work together. Choosing the right crochet hook (whether a larger hook or smaller hook) can make a big difference in achieving the correct tension.
If your project size matters, taking time to check your gauge is always a good idea.
What If You’re Always Too Loose or Too Tight?
If you consistently crochet too loose or too tight—even after adjusting your hook size—you’re not doing anything wrong. You’ve simply developed a natural tension style over time.
This is especially common with experienced crocheters. As your movements become more relaxed and efficient, your tension often becomes looser.
If You’re a Loose Crocheter:
- You may always need to go down 1–2 hook sizes
- Your gauge may require choosing a smaller pattern size
- Your fabric may have more drape than the designer intended
If You’re a Tight Crocheter:
- You may need to size up hooks consistently
- Your fabric may feel dense or stiff
- Your projects may come out smaller
The key shift is this:
Instead of trying to change your natural tension, learn to work with it.
That means:
- Adjusting hook size as your default, not a temporary fix
- Using gauge swatches to choose the correct pattern size
- Accepting that your version of a pattern may require modifications
For garments especially, matching gauge is more important than following the suggested hook size.
Common Tension Mistakes That Ruin Your Projects
Even experienced crocheters fall into these tension traps without realizing it.
Changing tension mid-project. You start out focused and consistent, then get distracted by TV or conversation and your tension shifts. The first half of your blanket looks totally different from the second half. Fix this by checking in with your tension every few rows, especially after breaks.
Holding the hook too tightly. You squeeze the hook handle so hard your hand cramps, which locks up your whole arm and creates irregular stitches. Your hook should rest comfortably in your hand with just enough pressure to keep it from slipping. Think about holding a bird gently, not strangling it.
Pulling yarn too tight after each stitch. You yank the working yarn hard to “secure” each stitch, which actually makes the next stitch too tight to work into easily. Let stitches settle naturally without extra tugging.
Inconsistent foundation chains. Your starting chain is always tighter or looser than your actual project rows because you treat it differently. Use a larger hook for foundation chains if you’re a tight crocheter, or practice keeping the same tension from chain one.
Skipping gauge swatches. You skip making a test square because it feels like a waste of time, then your finished sweater fits like a tent or a corset. A 4-inch gauge swatch takes 15 minutes and saves you from frogging an entire project.
Awareness alone can prevent most tension issues.
Top Tips for Better Crochet Tension
1. Relax Your Hands
Tension often comes from gripping too tightly. Keep your hands relaxed and your movements smooth.
2. Practice Consistent Movements
Try to repeat the same motion for every stitch. This builds muscle memory and leads to consistent stitches.
3. Adjust Your Yarn Flow
If you’re a tight crocheter, loosen your grip or use less yarn wrapped around your fingers.
If you’re a loose crocheter, add an extra wrap or guide the yarn more firmly.
4. Use Ergonomic Crochet Hooks
Ergonomic hooks can reduce strain and help maintain even tension over long periods.
5. Choose the Right Yarn Type
Some yarns are more forgiving than others. Smooth acrylic yarn is often easier for beginners than textured or fuzzy yarn.
Tools That Can Help
- Crochet tension ring – helps regulate yarn flow
- Ergonomic hooks – improve comfort and consistency
- Stitch markers – help track stitch count
These tools aren’t required, but they can make maintaining consistent tension much easier.
Frogging Is Part of Learning
If something doesn’t look right, don’t be afraid to pull back your work and try again.
In crochet, we call this frogging—because you “rip it, rip it” (like a frog 🐸).
Crochet is wonderfully forgiving, and frogging is a completely normal part of the process.
I’ve had to frog many projects over the years—and honestly, I still do. Sometimes a stitch count is off, the tension isn’t quite right, or a yarn choice just isn’t working.
And that’s okay.
Every time you redo a section, you’re improving your technique, building muscle memory, and getting closer to that consistent tension we’re all aiming for.
Finding Your Rhythm
Give yourself permission to learn at your own pace. Remember, there’s no single “perfect” way to crochet.
Crochet tension isn’t a talent you’re born with or without. It’s a mechanical skill you can analyze, adjust, and control once you understand the specific factors creating your current results. Your grip style, yarn hold, hook size, and awareness all combine to create either consistent professional stitches or frustrating wonky fabric. The difference is knowing which variables to adjust and actually testing those adjustments with gauge swatches before committing to full projects.
Small changes in finger position or hook size create dramatic improvements in stitch consistency. Pay attention to what your hands are doing, measure your actual results instead of guessing, and don’t be afraid to go up or down a hook size when your tension doesn’t match pattern requirements.
Tension, like all crochet skills, takes time. But with each project, each row, and even each frogged stitch—you’re making progress.
And that’s what truly matters.
Looking for a bit more advanced information on Tension and Gauge? Check out our next level article.
Why You Can’t Meet Gauge (Even When You’re Doing Everything Right) – Pattern Princess
Crochet Tension Cheat Sheet (Printable Guide)
If crochet tension still feels a little tricky, this quick reference guide will help you:
- Quickly identify whether your tension is too tight or too loose
- Understand what’s causing uneven or inconsistent stitches
- Make simple adjustments before starting or continuing a crochet project
- Match your tension more easily to crochet patterns and gauge requirements
- Build confidence while improving your crochet skills over time
This printable is designed to sit beside you while you crochet—so you can check it anytime your stitches start feeling “off.”
👉 Click below to download your Crochet Tension Cheat Sheet and keep it handy for your next project. If you are not already signed up for our newsletter, you’ll need to do that for access.

You can find Victoria crocheting, quilting, and creating recipes. She has cooked in restaurants for over 20 years, including many larger parties. She learned to crochet when she was just 11 years old and has been crocheting ever since; over 50 years now. Over 40 years ago, she loved her first class in sewing and continues to hone her skills in quilting. Many have enjoyed the handmade gifts over the years. In her professional career, she has worked in management in a wide variety of businesses including higher education as a dean of a division. All the while attending college part-time to achieve her doctorate in higher education with an emphasis in e-learning.
This maybe a great article for newbies but as a longtime crocheter who just started garment construction in the last 3 years I really didn’t find it helpful. I started out years ago with very tight tension and now very loose. Crocheting is very relaxing and consistent for me but for garments I am having to go down atleast 1 to 2 hook sizes AND a garment size to meet gauge. I was hoping for better suggestions. Thanks for trying.
Thank you so much for sharing this—this is actually such a helpful perspective, especially for those of us who have been crocheting for a while.
What you’re describing is something I see often with experienced crocheters. As crocheting becomes more relaxed and natural, tension tends to loosen over time. That’s great for enjoyment, but it can definitely make garment gauge more challenging.
Needing to go down 1–2 hook sizes (and sometimes even adjusting garment size) is completely normal for a loose crocheter. At that point, it’s less about “fixing” tension and more about understanding your natural tension and working with it.
You’ve actually inspired me to add a section about this, because you’re right—it’s a different challenge than beginner tension, especially with garments.
I really appreciate you taking the time to comment!
Vicky