Last updated on January 19th, 2026 at 10:29 pm
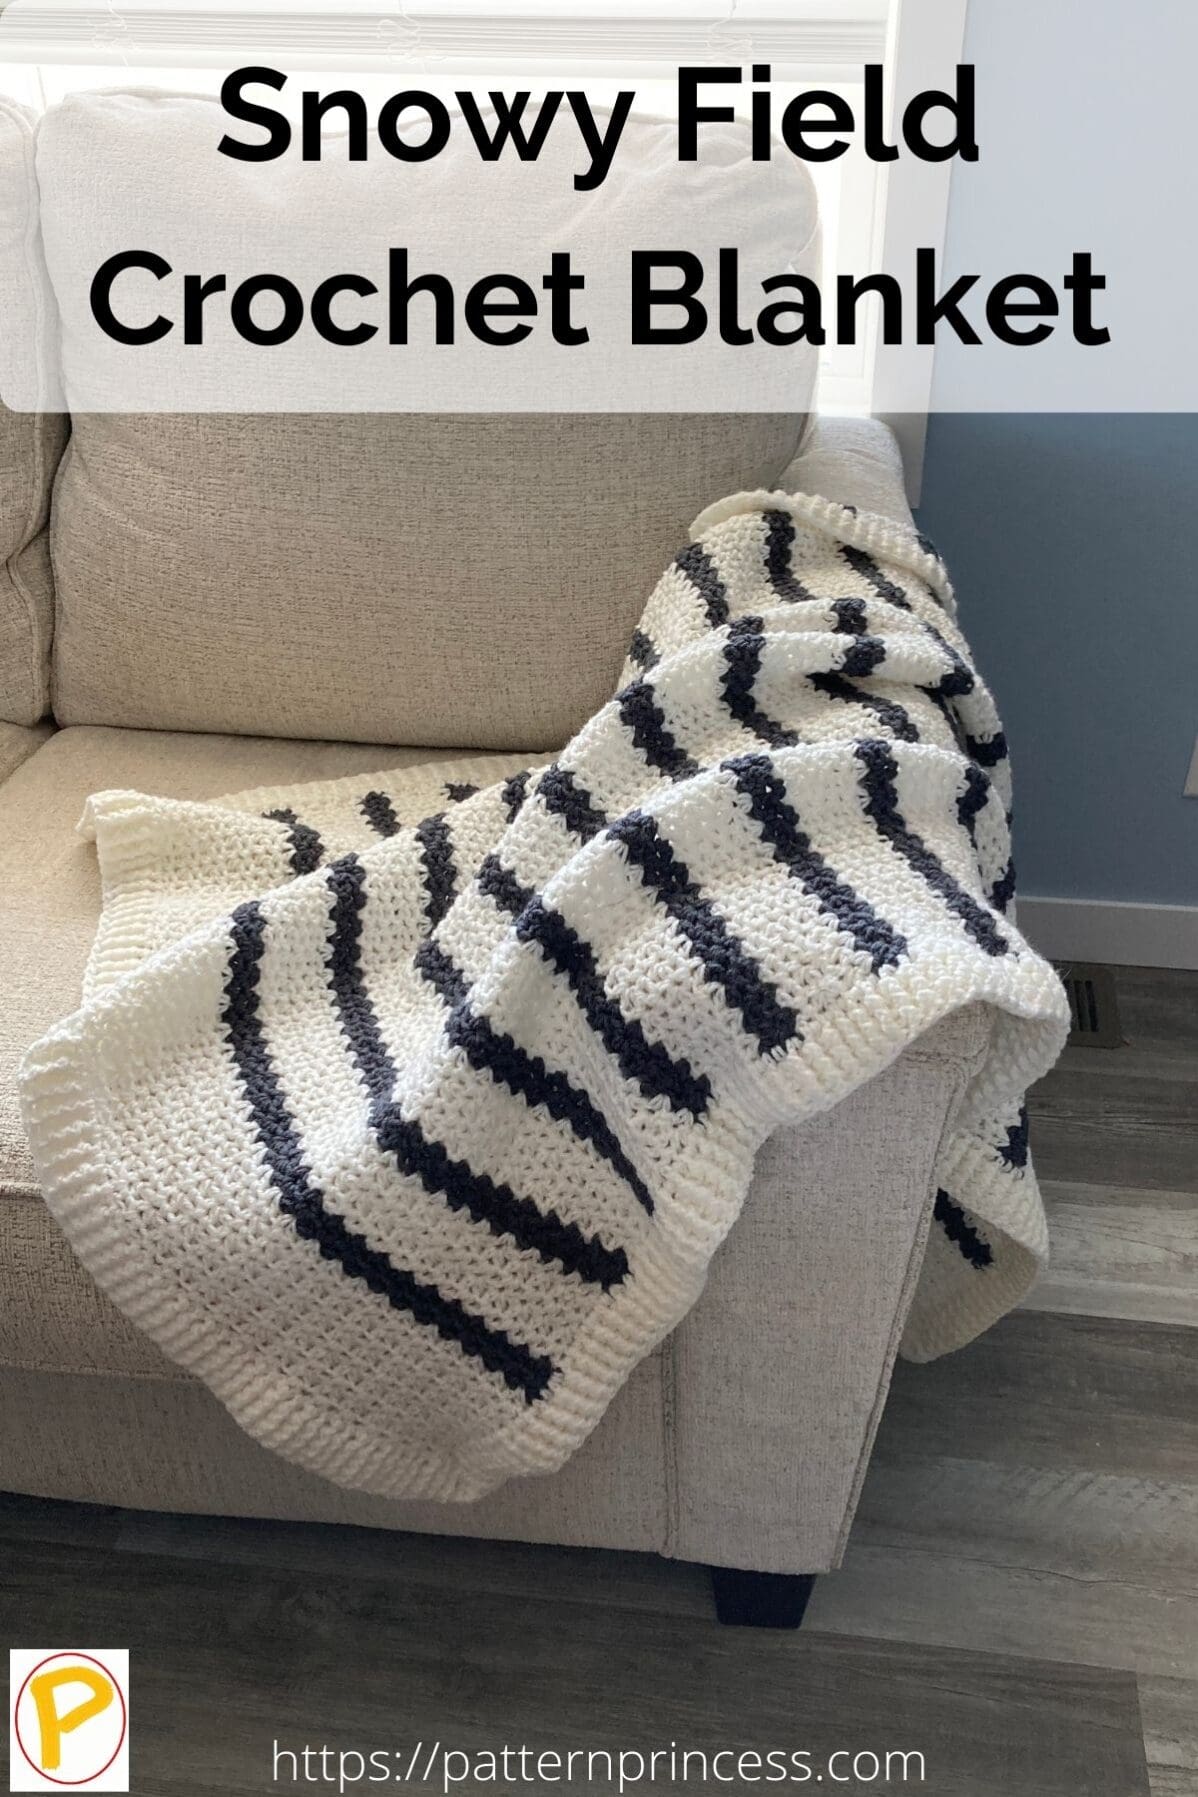
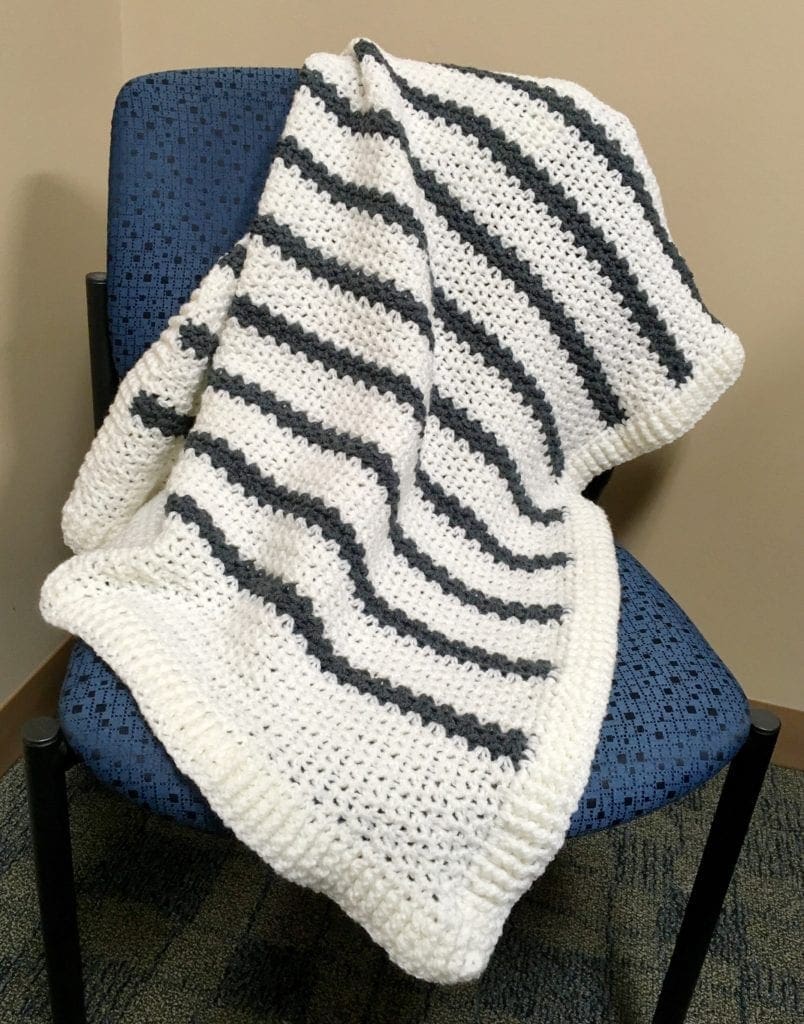
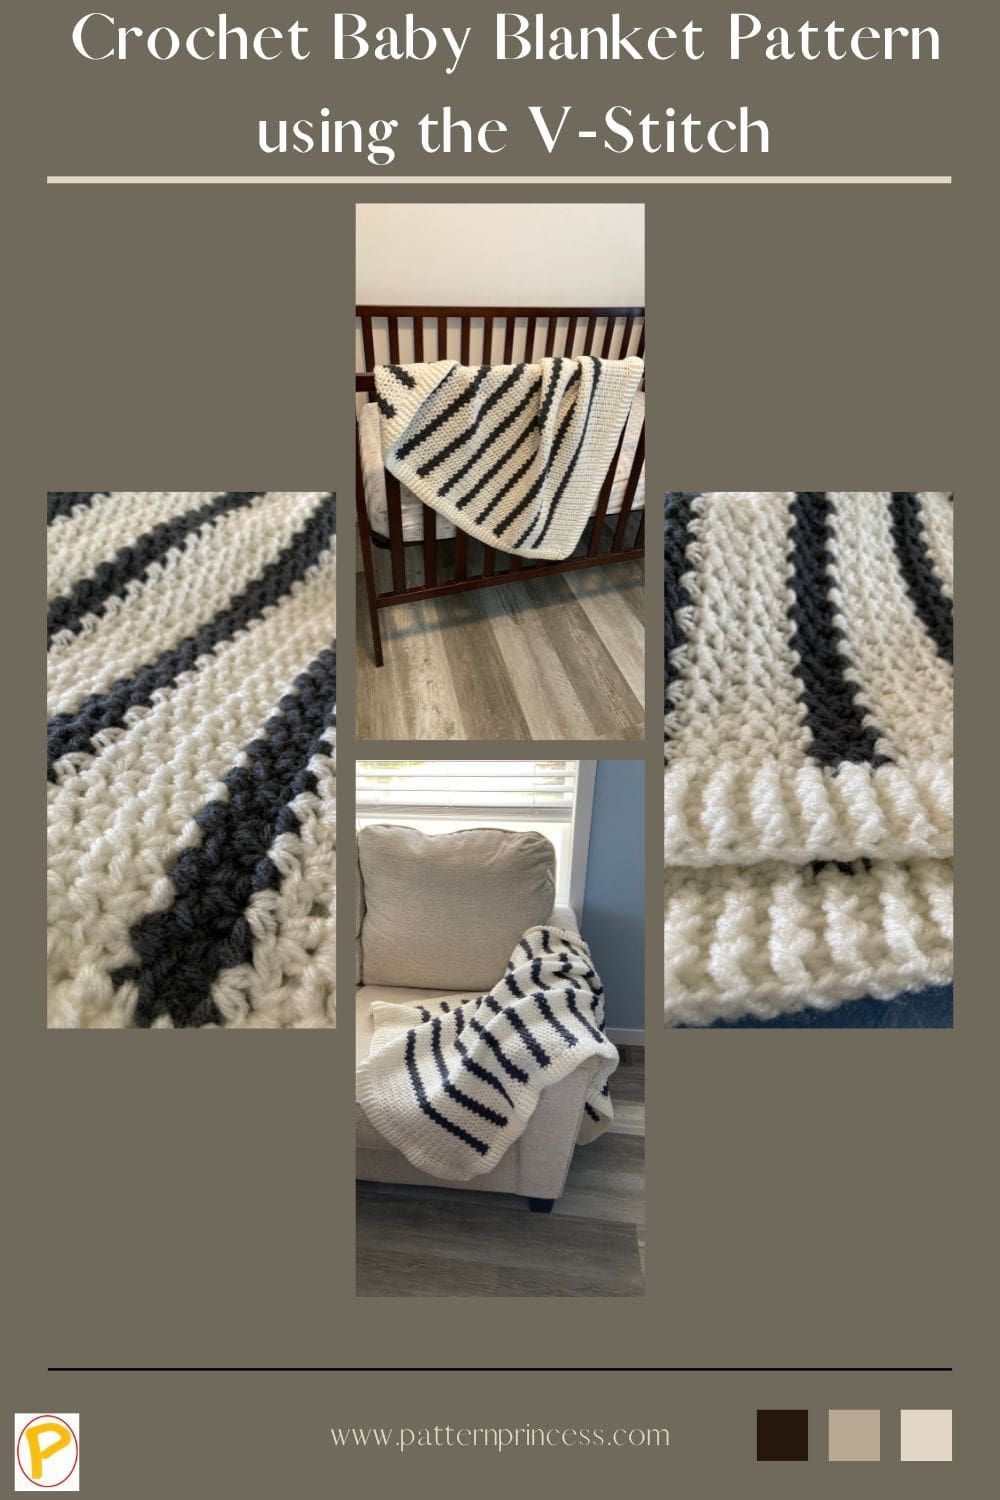
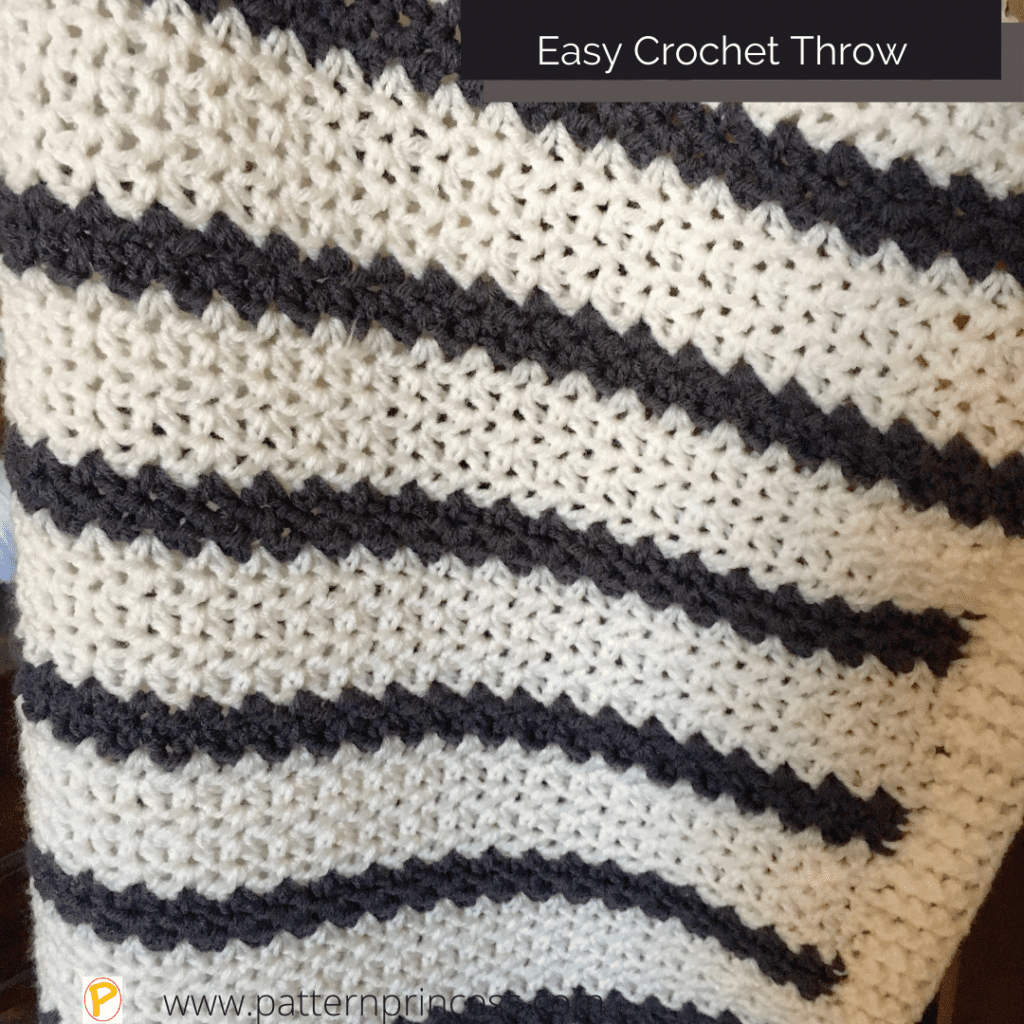
This snowy field crochet blanket is one of those easy crochet patterns that are a joy to make once you get started. With the half double crochet v-stitch pattern that is finished off with a front and back post double crochet. I just love how this blanket turned out.
Who doesn’t love a good crochet project?
Crazy, right! I know we do. That’s why we’re so excited to share this latest tutorial with you: the Snowy Field Crochet Blanket.
This easy pattern is perfect for confident beginners and experienced crocheters alike and makes a great gift or heirloom to pass down from generation to generation.
The wintery season is quickly approaching and what better way to prepare than by crocheting a beautiful blanket to keep you warm this winter.
You can you use this to cover your lap while you are reading your favorite book. It also makes a lovely squishy baby blanket. The nice part is that it works up rather quickly due to the v-stitch.
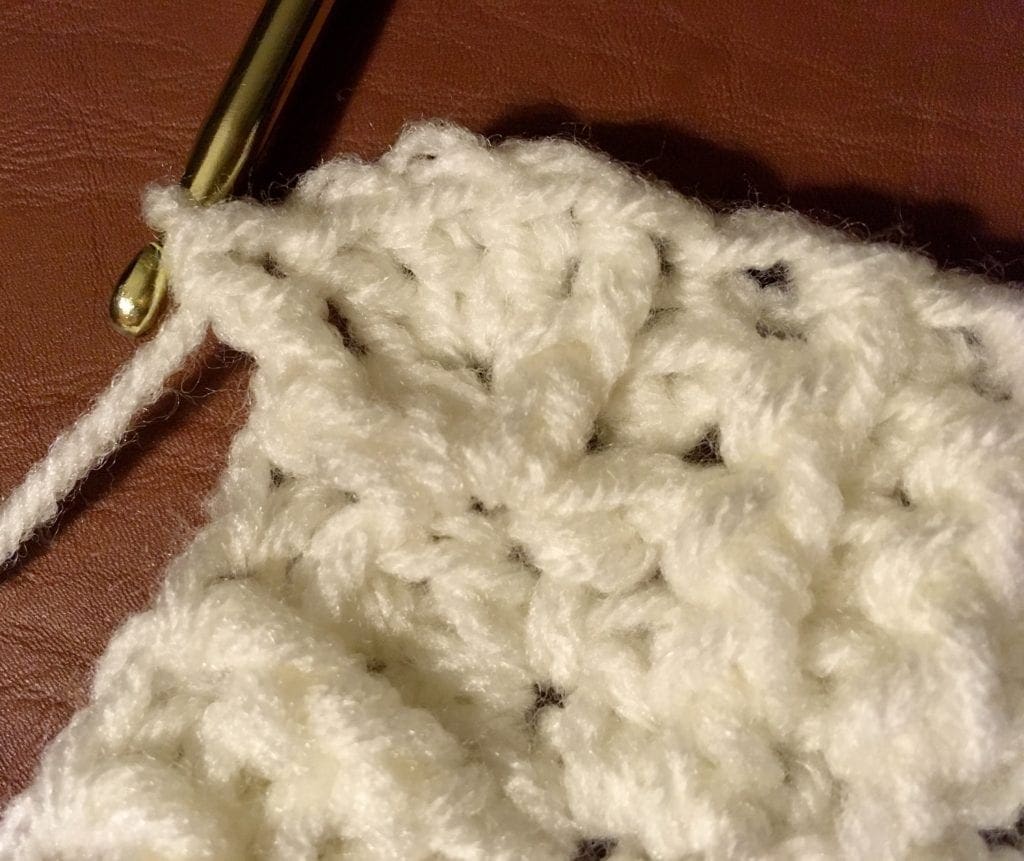
This crochet throw is the perfect project for any crocheter because it works up quickly. The instructions include a few photos of the steps to help you complete this lovely pattern. Additionally, there are video tutorials for the double crochet v-stitch and the front and back post double crochet stitches used for the border.
*Post contains affiliate links* for more information please read the disclaimer on the About Us page.
Change up the colors and make your own personalized version of the crochet blanket.
Deciding the Colors and Pattern
My family has been hanging close to me the last few weeks when I have been home on the weekend, so it is very hard to type up my patterns let alone make any crochet tutorial video.
That meant that I needed to find an easy project to work on. I’ll bet that like many crocheters, I have a pretty good yarn stash that I have to work very hard to keep under control.
I stood in the “yarn room” and grabbed the soft white skein of yarn off the top of a box. Then quickly found the charcoal grey yarn on the top of another box. I as off to the races.
Video Tutorials
There are video tutorials near the bottom of this crochet pattern for both the v-stitch and the front post and back post double crochet.
Modern Looking Crochet Blanket
Years ago, I would have just made wide stripes all the same size; however, the more modern look is to have varying sizes of stripes. This crochet pattern does have repeating rows for an easy pattern, but I still think that this blanket has a very modern look to it.
With or Without a Crochet Border
I was talking with a crochet buddy the other day. We both recalled when we used to make afghans of all sizes without borders. They were very nice looking blankets. However, then we started adding borders to our work – even if it is just one row of something. We now have both come to realize that we like our afghans much better when we add a border on it.
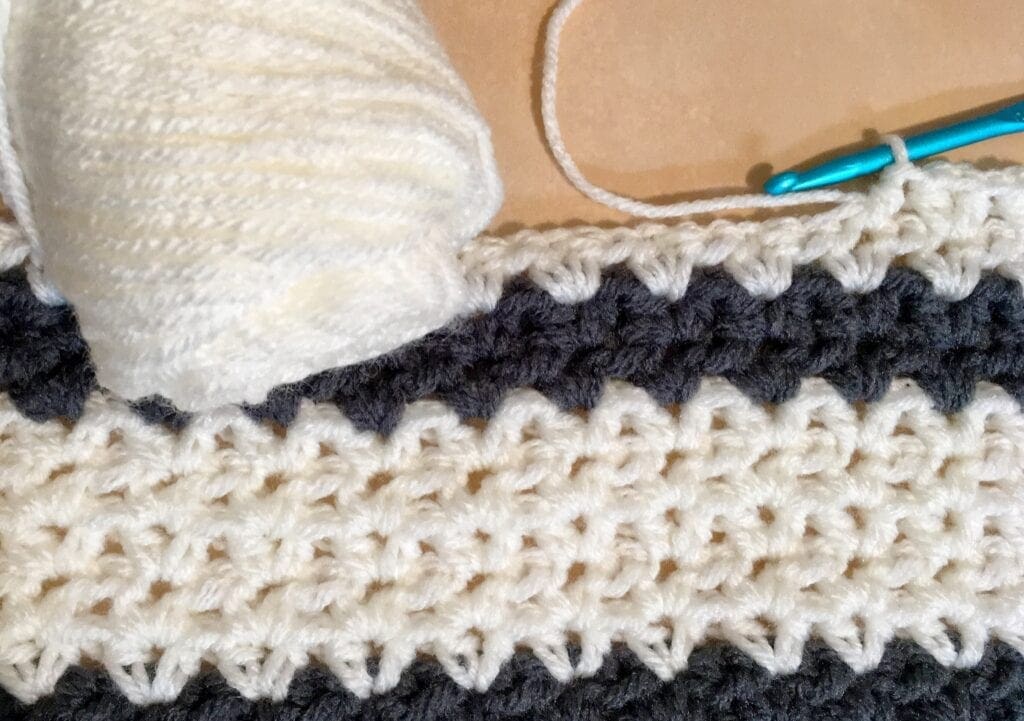
Front Post and Back Post Double Crochet Border
More recently, I had made a crochet hat that used the front post and back post stitch. You can find that pattern here. However, that gave me a great idea on what type of border to add to this already modern looking afghan. The feel of the edge is just luxurious and it really helped pull the entire design together.
Snowy Field Crochet Blanket Pattern
Skill Level
Confident Beginner. You should be familiar with the chain stitch, single crochet, and double crochet.
Gauge
14 stitches for every 4 inches.
Finished Size
33 inches wide by 44 inches long
Materials
- 1 Skein Charcoal yarn. I used Red Heart 364 yards.
- 3 Skeins Soft White. I used Red heart 1092 yards.
- Size H Crochet Hook
- Yarn Needle
- Scissors
Abbreviations
- BPDC = Back Post Double Crochet
- CH = Chain
- DC = Double Crochet
- FPDC = Front Post Double Crochet
- HDC = Half Double Crochet
- SK = Skip a Stitch
- SL ST = Slip Stitch
- SP = Space
- ST = Stitch
- [ ] = Repeat Between
Pattern Notes
Turn at the end of each row.
This pattern is a repeat of row two. The crochet border is harder than the blanket pattern itself. As the border uses the front post double crochet and the back post double crochet alternatively.
There are video tutorials on how to work the stitches below the written pattern.
This pattern is written in U. S. Terms.
Directions
Begin
Starting with the Soft White yarn, Chain 128
Row 1:
In the 4th CH from the hook, complete a HDC. SK 2 ST in the next ST [HDC, CH 1, HDC, SK 2 ST] repeat between the [ ] to the end. Ending with a HDC in the last ST.
Row 2:
CH 2, [HDC, CH 1, HDC in the previous row CH 1 SP]. Repeat the Stitches between the [ ] in each previous row CH 1 SP to the end. Ending with a HDC in the last ST.
Repeat row 2: For the desired length. Here is the color pattern that I used.
10 Soft White
2 Charcoal
5 Soft white
(repeating the 2 Charcoal and 5 Soft White until it was long enough – ending with the 10 rows of Soft White)
Here is the color changes that I did row-by-row
Rows 1-10 Soft White
Rows 11-12 Charcoal
Rows 13-17 Soft White
Rows 18-19 Charcoal
Rows 20-24 Soft White
Rows 25-26 Charcoal
Rows 27-31 Soft White
Rows 32-33 Charcoal
Rows 34-38 Soft White
Rows 39-40 Charcoal
Rows 41-45 Soft White
Rows 46-47 Charcoal
Rows 48-52 Soft White
Rows 53-54 Charcoal
Rows 55-59 Soft White
Rows 60-61 Charcoal
Rows 62-66 Soft White
Rows 67-68 Charcoal
Rows 69-73 Soft White
Rows 74-75 Charcoal
Rows 76-80 Soft White
Rows 81-82 Charcoal
Rows 83-87 Soft White
Rows 88-89 Charcoal
Rows 90-94 Soft White
Rows 96-97 Charcoal
Rows 98-108 Soft White
Adding the Border
Weave in ends prior to starting the border. Trim off any excess yarn. Once this is done, you are ready to add the border. It also makes it so much nicer later when you complete the border…there are only a few pieces of yarn that need to be weaved in later and snip off.

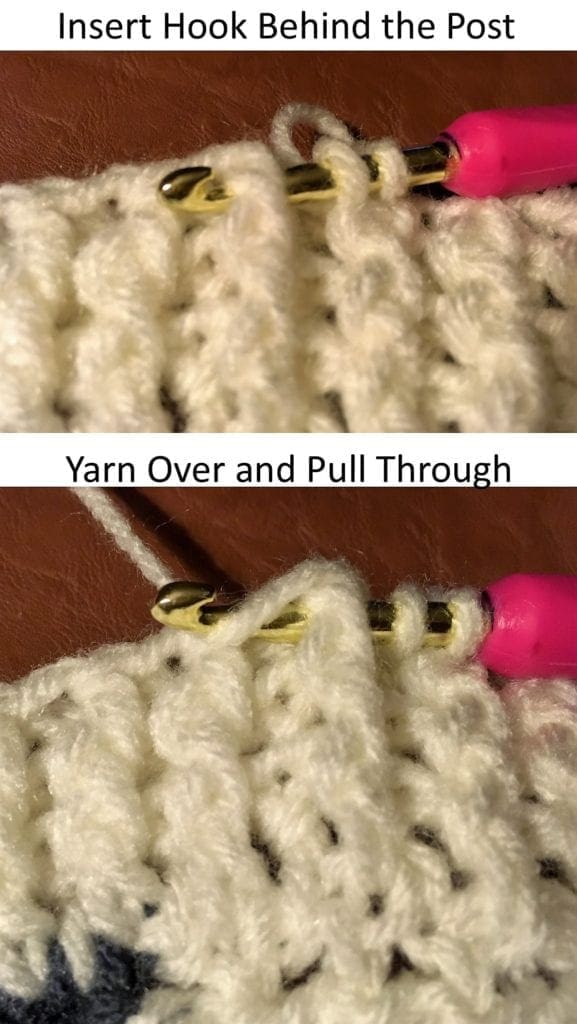
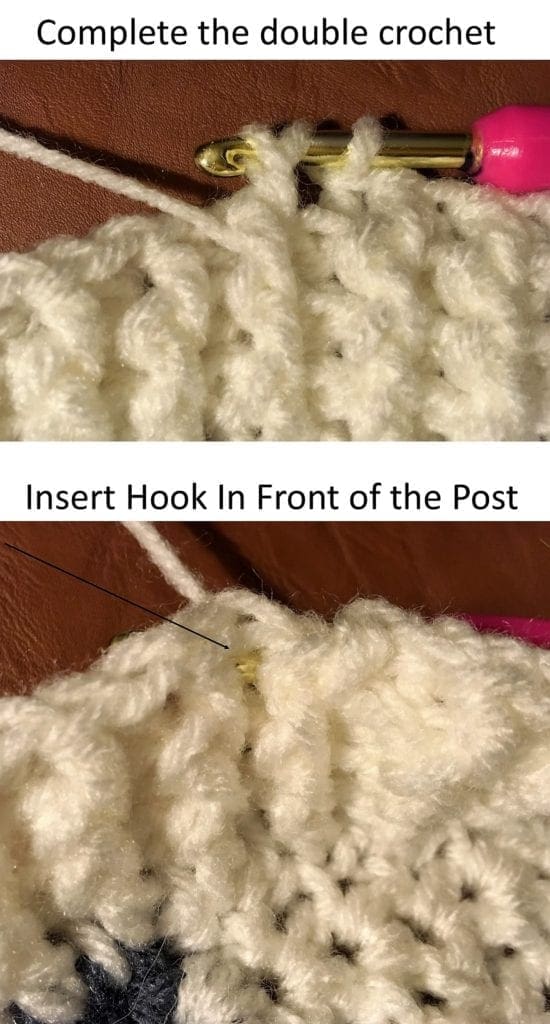
Front Post and Back Post Border
FPDC: means that you insert your hook in the front of the post from the previous row DC.
BPDC: means that you insert your hook behind the post from the previous row DC.
This stitch combination creates a nice ribbed stitch look. This border is worked around the blanket 4 times. I will explain the pattern here and there is also a video tutorial on the front and back post double crochet. For those folks that would rather complete this with a photo tutorial, I have that below too.
Ribbed Border Direction:
Round 1:
Starting in one of the corners and chain 3. DC around the entire blanket, working 3 DC into each corner ending with a SL ST into the top CH of the first chain 3.
Rounds 2-4:
Start with a CH 3. Then go around the blanket again; however, this time, you will work the DC alternating between the front and back post. See more detail below for the corners…
Corners:
When you get to the corners, continue to work 3 DC into the middle DC ST from the previous row. However, on the other two stitches from the previous row DCs in the corner – blend those into the FPDC and BPDC. See the photos of the corners to help show the detail.
Ribbed Stitch Photo Tutorial

Crochet Tutorial Video Links
Here is the link for the front post and back post video tutorial. FRONT POST AND BACK POST DOUBLE CROCHET
Here is the link for the half double crochet v stitch. HALF DOUBLE CROCHET V STITCH
If you loved this post, please share. It helps to show me that these types of posts are helpful – thank you!
I hope that you liked this pattern. If you are looking for more ideas for crocheted blankets, here are a few other blankets you may enjoy.

You can find Victoria crocheting, quilting, and creating recipes. She has cooked in restaurants for over 20 years, including many larger parties. She learned to crochet when she was just 11 years old and has been crocheting ever since; over 50 years now. Over 40 years ago, she loved her first class in sewing and continues to hone her skills in quilting. Many have enjoyed the handmade gifts over the years. In her professional career, she has worked in management in a wide variety of businesses including higher education as a dean of a division. All the while attending college part-time to achieve her doctorate in higher education with an emphasis in e-learning.