Last updated on July 4th, 2024 at 11:49 pm
Learning how to crochet the classic granny square is one of the first patterns that a beginner at crochet often learns how to make. The granny square is a design that can be used to create all kinds of fun projects and it is perfect for beginner crocheters.
Crocheting granny squares is a great way to add some flare to any project. The possibilities are endless when it comes to colors and combinations. In this tutorial, you will learn the basics of crocheting granny squares using basic stitches; the double crochet stitch and chain stitches.
Crocheting granny squares is a great way to start learning how to crochet. They are simple to make and can be used to create all sorts of projects, from blankets and afghans to scarves and hats.
This classic crochet stitch is simple and timeless, making it perfect for any project. In this tutorial, we’ll show you how to crochet a granny square, step by step.
With just a little bit of practice, you’ll be able to create beautiful projects in no time!
In fact, my daughter recently started crocheting and this is her first granny square blanket.
Post contains affiliate links and we earn commissions if you shop through the links on this page. For more information please read the disclaimer on the About Us page.
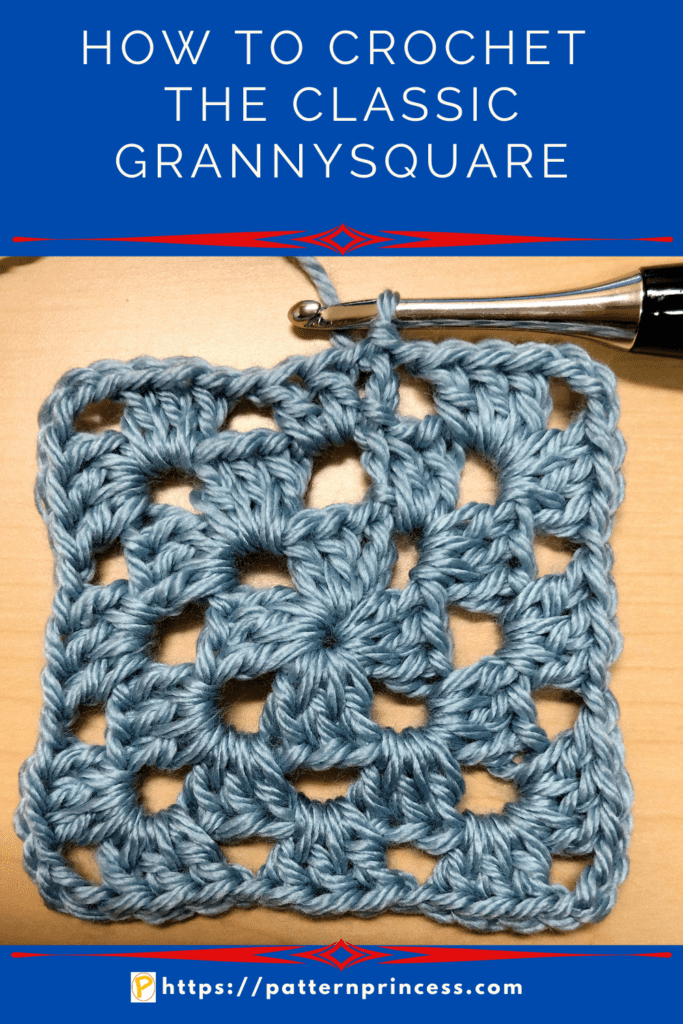
Easy-to-Learn Crochet Pattern
The basic granny square is a classic that is simply perfect for a beginner for many reasons. One is that it helps a new crocheter read a crochet pattern while making something that is quick to make. Another reason is that the pattern is repetitive.
Once you get beyond round three, the granny square pattern is a repeat of rounds two and three.
Granny Square Options
While the granny square crochet pattern can be worked using one solid color, it can be worked using a wide variety of colors in different rounds and specific stitches. This can be a wonderful way to use up yarn scraps.
These pretty squares can be small and joined together or you can keep adding rounds for an entire quilt.
Change the yarn type and hook size and you can make something that is chunky, as well as, something that is light and delicate like a shawl or tablecloth.
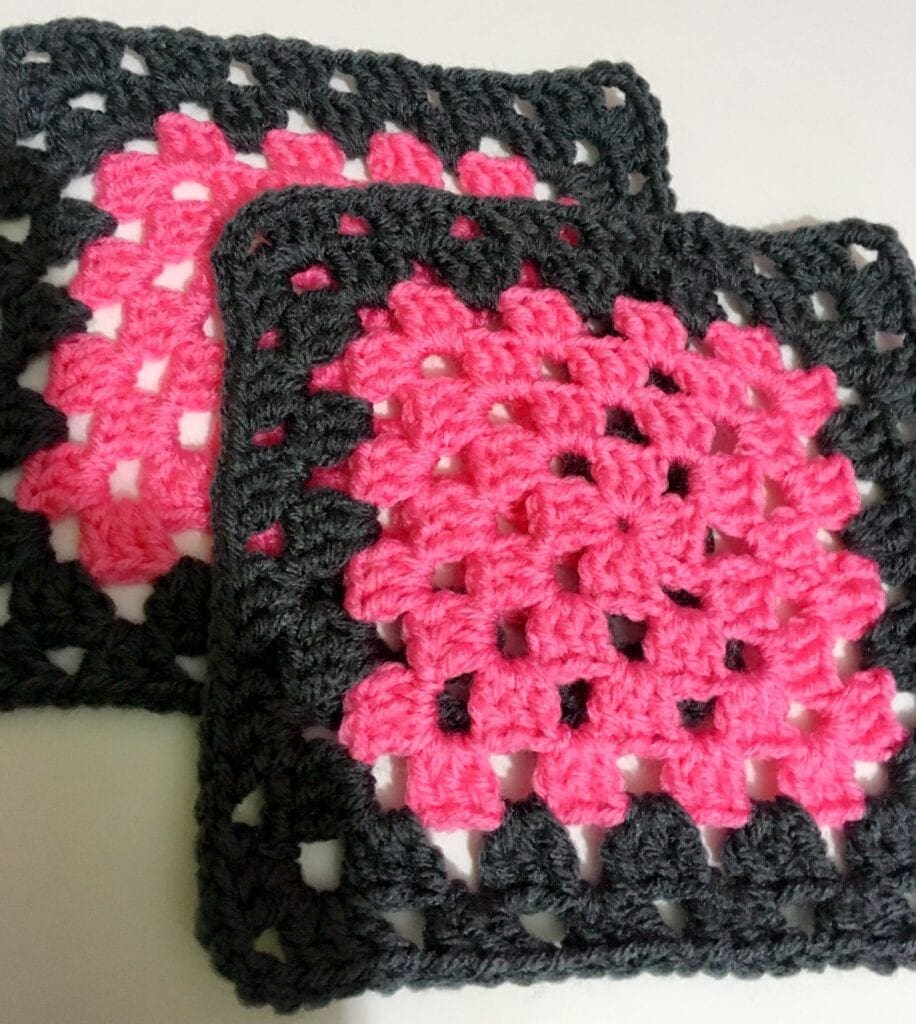
Basic Granny Square
Today, we will learn how to crochet the basic granny square. However, there are many, many variations of the granny square. Once you learn the basic concepts and stitches, it is fun to try new patterns too.
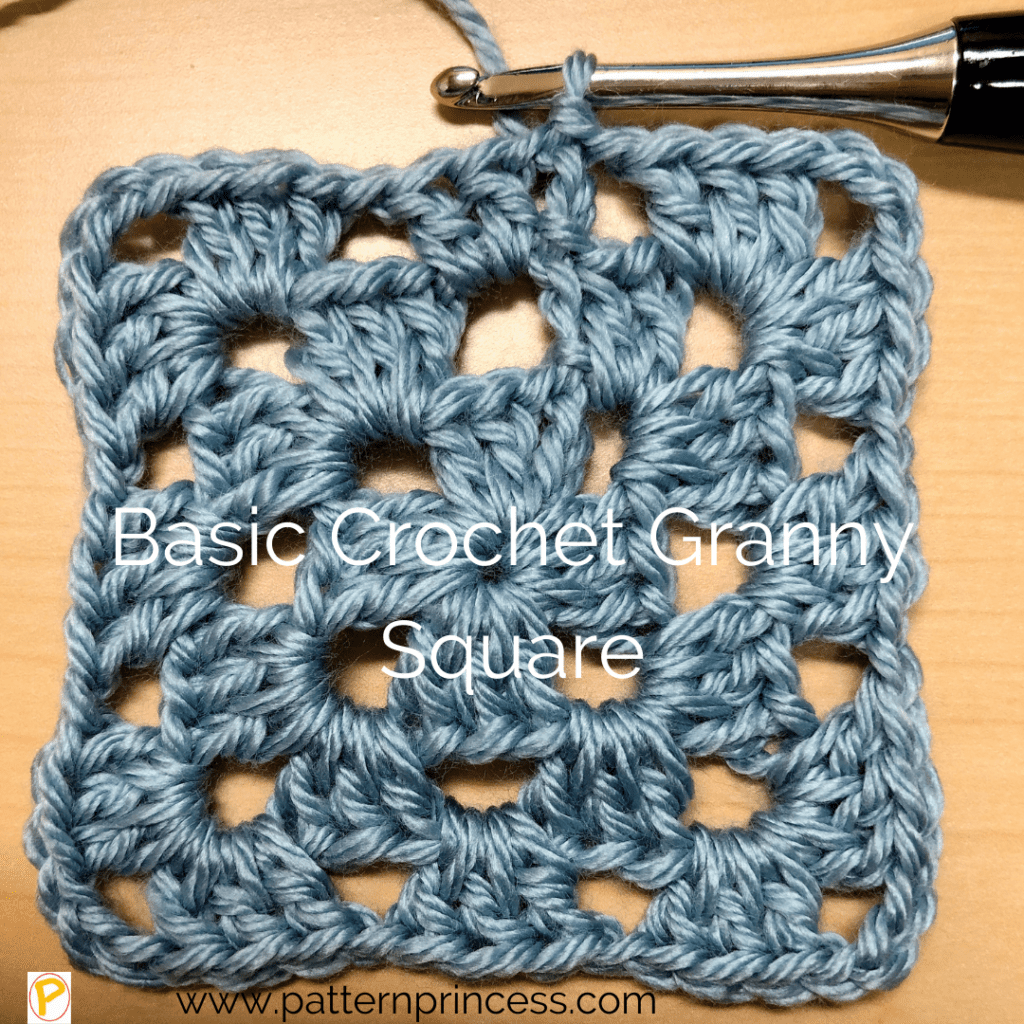
A classic granny square is worked in the round using double crochet and chain stitches.
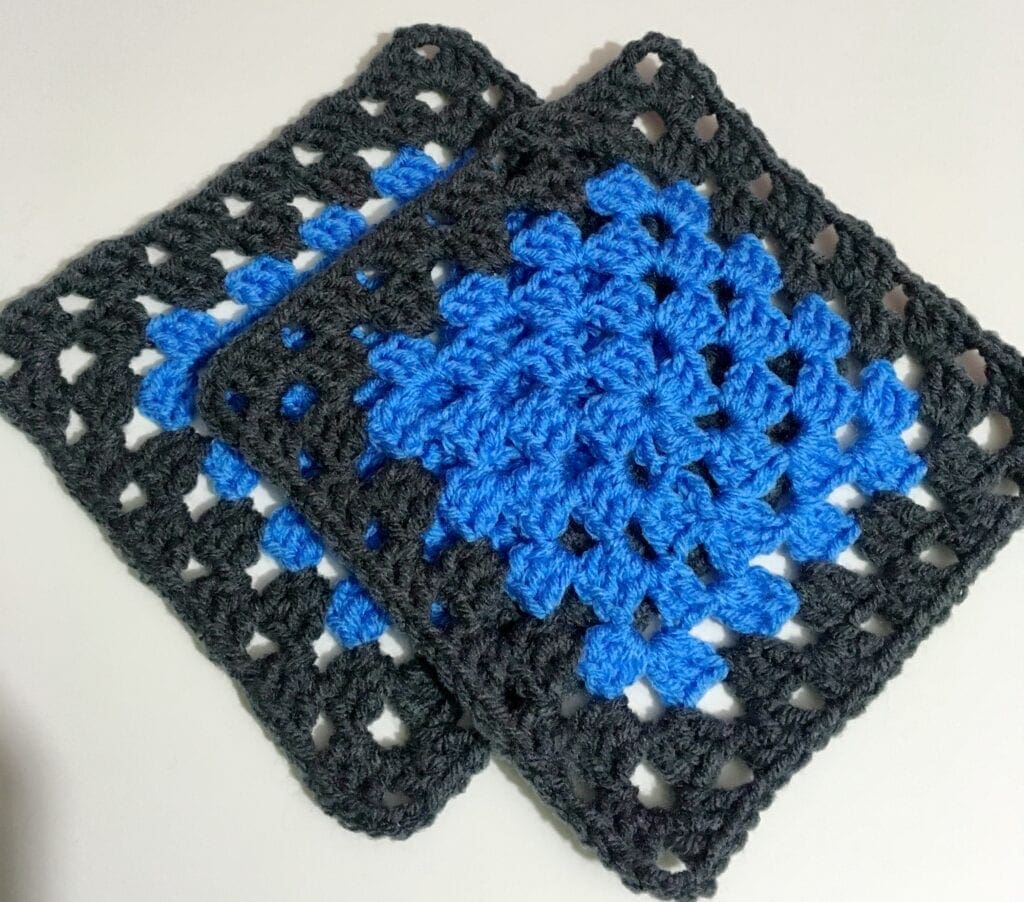
Corner Pattern Variations
This pattern uses a chain 3 in the corner spaces. However, some use just 2 chains. Make sure to read the pattern you are using to determine the number of chains to place in each corner space.
Granny Square Variations
There a lots of different types of granny square patterns. Here is a tutorial for solid granny squares. Once you learn how to do this crochet, you can even make half squares of the solid granny squares. There are just so many ways to use this type of crochet square.
While this is the classic granny, if you prefer to make a rectangle granny it has a great look with lots of uses too, from table runners to crochet blankets.
Directions: How to Crochet the Classic Granny Square
Skill Level
Beginner Crocheters
Gauge
Gauge will depend upon the yarn weight used and the crochet hook size.
Size
The size is determined by the number of squares joined for your crochet project. Additionally, you can do the continuous granny square and make something like a table runner or crochet blanket as large as you like.
Materials
Any type of yarn and crochet hook would work for this pattern. However, a nice and easy place to start with is a worsted weight yarn and a Size H (5.0 mm) crochet hook. A worsted weight yarn is like an all-purpose yarn that is of medium weight.
An easy way to choose the crochet hook for this project: Whatever you choose for a yarn, look on the package as it will tell you the yarn weight and the crochet hook recommended for the yarn.
Abbreviations
CH = Chain
DC = Double Crochet
SC = Single Crochet
SL ST = Slip Stitch
SP = Space
ST = Stitch
STs = Stitches
YO = Yarn Over
[ ] repeat between
Pattern Notes
This crochet pattern is written in US terms.
Granny Clusters, or shells:
A granny cluster is a term for a special crochet stitch that consists of a set of 3 double crochets, all worked into one stitch or space. The clusters are then separated from one another with chain stitches.
The granny square is worked “in the round” in joined rounds; therefore, the project is worked with the right-side facing for every round.
Beginning the Granny Square Written Pattern
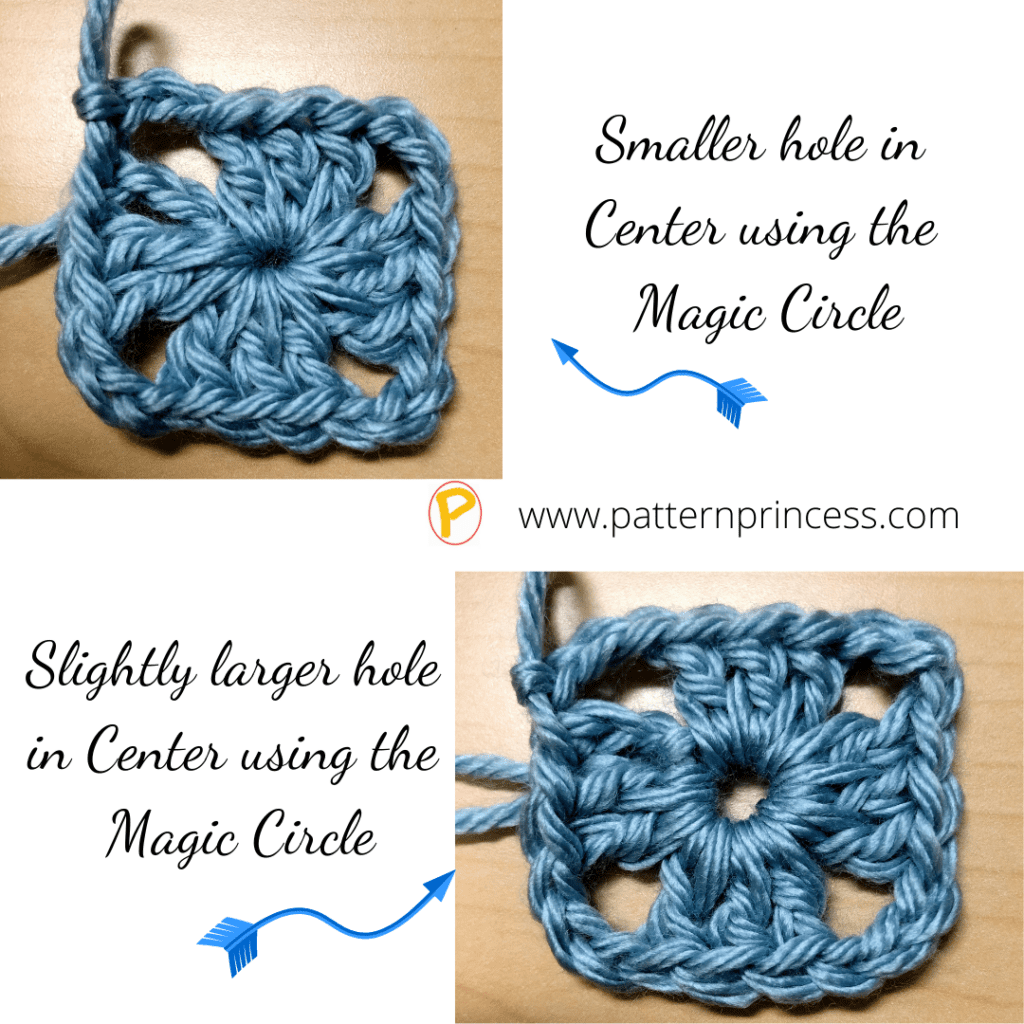
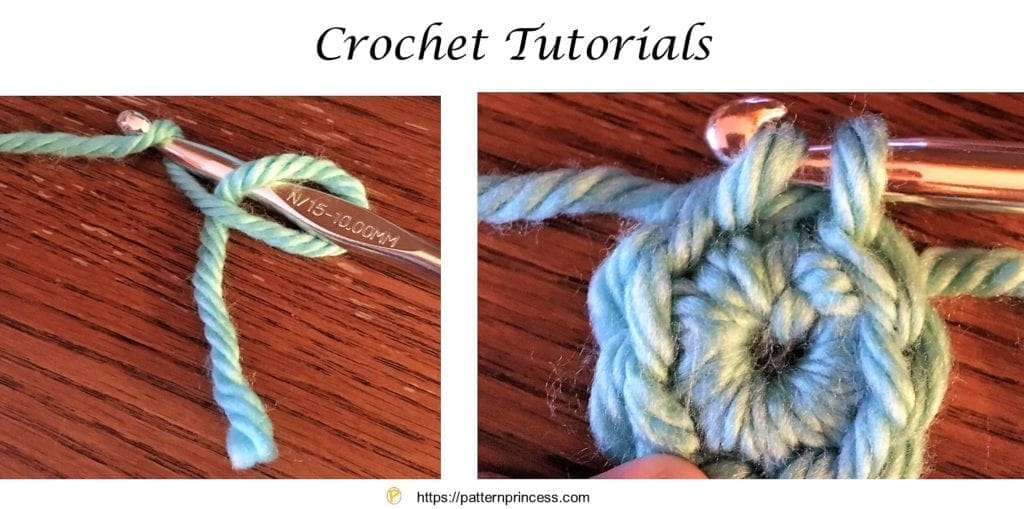
Begin by making a Magic Circle. Directions for the magic circle can be found here. This is a detailed step-by-step tutorial on making the magic circle. Sometimes, you will find this step referred to as the magic ring in patterns.
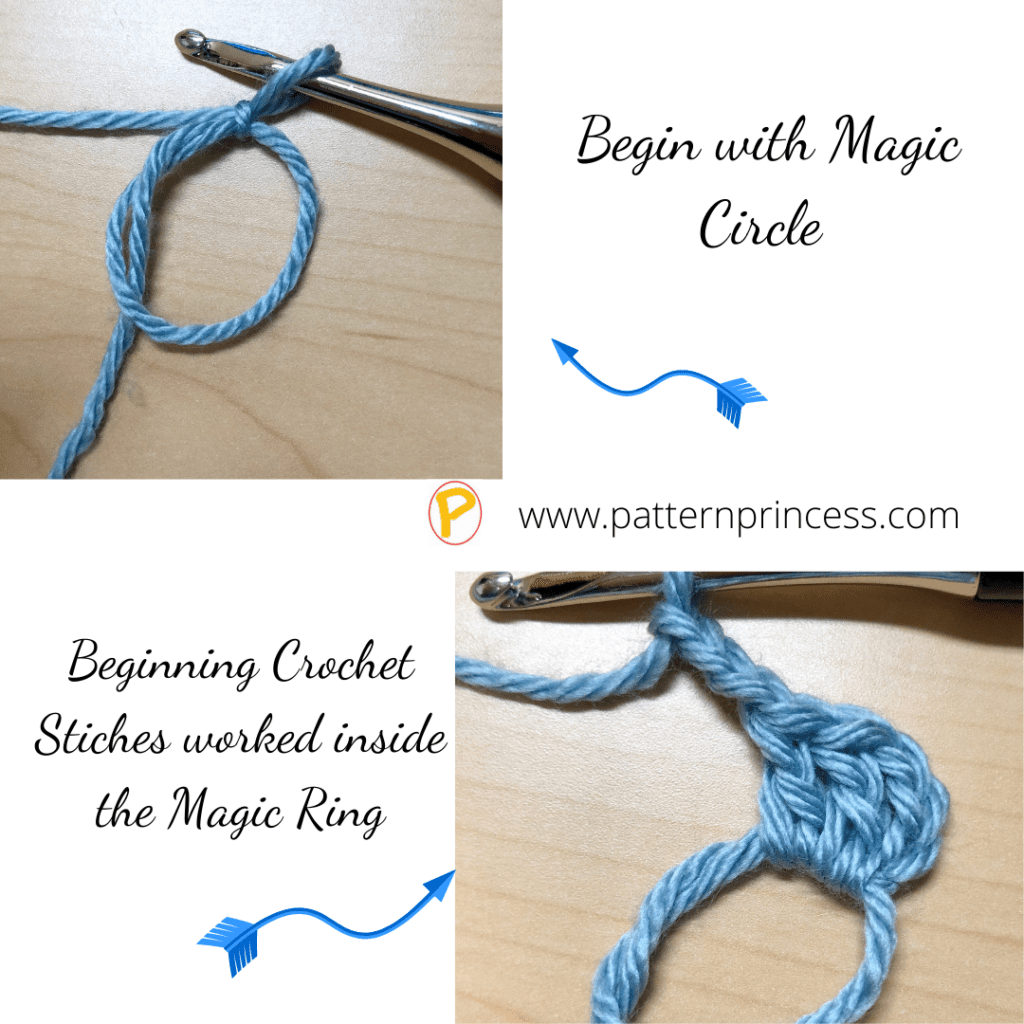
The magic circle provides for a tighter center to the beginning round. Once the initial round is completed, you tighten the center hole snug by tugging on the beginning yarn tail.
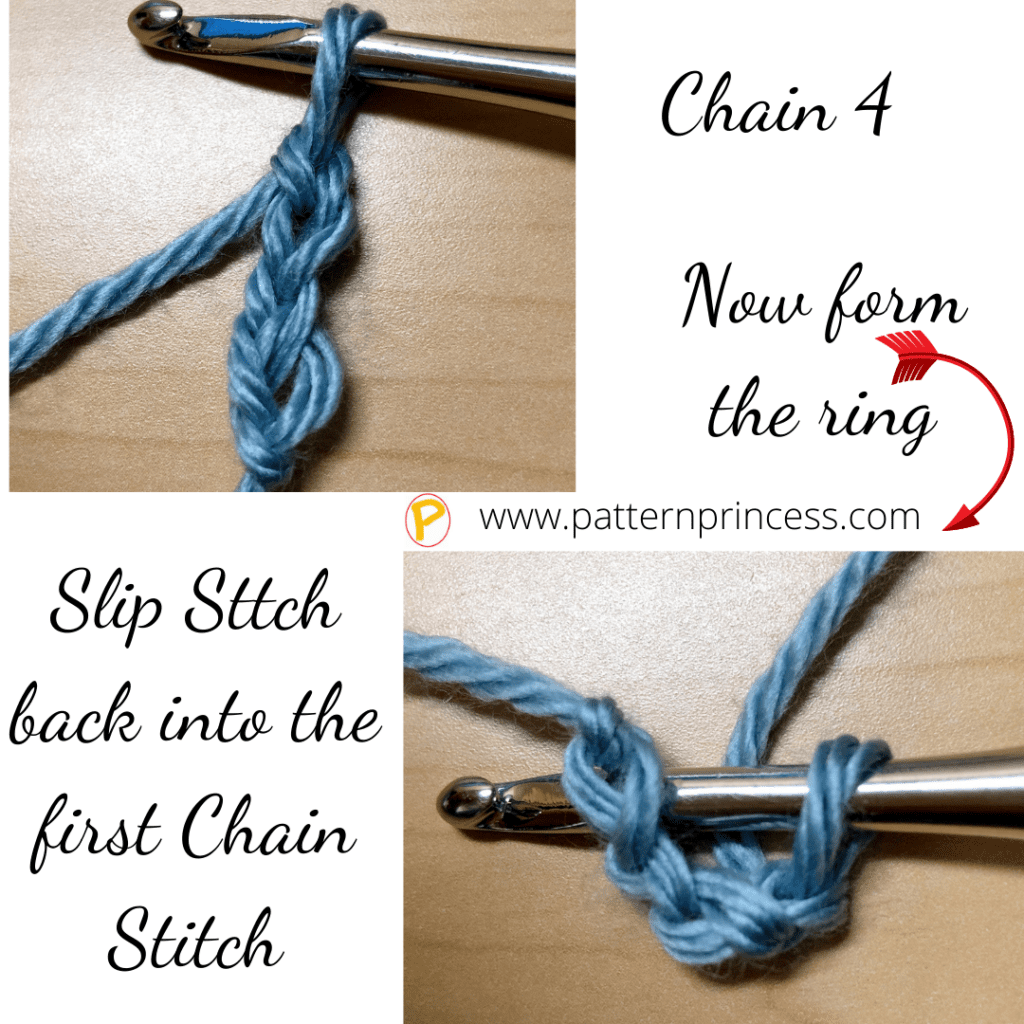
An alternative way to begin this pattern is to CH 4 and SL ST into the first CH ST to form a circle. Then continue working the pattern inside the circle that is formed when completing that SL St into the first CH ST.
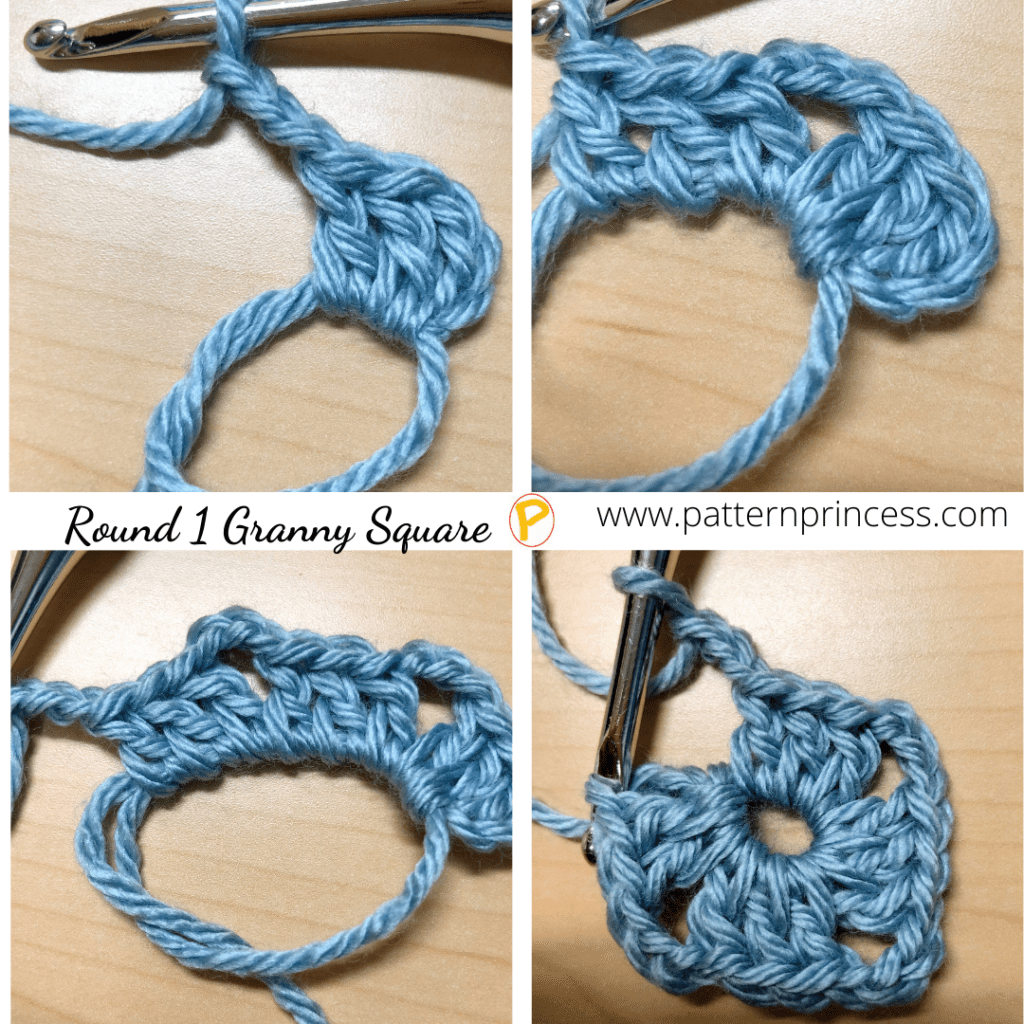
Round 1
- Chain 3. (This counts as a DC.)
- In the foundation ring, work: 2 DC and CH 3.
- Continue working in the ring and work (3DC, CH 3) three times.
- Join with a SL ST into the 3rd CH of the beginning CH STs.
- This will complete the first round of the granny square. There should be 4 clusters of 3 DC with 4 areas of CH 3 between. (The CH 3 Spaces are the corners.)
Round 2
- Chain 4. (This counts as 1 DC plus CH 1.)
- In the next CH 3 SP work (3 DC, CH 3, 3 DC, CH 1).
- In the next 2- CH 3 Spaces, work (3 DC, CH 3, 3 DC, CH 1). You should now have three sets of 3 DC, 3- CH 3 Spaces, and 3-CH 1 Spaces.
- In the last CH 3 SP, work (3 DC, CH 3, 2 DC).
- End the round by joining with a SL ST into the 3rd CH of the beginning CH STs. (You should have 8 shells, 4 chain 3 spaces, and 4 CH 1 spaces).
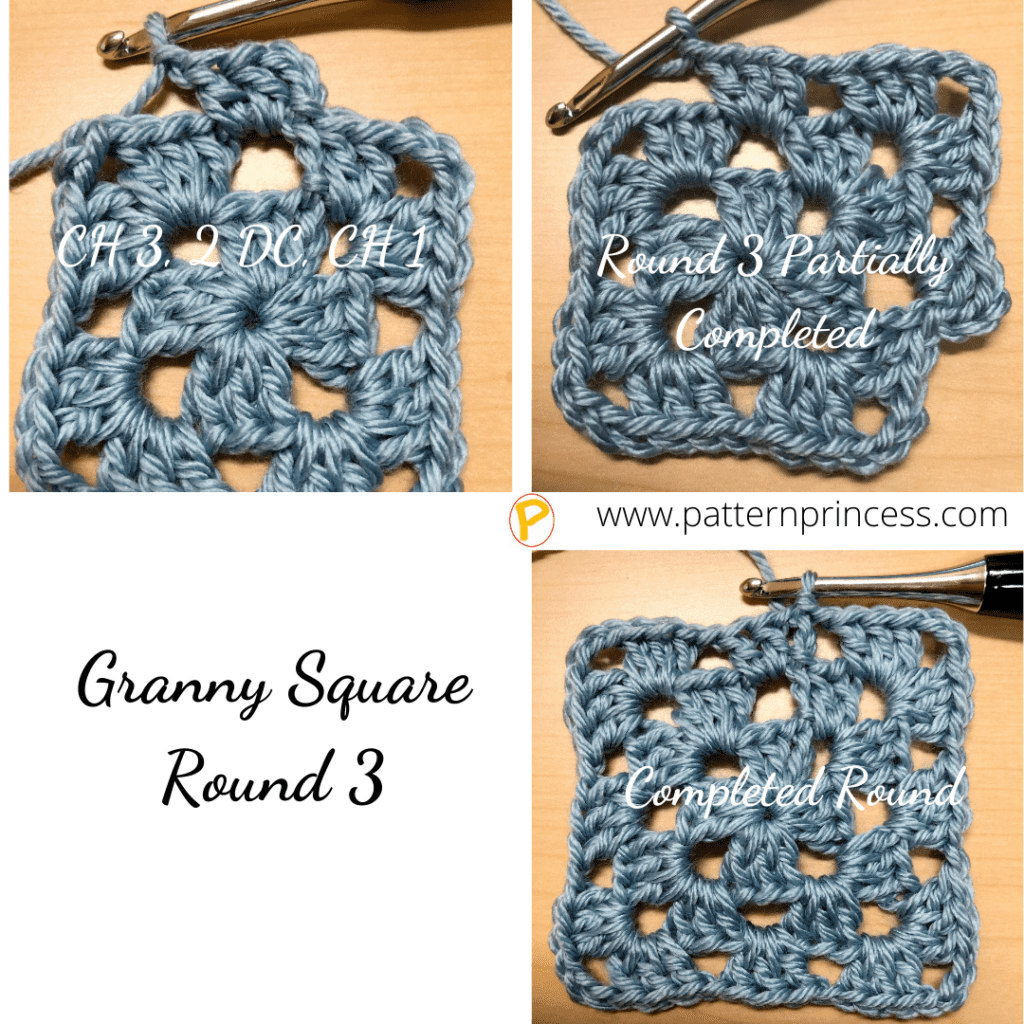
Round 3
- Chain 3. (This counts as 1 DC.)
- Then into the same space, work: 2 DC, CH 1. (This completes the first granny cluster of this round.)
- Skip the 3 DC of the previous row. In the next CH 3 SP, work (3 DC, CH 3, 3 DC, Ch 1).
- In the next CH 1 SP work 3 DC and 1 CH.
- Skip to the CH 3 in the corner space and work (3 DC, CH 3, 3 DC, Ch 1).
- Repeat steps 4 and 5 two more times until all 4 corners are complete.
- After the last DC in the CH 3 space CH 1 and SL ST into the top ST of the first DC of this round. (You should have 12 shells and 4-CH 1 spaces and 4 CH 3 spaces after the completion of this round).
Rounds 4 and Beyond
Repeat rounds 2 and 3.
Now that you know the pattern, you can keep adding rows to make the granny square as large as you like.
Finishing Each Square:
Weave in loose ends.
Pull the yarn through the last ST. Leave about a 12 inch yarn tail. Using the yarn needle, weave the yarn back and forth through the crochet stitches until a bit snug. Cut off excess.
Granny Square Crochet Video Tutorial
If you prefer a video on how to crochet a granny square, that is here for you too.
How to Crochet a Granny Square
How to Change Color on a Granny Square
Changing Colors in Granny Squares
Once you’ve mastered how to crochet granny squares in a single color, you are ready for color changes. It is really simple to do.
To change to a new color of yarn, I like to make a slip stitch and add the new color loop onto the hook. Insert the hook in the space where you want to use your new color, yarn over and draw the yarn through the loop on the hook. Now your new yarn color is ready.
Here is a quick video on changing yarn color to help you see the written pattern.
If you loved this post, please share. It helps to show me that these types of posts are helpful – thank you!
I hope that you liked this pattern. If you are looking for more ideas for crocheted projects, here are a few others you may enjoy.
Find Free Patterns Using the Granny Stitch
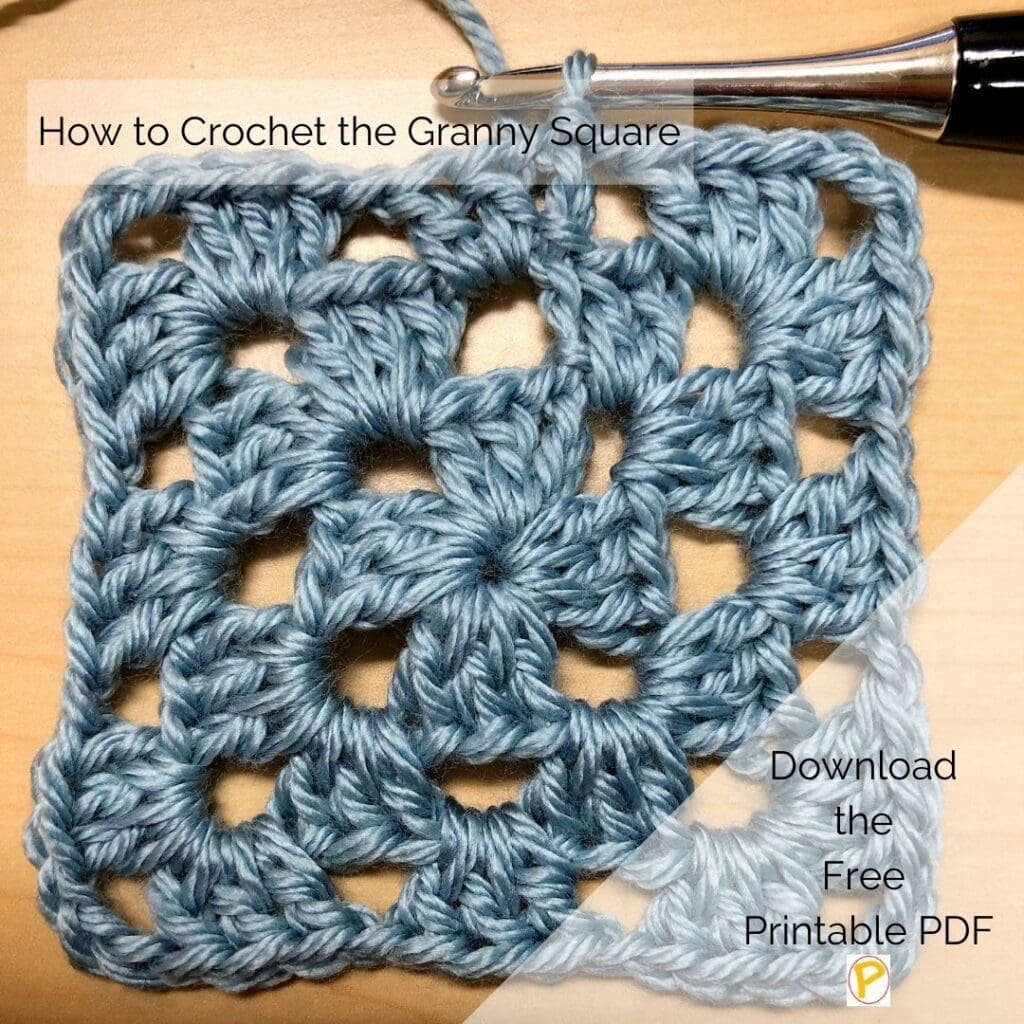
Sign up for the newsletter and unlock this printable PDF along with a few other Free Pattern PDFs.

You can find Victoria crocheting, quilting, and creating recipes. She has cooked in restaurants for over 20 years, including many larger parties. She learned to crochet when she was just 11 years old and has been crocheting ever since; over 50 years now. Over 40 years ago, she loved her first class in sewing and continues to hone her skills in quilting. Many have enjoyed the handmade gifts over the years. In her professional career, she has worked in management in a wide variety of businesses including higher education as a dean of a division. All the while attending college part-time to achieve her doctorate in higher education with an emphasis in e-learning.
